22,49 €
Mehr erfahren.
- Herausgeber: Crowood
- Kategorie: Lebensstil
- Sprache: Englisch
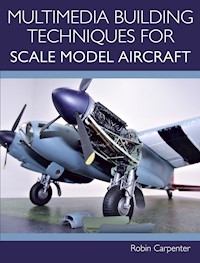
This is a practical guide to getting the best from the many resin and etch detailing kits available to enhance scale model aircraft, and is intended to help beginners and experienced model makers alike. Richly illustrated, it uses six model-building examples, from the very basic application of etch to the major conversions. It includes an overview of the tools required; guidance on building the basic model kit; an explanation of different types of multimedia; the methods for producing etched brass; how to undertake 3D design and 3D printing and, finally, gives the steps for successful resin casting.
Das E-Book können Sie in Legimi-Apps oder einer beliebigen App lesen, die das folgende Format unterstützen:
Seitenzahl: 158
Veröffentlichungsjahr: 2020
Ähnliche


MULTIMEDIA BUILDING TECHNIQUES FOR
SCALE MODEL AIRCRAFT
MULTIMEDIA BUILDING TECHNIQUES FOR
SCALE MODEL AIRCRAFT
Robin Carpenter
First published in 2020 byThe Crowood Press LtdRamsbury, MarlboroughWiltshire SN8 2HR
www.crowood.com
This e-book first published in 2020
© Robin Carpenter 2020
All rights reserved. This e-book is copyright material and must not be copied, reproduced, transferred, distributed, leased, licensed or publicly performed or used in any way except as specifically permitted in writing by the publishers, as allowed under the terms and conditions under which it was purchased or as strictly permitted by applicable copyright law. Any unauthorised distribution or use of this text may be a direct infringement of the author’s and publisher’s rights, and those responsible may be liable in law accordingly.
British Library Cataloguing-in-Publication DataA catalogue record for this book is available from the British Library.
ISBN 978 1 78500 724 8
Contents
Introduction
1Basic Plastic Kit-Building Techniques
2What Is Multimedia?
3Hints, Tips and Pitfalls
4Getting Started with Etched Brass
5Adding Multimedia Details
6Large Detail Sets and Converting Kit Parts
7Assembling a Complete Multimedia Kit
8Replacing Major Parts of the Plastic Kit with Resin and Etched Brass
Scale Conversion Chart
Glossary
Useful Contacts
Reference List
Index
Introduction
Like many modellers I have met over the years, from an early age I have been building plastic model kits. Birthdays and Christmases would be filled with the anticipation of looking at the latest Airfix kit release. As I grew older, my enthusiasm for building kits didn’t stop, even during my years of service in the Royal Navy. Having this hobby as a lifelong companion has allowed me to see clearly how things have changed: from the early days of a 1/72-scale cockpit represented with a single bar the pilot sat on, to today’s kits that have a complete cockpit interior.
This book is an introduction and guide to adding those extra details, using multimedia accessories to add finesse to a standard plastic scale model aircraft. There is only a certain amount of detail that injection-moulded plastic can achieve, but by using slide moulding, manufacturers are getting better detail definition all the time. Some manufacturers now include extras such as etched brass to their kits, giving the option to use either the plastic parts or the etched brass parts. There are also multimedia kits available that will typically include etched brass, polyurethane resin, white metal and even wood, and there is a plethora of manufacturers of etched brass and resin accessories.
An early 1/72-scale Hawker Hurricane from Airfix, with very few parts. The pilot is seated on the protruding peg, and no other cockpit details or options are included.
The modeller now has plenty of choice to enhance areas of his model for a more accurate representation of the aircraft he is building, although with some older kits additional parts may not be available, so some scratch building or cross kitting will be required. With what is currently available in the market place, modellers can make a minor adjustment – for example, by just changing the wheels – or they can go the whole hog, getting everything available for the chosen aircraft to build a super detailed model.
Building model aircraft using the extra detail sets available can be very satisfying, but it is worth giving some thought to how much of the detail will be visible once the model is fully built. Much will be dependent on the kit scale, of course, as generally, the larger the scale the more detail can be seen. It is entirely up to the builder as to how much is done, and eyesight and patience play their part. For some modellers, knowing that the inside of the rear fuselage is as detailed as the real thing will give a great deal of satisfaction, even though only a small amount of it can be seen.
In the preparation of this book I would like to thank Alex Medwell and all the staff from The Airbrush Company for their unfailing support with supply, facilitation and support of my model finishing courses; also Ann McCarten and staff at Precision Photofabrication Developers Ltd (PPD Ltd) for access to, and photography of their production line; Mr Tim Perry for access to 3D printing processes; and my wife Rosemary, who has supported me in my hobby and helped me put this book together.
Compare this with the previous picture: this is the latest 1/72-scale Hawker Hurricane from Airfix, with options to replicate either an early or a late Mark 1 Hurricane, including two options of an early or a late fully detailed cockpit.
Chapter One
Basic Plastic Kit-Building Techniques
Even if you were making models in childhood or adolescence, it is possible there are new techniques and materials that have developed recently, with which you are not familiar. There are many kits that now come with etched brass, resin and white metal included, which must be used to complete the kit, and many plastic kits, even expensive ones, can turn up problems, such as short shot sprues or warpages. This chapter is written both as an introduction and as a refresher for some of these techniques.
A short shot fuselage where the plastic did not fill the mould correctly. This is not a common incident, but it can happen. In this case the opposite side was not affected so it will be an easy repair using filler. Alternatively, the manufacturer may replace the part on request.
TOOLS
Tools are an important part of a modeller’s arsenal. It is very easy to accumulate tools, but before you buy another, it is worth thinking about how much modelling you do, and whether you are really going to use it. Every modeller will have a budget, and there are tools available to suit every pocket. However, a successful ethos when buying tools is to get the best quality you can afford, as cheap tools rarely last well. A basic tool kit for building a standard plastic kit should consist of the following:
•Craft knives with a selection of different-shaped blades
•Razor saws, both fine and coarse cut
•Sprue/side cutters
•Tweezers, with both fine points and flat ends
•Selection of sanding sticks, particularly 120 grit to 1200 grit
•Round and square needle files
•Pin vice with a selection of drills
•Scissors
•Methods of clamping parts together, for example pegs, masking tape, rubber bands or clamps
•Cutting mat
•Plastic glue and ultra-thin cement
•Cocktail sticks
•Cotton buds
•Decal setting solutions
•Plastic putty/filler
•Disposable masks
This picture shows that the port side of the fuselage has a warp in the plastic around the nose area. This may cause a problem with fitting the wing if the warp has gone back to the wing root. To get round this problem, fit all the interior bulkheads to the starboard side of the fuselage, then attach the warped port side to the straight side. This will hopefully eliminate the warp.
For building more advanced kits or multimedia kits, further tools may be required:
•Clamping tweezers
•Small box-nose pliers with smooth faces
•Etched brass folding tool
•Photo etch scissors
•Various riffler files
•Powered mini drill with speed control with various attachments
•Mini vice
•6in engineer’s ruler
•Dust mask
•Safety glasses
•Superglues, medium and thin
•Five-minute epoxy glue
•PVA glue
•Electronic measuring callipers
•Magnifiers
•Daylight lamp
•Panel scribers
•Riveting tools
•Scribing templates
Not all the items mentioned are absolute musthaves, but some items – such as tweezers for handling etched brass – need to be of high quality, or you will become frustrated when you lose parts because the grip is poor due to cheap manufacture. Side cutters, otherwise known as sprue cutters, also require careful purchase. Xuron do an excellent range of sprue cutters and etch scissors with an accurate clip, while some of the cheaper sprue cutters will tear the plastic instead of cutting through it cleanly.
Eyesight is also worth a mention. Frequently eyesight can change with age, and working with fine etched brass requires good vision and patience. As well as ensuring that you visit the opticians as recommended, your vision can be helped with good lighting and magnifiers. It is surprising how much neater your build can be when you use magnification. This is also true of painting small details.
WHERE TO WORK
Building models can be a messy task, especially if you are sanding resin or painting using an airbrush. Spaces used for model making range from a square of the kitchen table, under the stairs, a spare room, roof space, a converted or purposebuilt shed, a garage, or a combination of these. Wherever you choose to model, please be aware that some products, as mentioned in Chapter 2 – particularly polyurethane resin dust, or polyester car-body filler – can be carcinogenic, so make sure you have adequate ventilation, use a face mask, and keep your work area tidy. Have consideration for other members of the household who may need to use the space, or who may pick up objects from your bench.
This is what a clean workspace should look like.
This is what usually happens: clutter, untidiness, and hardly any space in which to work. Modelling is a messy hobby, but the more cleanly you work the less frustrated you will be.
PAINT BRUSHES
Paint brushes are an important part of your tool kit. For painting small details, such as cockpit instrument panels, fine-point brushes are a must. There are several manufacturers who produce good brushes, including Modelkasten and Army Painter. For covering large areas I would recommend using sign-writers’ one-stroke brushes. These are broad, chisel-edged brushes with long hairs, designed to cover in one stroke. Premier Brush Company is a good supplier of this type of brush, and their range includes other brush types that might be useful.
A variety of brushes, from large flats for covering areas, to fine points for fine details. Quality brushes make painting much easier. Note that some brush manufacturers will still use imperial sizes on larger brushes.
To look after your brushes, keep them clean. If you will not be using them for a while, coat them with linseed oil or a smear of Vaseline, and lie them flat. This will keep the hairs supple and in good condition. Never leave a brush standing on its hairs in thinners or water: doing this can permanently damage the hairs within a short time. With good-quality brushes painting becomes a pleasure.
Even when using a brush, most paints still require a certain amount of thinner to be added. How much will depend upon the viscosity of the chosen paint. Some paints, especially acrylics, work better with a few drops of retarder or flow enhancer in them. When brush painting, as with airbrushing, do not try to cover in one coat. Depending on the colour and how much the paint is thinned, three coats would normally be needed for coverage. When applying the paint, use a brush that fits the scale. Some traditional brush companies still use imperial sizes, whereas other companies use ‘triple zero’ to denote the finest size, to zero for fine, and then in increasing numerals as the brushes get larger.
AIRBRUSHING
The author’s previous book, Airbrushing Scale Model Aircraft (The Crowood Press Ltd, 2018), describes in detail the use of airbrush equipment, from purchase and setting up, through training exercises to full paint schemes. In brief, the advice included on airbrushing equipment states that buying a compressor and airbrush package is an investment, and that it is always worth paying for good-quality equipment. Beginners should go to an established or recommended airbrush supplier, who will be able to offer advice, and who will give different options according to what the equipment will be used for. Model shows often have specialist retailers offering compressors and airbrushes, and they can give advice as to what may be needed. Established modellers who display their work at shows are usually more than happy to offer guidance and share their experience.
Not everyone can have a separate location for airbrushing, so having a portable set-up is ideal. The compressor is under the workbench, and the moisture trap and regulator are clamped to the worktop. The airbrush holder is also a micro switch, so when the airbrush is taken off, the compressor will automatically start up.
In order to operate any airbrush successfully, it is essential to have a constant air supply. It is possible to use compressed air from a car tyre and adapter, or from divers’ air tanks, but these will only give a limited supply of constant air before the pressure starts to drop. Some manufacturers supply an airbrush starter set with a can of compressed air, but again, the air pressure will soon start to drop, and you may run out of air just as you come to a critical part of painting, or when you are trying to clean the airbrush. For no more than the cost of half a dozen cans of air you could buy a compressor that is designed specifically for airbrushing.
Bear in mind that compressors that are sold at garages or camping outlets are only designed to inflate air beds or beach toys, and will not run an airbrush.
If possible, try to keep your compressor away from the immediate spraying area, as it takes the air from its surroundings. Airlines are available in plastic or braided material up to ten feet long, which is quite long enough for the compressor to be kept under the workbench.
BONDING PLASTIC
In the early days of plastic model building, the only glue choice would have been a tube of polystyrene cement. Currently the market is filled by many manufacturers producing all kinds of polystyrene glue, fast-setting liquid cement such as Tamiya extra thin or ‘Plastic Magic’ from Deluxe Materials. A new glue from Revell called Fix-Kit has recently come on to the market, which consists of an ultraviolet marker and lamp and UV ‘Super Kleber’, which when used together use ultraviolet light to form the bond.
There is a plethora of glues available. Pictured here is a selection of typical glues required for building multimedia kits.
When applying glues, you will need to use either the supplied applicator or a cheap paint brush. Glues often contain acetone, and give off strong vapours that are irritating and highly flammable, so make sure you use them in a ventilated area. Superglues can be used, but these bond almost instantly, which means you have little time to manoeuvre the parts if this is required; nevertheless they are very useful when bonding different substrates.
Where superglues come into their own is when the modeller is cementing small, delicate items such as pitot heads or external flying surface balance weights, or is reinforcing a joint from the inside.
CLAMPING
Most modern kits are 3D computer-aided designs (CAD). The CAD process makes the kit much easier to build, as the fit of parts is much better than kits from previous decades. If you are working with older kits or those not designed with computers you may find that when, for example, you put wing halves together and then look along the trailing or leading edge, there is a curve to the wing. This can be straightened by gluing the wing together and clamping the wing to a flat surface.
Some form of clamping is essential when building models. All these items are inexpensive and readily available from hobby or hardware stores.
There are numerous different types of model makers’ clamp available – for example, from Expo Tools. Remember not to over-tighten clamps, nor to use ones that need excessive strength to operate them, as they can distort the parts you are gluing, leaving a step. Other methods for clamping can be used, such as rubber bands, washing-line pegs or masking tape.
FILLING
The finished surface of your model will reflect what is underneath. Any imperfections, deep scratches, gaps, lumps and bumps will show through painted surfaces, and trying to bury them with paint will not work. Thorough preparation is essential.
Inspect all surfaces for gaps and imperfections, and lightly mark them with a pencil so you will find them again when filling. You will need to fill gaps on poorly fitting parts as well as sink marks on the visible surface. Sand the surface around any defects before applying the filler, to help blend in the edges of the filled portion.
There are many different types of filler available to modellers – the key thing is to find the right one for the job. Using single-pack putty for a large gap will only work if you apply it in several layered applications, as this type of filler shrinks back and if applied in deep layers will stay soft underneath for a long period. It is better to use a model putty such as Milliput, a two-part epoxy that is kneaded together prior to application. Any excess can be worked away with water.
Some modellers use car-body filler, and for smaller areas it is possible to use baking powder or micro balloons with superglue. It is important to note that some two-pack fillers are carcinogenic, so make sure you wear a mask when rubbing them down. The smaller the scale, the finer the rubbing down should be. Use a file or sanding stick to rub down seams, joints or excess glue marks. Firm favourites amongst modellers are the sponge sanding sticks used by manicure technicians. There are various grades, from 100 grit up to 1,200 grit for general sanding, and 3,000 grit to12,000 grit for polishing and buffing. The softer sponge sanders will allow you to ride over small raised details such as rivets or small vents without damaging them.
Please be aware that some metal finishes are so fine they will show up scratches from rubbing down if you have used too coarse a sanding stick or finishing pad. For small amounts of filler start with 180 grit and finish off with 240 grit or finer if doing metal finishes. Once the primer is on, you will have another chance to correct any flaws before putting on the finish coats.
Small gaps can be filled using a high-build primer. This product usually has micro fillers included, which help to bridge the gap. Apply with a brush, wait approximately fifteen minutes, and then, using a cotton bud soaked in rubbing alcohol, remove the excess, leaving the gap filled with primer. This method is preferable where the gap is close to raised detail that you don’t want to damage when rubbing down. White correction ink can also be used in this way.
SCRIBING/RE-SCRIBING
Having assembled your aircraft model, and filled and sanded the inevitable gaps, seams and


