22,49 €
Mehr erfahren.
- Herausgeber: The Crowood Press
- Kategorie: Lebensstil
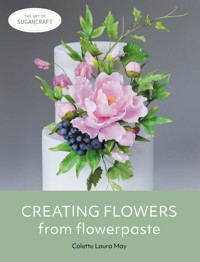
- Serie: The Art of Sugarcraft
- Sprache: Englisch
Flowers are a classically timeless way to decorate a cake for a special occasion. With flowerpaste there is no limit to the range of flowers, foliage or berries that can be created – both real and fantasy. All that is required are the right materials, equipment and technique. In Creating flowers from flowerpaste, Colette Laura May guides the reader through step-by-step tutorials to create stunning floral displays to adorn cakes for all occasions. With over 860 images, this book describes the equipment and materials required and demonstrates the essential techniques required to get started. It includes thirty-eight step-by-step tutorials for the creation of all aspects of floral displays: flowers, buds, leaves, foliage, berries and seedpods. Finally, there is guidance on the creation of fantasy butterflies to enhance floral displays and instruction on the construction of seventeen specific sprays and arrangements. Includes templates and a useful list of suppliers.
Das E-Book können Sie in Legimi-Apps oder einer beliebigen App lesen, die das folgende Format unterstützen:
Seitenzahl: 319
Veröffentlichungsjahr: 2022
Ähnliche


First published in 2022 byThe Crowood Press LtdRamsbury, MarlboroughWiltshire SN8 2HR
This e-book first published in 2022
© Colette Bell 2022
All rights reserved. This e-book is copyright material and must not be copied, reproduced, transferred, distributed, leased, licensed or publicly performed or used in any way except as specifically permitted in writing by the publishers, as allowed under the terms and conditions under which it was purchased or as strictly permitted by applicable copyright law. Any unauthorised distribution or use of this text may be a direct infringement of the author’s and publisher’s rights, and those responsible may be liable in law accordingly.
British Library Cataloguing-in-Publication DataA catalogue record for this book is available from the British Library.
ISBN 978 0 7198 4046 5
Cover design by Sergey Tsvetkov
Contents
Introduction
Chapter 1Equipment and Tools
Chapter 2Materials
Chapter 3Techniques
Chapter 4Flower Tutorials
Chapter 5Foliage, Succulents and Air Plant Tutorials
Chapter 6Berries, Seed Pod, Fruit and Butterflies Tutorials
Chapter 7How to Assemble the Sprays and Arrangements
Chapter 8How to Assemble the Cakes
Acknowledgements
Appendix ITemplates
Appendix IISuppliers
Abbreviations
Conversion Tables
Index
Introduction
My sugarcraft journey started in my early teens when I learnt the art of royal icing to produce beautiful cakes.
My mum was a keen flower arranger and I used to love watching her turn a box of flowers and foliage into a beautiful arrangement. I would help her, learning where and how to place the flowers and foliage. I quickly learnt that foliage is such an important part of a display, with its many different shaped leaves, sizes and colours. To this day I absolutely love it, perhaps more so than the flowers; not only does it add great depth to a display, it affords us a more extensive colour palette.
When I left school I embarked on a really boring career! My passion for sugarcraft became my therapy and helped relieve the stresses of the day job. A couple of years later I was lucky enough to be asked to tutor a course in royal icing. I excitedly accepted the challenge and loved it. This made me realize that this was what I wanted to do, to impart my knowledge to others through tutoring. I managed to secure three positions with my local adult education colleges, working full-time and tutoring on an evening. I gained my Diploma in teaching in further education and I’ve never looked back.
A few years after I started my sugarcraft journey, sugar flowers appeared on the scene; this was when I joined my local branch of the British Sugarcraft Guild where I watched talented artists like Tombi Peck demonstrate their craft beautifully. I was amazed at what she created – she inspired me so much that I bought myself some sugarcraft books and began to learn how to create sugar flowers. I went on to attend a couple of classes locally led by Margaret Ford, who later began Cel Cakes. I was spellbound by her amazing work – she made it look so easy! This is something my students say about my creations today.
I began to combine the two art forms of royal icing and sugar flowers into my classes. Sugar flowers became a lot more popular, so I changed my classes to purely sugarcraft flowers and foliage. I have spent over thirty years learning and perfecting this beautiful art, which is challenging at times but equally rewarding. It’s relaxing and fulfilling, far more advanced and botanically correct from where it all began. Seeing a flower made out of sugar that people think is real is awesome! The natural beauty of the flowers and foliage never ceases to amaze me; their beauty inspires me to strive to recreate it in sugar.
Over the years I have taught hundreds of students, whether it be for pleasure in their quest to create beautiful homemade cakes or, more recently, in their desire to run their own businesses and many have gone on to do this very successfully. For me, there is nothing more rewarding than a complete beginner learning the craft and creating something so beautiful in a short period of time. Most by this stage have caught the sugarcraft bug just like me. I love watching them grow and helping them to develop their skills over the following months and, in a lot of cases, years as they stay and progress. I have met some fabulous people and some are now great friends!
My journey may have started over thirty years ago but it’s nowhere near complete. I am still tutoring and imparting my knowledge and loving every moment. I strive to push each individual to reach their full potential, to achieving and generally exceeding their own goals. This is a fantastic job meeting people from all walks of life, young and old, but each one is there because they want to learn and they all have one thing in common – sugarcraft. This is a ‘family’ where people make friends and stay friends for years, all through a love of the art. It helps to develop confidence, well-being and a supportiveness towards those around us by sharing and learning from each other’s experiences! I love being a part of their sugarcraft journey and holding a pivotal role in their learning.
Each flower, foliage and berry tutorial starts with a list of equipment and materials you will need. It is recommended that you read through everything before you start to make sure you have what you need. The make of the items is listed in brackets; the list of abbreviations is on page 206.
I hope you enjoy my book and get as much pleasure from sugarcrafting as I have over the years and still continue to do so.
Colette Laura May
CHAPTER 1
Equipment and Tools
There is an abundance of sugarcraft material and equipment available commercially. Here are the items that are recommended for the projects featured in this book.
EQUIPMENT
Non-Stick Board
This is an essential piece of kit. I prefer a coloured board as it’s easier on the eye than white. Use a light dusting of cornflour on the board before rolling out the flower paste to stop it sticking. Use a piece of non-stick matting underneath the board to stop it moving.
Non-stick board (left), non-stick rolling pin (centre), Stay Fresh multi-mat (right).
Non-Stick Rolling Pin
It’s good to have a selection of sizes of non-stick rolling pins. They are essential for rolling out flower paste, sugarpaste and marzipan. For flower making, use a small pin around 23cm/9in long.
Stay Fresh Multi-Mat
Useful for covering petals and leaves when you have cut out several at once, whilst working on another, to stop them drying out. Alternatively use a food-grade plastic bag.
Foam Pad/Holed Foam Pad (PME)
A foam pad/holed foam pad is useful for softening the edges of petals and leaves using the appropriately sized ball tool for the size of the petal and leaf you are making. Ensure the ball tool is half on the paste and half on the foam pad or with a hard palm of the hand using a rolling or rubbing action on the paste, you are taking away the raw cut edge. If the paste starts to cup, you are working on the paste only!
Foam pad (left), holed foam pad (centre), size guide (right).
To hollow out a larger petal, use a larger ball tool. Press quite firmly, moving the tool in a circular movement. Use the holed pad to place a ‘Mexican hat’ in to soften the petals/sepals. Choose the right sized hole in the foam pad for the size of the back of the Mexican hat to fit in, soften as above using the correct sized ball tool.
Size Guide (CC)
A size guide is essential; throughout the book I have stated the ball size of paste to be used. Over the years of saying, ‘Roll a small ball’ and students responding, ‘What size is that?’ now you know what size it is! The ball should snugly fit into the centre of the relevant hole on the size guide.
Ball Size Guide
Scissors
A pair of sharp scissors is essential for cutting stamens, threads, and so on. They will ensure that you have a sharp cut edge to threads rather than a tatty one. I also use embroidery scissors, which are small, pointed and sharp; these are useful for many things. A pair of curved scissors is also useful for cutting around quick pressed leaves (see individual tutorials) and making serrations on leaf edges. The curve allows you to cut both sides evenly by just turning the scissors so that the curved blade is facing inwards.
Sharp scissors (left), small, pointed embroidery scissors (centre), curved scissors (right).
Pliers and Wire Cutters (MD)
Floristry wire cutters or scissors can be used depending on the thickness of wire. Heavy duty pliers are useful when cutting stronger wires. These are essential, especially when wiring a spray together.
Pliers (left), wire cutters (right).
Angled Tweezers (PME)
Smooth angled tweezers are a must, useful for pinching ridges for centres using the flat part of the tool – see the individual tutorials. They are also useful for holding stamens and wires in place and much more too! Make sure that they are smooth, without ridges on their grip, as this would leave unsightly ‘teeth mark’ on your flowers, buds and other features.
Needle-Nose Pliers
These are an essential piece of kit and are useful for bending wires and holding wires to add into arrangements. You will find many uses for them.
Angled tweezers (left), needle-nose pliers (right).
Dusting Brushes and Paintbrushes (Art Shops)
It is best to buy good quality synthetic or synthetic blend art brushes for dusting flowers. I tend to use short, flat, not too soft bristled brushes in a variety of sizes. I don’t wash brushes on a regular basis but try to keep them for certain colours. When using petal dust, work it into the bristles of the brush and tap off any excess. That way you don’t add too much colour and it stops excess dust particles from floating around in the air. Flat and filbert brushes pick up more petal dust, so use larger brushes when dusting larger areas. A fine 00 or 000 paintbrush is essential for adding fine detail onto petals/leaves. It’s also good practice to wear a mask whilst dusting large amounts to avoid breathing in the dust particles.
Paintbrushes (left two) and dusting brushes (right).
Foam Drying Tray
These are useful for drying leaves and petals to achieve a little bit of shaping.
Apple Tray (Supermarket)
Useful for shaping cupped petals whilst drying or sitting Styrofoam balls into for support.
Foam drying tray (left), apple tray (centre), kitchen paper ring former (right).
Kitchen Paper Ring Former
These are great for holding and supporting petals that require a cupped shape, allowing the paste to breathe. This speeds up the drying time. Cut a sheet of kitchen paper in half across the diagonal. Twist it back on itself, tie loosely. Smaller ones can be made by cutting a strip of paper across the diagonal and twisting as above.
Hanging Rack
This can be used to hang flowers upside down whilst drying petals, allowing the petals to keep their cupped shape. Keep adjusting the petals whilst they are drying.
Hanging rack (left), Styrofoam block (centre), hard-boiled egg (right).
Styrofoam Block (Florist)
Useful for pushing small leaves and berries into whilst leaving to firm up before colouring.
Hard-Boiled Eggs
These are used as formers when making the cymbidium orchid.
MODELLING TOOLS
Ball Tools – in a Variety of Sizes (CC/CS)
Useful for softening and/or frilling the edges of petals and leaves, hollowing petals, elongating sepals and generally shaping petals, and so on. Metal ball tools are a good choice as they don’t have a seam in them; some plastic ones do, which can cause issues when working on the paste.
Ball tools in a variety of sizes (left), cel sticks – 3 sizes (right).
Cel Sticks (CC)
Useful for opening throats on flowers, rolling out when making ridges and rolling out the paste for a Mexican hat (see individual tutorials).
Plain-Edged Cutting Wheel OR Craft Knife (PME)
The plain-edged cutting wheel is useful for marking sections on buds and cutting around templates for petals and leaves. The craft knife can be used in a similar way. However, I prefer to use the cutting wheel.
Plain-edged cutting wheel (left), craft knife (right).
Dresden Tool (J)
The pointed end is useful for marking veins or central ridges. The broader end is useful for frilling petal edges, softening serrations or making serrated/jagged edges on leaves (see individual tutorials and techniques).
Dresden tool (left), veining tool (right).
Veining Tool (J)
Use on petals to add veining and frilling around the edges or on the whole petal (see individual tutorials and techniques).
Scriber Tool (PME)
Useful for etching veins on leaves (see individual tutorials).
Scriber tool (left), small palette knife (centre), star tool (right).
Small Palette Knife (PME)
Useful for lifting thinly rolled petals off the work board.
Star Tool (PME)
Great for dividing equal petal sections in a cone to make a fantasy flower, if you don’t like cutting the petals freehand (see techniques).
Cocktail Stick/Wooden Skewer
Useful for frilling edges of petals. Great to have one in the toolbox (see individual tutorials and techniques).
Wooden skewer (left), cocktail stick (centre), emery board (right).
Emery Board
Used to fluff up cotton stamen tips.
Tape Shredder (J)
As the name suggests, it cuts floristry tape into half-width or quarter-width. For half-width tape, remove the two outer blades. Inside, it has three razor blades, which need changing regularly. Turn the blades around to get two uses. The blades get sticky with the glue from the tape! Change the blades with care.
Tape shredder (left), tea light (centre), alphabet/number cutters (left).
Tea Light
Use for singeing the ends of wires to blacken and heating hooked/ski-hooked wires to obtain a strong bond with the paste (see techniques).
Alphabet/Number Cutters
Useful for pressing out lettering and numbers to add a personalized message to your cake or board. These can be attached with a little fresh egg white. Always place the lettering onto the cake to ensure it is correctly positioned and spaced before attaching. Count the number of letters and spaces in the text, work out the middle letter. Position that in the correct place on the cake/board and add the remaining letters either side so it will be centred.
Silicone Petal and Leaf Veiners (see Tutorials)
When it comes to petal/leaf veiners and moulds, the commercial choice is vast. They are made from food-grade silicone rubber. They are essential for creating the correct veining/texturing of leaves and petals when trying to recreate nature from sugar.
Silicone petal veiners and petal cutters (left), silicone leaf veiners and leaf cutters (right).
Petal and Leaf Cutters (see Tutorials)
Similarly, there is a huge choice of cutters available from cake decorating suppliers, both in metal and plastic. They help to speed up the process of making petals and leaves but also ensure more consistency in the end result. I use mainly metal cutters as they allow you to change the shape if required.
CHAPTER 2
Materials
Flower/Gum Paste
There is a wide choice of flower/gum paste available commercially throughout the world. Gum paste by Rita D’Ascenzo is humidity resistant. I find it easy to work with and as it is humidity resistant; this is great if you intend to display your pieces in the home. The APOC own brand or smartflex are also good, easy to work with. However, they are not so humidity resistant, so it depends on how you intend to use your creations as to the choice of paste and also personal preference. They vary in consistency, strength and drying times. You may need to try several brands before you find the one that works best for you.
Paste Food Colours (SF)
These give quite a strong colour. Use a cocktail stick to add a tiny dot of colour to the flower paste. Mix thoroughly to achieve a uniform colour. I find it best to start with a pastel colour. This can then be dusted using the petal dusts to achieve the depth of colour. It’s easy to add more colour, not so easy to lighten!
Flower paste white and coloured (left), paste food colours (centre), petal dusts (right).
Petal Dusts
Petal dusts (SF unless otherwise stated) can be added to flower paste to colour; it generally gives a softer shade/colour. It is also used for colouring petals and leaves. Adding white petal dust to a colour will lighten it. I prefer to dust petals and leaves before they have fully dried; the dust will adhere better and give a more intense colour. It can also be mixed with isopropyl alcohol to make a paint.
Cornflour Bag
Cornflour is incredibly useful when the paste is sticky. You can make the bag out of disposable nappy liners – fold one in half and add cornflour. Tie into a bag with ribbon or a freezer tie. Give the work board a light dusting before rolling out the flower paste and dust the veiners before placing petals/leaves onto them.
Cornflour bag (left), fresh egg white (right).
Fresh Egg White or Edible Glue
I recommend fresh egg white to stick petals onto centres and moisten wires. Commercial edible glues are available but I find them quite sticky.
Wires
I use mainly white paper-covered wires and tape over them as required. I prefer sunrise wires; they seem to be the most consistent in quality, 33 gauge (very fine) to 18 gauge (thicker).
Wires (left), floristry tape (right).
Floristry Tape (APOC)
Floristry tape is used in the construction of stems and sprays. It contains a glue that when stretched is released; you can stretch the tape before using it or whilst taping down the stem, which is my preferred choice. I prefer the lion brand tape (APOC). I mainly use nile green but also brown, twig and white are useful to have.
Mimosa Sugartex
Readymade granular food colour for use as pollen.
Mimosa sugartex (left), pollen – semolina colour with petal dust (right).
Pollen
This can be made using fine semolina and coloured with petal dust for stamens and flower centres (see individual tutorials).
Stamens and Cotton Thread
There is a huge choice of commercial stamens available. I use mainly small white seed head and hammer head stamens, which can be coloured with petal dusts. White cotton thread (Gutermann) can also be used to make stamen centres and coloured with petal dusts.
Stamens (left), cotton thread (centre), Styrofoam balls (right).
Styrofoam Balls
These are available in various sizes and are used to make the centre of peony buds. Also used as petal formers for the peony.
Non-toxic Craft Glue
I sometimes use this for attaching stamens together to attach onto wires. The glue should not come into contact with the cake or the flower paste (please note this is not for competition work).
Non-toxic craft glue (left), edible spray glaze (right).
Edible Spray Glaze
Used to spray leaves and berries that require a shiny finish. Shake the can, then spray an even covering over the leaves/berries from a distance of 20–30cm. I always spray outside (not when windy). Take care not to spray jewellery and other items.
Hairspray
Use as a starch for cotton stamens.
Paper-Covered Wire
This is great for adding colour and interest to sprays. Curve and shape as required (see individual tutorials).
Paper-covered wire (left), ribbon (centre), fishing line (right).
Ribbon
Used to cover cake drum edges and around the bottom of the cake tiers. I use double-sided sticky tape around the cake drum edge before attaching the ribbon. Use a small piece of the double-sided tape to attach the ribbon edges together at the back. I like to fold one edge of ribbon over, stick with the tape and then attach to the other piece as this means you avoid having a raw edge. Do not attach the tape onto the cake.
Fishing Line
Used to make the spiky centres for the eryngium.
Florists’ Stay Soft
This is a soft modelling material that can be purchased from florists’ suppliers. Place into a vase or onto a food-safe sugar plaque before placing on a cake. Stay Soft does exactly that, but allows you to arrange sugar flowers, remove them and rearrange if required.
Florists’ Stay Soft (left), fix adhesive tack (centre), artificial moss (right).
Fix Adhesive Tack
Place a cross of the adhesive tack in the base of the vase, push the mound of Stay Soft on top.
Artificial Moss
Add into the top of vases to cover the Stay Soft, push down using a long-handled paint brush.
Safety Seal
Safety seal is used to add a protective food-safe barrier over floristry tape/wires before inserting into cakes. Read the label and follow the instructions (not for competition work), or see flower pics.
Safety seal (left), flower pics (centre), royal icing (right).
Flower Pics
Instead of using safety seal, flower pics can be used. Adding some sugarpaste into the pic, push the spray handle into the paste to secure, then insert into the cake. They are made from food-grade plastic and are available in various sizes.
Royal Icing
This is used to give extra support to the hoop wedding cake, and is useful for sticking sugar pearls onto the cake. Make your own or use a shop-bought mix.
Isopropyl Alcohol
Add a tiny amount into petal dust or paste colour to make a paint.
Isopropyl alcohol (left), florists’ silver spray paint (right).
Florists’ Silver Spray Paint (MD)
This is used to spray the twigs in Yuletide Splendour as it gives a strong silver colour. If placing on a cake, use edible lustre silver spray.
CHAPTER 3
Techniques
It is recommended that you read through this section before starting the individual tutorials as the techniques are explained in detail here.
Ski Hook
This is a great technique to use with large flowers that require a ball or cone as their centre. Take a small pair of pliers, wrap the wire around one tip twice, bend the wire to make a ‘halo’, bend to flatten against the length of the wire, bend backwards and upwards to form a ‘halo’. Heat in the flame of a tea light until hot, then insert into the ball of paste. Hold for a few seconds to allow the sugar to caramelize, ensuring a strong bond. Pinch around the wire at the base using the thumb and forefinger to secure onto the wire, taking care as the wire will be hot! Leave to dry.
Creating a ski hook.
Small Hook
A small hook is useful when making small berries using a smaller gauge wire. It can be made using the thumb and forefinger on a smaller gauge wire, pliers on a stronger gauge wire. Moisten with fresh egg white, insert into the paste, pinch around the base with the thumb and forefinger to secure onto the wire.
Creating a small hook.
Rolling a Ridge
This technique is essential to master as it enables petals and leaves to be wired. When rolling out the ridge, the length needs to be a good half way up the petal or leaf to give good support. Starting with a ball of paste, roll it into a sausage shape and flatten slightly. With a large cel stick, place on a slant, roll outwards. Repeat on the other side to create an inverted ‘v’. The ridge is thicker at the base and tapers to a point at the tip. Continue until the ridge is the correct size for the wire and the paste is the correct thickness. If you are struggling to master this technique, there are grooved boards available. This allows you to roll out the paste over the correct sized groove, cut out the petal or leaf shape and insert a wire.
The stages required to roll a ridge. Roll the ball of paste into a sausage and flatten slightly using the rolling pin.
Create a ridge using the large cel stick as a rolling pin to create an inverted ‘v’.
The finished ridge, which is thicker at the base tapering towards the top of the paste.
Wiring Petals and Leaves
Hold the petal/leaf ridge side up between the thumb and forefinger for support, insert the moistened wire into the ridge, pushing and twisting at the same time. You should be able to feel the wire moving up the ridge. Insert the wire between one-third to a half of the way up the petal or leaf for support. Secure by pinching the paste gently onto the wire at the base using the thumb and forefinger.
Inserting a wire into a ridge for petals and leaves.
This method creates a stronger petal rather than just using glue to attach them to a prepared centre. It also gives the flower a more realistic look. Most petals are wired; there are a few exceptions, which are detailed in the individual tutorials.
The individual wiring of leaves is a must as it enables you to create stems of foliage that look realistic.
Mexican Hat
This method is used when making a calyx with a back on it to attach petals to or when making a flower and neck all in one. The following is an example of how to make cherry blossom and periwinkle.
The stages required to create a Mexican hat.
After creating a cone, place the thumbs on the top and forefingers underneath, and squeeze the paste to flatten.
Use a cel stick to roll from the base outwards until the paste is thin. Place the chosen cutter over the top and cut out.
Starting with a ball of paste, shape this into a cone using the index finger. Taking hold of the cone, the widest section at the base, place the thumbs on the top and forefingers underneath, then squeeze the paste to flatten. Make sure that you pinch the paste around the base of the cone on the underside as well as the topside. If this isn’t done, you may end up with a bulbous lump around the base, which will make it difficult to position the cutter over the top!
Place onto the work board and using a medium cel stick, roll from the base outwards until the paste is thin. Place the cutter over the top and cut out.
Using a Ball Tool
When softening the edges, hold the ball tool like a pencil applying a reasonable amount of pressure. Move the ball tool around the paste one way and back again or find a way that works for you to create softening and movement in the paste (see also foam pad/holed foam pad).
Using a ball tool will soften and/or frill the edges of petals and leaves. Also useful for hollowing petals.
Frilling Petal Edges Using a Cocktail Stick
Place the petal onto the non-stick work board. Place the cocktail stick just onto the edge of the paste. Place the non-dominant forefinger very lightly on the tip of the stick with no pressure (optional). With the dominant forefinger, roll the cocktail stick in one direction across the paste – all the pressure is coming from this forefinger. The paste will start to lift and frill. Practice may be required!
Frilling petal edges using a cocktail stick – this is one of the ways to create frilling and a little soft veining to the petal edges.
Veining Petals Using the Veining Tool
Place the petal onto the non-stick work board. Place the pointed end of the veining tool at the base of the petal and starting at one edge, roll over the petal in a fan formation. If you apply more pressure to the tool you will achieve a stronger vein. If you distort the petal during the process re-cut the shape using the cutter.
Veining petals using the veining tool – this method can be used to vein petals that have soft veins, like sweet peas and oriental poppies, or when you need to add more veining around the edges of a petal.
Frilling Petal Edges Using the Veining Tool
Petals can be frilled in a number of ways. Using the veining tool allows you to keep the veining already in the petal whilst frilling/fluting the edges. As you move the tool over the paste the edges will gently lift to create movement. Roll over the paste in one direction with a gentle pressure on the non-stick work board as for the clematis.
Frilling petal edges using the veining tool – this not only adds veining but also encourages the paste to lift and flute, creating movement in the petal.
Pinching a Ridge from Base to Tip on the Back of a Leaf
Place the leaf on the non-dominant forefinger with the ridge side uppermost. Using the thumb and forefinger of the dominant hand, pinch a gentle ridge from base to tip. This helps to create a little shaping to the leaf.
Pinching a ridge – this is a simple technique to do; it helps to give the leaf a little more shaping therefore enhancing its realistic appearance.
Smoothing Flower Stems
When you have larger flowers with chunky stems, a necessary step is to try and create a smoother looking stem. This is perhaps not so important on the fantasy flowers as the stems are much smaller and not so noticeable. Holding the stem in one hand, use the back-closed blades of a pair of scissors and gently rub up and down the tape on the stem to smooth out the tape lines (made by thickening and taping the stem), making the stem look more natural.
Smoothing flower stems – an important step when you have larger, thicker stems as the lines from the tape are more noticeable.
Use of Real Leaves as Veiners
Sometimes commercial leaf veiners are not available, but a real leaf is. Use in the same way as for the commercial leaf veiner. You need two leaves; the front of the real leaf will be the back of the paste leaf. The back of the real leaf will vein the front of the paste leaf. Lightly dust with cornflour before using (see periwinkle Fig. 19 on page 89).
Using a Leaf Veiner
Each leaf veiner has two sides. The back of the veiner has an indented vein. When the paste leaf (ridge side down) is placed onto this part, the ridge will be pushed into the vein, thereby creating a ridge on the paste leaf. This will be the back. The top part of the veiner has a raised ridge down the centre. When pushed onto the paste leaf this will create an inverted vein, the front of the paste leaf.
Using a Petal Veiner
The petal veiners are predominantly cupped or hollowed slightly. Place the paste petal into the cupped/hollowed part of the veiner, ridge side down. Place the slightly rounded part of the veiner on top – this will create the front of the petal. Some are flat, like the clematis. The back of the petal is the part of the veiner with the hollowed veins; the front of the veiner is the part with the raised veins.
Using a leaf/petal veiner –this is an essential step for all flowers and leaves as this will give the correct veining, creating a realism to the flowers and leaves that you are creating in sugar.
Dresden Tool
The pointed end is useful for marking veins or central ridges. Hold the tool like a pencil, using the heel that’s the flatter part of the tool, not the tip of the point. Apply a little pressure, gently pull the tool up the paste from base to tip to create a central vein.
Dresden tool – the pointed end can be used to add a central vein on petals and leaves or vein a whole leaf.
Dresden tool – the broader end is useful for frilling petal edges, softening serrations or making serrated/jagged edges on leaves (see individual tutorials).
The broader end is useful for frilling petal edges, softening serrations or making serrated/jagged edges on leaves. Use the heel of the broad end to soften the edges by applying light pressure and moving the tool side to side over the paste on the work board (see individual tutorials).
Star Tool
This can be used as an alternative method of making the aqua blossom pulled and frilled fantasy flowers to that described on page 27. It has ridges, which is good for dividing the flowers into equal proportions.
Star tool – once a cone has been made, one end of the tool is inserted into the wide end of the cone. Scissors are then used to cut down the markings made by the tool to separate the petals. Use the thumb and forefinger to pinch and shape the petals.
Tea Light
Use for singeing non-hooked wires to blacken, as for the hypericum berries and heat-hooked/ski-hooked wires prior to inserting into a cone or ball of flower paste. Heat the hooked wire until it turns black/white, then carefully insert it into the cone. Hold for a few seconds to allow the sugar to caramelize to ensure a strong bond. Secure onto the wire at the base, taking care not to burn one’s fingers! Char the ends of cotton threads for a decayed look, for example, rose hips. This needs to be done with care and not for long!
Tea light – the flame can be used to heat non-hooked, hooked and skihooked wires until hot.
Using Flower Paste/Gum Paste
Always make sure the paste is well kneaded before starting to roll out or model it into a flower shape, otherwise it has a tendency to dry out and crack. It’s an air-drying paste, so when not using it, make sure you wrap it well in a plastic bag and seal in an airtight container. If cutting out several petals/leaves at once, use the Stay Fresh multi-mat to cover them. When rolling out the flower paste, make sure that it’s quite thin – as a guide you should be able to read some lettering through it. It does not want to be thick, for the petals and leaves to look realistic it needs to be quite thin. This will get easier with practice! Always roll out just enough for what you need.
Use of Templates to Make a Leaf or Petal
Trace the outline of the shape using a pencil onto tracing paper, turn the tracing paper over, outline on the back. Turn the tracing paper over again and place onto a piece of thin card. Re-trace the outline again. Cut around the pencil shape with scissors; the template of the petal or leaf is now ready to use. When using templates, insert the wire into the ridge before placing the template on top, ensuring the ridge isn’t squashed. Place the template centrally over the ridge. Use the plain-edged cutting wheel or scalpel to cut around the edge.
Twisted Floristry Tape
Use quarter-width tape and roll one end of the tape between the thumb and forefinger. It might take a few seconds to get it started, but once you have started keep going! Keep twisting with one hand whilst pulling the tape taut with the other.
Achieving a Clean Cut from the Cutters
Cut out the shape using the cutter, then pick the cutter up with the paste attached. Place on the foam pad, rub the cutter side to side – this will give a cleanness to the edges. Alternatively, rub the thumb over the edges of the cutter/paste, taking care if the cutters are metal as they can sometimes be sharp!
To Bend a Leaf or Petal Stem
Hold the petal or leaf with your thumb at the base on the back, forefinger on the top. Place your thumbnail at the base of the petal/leaf, then press into the wire to bend the petal/leaf backwards slightly (see individual tutorials).
Using Cotton for Stamens
Once the cotton loop has been made and attached to the wire, tape over the bend in the wire and down the wire. Cut though the loop of cotton at the top, thereby freeing the strands, and make sure that the threads do not split into a ‘V’. If this happens, tape around the base of the threads again so that they become one group (see individual tutorials).
Glazing and Steaming
I tend to use the steam from the kettle to set the dust on fully dried flowers and some leaves that have a matt finish. Hold the flower in the steam for a few seconds, turning it round. Keep the flower high above the spout of the kettle, otherwise it will be wet and it will also have a waxy appearance, useful however for some flowers!
Commercial confectioners’ edible glaze is available in a spray or liquid form. I prefer to use the spray as you can spray lightly to give a little shine or repeat for a really shiny finish depending on the leaf or berries. When using the spray glaze it’s advisable to do this outside.
Liquid glaze can be used alone or diluted with isopropyl alcohol to give a weakened solution to dip leaves and berries, depending on the amount of shine required. Care is needed when using this product: do not spill on worktops, sinks, and so on.
CHAPTER 4
Flower Tutorials
4.1 AQUA BLOSSOM
Method


