Erhalten Sie Zugang zu diesem und mehr als 300000 Büchern ab EUR 5,99 monatlich.
- Herausgeber: The Crowood Press
- Kategorie: Lebensstil
- Sprache: Englisch
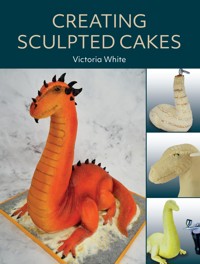
The thought of creating a sculpted cake can be a daunting one. However, when broken down, the skills and processes needed are not as intimidating as might be thought. Whether you are a professional cake decorator or a hobby baker, this book will guide you through each step needed to create show-stopping sculpted cakes. Each project will teach you new skills and techniques to help you progress to more and more advanced cakes. You will be shown how to stack, carve, cover and add details to create beautiful, gravity-defying sculpted cakes. With clear, step-by-step instructions and over 400 colour photographs.
Sie lesen das E-Book in den Legimi-Apps auf:
Seitenzahl: 147
Veröffentlichungsjahr: 2024
Das E-Book (TTS) können Sie hören im Abo „Legimi Premium” in Legimi-Apps auf:
Ähnliche


CONTENTS
Introduction
Chapter 1 Tools and Equipment
Chapter 2 Materials
Chapter 3 Building Structures
Chapter 4 Creating Textures and Basic Shapes
Chapter 5 Recipes
Chapter 6 Project 1: A Simple Carve
Chapter 7 Project 2: Using Templates
Chapter 8 Project 3: Carving Vehicles
Chapter 9 Project 4: Simple Structure
Chapter 10 Project 5: Standing Structure
Chapter 11 Project 6: Bust Structure
Chapter 12 Project 7: Armature and Airbrushing
Chapter 13 Project 8: The Show-Stopper
Appendix I Templates
Appendix II Stockists
Appendix III Conversion Charts
Index
INTRODUCTION
I have always had an interest in cake decorating. Baking with my nan is one of my fondest childhood memories. I made my first ‘proper’ cake for my son’s first birthday, following a tutorial in an old cake decorating book. It was a yellow and black fish, and I thought it was marvellous. So I began practising cakes and researching different techniques in books and online and, after many years of practice, decided to enter a competition – and not just any competition, the Cake International. I entered the carved category and made a dragon. I was thrilled to be awarded a bronze, even though my dragon was cross-eyed and only had one leg. I had discovered a love of sculpted cakes that has continued to this day.
An Easter bulldog cake created for an online cake school.
Sculpted cakes are always a popular choice for any occasion. The projects in this book are suitable for those looking to start carving cakes, but who don’t know where to begin. Have you ever looked at a cake and been completely baffled at how it is standing? If you have questioned how the structure is put together, what materials to use, how to carve the proportions and what covering is best to decorate the cake with, then this is the book for you.
The projects in this book have been designed to teach you the skills and techniques to create head-turning cakes with a realistic finish. The cakes should be made in project order, as each one introduces new techniques that follow on to the next cake. We start with a simple cake shape to help you get familiar with carving, then move on to using templates, sculpting vehicles, adding structure, using the airbrush and finish by putting it all together to make a gravity-defying, show-stopping cake.
A panda cake covered with modelling chocolate, with internal structure and armature wire to make the bamboo.
The opening chapters will cover the equipment and materials needed to sculpt cakes, starting with the basic set of tools I use and a few extras that are helpful for more advanced modelling. I have tried to use similar tools for every project, so you won’t need to purchase lots of new tools.
You will find useful information about the different materials that can be used to build structures, and the different coverings such as buttercream, ganache, sugar paste and modelling chocolate.
Towards the back of the book, you will find the templates for the projects. The best way to use a template is to scan it with your phone or computer, enlarge it to the required size and print it out. The template can then be cut out and used to carve a cake or cut the board shape.
The projects in the book are all popular designs that can be recreated exactly by following the step-by-step instructions, or you can adapt the design by adding personal touches. Experiment with changing the breed of dog, for example or the model of the car. Try making your own templates and structure and, most importantly, have fun!
A life-sized dinosaur made for Cake International competition in 2022; it won first place.
CHAPTER 1
TOOLS AND EQUIPMENT
There is a vast array of sugar-craft tools and equipment available on the market, and it is growing all the time. But what exactly do you need to start creating sculpted cakes?
This chapter will cover the basic tools needed for carving cakes and highlight the most useful. Most of these tools are used in every project in the book, so you will not need to keep purchasing more new equipment as you go.
The following tools are a good starting point for all cake-decorating genres. You can then grow your kit with more specialised tools as you progress and advance your skill set.
Tools and equipment used for creating sculpted cakes.
STAND MIXER
These mixers are attached to a stand and sit on the worktop, with a removable bowl on the base. Different attachments are added for different mixing requirements, and can be used for mixing cake batter, whipping buttercream and making royal icing, among other things. A stand mixer is a great investment for any baker, and they are available in a wide range of colours and designs. Research the different features and choose one to fit your budget. A good-quality mixer will make your baking life easier and last for many years.
BAKING TINS
Invest in good-quality aluminium baking tins. These are lightweight and distribute heat evenly for a great bake every time. I personally like to use PME baking tins with a fixed base. There are a wide variety of shapes and sizes on the market, so try to purchase ones you will use most often to begin with. Round and square tins in 15cm, 20cm and 25cm sizes are a good starting point, and will not take up too much cupboard space. A rectangular tin is a good option too, as the cake can be cut to create shapes and smaller cakes. In the UK, cake tins are still often sold in inches – see the conversion table in Appendix III.
An array of baking tins. I prefer the fixed bottom tins but spring-base pans are also suitable.
KNIVES
A large serrated knife is essential for carving cakes; a small serrated knife is handy for more delicate carving.
Pallet Knife
A pallet knife is an essential part of your cake craft tool set. They are used for spreading buttercream, fillings and ganache, lifting cakes and small decorations, trimming sugar paste and for buttercream decorating. They come in a wide range of sizes and shapes. I recommend purchasing a 15cm angled blade pallet knife.
Craft Knife
A craft knife or scalpel is used for cutting sugar paste. There are a variety available – some are disposable, and others have replaceable blades. They are not expensive to purchase so experiment with different brands until you find one you are most comfortable using. Craft knives are also used to cut poly-dowels.
SMOOTHERS
Smoothers are another essential part of your kit. Ridged smoothers are used for creating smooth finishes, keeping sides straight and rolling out neat, even ropes of sugar paste. Look for a smoother with a squared back end for smoothing out air bubbles and creating straight angles, and a rounded front to avoid leaving marks in the sugar paste.
The flexi smoother is designed to give your cake a flawless finish. Sharp, clean, sugar paste edges can be achieved as well as smooth ganache. These smoothers usually come in a set of different sizes and shapes and can vary in thickness. My favourite is the sugar smoother set from Sugarworks.
ROLLING PINS
Rolling pins come in various lengths and weights for different jobs. They can be smooth for rolling out sugar paste or embossed with a pattern. A small and a large rolling pin in your kit should cover all bases.
MODELLING TOOLS
You can purchase a basic modelling tool kit from almost all sugar-craft suppliers. This will include a shell and blade tool used for embossing and trimming sugar paste, a bone tool for frilling and smoothing petals and leaves, a ball tool for making round indentations and curves and a scallop and comb tool for cutting scalloped edges and embossing mouths on modelled figures.
There is a wide variety of modelling tools available on the market. Begin with the basics and grow your kit collection as your skills progress.
The tool used most often by cake decorators is the double-ended Dresden tool. It has a narrow point at one end and a spooned tip at the other. It can be used for a variety of techniques including texturing, marking details, making creases and facial features, smoothing and sculpting.
Modelling tools come in different materials, in packs or sold individually. I prefer metal tools as they have no seams, are weightier and better quality. They can be expensive but last longer than plastic tools, which tend to snap.
Silicone Modelling Tools
The tools I would not be without are my sugar shapers by Sugarworks. These silicone tools have a variety of different tips that are perfect for sculpting. The sides of the tools can be used to smooth and blend modelling chocolate.
My favourite tools to use for sculpting are sugar shapers.
Silicone-tipped tools are also very useful. They come in various sizes, and are hard- or soft-tipped. They are used for adding details and drawing soft lines.
Stitching Tool
A stitching tool is rolled along the paste to leave small lines that look like stitches, and is used to give a realistic finish when sculpting fabrics.
Wire Rake Tool
The rake tool is a metal tool with wire prongs like a rake. It is used to create fur and hair textures.
CUTTERS AND PLUNGER CUTTERS
Cutters are used to cut shapes from sugar paste, and are plastic or metal. Plunger cutters have a push-down plunger on the end, which is usually embossed to add pattern to the shape. As a starting point, I recommend a set of circle and square cutters and some plunger cutters with basic shapes such as circles, stars, hearts and flowers. Alphabet and number plunger cutters are also extremely useful.
PAINTBRUSHES
A selection of paintbrushes in various sizes is a must for any cake decorator. Choose good-quality brushes and clean them after every use with dish soap.
A selection of paintbrushes.
Fine brushes are used for painting details such as eyes, whereas thicker brushes are useful for larger areas. Always check the brushes for loose fibres and chipping paint before use.
CORNFLOUR POUCH
If you are having trouble with sugar paste or modelling chocolate sticking to the work surface or your hands, apply a light dusting of cornflour to help prevent this. A cornflour pouch is a fine mesh bag that holds the cornflour. I like to use the Wilton Dust-N-Store pouch as it has a container, but you can make your own dusting pouch very simply.
Making a Dusting Pouch
To make a dusting pouch for cornflour, take a new, washed, pair of tights and cut off the foot sections. Stretch one of the legs over a glass to make it easier to fill and spoon some cornflour inside. Remove it from the glass and tie the end, close to the cornflour.
You could also use a piece of muslin or cheesecloth by placing some cornflour in the centre and gathering up the sides, securing them with an elastic band.
Making a cornflour pouch from a pair of stockings.
SCISSORS
A small pair of scissors is useful for cutting dowels and templates, and creating texture in sugar paste.
TAPE MEASURE AND RULER
A tape measure is essential for measuring cakes and decorations. A ruler can also be used to take measurements and to help cut straight lines; a metal one is best so it can’t be accidently cut with a craft knife.
AIRBRUSH
An airbrush is used to colour cakes quickly and easily, creating depth and a professional-looking finish. Many colours are available with different finishes, such as pearl or matt, and can be mixed to create your own shades.
An airbrush is used for colouring and creating realistic paint effects on sculpted cakes.
Airbrushes come with a compressor and hose, or as a portable version with a battery unit attached to the pen. Airbrushing techniques are covered in Chapter 2.
STEAMER
Steam is used to remove cornflour and icing sugar from sugar paste, and to set dust colours to prevent smudging and colour transfer. It can also be used to create a glossy finish. You can purchase a dedicated cake steamer, or a hand-held clothes steamer will work just as well.
CHAPTER 2
MATERIALS
This chapter looks at the materials available for sculpting cakes. Sugar paste and modelling chocolate are widely used for both covering cakes and sculpting detail. Both can be coloured, painted and airbrushed, so how do you choose which to use and when?
Materials used for sculpting cakes.
SUGAR PASTE
Sugar paste is also known as fondant or ready-to- roll icing. It is used for covering cakes and drums, and making modelled elements and decorations. It can be used with moulds and cutters, and sets firm. Sugar paste most commonly comes in white but is also available in an array of colours. It can be smoothed and polished, giving a professional finish to cakes.
Sugar paste can be bought in various colours.
The advantage of sugar paste is that it is available to purchase in almost all local supermarkets as well as in sugar-craft shops. Try out different brands to see which you prefer; they can vary in elasticity and softness.
The main disadvantage of sugar paste is that once it has dried, you can’t rework it. If you are working on a large cake that may take several days, sugar paste is not the best option. It can also be difficult to blend and can tear when adding textures.
MODELLING CHOCOLATE
Modelling chocolate is a favourite among cake sculptors. It is extremely easy to blend and sculpt with and create fine details. Modelling chocolate is made by adding syrup to melted chocolate, creating a firm but malleable paste that holds its own shape. It is not as widely available in shops as sugar paste (it’s mainly bought from online suppliers) but you can make your own quite easily (seeChapter 5).
Modelling chocolate softens as it warms, so if you have particularly hot hands, it may be difficult to work with. The advantage of it is that it doesn’t dry out like sugar paste, so you can keep working on your project for several days. It can be used in moulds and can be coloured with gel colour. I prefer to work with white modelling chocolate so it can be coloured, but dark versions are also available.
Sculpting chocolate is commercially available and contains more sugar than cocoa butter, making it firmer than modelling chocolate. It is great for making models but can be expensive if you need a large amount.
GANACHE
Ganache is a mixture of melted chocolate and cream used to crumb coat and cover cakes to create a smooth base. Ganache is firm once set, so several layers can be applied to add stability to structured cakes.
Ganache is used as a crumb coat (a thin layer of icing used to cover cakes to hold the crumbs in place) and to add stability to cakes.
There are three main types of ganache: dark chocolate, white chocolate and milk chocolate. Different ratios of chocolate to cream are used for each type (seeChapter 5). Ganache can be used for a filling, a frosting or as a drip, or to make truffles. It can also be coloured and flavoured with the likes of orange, mint or rum.
RICE KRISPIE TREATS (RKT)
RKT is rice cereal combined with melted marshmallows to create a lightweight yet firm substitute for cake where strength and stability are needed. It can be shaped and modelled when it is warm, but once cooled, it sets solid. RKT is perfect for using on sculpted cakes to make an awkward-shaped head, for example. It can be covered with ganache and sugar paste/modelling chocolate and can also be carved in its solid state.
Rice Krispie treats used to create a circus ball in Project 8.
COLOURING: GELS, DUSTS AND AIRBRUSHING
Gel Colours
Gel pastes are ideal for colouring sugar paste, buttercream, marzipan, modelling chocolate, royal icing and cake batter. The gel is highly concentrated, meaning you only need a small amount to achieve the desired colour. Adding lots of colour can change the consistency of sugar paste and modelling chocolate, making it sticky and difficult to work with, so a high-concentration colour is advantageous.
A selection of gel colours.
Sugar pastes are available in many different colours and can be mixed to create new shades.
For black and red, it’s advisable to purchase pre-mixed black and red sugar pastes. These strong colours are difficult to achieve without changing the consistency of the sugar paste.
The same colouring technique can be used for modelling chocolate, but you may need to rest the chocolate in the refrigerator if it gets too warm when kneading.
Pre-coloured sugar pastes can be mixed to make new colours. Adding black can darken the colour, while adding white can lighten it. Using pre-coloured sugar pastes to make darker colours is beneficial as it saves having to add more colour gel, changing the consistency of the paste.
Colouring Sugar Paste with Gel Colours
Wearing gloves, add a small drop of gel colour to the white sugar paste and fold it in. Knead the sugar paste until you achieve a uniform colour. It is better to start with a small amount of colour and add more to create a stronger shade, than to try and lighten it with more white paste. Once you have achieved the desired shade, wrap the sugar paste in clingfilm and leave it to rest. The colour will darken slightly.
Dust Colours


