
Erhalten Sie Zugang zu diesem und mehr als 300000 Büchern ab EUR 5,99 monatlich.
- Herausgeber: Batsford
- Kategorie: Lebensstil
- Sprache: Englisch
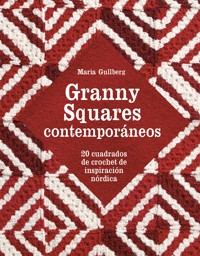
30 magical crochet square designs for clothes, accessories and the home. A square is a small, repeatable crochet project that is versatile and easy to take with you wherever you go. You can use them individually or you can join endless amounts of squares together to build up patterns which can give you everything from mug coasters to duvet covers. In this book, Maria Gullberg has designed different types of squares including classic and easy granny squares, new and interesting designs of squares and hexagons, as well as mosaic crochet squares. They can be used for all kinds of projects, from jumpers, shawls and waistcoats to rugs, cushion covers and bags: the possibilities really are endless. Each square can be joined together in as many ways as you can think of. There are pattern examples with clear instructions if you're looking for inspiration or specific designs, or you can make it up as you go along mixing patterns and choosing your own colour ways. In this book you'll discover squares to crochet that you'll never have seen before. With projects suitable for all abilities, from beginner through to intermediate and advanced, there's plenty to ignite your imagination.
Sie lesen das E-Book in den Legimi-Apps auf:
Seitenzahl: 83
Veröffentlichungsjahr: 2025
Das E-Book (TTS) können Sie hören im Abo „Legimi Premium” in Legimi-Apps auf:
Ähnliche


Contents
Crochet squares!
Crochet hooks
Stitches
Tips and tricks
GRANNY SQUARES
How to read crochet charts
Key to symbols
Fighter
Ulla-Bella
Brother Roger
Lollipop
Twist
Pillerull
Tora
Waldemar
Agda
Hilda
Dialogue
Delight
Jambo
Aida
Acke
Zola
Mateo
Bahia
Svea
Alfhild
Xara
Alina
Torild
Fingal
Trickster
Agaton
Daisy
Dainty
MOSAIC CROCHET
How to read crochet charts
Key to symbols
Stella
William Morris
Basic patterns for clothes
Assembly
Colours
Creativity and inspiration
Crochet squares!
This is a book about how to crochet different types of squares and use them for whatever you want! A square is a small crochet project, easy to take with you and very versatile. When you put several squares together and create a repeating pattern, magic happens! Squares can be for beginners and experts alike.
Everything is here, from the classic granny square and its variations, to more advanced mosaic crochet squares. They can be square, but also hexagonal or half squares, and can all be put together to create different patterns.
Squares are often assembled to make a throw or blanket, small or large. The squares can also be made into cushions, bags, rugs, jumpers, cardigans, scarves and waistcoats. At the end of the book as well as with each pattern there are suggestions for different projects that you can use the squares for. You will also find instructions for how to assemble your squares for a nice, neat finish.
The possibilities are endless!
The granny square has a special place in my heart and I have been developing it since 2013. Over the years that I have been crocheting squares, I have continued to find new possibilities and combinations. The abundance of variation is one of the reasons I got ‘hooked’ on squares. Sometimes several squares are needed to build a repeating pattern, and completely new patterns can appear just by rotating one or more of the squares in a group. A square can also reveal a completely new expression when worked with different contrasts or colour combinations.
I wish you the best of luck with exploring the squares in this book and hope that you – just like me – will find a lot of pleasure in crocheting them!
Crochet hooks
The size (thickness) of a crochet hook can be specified in different ways. There are multiple variations, depending on factors such as whether the crochet hook is made from aluminium or steel, if it was made in Europe, the USA, the UK or Japan, or if the diameter is measured in millimetres (which is the standard in the UK). If you stick with millimetres, the sizing will be the same no matter what the hook is made of.
Stiches
Abbreviations
st
stitch
rnd
round
lp
loop
ch
chain stitch
ch sp
chain space
sl st
slip stitch
dc
double crochet (US single crochet)
tr
treble crochet (US double crochet)
htr
half treble crochet (US half double crochet)
dtr
double treble crochet (US treble crochet)
cl
cluster
yo
yarn over
Yarn over
A yarn over is when you catch the yarn with the crochet hook. This is done to pull it through one or more stitches, to create another loop on the hook, or to make taller stitches like treble crochets. You can see a yarn over in the first illustration opposite.
Asterisks (*) mark sections in the pattern that are to be repeated a set number of times. For example: ‘Work *1 dc, 1 ch, miss 1 st*, repeat * to * until end of rnd.’ Repeat the instructions between the asterisks until you reach the end of the round.
Magic Ring
Make a ring at the end of your yarn. It’s important that the tail end of the yarn sits underneath where the yarn crosses over. Hold the ring with your thumb and index finger (marked with a red circle). Insert the crochet hook into the ring and make a yarn over with the ball end of the yarn; then pull it through the ring.
Now you have a first, loose loop on your crochet hook. Yarn over again with the ball end of the yarn, pulling the yarn through the loop. Now you can start crocheting stitches around the ring, following the pattern. Pull the tail end of the yarn to close the ring. You can start your squares with a magic ring.
Chain stitch (ch)
First, make a slipknot. Insert the crochet hook into the loop and tighten the yarn around the crochet hook (but not too tightly). Yarn over with the ball end of the yarn (as opposed to the tail end) and pull a loop through the slipknot. You’ve just made a chain stitch. Many crochet projects start with a chain of stitches called a foundation chain. To do this, simply make chain stitches until you have the required amount.
When you crochet into a foundation chain, i.e. on the first round, there are two ways to insert the crochet hook into the loops. You can either insert the hook so there are two loops from the chain stitch over it and one under (this makes the first round a bit thicker and less elastic), or you can insert it so that one loop from the chain stitch sits over the crochet hook and two under (this makes the first round thinner but more elastic). If they are slip stitched together to form a ring, work the first round’s stitches into the ring, as with a magic ring.
Chain stitches can start a project or be used within a pattern. One or several chain stitches in a row create a gap called a chain space (ch sp).
Slip stitch (sl st)
Insert the hook into a stitch, yarn over and pull the yarn through both the stitch and the loop on the hook. Insert the hook into the next stitch and continue to the end of the round. Finish with one ch to start the next round.
Slip stitches can be used to close a round by sl st into the top of the turning ch at the start of the round; you can work a whole round in sl st; or you can sl st to move your work from one area to another. They can also make a nice border, as well as make a braided chain if you work two colours, changing colours for each sl st.
Double crochet (dc) (US single crochet)
Insert the hook into a stitch, yarn over and pull a loop through. Now you have 2 loops on the hook. Yarn over again and pull through both loops on the hook at once. Insert the hook into the next stitch and continue until the end of the round. Finish with 2 chain stitches (these count as the first dc stitch on the next round) and turn. Dc stitches can be made differently: by inserting the hook through both loops of the stitch, only the back loop, only the front loop, or alternating between front and back. The work will look different depending which method you use.
Half treble crochet (htr) (US half double crochet)
Yarn over and insert the hook into a stitch, yarn over again and pull a loop through the stitch. Now you have 3 loops on the hook. Yarn over and pull through all 3 loops in one go. Continue in the same way to the end of the round.
Finish with 3 chain stitches (these count as the first half treble stitch on the next round) to start the next round.
Treble crochet (tr) (US double crochet)
Yarn over, insert the hook into a stitch, yarn over again and pull a loop through the stitch. Now you have 3 loops on the hook. Yarn over and pull through the first two loops. Now you have 2 loops on the hook. Yarn over one final time and pull through the 2 loops. Continue in the same way to the end of the round. Finish the round with 3 chain stitches (as these count as the first treble on the next round) to start the next round. These 3 chain stitches are known as the turning chain.
Double treble crochet (dtr) (US treble crochet)
Yarn over twice and insert the hook into a stitch. Yarn over again and pull a loop through the stitch. Now you have 4 loops on the hook. Yarn over and pull through the first 2 loops (3 loops left on hook), yarn over again and pull through the first 2 loops (2 loops left on hook), yarn over one final time and pull through the last 2 loops. Continue in this way to the end of the round. Finish the round with 4 chain stitches (these count as the first double treble on the next round) to start the next round.
All dtr crochet stitches start with two yarn overs. When you crochet double, treble or quadruple treble stitches and so on, you build on the treble crochet stitch. The number of initial yos determines the height of the stitch. A triple treble stitch starts with three yos, a quadruple treble stitch with four yos and so on. Always pull the yarn through 2 loops at a time until only 1 stitch remains on the hook.
Clusters (cl)
The number of treble crochet stitches in a cluster depends on the pattern. Clusters with more treble stitches become bobble or popcorn stitches. In the illustration above, a 3 treble cluster is worked into the same stitch (4th from the hook of the foundation chain), but only up to (and including) the second to last loop. Once the required number of stitches are worked this way, yarn over and pull through all the loops, finishing all 3 stitches together.
Work as follows: yo, insert hook into appropriate st/ch sp, yo and pull through. Yo and pull through 2 (leaving 2 loops on the hook for the first tr). Repeat twice more until there are 4 loops on the hook, then yo and pull through all 4 loops.


