23,99 €
Mehr erfahren.
- Herausgeber: Crowood
- Kategorie: Geisteswissenschaft
- Sprache: Englisch
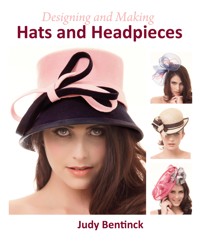
Designing and Making Hats and Headpieces is an inspiring instructional guide to the art of millinery. It explains how to go about designing a hat, what equipment and materials you will need, and the techniques required to get started. It divides the projects into three types of hat - blocked, headpieces and fascinators, and cut and sewn - and thereby describes how to make fourteen different designs. It goes on to suggest ways of finishing the hats with embellishments such as bows, felt, veiling and flowers. Drawing on her rich experience, the author generously shares her ideas and her advice so that you can achieve a professional finish and make a design that flatters the wearer and completes an outfit. With beautiful photographs and clear instructions, this book is an essential guide for anyone who wants to design and make a hat for a daily outing, a special occasion or a costume. The comprehensive coverage introduces stitching, shaping and sewing techniques - the essential skills of millinery; advises on design, where to find inspiration and fitting hats; covers blocked hats - five styles explained with different materials and trimming ideas; includes headpieces and fascinators - seven designs, including a bridal suggestion with lace, feathers and flowers; and cut and sewn hats - making the beret and bandeau using dressmaking techniques. With further ideas for trimmings, including advice on how to use bows, additional felt, veiling, flowers and much more, this is an inspirational book aimed at everyone interested in hats, millinery and fashion. Over 400 stunning colour photographs support the step-by-step instructions and illustrate the beauty of these hats.
Das E-Book können Sie in Legimi-Apps oder einer beliebigen App lesen, die das folgende Format unterstützen:
Seitenzahl: 176
Veröffentlichungsjahr: 2014
Ähnliche


Designing and Making
Hats and Headpieces
Judy Bentinck
THE CROWOOD PRESS
First published in 2014 by
The Crowood Press Ltd
Ramsbury, Marlborough
Wiltshire SN8 2HR
www.crowood.com
‘This e-Book first published in 2014’
© Judy Bentinck 2014
All rights reserved. No part of this publication may be reproduced or transmitted in any form or by any means, electronic or mechanical, including photocopy, recording, or any information storage and retrieval system, without permission in writing from the publishers.
British Library Cataloguing-in-Publication Data
A catalogue record for this book is available from the British Library.
ISBN 978 1 84797 823 3
Front cover: Judy Bentinck Millinery. Style: Wool Felt Cloche. Photographer: Alistair Cowin.
Model: Tamlyn Williams. Make-up and hair: Sammy Carpenter.
Frontispiece: Judy Bentinck Millinery. Style: Ivory Bridal Fascinator.
Photographer: Alistair Cowin. Model: Tamlyn Williams. Make-up and hair: Sammy Carpenter.
Acknowledgements
Enormous thanks to Freya Berry and Tim Bentinck for their IT skills, support and understanding. Thanks also to the milliners who have allowed me to use their photographs and to Natasha Moorhouse for the use of her hands. Lastly, thanks to all at The Crowood Press for their patience and to Alistair Cowin for his beautiful model shots.
Step-by step photographs by Tim and Judy Bentinck.
Diagrams by Selina Burgess.
Contents
1Introduction
2So What is Millinery?
3Materials, Tools and Equipment
4Techniques
5Design
6Blocked Hats
7Headpieces and Fascinators
8Cut and Sewn Hats
9Trimmings
Glossary
Suppliers List
Further Reference
Index
Judy Bentinck Millinery. Style: parisisal pillbox hat. Photographer: Alistair Cowin. Model: Tamlyn Williams. Make-up and hair: Sammy Carpenter.
Chapter 1
Introduction
1
Why do people wear hats? To keep the rain off, to keep warm, to be part of a team, to shield the sun from their eyes – or for no practical reason, simply to look lovely. Hats are sexy and the process of creating something that is both a sculptural work of art and an alluring, flattering adornment to a woman’s outfit is sexy too, and enormously satisfying. I love it and in this book I’ll show you how to do it.
Wearing a hat for style rather than just for need has been part of all cultures for thousands of years. Traditional millinery lost favour for a while in the 1960s, in the UK at least, as young people dictated fashion for the first time in history, with the flower-power rebellion and back-combed bouffant hairdos taking the place of the conventional crowning glory.
In Britain Princess Diana almost single-handedly reignited the millinery industry and, while the Queen has never stopped wearing them and Ascot has always demanded them, the wedding of Prince William and Kate Middleton certainly focused a lot of attention on hats and their wearers. Today special occasions are full of beautiful headwear – from fabulous fascinators to pretty pillboxes to colossal cartwheels!
I have always loved hats. As a child I was one of the few girls who happily wore their hat to school, come rain or shine. At college I would scour charity shops for perky titfers or huge floppy brimmed creations, and I always sported a flat cap for weekend walks.
In my early career as a costume designer and wardrobe supervisor I occasionally had to create hats but I had no real idea how to do it – I didn’t know what a block was until my first millinery lesson in 2000 but that was the day I fell in love! It was so exciting to discover that millinery involved sculpture, textiles, style, colour, flair, proportion and, most of all, passion!
Today I combine running my couture millinery business with teaching. I love passing on the traditional skills that were taught to me by Rose Cory, Royal Warrant Holder, and watching the delight on the faces of my students as they experience the same excitement at this most creative of crafts. It has prompted me to write this book, to let you, the reader, discover for yourself the joy of creating something beautiful and wearable. To be inspired and excited and to open up a new world of all things hats!
Judy Bentinck Millinery. Style: silk dupion-covered cocktail hat. Photographer: Alistair Cowin. Model: Tamlyn Williams. Make-up and hair: Sammy Carpenter.
Chapter 2
So What is Millinery?
2
Millinery is the term used to describe the craft of making hats and headpieces for women. The word milliner derives from the seventeenth century when Milan in Italy was the centre for the beautiful fine straws, ribbons and general haberdashery suitable to trim and create ladies’ hats. Salesmen who travelled across Europe to Britain became known as ‘the men from Milan’ or ‘Milaners’, which evolved into milliners. (Men’s hats on the other hand are made by a hatter. There are milliners who do both, for example the wonderful and prolific Stephen Jones has a range called Miss Jones for women and Boy Jones for men.)
There are several well known idioms about hat-making and hats in general; you may have heard of some of them but might not be aware of how they came into being. Being as ‘mad as a hatter’, for example, was an expression pertaining to the unfortunate side-effects of working with mercury nitrate, a chemical used most notably during the Victorian era to soften fur in the felt-making process. Although these feltmakers were known to drink copiously as a result of their dusty working conditions, it was the long-term inhalation of mercury that poisoned the hatters and produced a number of inebriate symptoms, which often developed into tremors, delirium, paralysis and eventual death. Mercury had been removed from the process in Britain by the end of the nineteenth century but in some areas of the United States its use continued until as recently as the early 1940s. Mercury poisoning was known as the ‘Danbury shakes’ in the US owing to the concentration of hat-making in Danbury, Connecticut.
There are several other expressions from the times when hats were commonplace which have survived to the present and are used in everyday speech without us even thinking about the original meaning. This goes to show what an important clothing item hats always were until the decline of the hat-making industry in the 1960s, and how, throughout the different fashions and styles of the decades, the hat remained an essential accessory. Idioms like ‘keep it under your hat’ (to keep a secret), ‘take my hat off to you’ (show respect, praise or admiration), ‘to pull it out of a hat’ (achieve a surprise or trick), ‘at the drop of a hat’ (to act quickly, instantly), ‘to wear more than one hat’ (having lots of jobs or responsibilities) and ‘old hat’ (out of date or old-fashioned) all give us a glimpse into the past. The word has also been used more recently, for example in the 1980s Paul Young song ‘Wherever I Lay My Hat (That’s My Home)’, showing how significant hats really were. In fact, millinery even has its own patron saint, St Catherine, and her patronage is celebrated annually on 25 November. Originally the festival was to honour unmarried women over the age of of twenty-five – known as ‘Catherinettes’ – where everyone would wish them a hasty end to their single status. Well-meaning friends would make the Catherinettes hats in green and yellow colours to symbolize fertility, faith and wisdom. This is, of course, outmoded these days but it still provides a welcome excuse for milliners to get together for a party! There are many other fascinating and quirky stories surrounding the hat-making industry and its rich history, and you can find out more by referring to the Further Reading section.
Japanese milliners celebrating St Catherine’s Day.
Components of the Hat: How it is Constructed
Hats come in all shapes and sizes. The hats featured in this book are designed to make a woman look gorgeous. If you’ve ever wondered how such beautiful things are actually constructed, you will find an explanation below with images to show the various parts.
COMPONENTS OF THE HAT:
•The crown consists of the tip (the top of the hat) and sideband (the sides).•The brim is made up of the headfitting (where the crown fits the brim) and the headribbon, which is attached inside the headfitting and is made of millinery petersham. It rests against the head to ensure a comfortable and secure fit. The wire supporting the outer edge of the brim is covered by the binding, which can be made from a variety of materials.•The trim is the finishing detail to cover the join between the brim and the crown. More trimmings can also be added, for example flowers, feathers, swirls and veiling.1: the crown; 2: the brim; 3: the trim.
Bespoke vs Mass-Produced Hats
Hats are made and sold in different ways. A hat that is created for a particular individual’s outfit for a special occasion is known as a bespoke hat. Milliners who create one-offs or only produce two or three of a design are called Model Milliners. Mass-produced hats are factory made, using specialist machinery to speed up the blocking and making process, thus creating much cheaper hats and making them more accessible to a larger number of people.
These hats can be found in department stores and on the high street.
The vast majority of men’s hats are mass produced, though the quality and cost vary widely. It is unusual for a man to have a bespoke hat made these days, although occasionally they can be commissioned for a chap with an exceptionally large or small head. It is interesting to note that women are now sporting a variety of men’s styles, for example the trilby, the fedora and the bowler – an example of which is featured in this book. Interestingly both the trilby and the fedora have their origins in fictional female characters. Trilby was the main character in George du Maurier’s novel of the same name, in the stage adaptation of which the leading actress wore the distinctive hat that went on to become the ever-popular trilby. Similarly, the fedora comes from a stage play featuring Sarah Bernhardt. She played Princess Fedora, a cross-dresser who wore the characteristic flat-brimmed hat with pinched front that later became popular with gangsters and was worn by Harrison Ford in the Indiana Jones movies. The beret was a traditional military hat for men, which has since been adopted as a fashion item for women. There is a beret pattern and making instructions later in this book.
Karen Henriksen Millinery. Girl Racer Collection. Style: Lombardi. Photographer: Tim Scott, Fluid Images. Models: Danni Menzies and James Pike. Make-up and hair: Polly Mann.
Keely Hunter Millinery. Shapka Collection. Styles: black fedora and red trilby. Photographer: Peter Fingleton. Model: Anna A @ Union.
In this book you will find instructions on how to make a variety of hats. They are grouped into three sections: blocked hats, which are created on a solid shape called a block; headpieces, which are made without blocks and thus are unstructured; and hats made using fabric and patterns (seeChapter 8).
At the beginning of each project is a list of everything needed to make the hat. The quantities of materials are approximate, but any left-overs can be kept and used for other trims or designs in the future. There is also a list of the techniques used, and an indication of where to find more detailed explanations of both trimmings and techniques.
Millinery is an exciting and highly imaginative craft, with endless possibilities for creative flair and innovative design.
Selection of millinery materials at Atelier Millinery, London..
Chapter 3
Materials, Tools and Equipment
3
Millinery Equipment
The good news is that most of what you need to get started with your first millinery creation consists of everyday items that you probably already have in your sewing kit, tool box or around the house. There are, however, a few specialist millinery items you will need to consider investing in before you start. The most important of these are: blocks; dolly heads; stiffeners; millinery needles in sizes 7–9 (7 for strong material; 9 for fine fabrics); and millinery cotton-covered wire.
Blocks
Blocks are moulds that are used to create hats. They usually come as separate crown blocks and brim blocks, although some styles have blocks made to include both crown and brim. Traditionally, hat blocks were carved from wood by a craftsman known as a block-maker; with the resurgence in popularity of hat-wearing in recent years, the need for hat blocks for milliners and millinery students has been reignited, with vintage blocks also becoming much sought after for original period shapes. There are far more block-makers these days, some of whom are listed in the Suppliers List at the back of the book.
How a crown and brim block are placed together to form a picture hat shape.
Older blocks tend to be made of much harder wood than the modern ones, and some people find pinning into these hardwoods difficult. Therefore it is important to learn to use a thimble effectively. If you find this hard to master, an easier way is to use red-headed purpose-made blocking pins or regular drawing pins. Many modern blocks are made from obeche wood, which is quite easy to pin into, and some are now being made from balsa wood, which is a soft wood. As a general rule, try to keep your blocking pins separate from any others as these may have some residue of stiffener on them that makes them unsuitable for pinning into fabric as they will be blunter than usual.
A selection of wooden blocks, courtesy of Atelier Millinery.
Generally milliners start with just a few blocks, as they can be interchanged and can be very versatile. For example, a standard dome-shaped crown block can be used with a variety of brim blocks to create very different styles. Some block-makers offer multi block sets or block bundles, which are ideal for starting out. Freeform hats are made without blocks, while cut and sewn hats use paper patterns, so there is a wide choice of methods.
Clockwise from left: Blocking spring; elastic band (a useful alternative to a blocking spring); cling film (Saran wrap) for protecting your blocks from dust and dye; wooden dolly head; tape measure without flat end; blocking pins; string; a corset bone; crown block on stand; small block; red blocking pins; kitchen palette knife for easing hats off blocks; thimble for pushing blocking pins in; cloche brim block; and wire-cutters (useful for pulling pins out).
BLOCKING SPRINGS
A blocking spring is a very useful millinery tool. It helps you block the crown of a hat by holding the material in place as you pull and pin. It is especially useful for the ‘pull down’ method (seeChapter 6). It gives a much neater result in less time and with fewer pins than if you use pins alone. Rings come in different sizes and correspond to the head size of the block you are using. You can buy blocking springs from specialist millinery suppliers such as Parkin Fabrics in Preston, UK. An alternative to a blocking spring is to use large elastic bands or a ball of ordinary (cotton) string.
A pull-down blocking spring in use.
Dolly Heads
A dolly or poupee head is ideal for working with hats and fascinators, as it allows you to view and shape the hat according to how it is going to be worn. It also, of course, provides the perfect stand to display your hats as well. Wooden dolly heads can be bought from specialist suppliers and come in different head sizes. Polystyrene heads as used by hairdressers and wigmakers are often a small head size but they are very inexpensive and really useful. They can be bought from shopfitters, hairdressing suppliers or online. It is possible to make your own dolly heads out of fabric-covered buckram but it is a time-consuming process.
A group of dolly heads.
Stiffeners
Different milliners have their own preferences for which stiffener they use, how much and when, depending on the material they’re working with. Generally the water-based stiffener works best with sinamay but nowadays most sinamay comes ready stiffened, which removes the need for extra stiffener. However, spraying with water to soften the sinamay ready for blocking can sometimes wash some of this stiffener away, especially if spraying is repeated during the blocking. In this case straw stiffener can be added afterwards. All straws can be stiffened both before and after blocking using a straw stiffener, which is painted on like a varnish. Felt can be stiffened with diluted water-based stiffener or felt stiffener.
Clockwise from left: felt stiffener; spray stiffener; straw stiffener; water-based stiffener; roll of kitchen paper; jam-jar with diluted water-based stiffener solution; and household paint brushes for applying stiffener wrapped in cling-film to keep them soft.
STEAMING AND STRETCHING
Professional milliners often use Jiffy hat steamers. These are bulky and expensive, but by no means essential – as an alternative you can use either a domestic kettle or a hand-held clothes steamer.
Left to right: hand-held steamer; kettle; and Jiffy steamer.
Another item often found in a milliner’s studio is a hat stretcher. Again, this is a cumbersome and expensive outlay. Smaller and cheaper alternatives called hat expanders are available from specialist block-makers.
Professional hat stretcher at the back, with a hat expander in the foreground.
Wire
Millinery wire comes cotton-covered in either black or white. A stiffer wire, with a diameter of 1.2mm, is best for holding brims. Fine wire is good for trimmings, and a very fine wire is ideal when working with hand-made flowers or tiaras. Strong millinery wire comes in a coil 50m long. An alternative is brim wire, which is clear plastic and comes in two diameters. Some shops sell wire by the yard (metre).
Left to right: Brim reed wire; flower wire; and cotton-covered millinery wire (1.2mm).
Sewing Equipment
Needles
Different materials need different-sized needles. Generally, for fine sewing, such as a silk binding, use a thin needle called a ‘sharp’ (these come in packs of sizes 3–9) as a thick milliner’s needle would be difficult to use. For more substantial sewing tasks, such as joining the crown to the brim, use a longer, thicker millinery needle (straw/milliner’s needle) as this will be stronger and firmer. Needles that are too small can be easily damaged when pushed through stiff or multi-layered fabric, so always check your needle is appropriate for the job in hand. With time and use, needles can become blunt and you will feel a resistance when sewing. This indicates you need to change needles.
Clockwise from left: Fine pins for sewing; thimbles for pinning and sewing; variety of sewing threads; pincushion (essential to avoid losing pins and needles); hand sewing needles; household pins for blocking; and long quilters’ pins for holding trims in place.
Tape Measures
All tape measures stretch over time, but good quality linen tape measures last a lot longer. It’s useful to have one with metric measurements on one side and imperial on the other, and be sure to get one without a 2in steel end, as this inhibits measuring around curves.
Miscellaneous Items
Cutting Tools
Ideally it is best to have different pairs of scissors for cutting different materials, so keep your everyday scissors away from fine fabrics. Conversely, don’t use your good quality scissors on straw and paper as they will go blunt in no time. Scissors can be sharpened professionally or with a DIY sharpener bought from a craft shop.
Left to right: heavy steel rule which can be used with knives; disposable craft knife; Stanley knife for cutting felt, leather and fur; large everyday scissors for cutting millinery materials; wire-cutters (or pliers with a cutting edge); snips for cutting threads; unpicker; small sharp scissors for snipping and cutting into small areas; and good quality scissors for silks and fine fabrics.
Heat Tools
With the exception of the electric mini iron, which can be bought online from a specialist craft retailer, all of these are household items and easy to access.
Left to right: electric mini iron (useful for awkward areas and small seams); kettle (preferably with a spout but this is not essential); steam iron; dry iron (or a steam iron can be used without water); and a hairdryer (very useful to speed up drying time).
Marking Tools
All of these items can be found in a regular sewing kit. They show the different ways of marking where you will be joining and/or sewing fabrics. It is often better to sew a tack line instead of using a chalk, particularly on a straw where the chalk can easily be rubbed off.
Left to right: tape measure; tailor’s chalk for mark making; quilter’s pins; fabric marker; needle and thread.
Household Items
A water spray is a very useful item to have to hand for softening stiffened materials. A plastic bowl is ideal for mixing water-based stiffener, and can be easily washed with boiling water and washing-up liquid.
Plastic bowl; water spray; and jug.
Useful Extras
Again, most of these can be found at home or easily purchased in your local hardware store.


