
18,49 €
Mehr erfahren.
- Herausgeber: The Crowood Press
- Kategorie: Geisteswissenschaft
- Sprache: Englisch
Charcoal is a versatile and dramatic medium with incredible potential for expression. This stunning book shows you how to create a drawing using its subtle, complex and bold qualities to best effect. Through step-by-step demonstrations and tasks, it explores the process, explaining how to capture a scene or the feeling of a scene, and, essentially, how best to fix an image to the page. With over 200 illustrations, this beautiful book is a compelling guide for everyone who wants to work with this elusive and powerful medium. Topics covered include: The basics of charcoal – explains the material, its qualities and ways of using it; Charcoal lenses – advises on how to choose interesting subjects with the use of photography and sketchbooks, and how to build a library of visual references; Mark making – includes techniques for complete beginners, as well as more advanced ideas for those hoping to develop and refine their work; Demonstrations – shows how to use the techniques and build a body of work; Soft pastel – suggests ways of combining charcoal with pastel to add colour to your work; Tasks and extensions – gives tips for trying and exploring ideas further to develop your own skills and to create a unique style to your work and finally: Protecting your work – advises on the key techniques used for fixing, photographing, storing and framing your work.
Das E-Book können Sie in Legimi-Apps oder einer beliebigen App lesen, die das folgende Format unterstützen:
Veröffentlichungsjahr: 2021
Ähnliche
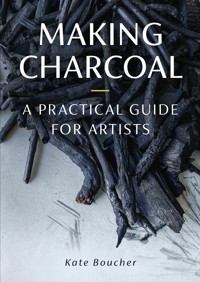


DRAWINGWITH
CHARCOAL
Promise of open sea, no.8, 2020, 84 × 59cm (private collection).
DRAWINGWITH
CHARCOAL
Kate Boucher
First published in 2021 byThe Crowood Press LtdRamsbury, MarlboroughWiltshire SN8 2HR
This e-book first published in 2021
© Kate Boucher 2021
All rights reserved. This e-book is copyright material and must not be copied, reproduced, transferred, distributed, leased, licensed or publicly performed or used in any way except as specifically permitted in writing by the publishers, as allowed under the terms and conditions under which it was purchased or as strictly permitted by applicable copyright law. Any unauthorised distribution or use of this text may be a direct infringement of the author’s and publisher’s rights, and those responsible may be liable in law accordingly.
British Library Cataloguing-in-Publication Data
A catalogue record for this book is available from the British Library.
ISBN 978 1 78500 976 1
Cover design: Serge Tsvetkov
Dedication
I wrote this book during the Covid-19 global pandemic of 2020–21, isolated and solitary in my home-studio. It gave me such purpose in those difficult times to immerse myself in my drawing practice. Drawing can be such a comfort: drawing, writing, thinking, drawing.
I dedicate this book to Jackie and John Boucher, quietly extraordinary people.
All artworks and photographs are my own work (including printed photographs, sketchbooks) unless otherwise stated.
Contents
INTRODUCTION
1WORKING WITH CHARCOAL: GETTING TO KNOW YOUR TOOLS
2LOOKING THROUGH ‘CHARCOAL LENSES’, AND STRATEGIES FOR FINDING SUBJECTS
3MAKING MARKS WITH CHARCOAL
4ADVANCED ‘LANGUAGE’ SKILLS
5FIXING, PHOTOGRAPHING, FRAMING AND STORING
6COMBINING CHARCOAL WITH SOFT PASTELS
APPENDIX: ARTIST RESEARCH
INDEX
INTRODUCTION
This might be an odd thing to say at the start of a book about drawing with charcoal, but for many years I didn’t enjoy using charcoal at all. My experience at that point was mainly frustration at not being able to make drawings I was happy with.
Studio ‘exhibition’ of completed works from the Promise of open sea series, 2020.
My attitude to charcoal changed during an intense threeday drawing workshop in 2016. One of the first exercises included an instruction to choose a medium to work with that we really didn’t like. I chose willow charcoal. After completing that short exercise, the tutor informed us that we would be using our chosen medium exclusively, for the rest of the three days. I must admit that initially I was horrified. However, with each subsequent exercise that I had to wrestle with, I began to understand what it was about charcoal that I found so difficult.
I realized that one of my problems was that I was trying to use charcoal like a graphite pencil, and it isn’t. It doesn’t have the same properties, or qualities, so it doesn’t behave the same way – you don’t even really hold it the same way. Once I’d realized this, I began to be able to use the willow charcoal in a way that expressed my intentions for the drawing. I also began to explore the particular qualities of the willow charcoal, and enjoy the things that it did do well, rather than trying to make it do something it doesn’t do well – a change of mindset, from ‘Why won’t it do what I want?’ to ‘What can this do?’
One of the main breakthroughs for me was turning the charcoal piece on its side rather than holding it like a pencil. Willow charcoal sticks, being an organic material, have naturally occurring variations in their density and surface, which when used on their side, create interesting, sometimes unexpected marks. I began to see how to utilize these qualities and create drawings I was happy with.
After the workshop I began to explore other types of charcoal, to understand their subtle variations in colour, how they cling to the surface, how they erase. I began to use different tools alongside the charcoal to expand my charcoal vocabulary. I experimented with different surfaces and types of paper and realized what a difference the scale of the drawing made to how the charcoal marks could be read. So, thanks to this initial tenacity, repetition and incremental experimentation I began to understand charcoal. I fell for charcoal because of its versatility and potential for subtlety, complexity and boldness.
Charcoal has now been my primary medium for seven years and I still feel excited by its wonderful versatility and expressiveness.
It’s for this reason that I believe in the importance of getting to know your materials and why this book will begin with the basics of charcoal and the ways you might use it. I will spend some time early on helping you to see how to develop your ‘charcoal lenses’, so you start to see interesting subjects and how they might be rendered in charcoal. We’ll look at how the things you notice, and become interested in, can be recorded to build visual references to base a project or a body of work upon. The set tasks will then develop skills through demonstrations and step-by-step instructions. Each chapter will build on the previous one, with suggestions for extension tasks or ‘what if…’ questions, to encourage you to develop your own ideas.
My main practice is drawing landscape, and so there is a leaning towards this in the drawings I will show you, but the techniques are applicable to any subject. I’ve not sought to catalogue all the ways you can draw in charcoal; there are perhaps as many ways as there are artists who use it. I’ve tried only to show you the way I work, and to help you to develop your skills at drawing in charcoal.
Beating the Bounds series, no.6, 2021, compressed and willow charcoal on paper, 20 × 14cm.
The tasks are numbered in sequence across the chapters, have suggested timings, a list of materials, and a variety of suggestions for subjects. The suggested timings are only to indicate if it’s a quick task or something you should spend an extended time on. Some techniques work best when you work quickly; the sense of urgency is translated into the quality of mark you make. This also means you can make several drawings quickly to practise those marks/tasks/techniques.
I’ll explain the aim of each task and what you might learn from it, and I’ll show you step-by-step how to go about it. The tasks are open-ended, so you can tailor them to suit your individual interests. Feel free to explore the tasks through whatever subject interests you, whether it’s landscape, interiors, architecture, geometric forms, urban landscape, figure or portraiture and still life.
At the end of each task are lists of ‘what if…’ suggestions or prompts for further experimentation. These might include trying the tasks with different papers, types of charcoal, drawing on cloth fabrics, paper towel, tissue, erasers, change of scale.
Work-in-progress on a large drawing in my studio.
In the last chapter I’ll show you some ways to combine charcoal with soft pastel, a similar medium in composition and behaviour, and an exciting way to continue to develop your newfound charcoal drawing skills. At the very back of the book there is a list of artists for further research.
CHAPTER 1
WORKING WITH CHARCOAL: GETTING TO KNOW YOUR TOOLS
The American photographer Sam Abell once said: ‘It matters little how much equipment we use; it matters much that we be masters of all we do use.’ This is as true for drawing as it is for photography. Before you can begin to draw you must first understand the properties and capabilities of your tools – for ‘tools’ take that to mean whatever equipment you’re using to draw with or on.
Studio table showing my studio drawing kit in its box base and lid, the base sheet of paper I’ve been working on top of, and printed primary source imagery.
In this chapter we will first look at what materials you might need, starting with an explanation of the types of charcoal, what they are and how they’re made. There will follow some basic tasks to explore and familiarize yourself with each of the most common types of charcoal, in turn and then in combination. We will look at the additional equipment that supports and enhances drawings made with charcoal, including erasers, cloths, paper towels, paper and masking tapes – what they are and through various tasks, how to use them – again, individually and in combinations.
This information, detail and tasks will build a firm foundation so that you can begin to understand how to realize your intentions for each drawing you want to make and to encourage a practice of questioning and experimentation.
We will then examine where you might find a space to work and what equipment you might need for both temporary and permanent, outside and inside ‘studios’ or workspaces.
CHARCOAL: WHAT IS IT AND WHAT ARE ITS POSSIBILITIES?
Charcoal is mostly the black carbon that remains after water and other volatile components are removed from wood (and other organic matter) by slow ‘burning’ without oxygen.
The oldest form of this method is an ‘earthburn’, where cut, dried timber is stacked in a cone around a ‘chimney’ in the centre. Then fresh grass or green matter is laid on top of this and sealed with previously burnt soil. Embers are dropped into the chimney and the top sealed off and then the ‘burn’ is tended for twenty-four to forty-eight hours, burnt soil sprinkled on any areas that begin to burn too hot, so cutting off the oxygen. Although this method is still used it is very labour intensive, and so there are now other methods of creating charcoal that are still sympathetic to the forest environment, such as the ring and retort kilns.
An earthburn kiln in the process of creating charcoal. This is an ancient way of charcoal burning: earth is packed around the outside of carefully stacked wood, to keep out much of the oxygen during the burning process. The earthburn is tended constantly for between twenty-four to forty-eight hours, with soil being added to areas where oxygen is getting in and the wood begins to burn red. If this were allowed to happen the wood would turn to ash. (Photo: Sam P. Nightingale)
An earthburn in progress in West Dean Woods, West Sussex, UK. The charcoal is unpacked from the kiln and in the case of an earthburn it would be raked out into concentric rings, and sparingly doused with water to prevent it from continuing to burn. It would be left to cool and then graded into sizes, by hand, through a griddle before being bagged or packaged. Every particle of charcoal can be used, from the finest powder to the lumpwood, from BBQs and fire pits, soil fertilization (biochar) and filtration, to face-creams, toothpaste and of course drawing charcoal. (Photo: Sam P. Nightingale)
A ring kiln being packed with wood at Charfest, the annual festival of charcoal-making held in August in West Dean Woods, West Sussex, UK. (Photo: Sam P. Nightingale)
Charcoal has many uses from medicine and food to big industry, but for drawing purposes there are two main types of charcoal: ‘natural’, made from wood, slow burnt but still in its natural state; and ‘compressed’, natural charcoal ground to a fine powder and mixed with a binder of some sort. These two main categories then come in many different forms, from different woods, cut or formed into shapes, encased in wood like a pencil, etc.
Natural charcoal
Traditionally, artist’s charcoal is made from the debarked twigs of either willow or grapevine, graded into thin, medium and thick. You can also find some large, commercially produced willow drawing charcoal that is the size of a small branch. However, you can use all sorts of different species of charred woods to draw with, which each have different qualities and subtle variations in colour. These can be bought from your local charcoal burner (you can also cook with this type of charcoal), usually of hazel, ash and beech. They may even make some for you in interesting species if you ask. I’ve had some made from honeysuckle vine.
Willow drawing charcoal, which comes in thin, medium and thick sizes, has a visible circular core that’s slightly more reflective. The twigs are packed tightly together as they’re burnt to stop them from twisting in the heat. Commercial artist’s charcoal will have had its bark removed. If you find a traditional charcoal burner, you can ask that they leave the bark on, which allows for a wider variety of interesting marks – the bark turning into a soft, sooty powder.
These charcoal pieces are hazel, made by a traditional charcoal burner from branches rather than twigs. The mix of shapes in this type of charcoal creates different edges and surfaces, which will produce interesting and organic drawing marks.
Grape vine charcoal with the bark left on, after having been charred inside a lidded steel box inside an earthburn. (Photo: Sam P. Nightingale)
Nitram and other brands are still natural charcoal because even though they are regular in form, they are cut from one piece of wood and haven’t been mixed with any other substances. To tell the difference between natural and compressed charcoal, look for the soft core of the twig, which can be seen in the centre of a piece of willow charcoal, or any that is made from single twigs. Unprocessed natural charcoal of larger pieces of wood will have some grain to it, even if it has been cut into a regular shape, like the Nitram blocks. Compressed charcoal will have a manufactured regularity to it and have no wood grain or core.
Natural charcoal is also available as a powder. Of course, you can grind down both compressed and natural charcoal yourself with a pestle and mortar (or two flat rocks).
I don’t recommend that you draw with the charcoal that comes in the pre-packaged ‘instant’ BBQ sets, as these are treated with chemicals and are very scratchy on the paper surface, in addition to not being very good for the environment or supporting woodland management!
Compressed charcoal
Compressed charcoal also began life as a natural material, burnt without oxygen, but was then ground into powder, mixed with various binders, and formed into a shape.
The type and ratio of binder used is different from manufacturer to manufacturer – one is not necessarily better than the other, it depends on the effect that you’re after. This is the reason it’s important to test your materials so that you can choose the most appropriate one for what you want to do.
Compressed charcoal comes in various shapes, but they will all have the look of a manufactured object, regular in shape and texture. The sticks will have a texture in your hand and on the paper.
Compressed charcoal may be in pencil form or encased in wood like a pencil or made to fit in a holder. The pencil and holder forms create less dust, which can be useful, and they allow small marks to be made on the surface. I would argue though that if you understand the nature of the natural and compressed sticks you own, you can work cleanly and create fine accurate marks without having to stop to sharpen the pencil. Not only this, but you can also make the wide, sweeping, expressive marks that aren’t possible with holders and pencils.
These are all compressed charcoal sticks, from different manufacturers, and also black conté crayon. Notice how there is a regularity of form to the sticks – no grain or core like that seen in the natural charcoal.
Charcoal pencils may come in a form that is more familiar to you, but I would encourage you to break away from the perceived safety of using them, especially in the early days of exploring charcoal. The danger is that you will miss discovering some of the possibilities that charcoal can offer because of the neatness of the pencil form and the restrictions of the small amount of charcoal surface available to draw with.
The wood part of the charcoal pencil can rest on the paper and prevent or reduce mark-making. It can also burnish or scratch the surface of the paper, which will show up when more layers of charcoal are added. These marks can be seen when looking at the drawing on an angle. Sharpen with a blade to remove the wood and expose a longer length of charcoal. If you want a point or an edge, gently sand or file the tip. The exposed section will be fragile so you will have to draw gently.
These charcoal pencils can be peeled or sharpened to expose a long length of charcoal, or a holder can be used with compressed or natural charcoal sticks.
‘Peel and Sketch’ charcoal sticks eliminate the need for sharpening by letting you unwrap the stick of charcoal as you go along. You pull gently on the small string, peeling back the paper to expose more charcoal. I use General Pencil’s Peel & Sketch Charcoal, which has a smooth consistency and can be useful for a travelling kit, especially if you want to draw in a gallery or museum. An emery board can be used to file off an edge, or you can just scribble in your sketchbook or a dark area of a drawing to create a flat edge.
Conté crayon (black)
Conté crayon is a compressed, fine charcoal powder with the addition of kaolin (clay), formed into a stick with a square cross-section. The crayons are manufactured using charcoal, carbon black, clay (kaolin) and a binder (cellulose ether), which are then baked after being extruded and dried. The degree of baking varies the grade: H (hard) to B (soft), as with graphite pencils.
The kaolin gives conté a smooth almost silky texture to the stick that can be distinguished by touch, which helps you work out which one it is when you have them all mixed up in your drawing tin, pot or box.
Even though they are manufactured to a standard consistency I would still recommend that you get into the habit of testing each stick you pick up, on your sketchbook or a spare piece of paper, before you make a mark on your main work – that way you can be sure of the resulting marks.
ADDITIONAL TOOLS
To draw with charcoal, you also need a few additional tools to help bring out the best in the medium. These are in many ways as essential as the charcoal itself. They will help you bring complexity and sophistication into your drawings. They can be both additive (adding material to the surface) and reductive (removing material from the surface), these two techniques often working in conjunction with one another. But first, as with the charcoal, you will need to find out what they are and what they do.
Bread erasers
The first erasers were pieces of bread, rubbed gently on the surface to collect and remove the charcoal particles. Until rubber was able to be vulcanized and formed into the substance now used, there was no better substance for removing drawn marks. It does work and you should make some sketchbook tests with it.
Kneaded eraser or putty eraser
Kneaded erasers are soft and pliable and can be shaped by hand to create shapes suitable for pulling out highlights or drawing in detail. Their pliability means that they can be formed into irregular shapes or pressed into objects to take on their form, which allows for interesting marks to be made across the surface of the drawing. They will remove light or powdery charcoal marks; however, they are not suitable for completely erasing large areas, and as they warm from moulding or holding in the hand they may smear or stick to the surface of the paper.
Putty erasers work by picking up charcoal particles on tacky surfaces and incorporating them into the body of the eraser. They don’t wear away or leave behind crumbs of vinyl, but they do get saturated with the charcoal particles that have been removed and will eventually begin to leave marks on the drawing surface. When this happens, it becomes a drawing tool for adding subtle marks, but it’s no longer suitable for erasing back to bare paper or light tones. However, it will still remove some charcoal in very dark-toned areas, giving quite subtle and interesting effects. You will require kneadable erasers at different stages of wear, for different purposes.
You will often read that you should use a kneaded eraser for working with charcoal, although I prefer to use vinyl or plastic erasers. Be aware that kneadable erasers can leave a residue on the surface (they’re made with vegetable oil to make them pliable), and as you rework the drawing the faint residue can collect charcoal particles, causing the area you wanted light to become dark. Because the charcoal is now mixed with the oil from the eraser, it is now more difficult to take back to the paper.
Plastic (vinyl) erasers
High quality plasticized vinyl or other ‘plastic’ erasers are soft, non-abrasive and erase cleaner than standard erasers made from rubber (some of which can contain pumice). The removed charcoal does not get absorbed into the eraser but instead coats the crumbs that rub away. Being softer and non-abrasive, they are gentle on the paper and can be more precise, with less accidental smearing to surrounding areas. Mostly they are white, but they can be coloured. However, care must be taken (and, of course, tests done) to ensure that the colour doesn’t come off on the paper as you erase.
I mainly use Staedtler Mars plastic pencil erasers. I use them whole (always unwrapped) and modify them into specific drawing tools: ripped in two for natural uneven edges, cut with a craft knife for fine crisp lines, or round the edges for soft marks like clouds or for creating soft forms.
The pink abrasive erasers that contain pumice can be used to texture the surface slightly and give it more tooth or to add texture to the surface of the paper rather than for actual erasing. In fact, these would have the opposite effect to an eraser because the charcoal would sit in the texture and create a darker area.
Drawing cloths
I define a drawing cloth as any soft fabric used to rub charcoal onto or into the surface you’re drawing on. I mostly use cotton muslin or polyester-cotton mix, and used rather than new so that the fabric is softer. Old sheets, pillowcases or curtain linings are perfect as drawing cloths. I have a range of sizes for different purposes, from approximately 25 × 25cm to 10 × 10cm for detail work.
I don’t wash drawing cloths, so that the charcoal powder in them is preserved for drawing with. One or two of these cloths are more than seven years old and all of them started out as white fabric.
When rubbed over a drawn mark, the cloth consolidates those marks into the surface of the paper, almost immediately giving a more interesting and complex mark because now there is a variety of tones. Not only is the cloth a blending tool but as it becomes impregnated with charcoal it becomes a drawing tool in its own right. It can be used to apply charcoal to the surface by dabbing into charcoal powder or rubbed over compressed charcoal. The marks it gives more easily describe mass or form than when using line. When full of charcoal dust, the cloths are used as a painter would use a brush. The marks made with a drawing cloth are much easier to erase and so are useful when you’re working out a composition on the page, or if you know you want to keep rubbing back to build complexity into the drawing.
Folded in different ways the drawing cloth can give different types of marks, from thin straight lines to broad soft or textured marks – your fingers inside the cloth can be used to vary the weight of the marks made.
Be mindful that there is a possibility of creating a stamp, by making repeated marks across a page with a cloth folded in the same fashion or creases. To avoid this, you should slightly alter the shape of the cloth each time you apply it to the surface.
Chamois leather


