Erhalten Sie Zugang zu diesem und mehr als 300000 Büchern ab EUR 5,99 monatlich.
- Herausgeber: The Crowood Press
- Kategorie: Geisteswissenschaft
- Sprache: Englisch
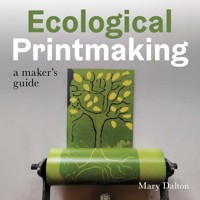
This practical book explains how printmakers can be more ecological in their practice. It suggests small changes an artist can make from, for example, tracking their materials to making ink from home-sourced pigment. In meaningful ways, it inspires art practices that benefit the environment and enrich understanding of the making process. Above all, it encourages ways of exploring the potential of print in expressive and challenging ways that do not hurt the planet.
Sie lesen das E-Book in den Legimi-Apps auf:
Seitenzahl: 195
Veröffentlichungsjahr: 2025
Das E-Book (TTS) können Sie hören im Abo „Legimi Premium” in Legimi-Apps auf:
Ähnliche


CONTENTS
1 Ink
2 Substrate
3 The Matrix: Relief
4 The Matrix: Planographic
5 The Matrix: Ecological Intaglio
6 The Matrix: Lithino
7 The Matrix: Print as Object
8 The Ecological Workshop
Index
CHAPTER 1
INK
I nk starts off all printmaking journeys. It is the backbone of how a printmaker translates the image they have created into an impression. Nowadays, we have an array of inks available on the market, from water-based to oil-based and even water washable oil-based inks. Depending on the medium used, the ink chosen by the printmaker will vary in viscosity, tackiness and binder. Building up our backbone of printing, the focus of this chapter is looking at traditional oil-based printing inks as their uses are diverse and they can be used across all the methods of relief, planographic and intaglio that we will look into in this book. We will understand what oil-based ink is, how to make a considered decision when buying pre-bought inks and how you can make your own artist-quality printing ink.
OIL-BASED INK
Printing ink is very unlike other oil-based artist’s mediums, such as oil paint or oil sticks. They share similarities, particularly in reference to the linseed oil binding agent, but the texture and viscosity are quite different. The ink has to be able to work for intaglio, where a stiffer ink is required for ease of wipe down, and relief, where a tackier ink is required for smooth and even rolling. Then we have inks required for lithography, which have to be loose and able to be rolled out thinly and evenly. The ink consistency can really affect the end result of the print, both aesthetically and technically in how well it prints.
Oil-based ink is luscious in colour and texture, and highly versatile.
Oil-based inks have a sheen, a colour strength and a diversity that I find is unlike their water-based modern counterparts. Traditionally, oil-based inks would have been used for relief, lithography and many other printing methods. However, in the modern age, harsh solvents were being used to clean up the inks, which were hugely damaging for both human and planetary health. This is completely unnecessary, because all oil-based inks can be cleaned up using simple oil and a mild soap solution. Easy, effective and non-toxic, it saves washing lots of pigments and modifiers into our watercourse.
Cleaning oil-based inks is easy and sustainable with oil and rags (see Chapter 8).
Oil-based inks are made by grinding a pigment with thickened linseed oil. The linseed oil is heated to various degrees to achieve different thicknesses, and this is referred to as copperplate oil or plate oil. When making studio-quality inks from your own pigments, a base plate oil is used for the main grind and the viscosity is altered using a very heavy, tacky plate oil. Making your own ink allows for you to change the consistency according to your individual needs. It also guarantees complete transparency of all ingredients used, creating a very ecological approach.
Pigments of different types contribute to the colour in printing ink.
Oil-based inks have a longer drying time than their water-based counterparts. However, this is a distinct advantage when it comes to working time. Oil-based inks will stay ‘open’ (or wet) for lengthy periods on your work station, and in some cases can even be covered and left overnight to continue working the next day. If you are working on a print but need to pop out or make lunch or have a break, no need to clean up, just leave it all and the ink will stay open. A huge advantage for both flexible working and editioning. They will take longer to dry on the paper, but I always see this as a game of patience and planning, and I often have multiple works on the go at once to allow for layers to be built as other layers dry. Some artists will add cobalt or magnesium driers to their inks. Cobalt driers are surface driers, meaning they allow for the top surface of the ink to dry more quickly, so that the next layer can be added. Magnesium driers are body driers, speeding up the drying time of all the ink layer evenly. Both these driers are extremely hazardous to human and planet health. I avoid them unless absolutely necessary. When buying oil-based inks, check the ingredients. Some modern inks have these driers added to speed drying time, and so you may think you are buying an ecologically safe oil-based ink, but double check.
Cobalt or magnesium driers are not ecological and not always necessary.
Pigments
Every ink is made from a pigment. Usually just one pigment ground with plate oil. The traceability of each pigment used for modern pre-made inks is very easy. Every pigment has a unique pigment number, which usually can be found on the side information of the ink container.
Individual pigments can be traced according to their pigment number.
This unique pigment number can be searched for on the internet and you can pull up details of what the pigment is made from, how it is made and its ecological data. Much of this information is contained in what is referred to as a Material Safety Data Sheet (MSDS). These sheets are invaluable when researching and finding out about materials you bring into the workshop. Many of the modern inks use pigments that are manufactured in laboratories, and the ecological effects of the pigments used varies hugely. It also depends on how much you want to delve into the subject. If you choose to buy pre-made inks, but wish to have as sustainable a model as possible, then a little bit of research goes a long way. Firstly, look at the MSDS for the ink you are buying and importantly avoid the use of driers, either in the ink as bought or added by yourself. If you fancy a bit more in-depth research, have a look at the pigments used in each ink and you can make a very informed decision that suits personal practice with all the new-found information presented to you. The only sure way to ensure that the ink you use is ecologically traceable is to make it yourself, which is what we will be looking at next. This is very dedicated but is also great fun and allows for complete traceability of the ink.
MAKING PRINTING INK
This step-by-step guide is a very basic introduction into the wonders and variance of making printing ink. The ink produced here will be an all-round, oil-based tacky printing ink. Further on in the chapter we will look in more detail at collecting and grinding pigments, changing the texture of inks and how to store them. We are starting by using a pre-ground natural English red ochre pigment. The principles of this procedure can be followed with other pre-ground pigments. Note that each pigment requires different amounts of grinding and oil, and this is something that you will learn the more you feel the materials. You will also need an ink muller and grinding slab. These are essential for ink making. You can purchase a whole range of mullers, from glass through to granite ones. You can also make your own using a lovely smooth, large stone.
Using a muller helps grind pigment into the oil. This one is made from granite.
All ink materials are cleaned up with vegetable oil and a rag.
Materials
Copperplate oil weak
Copperplate oil strong
English red ochre pre-ground pigment
Ink muller
Ink grinding slab
Palette knife
Materials needed for making a basic ink.
Place your pigment in the middle of the grinding slab. Make a well.
Add weak copperplate oil to the well. You can always add more later.
Use a palette knife to slowly work the oil into a dry paste.
Add more weak oil in small amounts, work with a palette knife until smooth.
Use the muller to grind ink across the slab, small amounts at a time.
Use a push knife to scrape up ground ink and put to one side.
Add a couple of drops of strong plate oil to the ground ink.
Mix oil in with a palette knife until tack is desired consistency.
Using your ink
The ink we will make is a good all-round basic ink. Let us take a look at how it performs over relief, intaglio and planographic methods.
To test the relief qualities, I am inking up a basic lino cut carved on traditional artist’s lino. The ink rolls out well and has a good gloss and tackiness. I will roll up and print under a press on Fabriano Rosaspina 220gsm paper and by hand on 39gsm Japanese washi.
Testing the roll-out strength of homemade oil-based ink.
Results from hand printing a lino cut on 39gsm paper.
Results from printing a lino cut under a press on 220gsm paper.
To test intaglio, I am inking up a paper dry point plate using reclaimed Tetra Pak from an old long-life plant-milk carton. Details on how to utilise paper dry point can be found in Chapter 5. Because we have not stiffened the ink a little to adjust for the intaglio process, it was quite oily and created a strong plate tone, but it held well in the marks and softer elements such as the areas of sanding.
Results from using homemade ink with an intaglio process.
Finally, we are testing the ink through a planographic process – this could either be lithography or monoprint. To cover a good base that would be suited for both these processes, particularly checking the use for the thin layers of a lithographic roll up, we are going to apply a very thin, even, solid area on a sheet of Perspex. We will then remove this solid area using rags, fingers, knitting needles and any other tool that in essence creates a negative drawing upon the surface. This allows us to test the quality of the ink over a thin area, as well as whether it can hold textural effects from rag wiping.
Results from using homemade ink with a monoprint process.
Developing ink
The studio basic oil-based ink works really well across the board. However, the more you delve into printmaking and ink use, the more you wish to be able to influence the viscosity of the ink so that you can play with texture, gloss, layering and numerous other effects in your final impression. Commercially ground oil-based inks undergo minute oil changes, different grinds and tweaks in recipes to achieve the reliable consistency we all love and that is so accessible. But these nuances can be achieved on a smaller scale in the workshop, and indeed this allows you to be able to have individual inputs into the qualities of each and every ink made. If you gather or sustainably source your own pigment, then the ink becomes fully traceable and ecological.
To change to texture of the ink, to make a stiffer ink for etching, then you can add some magnesium carbonate. It will reduce the gloss but make for easier wiping if needed.
Magnesium carbonate is a non-toxic additive to stiffen inks.
If you wish to increase the tack of an ink to help with a roll-out for relief work or for monoprint purposes, then a strong plate oil can be added drop by drop. If you wish to loosen the ink for perhaps some viscosity work as we will explore in Chapter 4, then a weak plate oil will do the trick. Changing the consistency of oil-based inks is a useful skill to get to grips with, so do have a play.
Different strengths of copperplate oil change the ink viscosity.
WHERE TO FIND PIGMENT
Sources of pigments are all around us. Earth, stones and clays are common sources of richly coloured pigments that can be made into inks. For many years we have also developed pigments using laboratory techniques that generate pigments based upon synthetic chemicals or metals. The collection and sourcing of the pigments can be a fun adventure, and if you are wishing to know what makes up the inks you use in your studio practice, then tracing the pigments back to the original source is really the only way.
Clay rich in earth ochres can be found readily in back gardens.
Pigments can be bought pre-ground, or you can source your own rock or earth. In order to have a sustainable approach to it all, an element of common sense and balance needs to be exerted. Gathering a small lump of chalk washed up on a beach to use to make your extender for a year, in balance, is far better than going along to the cliff face with chisel and bag and hammering away to take kilograms to then sell on as a wild pigment. Stampeding off designated pathways in protected lands to raid a patch of ochre-shaded earth in a woodland will invariably destroy much-needed protected habitats. Whereas asking a group of building workers if you could take home a section of the ochre-coloured clay they are digging up as part of the site works is a far more sustainable approach. Collecting sources of pigments means being fully attentive and aware of the land and the situation in it. If you are wishing to gather from land that is not your own, do seek permission or open a dialogue with those who manage the land. People who protect the lands for future generations are often very friendly and amicable if you are honest and open in the first instance. And I always make sure I never, ever, collect in greed. Over-consumption and waste is a huge sustainability issue.
Building sites often dig up coloured earths and are usually happy to spare some.
Pigments that are collected from around the globe and shipped to us are part of a long history of trading resources, dating back to the ancient world. Again, use common sense if you wish to partake in the sharing of rich-coloured pigments from around the globe. There is a reason lapis lazuli was so rarely used, or that certain ochres from Roussillon, France are used in abundance to colour the village limewash. Some pigments are more plentiful than others and if we respond and listen and reflect this in our own practice, then I think making one’s own inks can be fully sustainable. Vitally, I always remember to give back. If my practice involves using some pigments shipped from the South of France, or a piece of sea-washed chalk, then I will endeavour to make sure that areas in my lifestyle are also contributing positively to the earth, such as choosing to walk or cycle over driving, reducing plastic use or growing food. Ecological awareness is a big picture made up of many smaller moments, which include our art practice and lifestyle choices.
If we do take, can we give back? Is that car journey necessary?
HOW TO PREPARE PIGMENT: EARTH
In this project we will be looking at how to extract earth pigments from an ochre-rich earth. I will be using a rich orange/red ochre-coloured clay-heavy earth that was gathered from my back garden. Basic coloured earths are usually a good sign of ochre existing. Ochres are iron-based pigments that are heavy in iron minerality and it is the oxidisation of this iron that produces the rich yellows to reds we know. Ochre can be found in soils and earths as well as in ochre-rich stones, or even bricks, due to the ochre-rich clays that were used. We will look at processing minerals in the next section.
Materials
Approximately a small handful of ochre-rich clay/soil
Three standard jam jars, cleaned out, with lids
A small bucket
Source of water (I use rainwater)
Clean fine muslin
Materials needed to extract the ochres from a clay sample.
Place clay sample in jam jar and cover with water.
Put the lid on and shake the jam jar vigorously until the clay is dispersed.
Let the mixture sit for a few minutes to let sediment gather at the bottom.
Carefully strain off the top ochre water into a clean jar.
Strain ochre water through a fine muslin into another jar. Discard sediment.
Let pigment settle to the bottom and carefully strain off clear water.
Let the remaining pigment settle, and the water evaporate over time.
When the water has evaporated, you have a fine ochre pigment ready to grind.
HOW TO PREPARE PIGMENTS: MINERAL
Stones are a rich source of many pigments. Their processing from stone to pigment can vary in method and ones such as lapis lazuli require a lot of time invested to gather the rich blue pigment. Stones such as chalk, or iron-rich ochre stone, slate, even bricks, are great sources of colour that are more accessible to make into pigments. In this project we will be using a small lump of brick gathered from my garden. This is where you will need a pestle and mortar for grinding. I use a stone one to withstand the heavy bashing that comes from stone smashing. Please also wear a face mask as you make the pigment and/or work in a ventilated area. I tend to work outside. Although we are not grinding up heavy metals, insoluble particular matter is still airborne during the grinding process and precaution is sensible.
The grinding of the red ochre into an ink can take time, as with many of the earth pigments. However, the colour is wonderful and all from a resource otherwise left to go to waste.
Materials
Small lump of brick. The older bricks are better – you can find some great old brick samples on pebbly shorelines
Stone pestle and mortar
Two jam jars and lids
Fine muslin
Water source
Using a pestle and mortar, grind up a brick sample to a fine powder.
Place powder in a jam jar, cover with water and shake vigorously.
Strain the brick solution through a fine muslin into a clean jar.
Let pigment settle and water evaporate leaving red ochre pigment.
Resultant red ochre ink extracted from a brick in our back garden.
HOW TO PREPARE PIGMENTS: DYE AND LAKES
A lake pigment is describing a pigment that has been extracted from a dye. A dye contains a pigment that is soluble in water and thus methods were invented to extract this colour to acquire a solid pigment that can then be ground in suspension with a binder. Lake pigments are often fugitive, that is, they fade in UV light, because they are based upon dyes that are also sensitive to light. The extraction of the dye colour to a solid form involves the use of a metallic salt for the dye molecules to adhere to, so you end up with a solid coloured powder. Most commonly used is alum, or aluminium sulphate. Alum is also used widely as a mordant for textile dying. Alum has mixed reviews on toxicity, and like many substances if used in huge amounts – if kilos were emptied into a watercourse – then it would cause high levels of damage to the aquatic life. On a smaller scale it is significantly less harmful but in principle, should not be entering the watercourse when making lake pigments. It is technically classed as a hazardous waste, and thus its disposal should be treated in accordance with your local authority disposal regulations, and it should be handled with care to avoid skin irritation. I am still pondering the use of lake pigments with regards to ecological printmaking, so for now, the focus of ink making in this book is upon solid pigment from earth and minerals.
Pigments around the home
Pigment making and thus ink making is hugely rewarding and even if you do not make all your inks, a small contribution of homemade ink from well-sourced pigments is a huge step to more ecological printing. It also adds a direct connection to the landscape around you, which tells a story in the artwork itself. There are some pigments that can be made and sourced readily from around the home that offer the artist some fun experimentation. When we cleaned out our wood-fired ranges, beautiful ultra-fine soot came down the flue and promptly was gathered up for future soot black making. Old bones from the ground can be used to make bone black, and if you know of anyone with a grape vine, then gather their pruned branches and try making vine black. This is a beautiful deep black pigment that developed from charring the yearly pruned stems from grape vines. If you have access to a wood-fired stove, then you can make your own. It is a fun introduction into the various deep blacks that can be acquired from the carbons created through charring substances.
MAKING VINE BLACK
Materials
A handful of dry vine clippings
A metal tin with lid that fits all clippings
Access to a wood-fired stove or small fire box
Ink-making equipment as per previous demonstrations
Materials needed to make a basic vine black pigment.
Carefully stab holes into the lid of your metal tin.
Fill the tin with the dried-out vine cuttings, close lid.
Carefully place tin in hot embers of a fire and leave overnight.
After the tin has cooled, you can check the vine charcoal.
The vine charcoal can now be ground into a fine pigment ready for ink.
CHECK YOUR PIGMENTS FOR THE FUTURE
After exploring pigment making, you may notice that individual pigments grind differently, they sit differently in oil and they also change colour once bound with the linseed oil. It is a huge journey with much fun along the way. A note to bear in mind for the future; some pigments change colour rapidly when bound with linseed oil and are not suitable for an oil binder. One such is green verdigris made from the reaction of acetic acid upon the surface of copper. Binding with linseed oil causes it to go brown rather than the luscious neon blue-green. There is a wealth of supportive information on pigments online and in books, so if you are taking the joyous powdery plunge, then it is worth checking out the background of the pigment you wish to make to check its stability in oil. If not for oil, then why not try it as a watercolour for paste printing or mokuhanga, but that is a whole new book…
Pigment collection and ink making can be highly addictive and beautiful. It can, however, make you feel daunted about trying to be sustainable and overwhelmed with the amount of work required to fully overhaul an ink system. My advice is, as with all things, to find a balance that is manageable within your own set-up and lifestyle. Even changing one commercially bought ink to an inert handmade one is a huge step. Massive, in fact. It is important to make change but also make sure that change is sustainable and manageable so that it stickily sticks into the future. One of my first investigations, and a true learning curve it turned out to be, was extender or transparent medium. Transparent medium is used to make highly pigmented inks more transparent. I use it a fair amount in my work, so the following investigation turned out to be interesting. One day (and this is a true story), my five-year-old daughter started collecting the chalk found naturally in our garden and smashing it up with a rock, filtering it and sifting it with a sieve and making beautiful white water, which she and her sister played with as magic milk. I collected some of the milk (in exchange for biscuits) and followed the standard filtering procedure to produce a very fine chalk pigment.
The process of making ‘magic milk’ in exchange for biscuits inspired making oil-based extender.


