22,49 €
Mehr erfahren.
- Herausgeber: The Crowood Press
- Kategorie: Geisteswissenschaft
- Sprache: Englisch
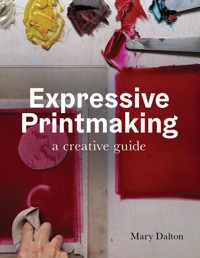
Expressive Printmaking goes back to first principles to rediscover the full potential of printmaking. Through introducing a tantalizing array of techniques, it shows the artist how to communicate stories and emotions through dynamic prints that sing off the page. It covers printing by hand and by press and techniques range from paper dry point to Mokulito and from monoprint to plaster cast impressions. It also explains how to combine techniques and gives advice on line, tone, form, colour and texture. Along with step-by-step projects and some 500 illustrations, this exciting book leads you to create unique prints that challenge you technically, inspire you visually and encourage you to try more.
Das E-Book können Sie in Legimi-Apps oder einer beliebigen App lesen, die das folgende Format unterstützen:
Seitenzahl: 301
Veröffentlichungsjahr: 2022
Ähnliche


First published in 2022 by
The Crowood Press Ltd
Ramsbury, Marlborough
Wiltshire SN8 2HR
www.crowood.com
This e-book first published in 2022
© Mary Dalton 2022
All rights reserved. This e-book is copyright material and must not be copied, reproduced, transferred, distributed, leased, licensed or publicly performed or used in any way except as specifically permitted in writing by the publishers, as allowed under the terms and conditions under which it was purchased or as strictly permitted by applicable copyright law. Any unauthorised distribution or use of this text may be a direct infringement of the author’s and publisher’s rights, and those responsible may be liable in law accordingly.
British Library Cataloguing-in-Publication Data
A catalogue record for this book is available from the British Library.
ISBN 978 0 7198 4104 0
Cover design: Sergey Tsvetkov
CONTENTS
Introduction
1Getting Started with Ink
2Relief Work: Vegetable Stamping and Beyond
3Spontaneous Monochromes in a Single Pull
4Expressive Paper Dry-Point
5Mokulito
6Lithino
7Collage in Printmaking
8Inks and Colour Effects
9Celebrating the Unique: Print Beyond Paper
10Workshop Basics
Stockists and Resources
Index
INTRODUCTION
What do you think about when I say ‘printmaking’? Perhaps some old lino that was reluctantly carved into many years ago? Perhaps this old lino was actually cracking and smelt slightly odd? Perhaps you think of screen-printed t-shirt designs or lots of small businesses hand printing greetings cards? Most likely there will be some notion of being able to create more than one of the same image, what we refer to as an edition.
Printmaking has many images and stereotypes amongst the general population who are interested in the arts. It sits on a very perilous fence between drawing and applied art, painting and craft, digital and handmade, reproduction and unique. It seems not to have its own category, something that may seem at first confusing, but actually it means it can be anything you want it to be. And isn’t that glorious? This book will take you on a journey through the more dynamic approaches to learning the techniques of printmaking so that it can be moulded into your own language. We will look briefly at editioning, but it will not be the focus or the main event because art is unique. This includes printmaking. It has so much potential that I only begin to explore in the following chapters, so many ways of communicating feeling; the textures and forms of the printed impression sing so loudly that words and editions are not needed.
Treat this book as your guide: a way to explore these unique and dynamic ways of working whilst being given permission to let loose. Whilst you have a supportive ear, you can try out new approaches with energy and vigour knowing questions will be listened to and answered. This book leads you down a path towards understanding printmaking as an art form unlike any other and as unique as them all. Once that path is walked, it will be such fun and so energizing, that you may not turn back.
The chapters build in momentum and can be read sequentially, developing your technique and confidence, or they can be dipped into individually. Even if you are an experienced printmaker, why not try some of the exercises that may seem aimed towards beginners? Who knows, by trying an approach outside of your daily practice, it may trigger something unexpected. It is always good to re-learn skills from a different educational angle.
But of course, what is most important is to have fun. Fun and play are crucial to learning, skills that as adults we so easily relegate to our childhood years. Well, now is the time to bring it back and embrace it. Through playing we actually learn far more and learn it with more studiousness because we are freely engaging with it. We are able to be more direct with our feelings and our communication and the resulting print is awesomely stronger. Printmaking for all! Printmaking for fun!
HOW THIS BOOK WORKS
This book is a process-led book, placing the emphasis upon guiding the reader how to build confidently in printed expression, rather than purely feeding technical facts to you. There are numerous follow-along projects that are guided but also loose enough to allow you to take your own spin on the inspiration and thus the outcome. The projects are useful to aid the understanding of practical elements of the printed medium as well as how these technical elements may influence expression.
The book covers relief, planographic and intaglio methods of printmaking. The planographic areas include monoprint and the lithographic chapters. Each chapter has its own specific topic to cover, but as the chapters develop, they will freely reference and take influence from techniques already covered throughout the book. The chapters can sit alone, but they are best assimilated in conjunction with a brief understanding of preceding topics. It is vital to understand that the emphasis of this book is on producing unique prints. They are rarely designed to be editioned. Thus, when chapters freely take influence from each other, it leads to building very complex and expressive works.
I hope you enjoy reading this book. More than this, I hope you get inky fingers on its corners, flick through the pages with joy, excitement, trepidation and absolute wonder at what the possibilities are for making art. Expression is a vital part of being human. Open eyes, minds and hearts and look – really look – at what stories you wish to tell through the glorious medium of printmaking, and I can promise you, print will tell those stories with a firm punch of what it is to be human.
ENVIRONMENTAL STANDARDS
The planet and its environment need all the support we can give. Printmaking, as with many commercial industries, is at odds with improving environmental standards. Many of the commercial printmaking processes are not healthy for the planet, but the industry is taking small steps towards improvement. Artist printmakers have a greater ability to shape their own practice to aid the planet and their own health. We can choose what we use in our studios and how we take care of the waste that leaves. It truly is important that as individuals we begin to make changes in day-to-day studio practice to help the future of this planet. It is not impossible either. Small changes in operations do not need to mean grand shifts in practice, they just incrementally make a change for the better. Furthermore, these small achievable targets start to educate those around us that it is possible.
This book, where at all possible, adheres to quite tight environmental practice. Toxic clean-up chemicals are not used, rainwater is used where possible to replace tap water, items are encouraged to be re-used and recycled, non-toxic oil-based ink is used throughout, and the processes that we learn about are, for the most part, leaving a pretty clean footprint behind us.
Printmaking ink is a vital part of the artist’s practice and one that is open to huge debate. Many options are available on the market, and it can often be confusing. The reasons I advocate traditional oil-based ink throughout this book are long and well researched. My personal choice is taken through reading many Material Safety Data Sheets (MSDS), looking at studies and generally making a considered decision within the facts I am able to obtain. For this reason I use traditional oil-based printing inks, made with non-toxic pigments and with no added modifiers or driers.
The end decision with all these small steps rests with yourself. I will offer tips and hints on how to change personal practice to be cleaner and have less of an impact upon the planet, but you have to make the change. The planet is suffering, that is a fact, and we need to help it. In Chapter 10 (Workshop Basics), we will look at day to day changes and operational decisions that can help you express with a lighter footprint. Key to all of this is to take time out and research the processes and materials with the facts you can obtain through MSDS and research papers. It does not take long, but I feel it is vital if we are to change the way printmaking operates and the impact it has upon the planet.
CHAPTER 1
GETTING STARTED WITH INK
To understand printmaking and its full expressive potential we need to look at what print is. This is not a historical analysis nor a technical breakdown of the printmaking family tree; instead we need to creatively explore the essence of what differentiates a print from other forms of visual expression. In this chapter we will take it back to the beginning and look at how we can create unique, bold, dynamic prints from the most limited supplies. In some ways, the processes in the chapter may seem simplistic, but the emphasis here is on resetting a way of thinking about print, not just a way of doing. Through an exploration of the essence of printmaking and by taking things back to the start, new doors often open to rekindle expression. This chapter will start a journey on changing the way we think about print and how we may explore printmaking without any judgement upon technique, aesthetic, or facilities. Let’s start over.
WHAT IS PRINTMAKING?
There is huge debate amongst artists as to what a print is, especially with the advent of digital technologies and their influence upon printmaking. I fall into the category of printmaking by hand. This means there is a print plate, which I refer to as the matrix, which receives ink, which then gets transferred onto a substrate (e.g. paper) to produce an impression. Thus we have a matrix, some ink and an impression. This is how I see printmaking and, yes, it may seem incredibly understated for what printmaking can offer, but it highlights the process by which print differs from other mediums. A hand print or a finger print is simple, but it is print.
Artists often refer to printmaking to describe an image that can be editioned. This has categorically nothing to do with the essence of printmaking and what it can offer the artist. A print does not need to be editioned to be a print. In fact, the majority of techniques and works we explore in this book are not editioned, instead they explore the expressive qualities of unique printmaking. Editioning has huge value and place within print, and of course is an element of the art form that does not exist in a similar fashion in other media, such as painting. However, it is a business, artistic and personal choice to edition; it does not define printmaking.
Untitled, 2006, Tara Donovan, ink on Kozo paper from a rubber band matrix, 52” × 42” (132.1cm × 106.7cm). (Photo: Kerry Ryan McFate, courtesy Pace Gallery © Tara Donovan)
Do We Really Need all that Equipment?
No, you do not. Printmaking is notorious for needing a huge amount of specialist equipment that can not only cost a huge amount of money but can also become a way to distract the artist from actually making something. Printmaking studios are full of lovely rollers lined up, little tools in boxes, tins of strange liquids and potions, pencils, needles, baths, tanks, papers, glues, inks, presses, hot-plates, more rollers, metal, plastic, card, scrapers, roulettes…. On top of this the techniques of printmaking are so vast and huge and gloriously endless, that it can all be overwhelming for both the beginner and the more experienced artist. Many people new to printmaking are daunted with so much information, that they are quivering before they even get a chance to put ink onto paper. It is so important to not let the material requirements for the technical elements of printmaking prevent you from freely expressing. So, let’s move on from all those materials and tools at the very beginning and approach them as and when needed. We will be starting out from the most fundamental of materials that allow us to generate a matrix, apply ink, and create an impression on paper. The items for printmaking in this chapter should all be readily available. Let’s form a new way to approach printmaking, a new way to think about printmaking. This is Chapter 1, where we shall be starting from the essence of print and taking it on a wonderful journey to its explosion in Chapter 9, witnessing where dynamic printmaking can really go.
Printmaking is unpredictable, feisty, fun, glorious, and most of all it is uniquely expressive. It is an awesome medium that can bring joy to all, old and young.
Ink
Throughout this book, the projects and demonstrations are created using traditional printmakers’ oil-based ink, which is linseed oil and a pigment ground together. There are water washable oil-based inks on the market nowadays; however, their properties are different from traditional oil-based inks which I refer to. There are three main reasons for the use of oil-based inks in this book. Firstly, they have a very slow drying time, thus allowing you to have all your ink out all day and you never need have to worry about constantly cleaning it up or it drying on your equipment. This means you can have a full experiment and play without having to stop, vital for many of the projects in this book. Secondly, certain techniques that we cover will only work with oil-based inks, such as lithography. Thirdly, the environmental debate regarding inks, as discussed in the environmental section, has strengthened my reasoning for using traditional oil-based ink. Do not be put off by cleaning oil-based inks at home. They do clean up with standard vegetable oil and a cotton rag – no solvents needed.
We will be focusing on using oil-based ink throughout this book.
So how is oil-based printmaking ink made? And why is it different to oil paint? Oil-based ink, like oil paint, consists of ground pigment and oil (traditionally linseed oil). Linseed oil is described as a ‘drying’ oil. Oils fall into two categories, drying oils and non-drying oils. You need inks to be ground with drying oils, otherwise you would have a very oily, wet print for a very, very long time. Olive oil is a non-drying oil. Sunflower oil is a partially drying oil, with a slower drying time than linseed. It is naturally yellow, and so not a great binder when really making high-quality inks. Linseed oil dries fully and can be heated and reduced down to produce different viscosities of oil. When the linseed oil is heat treated, in printmaking it is generally referred to as plate oil or copper plate oil. It comes in various viscosities to adjust the ink’s consistency.
Printing ink is much tackier than oil paint, allowing it to stay in the incised lines of intaglio or sit evenly on relief matrix and not slip around. But in both instances, pigment is ground with the oil until the two materials are bonded together and the ink is a smooth consistency, with no gritty particles of pigment. Ink manufacturers have a multitude of wondrous recipes for ratios of different oil, pigments and grinds, all of which work in unison to produce a high-quality printing ink. For the purposes of this book, we will be using a pre-made traditional printmaking ink. However, making your own printing ink is a wonderful exploration of materials science and is well worth the journey if and when you choose.
Linseed oil is the main binder used in traditional printing inks.
Traditional oil-based relief printing ink in deep pink being ground by Cranfield Colours. Traditional inks of such high quality and colour strength such as these are beautiful to work with.
PROJECT
MAKING A PRINT
In this guided project we will be looking at how to make a printing dolly and use it to help print an impression. The image we produce is not intended to be the most technically challenging print, but it is the result of an extraordinary journey that enables you to see what makes a print different to other means of artistic expression, both visually and technically. It is intended to allow you to get to know your materials and to see what can be done with the bare minimum.
Materials
• Oil-based black printing ink
• Paper of any description or size
• A selection of textured objects and surfaces
• A stable and non-absorbent solid surface approximately A4 that will get inky (e.g. piece of plastic or thick glass)
• A large, round smooth stone that fits in your hand
• Two pieces of old cotton (e.g. pillowcase) approximately 30cm square
• String
Workspace
Any space you can find. You will not be using a press. You will need the non-absorbent sheet to be very stable, so if you have a wobbly table, work on the floor if you are able. The non-absorbent sheet will be getting inky so please make appropriate precautions to its surroundings. You will also need a clean working area where you will be printing.
Printmaking Dolly
Printmakers’ dollies were a traditional way to apply ink before the mass use of a printmaking roller. They are held in the hand and their soft, round ‘head’ is used to apply ink to the surface of the printing matrix. Traditionally made with leather and wood, and rather beautiful, we are going to emulate the principle with materials that you are more likely to have around. This home-made dolly may not last the rigours of decades in a print shop, but it will last this chapter (if not, it is easily repairable). The dolly made here is mainly for the purpose of this chapter for you to see what you can do from nothing, but you can use it for the other projects in this book, even if we switch to a roller. Once the dolly is made, we go on to use it to apply ink.
The sample materials required to make the printmaking dolly.
Lay the fabric strips in the middle with the stone on the top.
Gather all four corners to the top and hold tightly together.
Use the yarn to bind around the fabric, creating a handle.
The finished basic dolly will serve you well in this chapter.
A vast array of materials will produce interesting printed marks.
Cut out the silhouette of the object free-form with scissors.
Loosely tape the mask down in place on your printing paper.
Apply ink to the preferred object using your printing dolly.
Use the object to create texture and marks within the mask.
You can use the dolly itself to generate areas of darkness.
Tools unrelated to your object may print interesting marks.
Continue to build up textural information within the print.
When complete, very gently peel away the tape and the mask.
The completed print will have both strong texture and form.
The Matrix
The matrix, as we briefly mentioned, is the element of printmaking that receives the ink, for instance a linocut, an etching plate, a lithographic stone. In this very first chapter, we will be using textured items from around the home as our matrices. This could be a bit of lace, an orange peel, corrugated card, scrunched foil, a plastic dinosaur foot – basically, anything that has a flat surface element to it that we may apply ink to and create a stamp.
The impression we will be building will take inspiration from a singular object from around you. The choice of object is important, as it needs to be something that means something to you and that you want to express. Emotion plays a huge role in expression, so let’s engage with it now. The object will also need a few textures upon it so that we have something to get to grips with. This project will also introduce the principles of mask making, that is, using paper to protect areas of the paper whilst you print upon others. Masks are used throughout the book and it is important we see their value early on.
Have fun using the dolly to apply ink to your textured surfaces and representing the object you have chosen. If need be, test a texture on a scrap of paper before you print on your actual impression. Many questions arise when printing with these techniques: Is there a preferred amount of ink to get a clean image? Can you create multiple prints from the same material? What happens if you do not reapply ink before stamping? If there are any particular results you enjoy, note them down as they may have an input later on.
LOOKING AT THE TOOLS UPSIDE DOWN
Shapes and patterns and textures exist all around us all of the time. Sometimes it is difficult to see how a cork stamp can look like nothing more than a mottled moon. Or a piece of lace, well, like a piece of lace. Understanding the essence of printmaking, from the ink to the matrix to the substrate, needs to be explored freely alongside how we see things in relationship to print. Printmaking has a huge amount of making in its process, and thus a huge amount of mark-making, from scratching with needles to stamping with corks. However, it is difficult in an art form so full of information and controls to see beyond the cork stamp being more than just the image of a moon. Here we take a look at a few materials in more detail to see how a different approach to their use can completely change the mark.
Cork
If you use a basic cork to make a few stamps, it is how we expected: a mottled round shape resembling some moon face. What if we are to roll the cork on its side edge and repeat this action with energetic motions? The marks are quite beautiful and extraordinarily different from moon face. If you integrate this rolling technique with a mask you can generate some very dynamic forms. Still printing, just with a simple, fun twist.
A humble cork can produce varying effects if explored fully.
Using a paper mask adds a bold and crisp edge to the marks.
The mask allows a definite textural shape to be generated.
There are many types of corrugated card with varying textures.
Try building a cross hatch, peeling or printing on its side.
A range of marks can be explored, from edges to surface area.
Corrugated Cardboard
Corrugated cardboard comes in so many different forms and patterns. Have a rummage around and see what you can find. If you are able to peel away the top layer to reveal the corrugation strips underneath, these print beautifully. It is a hugely versatile print medium for textural effects and can be layered very successfully to create tonal value. Do not forget to use the edges of the card, as some of them have wonderful zig-zags running along the cut edge. Have a play with texture and also a basic mask, as with the cork.
Netting
Netting is so versatile and can be used with many different approaches. The tonal work created through the inked netting is created through the build-up of layers. The build-up of a netting stamp, with all its cross hatches, highlights how a printed impression is built up of these layers, each one independent in application but integrating with each other in the end result. It is a very unusual way of thinking and one that may take some time to get used to, but that is not uncommon. It is fun, complex, and exciting, and very much key to printmaking.
TOOLKIT OF MARKS
It can be very useful to make a series of tester sheets made from the marks of various objects to help guide your selection for your impression. This toolkit of textures can be quite extensive. Cut a selection of paper and on each sheet, print the first impression of the texture and the ghost. The first impression is when you ink and stamp the object, producing a dark impression. The ghost is any subsequent stamping done without applying more ink to the object. It will inevitably produce a fainter impression, but also one that will be significantly different from the first impression.
Kettle, by Mary Dalton. A cast-iron kettle hand stamped through a mask using only netting from a bag of pony carrots. The varying use of the material has built up a sense of depth.
Print the first impression and the ghost on each sheet.
Each sample can be labelled and be used for reference.
An extensive toolkit of varying markmaking tools.
PROJECT
CARDBOARD ROOM ‘SKETCH’
This project will showcase exactly what can be done with just one material and a bit of imagination and play. You will be taking inspiration from the room view you see around you, so make sure you are in a setting in which you can refer to a suitable space.
Materials
• Corrugated card of varying textures and sizes, clean and free of detritus (tape can be left on)
• Ink
• Printmaking dolly
• Paper, smooth surface, white or off white, approximately A3 in size
• Inking area
• Scissors
• Craft knife
• Pile of clean tissue paper or newsprint, about ten A5 pieces
• Vegetable oil for clean-up
• Cotton rag
A varied selection of corrugated cardboard is vital.
The simple selection of materials required for the project.
Image Making
To start with, you will need to assess your cardboard selection. Some corrugated card has a top layer that can easily peel away, revealing the lovely ridges underneath. Other varieties tear less well but instead have a beautiful edge section. Explore the card you have and find out its individual properties before delving into the ink. Play with tearing, cutting, and peeling the top surface, scrunching or stabbing the card, cutting it to shape with scissors or knife. After exploring the possibilities of the card, look around you and select a view that you feel you could have a fun go at representing. We will not be able to print tiny details like door knobs or individual leaves, but we can have a good go at the impression of the space, the dynamics of its architecture and light. Once you have found a good space, set up your workspace and start printing. Think of how you can create a sense of depth using the card by applying more or less ink, pressing with a firmer or lighter pressure, or even building tone by using the corrugated stripes like cross hatching. Be bold with decisions and be bold with leaving some areas with no marks on at all. Prints need space to breathe. To keep your image clean, after you have placed the object in contact with the paper, before applying pressure, lay a piece of clean tissue paper or newsprint over it. This will prevent any inky fingers transferring fingerprints to your impression paper.
Embrace strong shapes and bold decisions to guide the print.
Note the type of the card and ink up to enhance the texture.
Use masks to protect any areas of the paper before printing.
Card with tape on is fun to print, especially if scrunched.
Build up layers, forms, and fun textures for a dynamic print.
Masks can protect printed areas when adding further layers.
Using card on its side allows for a beautiful organic approach.
Details are useful in large empty spaces to keep interest.
The completed room ‘sketch’ printed in corrugated cardboard.
FINISHING UP
The techniques covered in this first chapter, and the basic principles of printmaking, will be developed throughout the book. This very first introduction, or even re-introduction for experienced printmakers, is about opening up to new possibilities and thinking about what print is, how it can be used as unique expression, and how we can engage with it playfully. As mentioned at the start of the chapter, we are retraining our minds as much as our technique.
Home-made dollies will be used in this book for certain techniques.
The printmaking dolly can be used in most of the chapters of this book, although feel free to use a roller as well. The dolly is an example of making a print applicator at home and with little expenditure, but we will also be specifically using it for certain techniques later on.
Cleaning
Cleaning up oil-based ink is very easy. If you are using oil-based ink throughout, then the clean-up process is exactly the same after each project. Using a piece of firm card, a palette knife, or even an old plastic loyalty card, scrape up any spare ink. Place this into a scrap of paper and fold up to be binned. Large volumes of ink can be put onto some thick card and covered with a piece of foil to re-use another day. Once spare ink is removed, add about a 50p blob of oil to the centre of the inking area and spread around with the dolly. Cover all equipment with a film of oil and leave it for a couple of minutes. Using a clean cotton rag, wipe away the ink on the surface and on the dolly. Once surfaces are clean, and the dolly is wiped as best you can to take it back to a smooth, even surface, wipe fully over with a completely clean rag. The ink will never be completely removed from the dolly; instead, the oil-based ink will dry on the surface of the dolly in a small film, helping seal the cotton ready for next use.
Scrape up excess ink and place in scrap paper to be binned.
Using the rag, wipe a small amount of oil over the ink area.
Continue wiping with clean sections of the rag until clear.
Scrape off excess ink from the surface of the dolly and bin.
Using a small amount of oil, wipe the dolly top until smooth.
Use a mild soap solution and cloth to remove any residual oil.
CHAPTER 2
RELIEF WORK: VEGETABLE STAMPING AND BEYOND
Methods of relief printing have become hugely popular amongst artists as a way of an introduction to print. They require minimal set up and can be hand-printed, both of which are fantastic. The key factor with relief work is to prevent it becoming too repetitive, with similar imagery and motifs being used because they are graphically satisfying or easy to cut and print. Relief work can be dynamic and full of raw intuitive energy if we allow the tools to flow freely and the imagination take hold with alternative methods. Most objects around you produce a texture or pattern which can be combined with other methods of traditional relief work. This chapter will introduce a few of these approaches to alternative relief printmaking, which will hold you in great imaginative stead for creating energetic and unusual prints.
WHAT IS RELIEF PRINTING?
Relief printmaking describes a print created when ink sits on a raised surface of a matrix and an impression is taken from this. Linocut is a form of relief printing because the ink sits on the raised area of lino that is left after other areas have been carved away. Wood cut, wood engraving, potato stamping, cork carving, and plaster cast carving are all other methods of relief printmaking. Linocut is hugely powerful and versatile in its application for printmaking, particularly if you combine it with other methods. We will be exploring lino broadly as a means to create certain marks and effects, but we will also be looking at methods to create relief texture and prints with varying tools and materials that can be readily found around you. Relief printing is a very broad topic, so we are looking at the specific areas that are relevant to our end goal of creating dynamic prints with alternative methods. If you wish to further explore relief printmaking, this chapter should help keep your imagination open and your technique clean.
The surface texture of different inks on a hand-printed impression is unique to relief work.
Linocut
Linocut is a great introduction to the principles of relief printing. Traditional artists’ lino derives from linoleum flooring and is made with a mixture of linseed oil, bark and resin which is backed onto jute. Traditional lino is inert to humans and the environment and a great product for those who wish to pursue a more sustainable approach to their printmaking. It has a shelf life, and the natural ingredients will eventually go rancid after a few years; old lino can crack and be hard to carve. Fresh lino with sharp tools should be like cutting through hard butter. There are also alternatives to traditional lino on the market, made from vinyl or rubber. These can commonly be referred to as soft-cut or Japanese vinyl. These cut differently and are not biodegradable. But they sometimes offer less resistance and more ease of cutting for those with wrist, arm or shoulder difficulties. When using lino in this chapter, I will be using the traditional grey artists’ lino. Traditional lino can also come in a dark brown or pale buff colour. All three varieties have slight nuances when it comes to the cutting, but the primary principles are exactly the same. I will be covering the basics of linocut as a means to an end to give you enough information to use it in conjunction with other relief methods. If lino is your calling, then please be assured there are many wonderful resources dedicated to its craft to help guide you.
Traditional artists’ lino is seductive and wonderful to cut into.
Lino Tools, Traditional and Otherwise
Traditional linocut tools come in so many varieties and shapes that it is worth researching to find the ones you like. My advice tends to be to use a mid-range set to have a play, and then if you wish to pursue further you can invest in some higher-quality tools. I have six high-quality Swiss tools in my set that have served me well for over ten years. I require no more for my purposes. If, however, you have no lino tools with you now (and why would you necessarily?) then do not panic. Lino can be marked with numerous other household objects. Anything that will remove that top surface of lino and thus create a raised surface to receive ink, will generate an impression; for instance, a cheese grater, citrus zester, old dental tools, sandpaper and many more.
My personal and well-loved traditional linocut tools.
Surface Relief Printing
We have covered this briefly in the previous chapter, in which we applied ink to textures and took a basic impression. This is the absolute essence of the relief print; in this chapter we will develop this into a sophisticated and quality method of printmaking. This may involve direct stamping or it may involve making an actual matrix. We have a whole array of techniques up our sleeves that can bring relief printing into a new dimension. As with the printing in Chapter 1, we will be treating much of the relief methods as unique prints. This is something that we follow throughout the book.
Unique prints, especially when it comes to relief printing, seem almost a contradiction in terms. To spend so much time carving a linocut and to only use it once can indeed be confusing if one is trained in editioning or print as a means to replicate. This is why we must begin to unlearn and to sing relief print from the highest of mountains as a unique, sumptuous impression.
Unique relief prints are compelling, dynamic and challenge the artist in all directions.
Materials
For the projects in the following chapter, you will need:
• Lino


