18,49 €
Mehr erfahren.
- Herausgeber: The Crowood Press
- Kategorie: Lebensstil
- Sprache: Englisch
Handbuilt Ceramics is a practical guide to all aspects of technique, but goes further by exploring the studio practices of ten exciting contemporary makers. Advice is given on how to get started and information on tools and equipment, types of clay and a safe workspace set-up. Handbuilding methods, such as pinching, coiling, slabbing and press moulding, are explained in detail with step-by-step sequences. Techniques for creating surface interest, pre and post firing, are included using coloured slip, glaze or paint. Ideas for combining techniques and ways to experiment are explored and encouraged, as well as tips to avoid common problems and to achieve successful outcomes. With over 350 lavish photos, this book will provide inspiration through a unique understanding of current work. It is written both for the novice and for the experienced maker looking for a new direction.
Das E-Book können Sie in Legimi-Apps oder einer beliebigen App lesen, die das folgende Format unterstützen:
Seitenzahl: 259
Veröffentlichungsjahr: 2021
Ähnliche


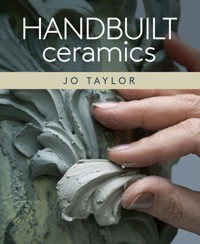
HANDBUILTceramics
JO TAYLOR
HANDBUILTceramics
First published in 2021 by
The Crowood Press Ltd
Ramsbury, Marlborough
Wiltshire SN8 2HR
www.crowood.com
This e-book first published in 2021
© Jo Taylor 2021
All rights reserved. This e-book is copyright material and must not be copied, reproduced, transferred, distributed, leased, licensed or publicly performed or used in any way except as specifically permitted in writing by the publishers, as allowed under the terms and conditions under which it was purchased or as strictly permitted by applicable copyright law. Any unauthorised distribution or use of this text may be a direct infringement of the author’s and publisher’s rights, and those responsible may be liable in law accordingly.
British Library Cataloguing-in-Publication Data
A catalogue record for this book is available from the British Library.
ISBN 978 1 78500 960 0
Cover design: Sergey Tsvetkov
All sequence photos taken by Jo Taylor; for makers’ credits, please see Contributors page at the end of the book.
DEDICATION
For Barry and Oscar
ACKNOWLEDGEMENTS
I would like to thank the amazing contributors to this book and I am extremely grateful to Paul Briggs, Lynda Draper, Mark Draper, Madoda Fani, Wanying Liang, Claire Partington, Eusebio Sanchez, Dirk Staschke and Patricia Volk. Without their generosity, this book would not have been possible. All have kindly given their time, knowledge and stunning images for all to enjoy.
I am indebted to Tessa Eastman for the initial recommendation and to Louisa Taylor for her pragmatic advice, proofreading and support with this project. Thank you for your time and patience, proofreaders Julie Fitzpatrick, Jasmine Hearn, Yasmeen Khatib, Jane King, Jo Sterrick, Oscar Taylor and Patricia Volk.
A special thank you to photographer Layton Thompson for going above and beyond; to Kelly Berman at Southern Guild for superb communication; and for the continuous support of Crowood Press, which was very much appreciated for my first outing.
And finally, you have both been in my thoughts throughout this process: Michael Pennie and Kevin de Choisy.
CONTENTS
1 Introduction
2 Materials and Equipment
3 Inspiration and Planning
4 Pinching and Coiling
5 Slabbing and Press Moulding
6 Sculpting and Additional Techniques
7 Surface Treatment Pre-Firing
8 Firing, Glazing and Further Techniques
Contributor Profiles and Photographers’ Credits
Glossary
Resources
Index
CHAPTER 1
INTRODUCTION
People have been hand building with clay for around 20,000 years; ceramics offer many clues to human development through archaeological finds. The use of clay has always been wide-ranging to include objects for rituals, storage and serving food, expanding through the centuries alongside technological developments in the processing of raw materials and more efficient firing methods. From the largest national museum to the smallest local museum, it is fascinating to see how people in your district or from further afield made and used fired clay objects. Local resources influenced the material constitution of objects; custom and function influenced form and decoration. As humans we are still fascinated with shaping soft clay using our hands and a basic range of tools; its tactile, responsive quality could almost be described as addictive. Although we can now purchase the materials we need in store or online, it is interesting to consider that many of the methods used today were applied using a high level of skill across the continents thousands of years ago.
Jo Taylor, detail from Cincture wall series, 2019, porcelain, thrown, hand-built and assembled.
In our modern age with its sophisticated technology, it may seem surprising that the analogue activity of working with clay is more popular than ever. In the UK, accommodating this demand in a changing educational landscape has led to an increase in the number of courses being run by collectives and individuals in ceramic studios, outside of general education facilities. No matter what is ‘on trend’ people have always and will continue to attend classes for reasons such as enjoying a creative, grounding activity and receiving a warm welcome in a diverse and sociable group. Goals can be achieved, such as creating specific objects, trying something new, and learning skills. Some make objects they can use, give as a gift or sell; for some, what starts as a hobby can lead to further education or a change of career.
Mark Draper, press-moulded elevation with mould.
Learning by observation and through feeling with your hands what clay will (and will not) do is as important as instruction. Much of a learner’s progress will be ‘kinaesthetic’, which is the activity of learning by doing, as tuition will only take you so far. Watching people working with clay, both on television and online, is ever more popular; observing making in all its variations can quickly aid understanding. As a consequence of suiting different learning styles, ceramics retains universal popularity across a range of settings as it is an appropriate activity for anyone. It is widely accessible: most issues can be accommodated and it is a proven beneficial activity for well-being. It is also an excellent means of building resilience and problem-solving skills, alongside the development of creative and making skills.
Wanying Liang, hand-modelled work in progress.
The route to ceramics is not always linear; the percentage of mature students on courses is testament to this, as many start their journey later in life. My passion for ceramics was sparked when attending evening classes, a weekly gathering of a diverse crowd of people excited by the possibilities that making allowed. A patient and knowledgeable tutor guided us, inspiring an eagerness to learn, and for some this enthusiasm led to a career in ceramics. My first tentative step was to set up a small workspace at home to make pots, alongside my ‘proper’ job. This interest grew, although it was frustrating trying to work things out pre-internet; many books seemed excessively technical or prescriptive. Needing to know more about this complex subject I committed to studying for a degree; feeling lucky to have the opportunity to learn, experiment and appreciate the company of experienced tutors and enthusiastic students. As soon as I graduated, I changed career and began teaching, combining this with making and selling functional tableware.
I returned to study for a Master’s degree and began exploring hand-building techniques, while resting a shoulder injury which meant I could not throw. This led to an experimental approach to making, through combining several construction methods. Since graduation in 2012, I have been working from my small studio in South West England, alongside teaching ceramics in a range of settings including schools, colleges, universities, a prison, care homes, arts centres and museums. Working with all types of students I have been able to understand the joy ceramics can bring to almost anyone, regardless of disability, dementia, learning or behavioural issues.
Eusebio Sanchez, scoring coiled work in progress.
This book is written with all kinds of makers in mind: the intention is to write straightforward, practical explanations and be a friendly, reassuring voice in the studio. It is not exhaustive; there is enormous variety in how people approach ceramics and there is no right or wrong, as long as it works for the individual. The aim is to foster experimentation based on sound understanding of techniques; we all have times when things might not go to plan, but there will be discoveries along the way and ‘happy accidents’. Through years of making and observing people in the classroom it is clear that the more you work with clay the more you discover for yourself.
The content of this book covers the following: setting up a workspace, the practicalities of making, and kilns, including important health and safety information. A chapter about inspiration and planning discusses different approaches to the conception and development of a project. The basic building techniques are demonstrated: pinching, coiling, slabbing, press moulding and modelling, as well as mixing techniques and experimenting. Decorative techniques, such as sprigging, adding texture, colouring clay, using slip, paint and glaze, are explained alongside firing information. Included are practical tips and an appreciation of different approaches. I write from years of experience as a learner and teacher, so my knowledge is a mixture of information gained from peers, tutors and technicians, and from reading and my own discoveries. When checking facts, I found it is not unusual to discover a diversity of approaches; at those points I have acknowledged the range in which makers work.
Claire Partington, detail of figure from installation, Taking Tea, Seattle Art Museum, 2018.
Besides outlining techniques and sharing my own practice, I have invited a diverse range of contemporary makers to contribute to this book. These inspirational ceramicists have generously shared many aspects of their approach to hand building and their contributions will enable readers to appreciate how building skills and experience alongside creative drive can deliver accomplished results.
The group was selected carefully; although at different stages of their careers and with contrasting practices, they all challenge themselves and the material. Their integrity and craft skills are evident; each combines ongoing curiosity with sophisticated problem-solving skills. Many discuss working intuitively; this way of working evolves over time as part of the ongoing dialogue between maker and matter. Origins of inspiration are wide-ranging and revealing; it is fascinating to consider the variety of source material and technical processes, many of which have been adapted to suit the works concerned. This means the book is essentially by makers for makers – every person involved allows the reader to gain an understanding of their personal conversation with this most responsive of materials.
Jo Taylor, 2021
CHAPTER 2
MATERIALS AND EQUIPMENT
This chapter summarizes the materials and processes that support the activity of making and offers practical guidance for working safely wherever your space is, from a kitchen table to a purpose-built studio.
Image of Wanying Liang’s studio.
TYPES OF CLAY
Clay is an amazing material and the possibilities for manipulating it are almost endless, so understanding its origins and the varieties available helps to inform the work made. Clay is formed naturally from the erosion of weathered rocks over hundreds of years. The rock particles are washed away and gradually ground down by moving water, which is why clay is often found close to rivers and lakes, or where there has been water in the past. Anyone can dig clay from the ground and process it manually by drying it out, adding water, then soaking and sieving it. The inclusion of local minerals will influence the colour and performance. The majority of makers buy clay that has been commercially extracted and processed. This has the advantage of having consistent quality and performance and being ready to use as soon as you open the bag.
An example of the range in texture and colour of raw clay.
The range of clays available from a supplier can be overwhelming, so a little planning will help you make the right decision. Think about the size, function and finish of what you want to make – do you want to make a large work? Will it go outdoors? Is it for regular food use? If so, will it go in the microwave or dishwasher? Is it decorative? Will it live safely on a shelf or mantelpiece? Is the colour of the clay important or will you paint or glaze the surface? Do you already have a glaze in mind?
Choose a clay body to suit the firing temperature you require; having a rough idea about the finished object will help. Clay is often labelled as ‘earthenware’, ‘stoneware’ or will state a cone number, which refers to the recommended temperature range at which to fire the clay. Choose ‘stoneware’ and a high firing if you want to put your work in the dishwasher, microwave or outdoors in frosty conditions; ‘earthenware’ suits decorative works or less frequently used functional pieces that will be washed by hand. Many suppliers sell small sample bags so you can try out an unfamiliar type of clay before committing to a regular 12.5kg (27.5lb) bag or more. They will normally give guidance about the properties of each clay on their website, with images to help with colour choice.
The most popular clay to start with is a general, multipurpose type, often labelled ‘school’ or ‘college’ clay, which suits beginners and most types of domestic scale projects, whether functional or sculptural. This clay will have a broad firing range, meaning it can be fired to earthenware or stoneware temperatures and is fairly forgiving, making it a good place to start. For texture, clay with added grog (ground fired clay) will give a progressively rough surface, dependent upon the grade of coarseness of the grog. Normally called ‘crank’, ‘sanded’ or a ‘grogged’ version of a regular clay, it can range from feeling slightly sandy to having little hard chunks mixed in like aggregate. Adding grog decreases the overall shrinkage, as the grog has already been fired. Grog may have the effect of making clay less ‘plastic’, but it offers better support when making larger works as it is less prone to sag, or even collapse, in the building process.
Molochite is a white version of grog made from calcined china clay and is used in the same way to reduce shrinkage and add texture and ‘tooth’ to the clay body to help support the building of larger works. You can buy grog and molochite separately and mix them into clay in your own proportions if preferred.
Terracotta, or red earthenware, is coloured clay often associated with bricks and flowerpots. Colour comes from the presence of iron oxide in the clay, which occurs naturally in many parts of the world. Terracotta can have a high plasticity which means it will bend and stretch well, but it will also have relatively high shrinkage. If your work is not dried under carefully controlled conditions it may be prone to cracks and breaks even if your thickness is even. Terracotta will need to be kept separate from white clays as it will stain them easily with brown marks. Washing your tools and workspace thoroughly between using different coloured clays will help to avoid contamination.
Terracotta has a beautifully rich tone when fired and works particularly well with slip decoration. Normally fired to earthenware temperature (up to 1100°C or 2012°F) to retain its classic colour, the finished work will be slightly porous and therefore not as tough as work fired to higher stoneware temperatures (up to 1300°C or 2372°F). This affects its suitability for use in the dishwasher, microwave and outdoors in frosty conditions. If fired to higher temperatures the colour darkens to a rich brown and it may warp, crack or become bubbly in texture, which is not suitable for functional ware but can be interesting for sculptural work.
Dirk Staschke, Soliloquy no. 4, 2017, height 71cm (28in) x 53cm (21in) x 23cm (9in). The rich colour of the clay used in the frame is shown in a more immediate state, combined with lighter-coloured clay in the rear view of this intricate sculptural work.
White earthenware is commonly used in educational settings – as the name suggests it is similar to terracotta, or red earthenware, except for the colour. It suits the lower temperature range well and the joy of firing to a lower point means less energy consumption and a shorter firing cycle: firing is discussed in detail in Chapter 8.
Black clay is prepared commercially and there are several versions available, with tones varying from brown-black to a more purple-black. A variety of grogged versions are also available, as is black porcelain. The colour is achieved by mixing oxides or stains into regular clay – you can also do this yourself. How to colour clay is explained in detail in Chapter 6. Be aware that some black clays are not food safe due to the oxides used, so always check with the supplier or manufacturer if you are thinking of using black clay to make tableware. A limited number of coloured clays are also available to buy commercially, mainly in greys, blues and greens.
Porcelain coloured with blue stains in preparation for Nerikomi technique.
Wanying Liang, detail from Woman as Vessel series, 2020, glazed porcelain.
Porcelain is a white, highly plastic clay with fine particles, high shrinkage, and a fascinating history. There are many versions available commercially with slightly differing qualities designed to be better for throwing, or for translucency, for modelling or even self-glazing (Parian). What they all have in common is the whiteness which makes a superb base for many glazes or looks equally beautiful with no glaze at all. Many makers colour porcelain with stains or oxides as the white base gives excellent clarity of colour.
Porcelain has a reputation for being a little difficult, but it is more about understanding the practicalities of how it behaves; you have to get to know it. It will stretch and bend more than other types of clay, it can be worked until it is very thin so as to be translucent, but it will also shrink more than any other clay (up to 15 per cent). It will absorb water like a sponge and become saturated easily, making it floppy. This can be controlled if you limit how much water you use, take extra care with any joins, and manage your drying carefully. It is also important to use a clean workspace to avoid contaminating the porcelain’s purity as any debris from other clays, glazes or general mess are guaranteed to show up in the firing, which is always in the stoneware range (up to 1300°C or 2372°F).
Paperclay is exactly that, clay with paper pulp mixed in. You can buy it in regular and porcelain versions or make your own by mixing slip with soaked, shredded paper. There are variations in recipes and processes, so it is worth a little research to find the best method to suit your needs if making your own. The home-made version can be prone to growing mould, so only make up what you need and avoid storing it for long periods of time. The advantage of paperclay is that its fibre content provides support, making it popular for figurative sculpture. The paper element burns out during firing, so the resulting work is much lighter than 100 per cent clay pieces. It does feel a little fibrous to work with, but like porcelain it can be worked until it is very thin and quite unlike any other clay it can be used raw on to dry or even bisque work for repairs or to continue building.
Getting to know the clay you are using is the best recommendation for understanding how it works, as you can better gauge what it will and will not do. Ask yourself how it feels to work with, how much will it stretch or bend? What happens when you add water; is it easily saturated? How much does it shrink? How carefully should I dry it? Does it crack easily? It’s useful to talk to your supplier or other makers for recommendations. It’s helpful to remember that ultimately it is all clay particles, just with different additives that change the colour or texture, so there is much common ground.
STATES OF CLAY
Several terms apply to clay in its various states: ‘greenware’ is clay that has not been fired. Until it goes into the kiln it can be broken up, reclaimed and made back into workable, soft clay. ‘Leather hard’ (sometimes ‘cheese hard’) applies to clay that has dried halfway between soft clay and bone dry – it is still workable but feels stiffer and is how many slab-built works are made. ‘Bone dry’ means the clay has completely dried out, which results in it looking much paler and chalkier than when moisture was present. It no longer feels cold to the touch, and it is at the most fragile point in the whole cycle, requiring the greatest care when being handled.
Patricia Volk’s studio: kiln, just opened, revealing bisque work.
‘Bisque’, ‘bisc’ or ‘biscuit’ ware applies to clay that has been fired once to a comparatively low temperature of around 1000°C, or 1832°F, and is still porous. It has turned from greenware into fired pottery and cannot be reclaimed; it is ready for glazing and a second firing. ‘Earthenware’ applies to the lower of the traditional glaze firings, up to 1100°C or 2012°F. ‘Stoneware’ applies to the higher of the traditional glaze firings, up to 1300°C or 2372°F. Firing will be explored further in Chapter 7.
CLAY PREPARATION
Clay will keep for years in a soft, workable state if it is stored in a tightly closed plastic bag, so when not in use always close the top with a few twists and secure with the wire to keep it airtight. Some makers store clay in an old fridge or freezer, which will keep it airtight and protect it from frost if it is stored in an outbuilding. Makers with indoor studios will normally just stack bags of clay out of the way under a table. Check the bags for little holes which sometimes appear at the suppliers or in transit; you can simply place the whole thing into another bag and seal or put waterproof sticky tape over the hole. Be aware that any exposure, however small, will cause some degree of drying so keeping the clay properly sealed will save work later on.
Wedging is the act of kneading clay to prepare it for use by ensuring a uniform consistency and eliminating any air pockets. It requires a bit of muscle and for some, it also prepares the mind for the making that follows. It is not necessary to wedge all clay – many makers use it straight from the bag if it is even in consistency, often as a result of the industrial mixing processes (pugging) before being bagged up. The exception to this is porcelain, which often feels quite hard when you open the bag, but softens quickly after wedging.
Good wedging skills are very useful and can help, not just with preparing clay but also with softening it, mixing in coloured stains and for reclaiming – recycling – your scraps back into a usable state. It can be tricky to get the hang of initially, but like many aspects of ceramics, honing your technique involves practice and getting the feel for it. Avoid tiring muscles by only preparing what you need for the next couple of hours and work on a table at a comfortable height. Wedging can be performed on a plaster bat or wooden board which will dry it very slightly, or on marble or slate, but avoid plastic surfaces as the clay will stick.
To wedge, take a large lump of clay of a manageable size compared to the size of your hands and pat it into a round shape. Standing feet apart will help provide stability as you motion forwards and backwards. Place the clay on your chosen surface and push the heels of your hands firmly into the clay, pushing it down and slightly away from you. Gradually curve upwards at the end of the motion, letting your body follow the movement.
Next, pull the clay back towards you and rock back slightly with your body. Repeat this pushing, pulling and rocking motion, occasionally turning the clay 90 degrees to ensure an even process. To check if you have removed air bubbles, wire the clay in half and look at the cut surface for anomalies. If it is smooth and even you have done a good job: if not, slam the clay back together and try again; it can often take a few attempts. There are many variations of this method and to view the technique in action there is plenty of online film footage of makers wedging.
Depending upon what you are making, you may want the clay to be softer or firmer; you can harden clay by drying it in the air for a little while before wedging, or soften it with water or slip by wedging it in. If it’s rock hard, skip to the next paragraph on reclaiming. If you can push a pencil into it, poke long holes throughout with a wooden stick (a pencil or long-handled paintbrush works well), then add water to the holes, seal tightly in a plastic bag and leave for a day or two to let it absorb before wedging. Alternatively, you can wire the clay into slices (approximately 1cm or half an inch thick), paint each slice generously with water or slip and stack them like a sliced loaf. Cut the loaf in half with a wire, slam the clay together and wedge, repeating if necessary. This method is a little labour-intensive, but you can control exactly how soft you want the clay to be.
To dry clay, form it into thick arches on a board or plaster bat, then using your fingers poke it all over to make small indentations to increase the surface area. Depending on the room temperature and air flow, leave the clay for a short while and re-wedge when it feels a little drier. Sometimes just a quick wedge on an absorbent plaster or wooden surface will dry it enough for your requirements. It can be interesting to mix two types of clay together to add the texture of one to the colour of another – just wedge them together and wire through to check they are mixed thoroughly.
RECLAIMING CLAY
Makers are thrifty types and appreciate the opportunity to recycle: reclaiming is the process of reworking scraps to produce fresh, workable clay for future masterpieces. It can be labour-intensive, so it is much easier to reclaim small amounts regularly, rather than save up dustbins full of slops. Save up scraps including any offcuts, disasters, spare handles or unused bits – any clay that has not been fired. Set aside a plastic pot or small bucket to collect them in and leave until the pieces are bone dry. To begin the reclaiming process, add enough water to cover the clay pieces. Notice that the clay breaks down very gradually upon contact with water; clay particles are heavier than water and will sink to the bottom. Keep adding more scraps as you work; it may take a few weeks (or even months) to amass a reasonable amount depending upon your process.
When you have enough soaked clay to reclaim, make sure your plaster bat is clean and clear, and discard the excess water from the top of your pot by gently tipping it away. Add the sticky slops evenly to the plaster bat: poking holes into the slops will increase the surface area and aid the drying process. Drying time depends upon how thickly the slops are piled and the temperature in your space, so it could be ready in an hour or it might take a day. Check to see how it is progressing by seeing if you can lift the clay slightly on the underside where it touches the plaster. This part will dry first as the porous plaster absorbs water from the clay slops faster than air will dry the top half. When you can lift it a little, flip the slops over in sections to allow the plaster to dry the wetter half. Once you can lift this side a little it is ready to wedge back into workable clay, and seal in a plastic bag ready for use.
Porcelain is the exception to this method as it loses its elasticity when bone dry and can become crumbly and unworkable if reclaimed in this way. The best way to avoid this is to add all scraps to a bucket of water before they dry out. The scraps will absorb water while soaking and become soft, so you can slop it onto the plaster bat and follow the same steps of allowing it to dry a little before wedging and bagging. Reclaimed paperclay can lose its strength but is still useful as a filler. If you use different types of clay there is nothing to stop you putting all your scraps in one bucket. You will end up with a hybrid with the colours and qualities of whatever went into the bucket, and it will be perfectly usable.
Plaster bats can be made using potters’ plaster purchased from your supplier – once made they should last for years. Your plaster bat need not be enormous; the size depends upon your needs in terms of reclaiming. To be able to absorb water during the reclaim process it needs to be quite thick – most are between 5 and 10cm, or 2 and 4in. Production methods vary, but you will need something to act as a mould. A wooden frame on glass is a popular method, or you may find a flat-bottomed plastic tub that is the right size and shape. Whatever you use, if there is a possibility the plaster will stick, any area that might come into contact with it will need greasing with soft soap, Vaseline, liquid house soap or releasing agent. If there are any small gaps in the mould where the liquid plaster could escape, plug them with a little soft clay.
Work on a flat surface to ensure the plaster bat will be an even thickness – check with a spirit level if you are unsure. The plaster to water ratio should be stated by your supplier as this can vary slightly. It is important to wear a respirator mask and protective gloves for mixing up; always measure the water first and add plaster to the water to avoid making additional dust. Sprinkle the plaster onto the water evenly and stir gently, getting right to the bottom. Try not to make bubbles – you can gently tap the bucket to encourage them to rise to the surface and skim them off. Once the plaster starts to thicken pour it into your mould. Once set it can be released from the mould and will need to dry thoroughly before use. For further research there is a range of film footage online demonstrating different approaches to making a bat.
RECLAIMING AND WEDGING
Step 1: collect scraps of clay in a bucket and allow to dry.
Step 2: add water and leave the clay to gradually break down.
Step 3: tip excess water away and place slops on to a plaster bat.
Step 4: once the slops have dried a little, lift the clay and flip over to dry the other side.
Step 5: pat the clay into a ball and push down with the heels of your hand.
Step 6: keep pushing the clay away from you in a rolling motion.
Step 7: pull the clay back to where you started and repeat the pushing and rolling motion.
Step 8: the clay will start to look like this; the technique is known as ‘rams head’ wedging.
Step 9: cut the clay in half with a wire to check for air bubbles.
WORKSPACE PRACTICALITIES AND ESSENTIAL HEALTH AND SAFETY


