32,99 €
Mehr erfahren.
- Herausgeber: John Wiley & Sons
- Kategorie: Wissenschaft und neue Technologien
- Serie: Digital Classroom
- Sprache: Englisch
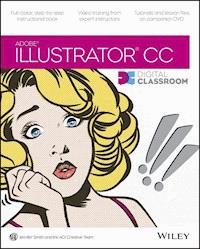
A complete training package lets you learn Adobe Illustrator CC at your own speed Adobe Illustrator is the leading drawing and illustration software used to create artwork for a variety of media. This book-and-DVD package provides 13 self-paced lessons that get you up to speed on the latest version of Illustrator (Creative Cloud). Step-by-step instructions in the full-color book are supported by video tutorials on the DVD. Together, these tools will help you learn Adobe Illustrator basics, essential skills, and all the new capabilities in Illustrator CC--in no time. * Includes step-by-step instructions in a book-and-DVD training package * Features expert instructors who guide you through 13 lessons that prepare you to create fabulous artwork with Illustrator * Covers beginning through intermediate-level skills Illustrator CC Digital Classroom is like having your own personal tutor to help you learn the latest version of Illustrator. Note: DVD and other supplementary materials are not included as part of the e-book file, but are available for download after purchase.
Sie lesen das E-Book in den Legimi-Apps auf:
Seitenzahl: 425
Veröffentlichungsjahr: 2013
Ähnliche
Table of Contents
Cover
Title
Copyright
Credits
About the Authors
Acknowledgments
Starting up
About Illustrator Digital Classroom
Prerequisites
Starting Adobe Illustrator CC
Access lesson files and videos any time
Resetting Adobe Illustrator CC preferences
Loading lesson files
Working with the video tutorials
Additional resources
Lesson 1: Adobe Illustrator CC Jumpstart
Starting up
The project
Setting up the Artboard
Creating the background shape
Using the new Kuler panel
Distorting a shape
Importing an image
Using the new Touch Type tool
Self study
Review
Lesson 2: Getting to Know the Workspace
Starting up
Opening Illustrator
Choosing a workspace
Opening a file
The document window
Using Artboards
Changing your view
The Tools panel
Using tools and panels
Custom workspaces
Customizing keyboard shortcuts
Self study
Review
Lesson 3: Illustrator CC Essentials
Starting up
Using the shape tools
Constraining a shape
Selecting artwork
Using shape and transform tools to create artwork
Using layers when building an illustration
Cutting and pasting objects
Repeating a resize transform
Self study
Review
Lesson 4: Adding Color
Starting up
Basics of the Appearance panel
Creating a colorful illustration
Using Live Paint
Adding a symbol to your artwork
Saving swatches
Using the Color panel
Adding Pantone colors
Taking advantage of the new and improved Kuler panel
Self study
Review
Lesson 5: Working with the Drawing Tools
Starting up
Working with the Pen tool
Tracing images
Other drawing tools
Editing existing paths
Combining shapes using the Shape Builder tool
Self study
Review
Lesson 6: Exploring Additional Color Options
Starting up
Taking a look at the finished illustration
Adding tonal values with gradients
Creating and using patterns
Finishing up the illustration
Creating a color group
Using the Color Guide
Self study
Review
Lesson 7: Using Patterns
Starting up
Self study
Review
Lesson 8: Working with and Formatting Text
Starting up
Formatting type
Advanced techniques with text
Self study
Review
Lesson 9: Organizing your Illustrations with Layers
Starting up
Using layers to organize your illustrations
Paste remembers layers
Template layers
Self study
Review
Lesson 10: Working with Symbols
Starting up
Cleaning out the symbol library
Creating symbols
Editing symbols
Importing a symbol library
Using the symbolism tools
Editing nested symbols
Replacing symbols
Saving symbol libraries
Self study
Review
Lesson 11: Using Effects and Transparency
Starting up
Working with the Appearance panel and effects
Working with object transparency
Working with blending modes
Saving and importing graphic styles
Self study
Review
Lesson 12: Exporting and Saving Files
Starting up
Saving using the AI file format
Saving an illustration with layers
Saving different versions of the logo onto separate layers
Saving a layered PDF
Integration with other applications
Saving as EPS
Saving for the Web
Self study
Review
Lesson 13: Advanced Blending Techniques
Starting up
Using the Blend tool
Applying a gradient
Applying radial gradients
Applying gradients using Illustrator’s Gradient Mesh options
More mesh work
Overlapping images
Creating a symbol
Self study
Review
Lesson 14: Adobe Illustrator CC New Features
Starting up
What makes Adobe Illustrator CC so great?
Creating the luggage tag
Punching out the strap holder
Cloning the tag
Placing multiple images
Converting an image to vector art
Investigating the improved Links panel
Adding text
Using the new Touch Type tool
Embedding an image
Creating an image brush
Applying the image brush to a stroke
Packaging a file
End User License Agreement
List of Illustrations
Starting up
In Windows, you might have to change your folders to show Hidden folders.
Lesson 1: Adobe Illustrator CC Jumpstart
The completed rough design of an ad.
Define the settings in the New Document dialog box.
Enter the values for the Rounded Rectangle.
The result.
Click and drag to create a rectangle.
Click and drag through the shapes.
The result.
Use the new Kuler panel to assign colors you create on the Kuler website or your iPhone.
Apply a Kuler color to your background shape.
Press the down arrow while dragging the rounded rectangle shape to reduce the corner values.
Combine the newly created shapes.
Make sure that you have a 1-point black stroke.
Add an effect to only the stroke.
The result.
Press and hold the Alt/Option key and drag.
The result.
Use the Appearance panel to change the fill color.
The artwork at this stage.
Align and distribute the shapes.
Set the position for the three shapes.
Set the position for the background shape.
Change the font size.
Type text.
Apply the Flag warp.
Change the color of the text to Red.
Resize the text if necessary.
Center the text.
Change the font color to white.
The result.
The comp at this stage.
The comp after the text has been replaced.
Create a green rectangle.
Position on the artwork.
Select the Shear tool.
Click and drag to the left.
Lesen Sie weiter in der vollständigen Ausgabe!
Lesen Sie weiter in der vollständigen Ausgabe!
Lesen Sie weiter in der vollständigen Ausgabe!
Lesen Sie weiter in der vollständigen Ausgabe!
Lesen Sie weiter in der vollständigen Ausgabe!
Lesen Sie weiter in der vollständigen Ausgabe!
Lesen Sie weiter in der vollständigen Ausgabe!
Lesen Sie weiter in der vollständigen Ausgabe!
Lesen Sie weiter in der vollständigen Ausgabe!
Lesen Sie weiter in der vollständigen Ausgabe!
Lesen Sie weiter in der vollständigen Ausgabe!
Lesen Sie weiter in der vollständigen Ausgabe!
Lesen Sie weiter in der vollständigen Ausgabe!
Lesen Sie weiter in der vollständigen Ausgabe!
Lesen Sie weiter in der vollständigen Ausgabe!
Lesen Sie weiter in der vollständigen Ausgabe!
Lesen Sie weiter in der vollständigen Ausgabe!
Lesen Sie weiter in der vollständigen Ausgabe!
Lesen Sie weiter in der vollständigen Ausgabe!
Lesen Sie weiter in der vollständigen Ausgabe!
Lesen Sie weiter in der vollständigen Ausgabe!
