11,49 €
Mehr erfahren.
- Herausgeber: The Crowood Press
- Kategorie: Lebensstil
- Serie: Knitting Techniques
- Sprache: Englisch
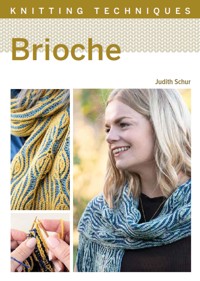
This accessible book is a practical introduction to the technique, with projects to try and ideas for your own designs. Master brioche knitting and create textured, reversible knitted fabrics. Whether you're a new knitter expanding your skillset or an experienced knitter honing your technical ability, brioche knitting is an essential technique to add to your repertoire. Each single row involves two passes of the needles, knitting half of the stitches and slipping half of the stitches each time, which is very different to most other knitting techniques. Projects can be created in a single colour or by using two contrasting colours, with increase and decrease stitches creating texture and movement on the surface of the fabric. Includes 255 colour images of which 36 are knitting charts plus three two-colour brioche patterns to practise the technique.
Das E-Book können Sie in Legimi-Apps oder einer beliebigen App lesen, die das folgende Format unterstützen:
Seitenzahl: 124
Veröffentlichungsjahr: 2023
Ähnliche


First published in 2022 byThe Crowood Press LtdRamsbury, MarlboroughWiltshire SN8 2HR
This e-book first published in 2022
© Judith Schur 2022
All rights reserved. This e-book is copyright material and must not be copied, reproduced, transferred, distributed, leased, licensed or publicly performed or used in any way except as specifically permitted in writing by the publishers, as allowed under the terms and conditions under which it was purchased or as strictly permitted by applicable copyright law. Any unauthorised distribution or use of this text may be a direct infringement of the author’s and publisher’s rights, and those responsible may be liable in law accordingly.
British Library Cataloguing-in-Publication DataA catalogue record for this book is available from the British Library.
ISBN 978 0 7198 4150 7
Cover design: Blue Sunflower Creative
Contents
Introduction
Abbreviations
1 Plain Brioche Knitting
2 Two-Colour Brioche Knitting
3 Increases and Decreases
4 Brioche Knitting in the Round
5 Finishing Tips
6 Brioche Knitting Projects
7 Developing Ideas and Designs
Bibliography
Acknowledgements
Index
Introduction
HOW AND WHY I LEARNT ABOUT BRIOCHE KNITTING
Like many people, I was taught to knit by my grandma and my mum, when I was around ten years old. I was instantly smitten, and have rarely been without something on the needles ever since. For a few years Mum and I had a needlecraft shop in Tadcaster, North Yorkshire. We had beginners’ classes, and I loved helping people try out techniques such as Fair Isle or cable knitting that were new to them. After achieving a City and Guilds qualification in Hand Knitting and Design, I continued to design my own knitting patterns and share my passion with knitters, teaching a variety of workshops. I was asked if I could teach brioche knitting, and spent time researching. Very quickly I came across the name of Nancy Marchant, who didn’t invent the technique, but it is obvious that she can be credited with having developed and standardized the terminology and abbreviations that are now widely used. Many knitters create marvellous knitting patterns using Nancy Marchant as their main inspiration and technical source. I just had to learn more.
Brioche knitting turned out to be something different to any knitting that I had tried before. So I want to tell you that, even if you are an experienced knitter, it is totally all right to begin with the basics of this one – and if you find it tough, keep going. My obsession continues to grow, and I keep finding new things that I have not tried yet.
WHAT IS BRIOCHE?
Brioche knitting creates a rib stitch similar to fisherman’s rib. There is also a similarity to double knitting. You are creating a double-sided fabric by working two passes of the needle for every row. This creates a thick, reversible, super-squishy fabric with an interesting ribbed texture. Brioche knitting can feel very different to other knitting techniques, so even experienced knitters may feel like total novices – but it is so worth persevering. The basic stitch creates a rib, which can be worked in two contrasting colours to produce an attention-grabbing effect. By using increases and decreases you can create movement across the surface, and manipulate the direction of flow, producing some stunning results, using one or two colours. It is supremely satisfying, and without a doubt gives the WOW! factor.
ANYONE CAN DO IT!
I want to inspire and encourage others to learn this exciting technique, which they can then explore and develop for themselves. I love seeing the excitement that happens when people realize that they can do it. This book will help you to face the challenge and get started with brioche knitting. You may find the technique difficult to master at first, but take the process slowly and methodically so you fully understand the mechanics, and in time you will be knitting brioche patterns with ease. With brioche knitting it is definitely the case that small, manageable steps are better than trying to make giant leaps.
I aim to provide a gentle and practical instruction that will enable you to confidently follow and understand the many beautiful patterns. I suggest you begin by carefully reading the basic instructions on how to work the stitches, and then work through the small knitted samples to develop skill and confidence. These are aimed at helping you to understand how the basic technique works, and encouraging you to experiment and find out what works best for you.
WHAT IS NEEDED
Needles
For two-colour brioche knitting you will need some long, double-pointed needles (dpns) or a circular needle. It would not be possible to do two-colour brioche knitting using standard, straight knitting needles. A locking stitch marker, safety pin or a cable needle is a massive help for the more complex decrease stitches. Other than that, you don’t need any special equipment that you wouldn’t use for general knitting.
Yarn
It is important to choose your yarn carefully. Different fibres give different qualities, and I recommend using wool, preferably not Superwash. You need yarn that will cling to itself – avoid silky or slippery yarns, because they won’t give the best stitch definition or stay in shape when wearing and washing.
Abbreviations
brk
brioche knit. This involves knitting a stitch that was slipped on the previous row
together with
its yarnover.
brp
brioche purl. This involves purling a stitch that was slipped on the previous row
together with
its yarnover.
sl1yo
slip one, yarn over. Before a brp, keep the yarn at the front, slip the next stitch purlwise, take the yarn round the needle (creating the yarnover); now you are ready for the next stitch.Before a brk, bring the yarn to the front of the work (between the needles), slip the next stitch purlwise and take the yarn over the top of the right-hand needle to the back of the work (creating the yarnover); you are now ready to work the next stitch.
LS
light side
DS
dark side
LC
light colour
DC
dark colour
LSLC
light side light colour
LSDC
light side dark colour
DSLC
dark side light colour
DSDC
dark side dark colour
brkyobrk
increase by two stitches, brk, leave the stitch on the LH needle, bring the yarn forward and then brk into the stitch again.
br4st inc
increases by 4 stitches, working into one stitch (brk, yo) twice, brk.
br6st inc
increases by 6 stitches, working into one stitch (brk, yo) 3 times, brk.
br8st inc
increases by 4 stitches, working into one stitch (brk, yo) 4 times, brk.
brLsl dec
2-stitch decrease slanting to the left, slip the first stitch knitwise, brk the next two stitches together, pass the slipped stitch over.
brRsl dec
2-stitch decrease that slants to the right, slip the first stitch knitwise, knit the next stitch then pass the slipped stitch over, transfer the stitch on to the left-hand needle and pass the next stitch over it, move the stitch on to the right-hand needle.
br4st dec
slip 2 sts separately knitwise, place the following st on to a cable needle at the front, knit the next st, pass the second slipped st over, transfer the st to the left-hand needle, pass the following st over, transfer the st to the right-hand needle, pass the first slipped st over, put the st from the cable needle on to the left-hand needle, place the st on to the left-hand needle and pass the st from the cable needle over, transfer the st to the right-hand needle.
k
knit
p
purl
rep
repeat
sl1
slip one
st/s
stitch/es
LH
left-hand
k2tog tbl
knit 2 together through the back of the loop
PM
place marker
CHAPTER 1
Plain Brioche Knitting
BEFORE YOU START
There are some rules that are specific to brioche knitting that you may not have come across before. I feel that the key to really enjoying this technique is to understand three important things.
First, every row of brioche knitting requires two passes along the needles to complete a single row. You will see one knit stitch ‘v’ on the surface of the work for every two passes. The rib is created by alternately working a stitch and slipping a stitch.
Second, when you slip the stitch, you also make a yarnover, which then becomes part of that stitch. When you count stitches, the yarnover and slipped stitch will count as one stitch.
Third, the method used for creating the yarnover is different when working brioche knit or brioche purl. It is also worth bearing in mind that the fabric produced by brioche knitting tends to be loose and stretchy, so it is usually best to use a smaller needle than that recommended on the ball band.
UNUSUAL TERMINOLOGY
brk – brioche knit: This involves knitting a stitch that was slipped on the previous row together with its yarnover.
brp – brioche purl: This involves purling a stitch that was slipped on the previous row together with its yarnover.
sl1yo – slip one, yarn over: You are slipping a stitch and at the same time creating a yarnover.
I know that this is going to seem confusing at first, but with patience and practice it will become second nature and you will instinctively know how to create the yarnover without thinking about it. Before a brp, keep the yarn at the front, slip the next stitch purlwise, take the yarn round the needle (creating the yarnover): now you are ready for the next stitch. Before a brk, bring the yarn to the front of the work (between the needles), slip the next stitch purlwise and take the yarn over the top of the right-hand needle to the back of the work (creating the yarnover): you are now ready to work the next stitch.
CASTING ON
Because brioche knitting produces a looser, stretchier fabric it needs a suitably elastic cast on. In the next section there are some specific methods of casting on that produce a stretchier edge to the work, which you may wish to try out. This is just a selection, but there are lots more to choose from – you could fill a whole book just with methods of casting on.
Some people are unhappy with having to learn a new technique for casting on, and sometimes decide that they do not like brioche knitting just because they don’t want to work the cast on. Whilst at first it may seem very tedious to spend valuable knitting time on learning a new cast on, I am confident that the improvement to the finished project will make it worth it. The Italian cast on is considered to be the best method to use with brioche knitting, and I am going to show you how to do that.
I am also going to show you a few other methods that can be suitable to use with brioche knitting. This is for two reasons. The first is because the pattern that you are using will tell you what method to use, and you need to know what that means. The second reason is that, as mentioned previously, you may find that the method recommended really is not for you. If you know there are alternatives out there which might suit you better, then, rather than abandoning the project before you have even got going, you will know that you have other options.
Thumb method cast on
Here I have used an Aran-weight wool with a recommended needle size of 5mm. I have cast on using the thumb method – which is generally my preferred way of casting on for knitting – over two knitting needles, and have worked a brioche knit rib followed by a brioche purl rib with a pair of 4mm needles.
Thumb cast on and standard cast off.
Step 1: Leaving a long tail, make a slip knot and place it on the needle held in the right hand.
Step 2: Using the yarn tail, make a loop that goes behind and over the left thumb.
Step 3: Insert the needle into the loop that is on the thumb from below.
Step 4: Wind the yarn from the ball moving clockwise under the needle.
Step 5: Continue this movement, taking the yarn over the needle to the right.
To work this kind of cast on you would normally use one knitting needle only.
Step 6: Take the loop on the thumb over the end of the needle and pull the tail.
Step 7: There are now two stitches on the needle. Repeat as needed.
Tubular cast on
The yarn used in this example has a recommended needle size of 4mm, but I used 3.5mm needles for the knitting and a tubular cast on, which is a stretchy cast on. Even though it is a stretchy cast on, I have used a larger needle (4.5mm) for the cast on than I have for the knitting (3.5mm). I think this works best for me. You can experiment with what works best for you. There is a chance that, if you use the same size needle for the cast on and the main knitting the edge will be too tight because brioche knitting produces such a stretchy fabric. Start off using some spare yarn and your larger needle.
Tubular cast on, and invisible or tubular cast off.
Step 1: Cast on with the spare yarn; half the number of stitches are required. Join in the main colour (purl one row, knit one row) twice.
Step 2: *Purl the first stitch, using the left-hand needle, pick up the loop between the first two contrasting yarn loops.
Step 3: Take the yarn to the back of the work and knit the loop you just picked up. Repeat from * to the last stitch.
Step 4: Purl the last stitch, then pick up the half-loop of the main colour from the edge and knit into the back of the loop.
You can now remove the spare yarn and change to your smaller needle before commencing with the set-up row for brioche knitting.
Double cast on
I find this is a useful casting-on method which can be done loosely; or, if you need to, use a larger needle than for the main knitting to give the desired edging.
Step 1: Leaving a long tail of yarn, make a slip knot and place it on to a needle held in your right hand.
Step 2: Hold both yarn ends in the left hand. The working yarn needs to go over the index finger and the tail over the thumb.
Step 3: Take hold of the ends of the yarn with the left hand. Bring the needle underneath the yarn around the thumb, and insert upwards into the loop.
Step 4: Now take the needle over to the yarn which is around the index finger, coming down on to the first strand from above.
Step 5:


