28,49 €
Mehr erfahren.
- Herausgeber: The Crowood Press
- Kategorie: Geisteswissenschaft
- Sprache: Englisch
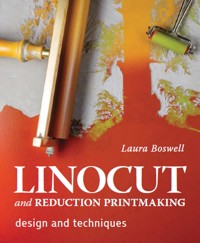
This beautiful book reveals the astonishing flexibility and creative possibilities of the linocut printmaking technique. Written by a leading and innovative linocut printmaker, it focuses on the reduction printing technique and gives detailed, practical help to choosing and using tools and materials, plus generous creative advice on designing specifically for linocut. With over 300 lavish illustrations, it is sure to inspire every aspiring and experienced printmaker to pick up their blade and start cutting. Divided into three parts, this book introduces the reader to the infinite possibilities of working with traditional artist's lino. Explains the tools and materials you'll need, as well as vital techniques such as sharpening your tools and installing a printing press. There is instruction on how to draft a design and transfer it to lino, ready for cutting and printing. Finally, there are step-by-step sequences to eight different prints, broken down into layers and showing the build-up of colours.
Das E-Book können Sie in Legimi-Apps oder einer beliebigen App lesen, die das folgende Format unterstützen:
Seitenzahl: 346
Veröffentlichungsjahr: 2022
Ähnliche


First published in 2022 by
The Crowood Press Ltd
Ramsbury, Marlborough
Wiltshire SN8 2HR
www.crowood.com
This e-book first published in 2022
© Laura Boswell 2022
Frontispiece: Blending yellow ochre and phthalo blue oil based ink on my glass inking slab.
All rights reserved. This e-book is copyright material and must not be copied, reproduced, transferred, distributed, leased, licensed or publicly performed or used in any way except as specifically permitted in writing by the publishers, as allowed under the terms and conditions under which it was purchased or as strictly permitted by applicable copyright law. Any unauthorised distribution or use of this text may be a direct infringement of the author’s and publisher’s rights, and those responsible may be liable in law accordingly.
British Library Cataloguing-in-Publication Data
A catalogue record for this book is available from the British Library.
ISBN 978 0 7198 4032 6
Cover design: Sergey Tsvetkov
Dedication
For Sal and Brian, Liz and John
Contents
Introduction
Part One: Tools and Materials
1 Lino
2 Cutting Tools and Techniques
3 Paper
4 Printing Ink
5 Ink Rollers/Brayers
6 Pressure and Registration
Part Two: Drawing and Design
7 From Sketch to Design Drawing
8 Moving from Paper to Lino
Part Three: Example Prints
Print one: Apples and Swallows
Yorkshire Barn series
Print two: Yorkshire Barns, Trees and Clouds
Print three: Yorkshire Barn, Sunset
Print four: Yorkshire Barn, Winter Mist
Print five: Yorkshire Barn, Winter Sun
Print six: Windy Day, Moving Grasses
Print seven: Late Autumn Bright Day
Print eight: Limestone Edges
Case Study: Garden Seasons Summer
Case Study: Black Stone Beach
UK supplier list
Index
My first encounter with lino was not auspicious. Aged thirteen, I was given a piece of lino and some tools to produce a ‘cheerful sun’ design during art class. The lino was rock hard, the tools hopelessly blunt and, in an ill-advised attempt to combine art with sewing, the resulting sorry block had to be printed onto rough hessian cloth with lumpy ink. I adored my art class and my sewing lessons. Linocut conspired to ruin both that day.
Luckily for me, I have a good deal more success with lino now. These days I am a full-time printmaker and linocut, partnered with Japanese woodblock, is my technique of choice. I’ve come to love linocut, specifically the reduction printing method, as an incredibly flexible and creative printmaking process. I doubt I’ll ever stop specializing in lino now, I find it a printmaking method with almost endless capacity for experiment and invention.
This book is a deep dive into my kind of linocut printing. I’ll help you avoid my schoolgirl angst with lots of practical advice, ensuring you’ll be enjoying the buttery cut of fresh lino, razor sharp tools and clean inking. I’ll share my process for gathering ideas and turning them into design drawings for print, with cheerful sun designs entirely optional. Most of all I hope to inspire you to experiment with the reduction process and to dispel any ideas that reduction linocut is an inflexible method, requiring flat colour and a fixed game plan.
One of my linocuts in progress. Artist lino is a wonderfully versatile material to cut and print.
HOW THIS BOOK WORKS
While this book is designed to help you explore reduction linocut printmaking, much of the content will also be helpful and relevant to single colour linocut and multi block linocut printing. The book is divided into three parts. Throughout the book you will notice that the grey artist lino in many of the photographs is pink, that’s because I have stained it for ease of cutting, also for ease of photography. There are full instructions for how to stain lino in Part One under ‘Lino’.
Part One
Part One is devoted to tools and materials. Revel in the sheer loveliness of printmaking paraphernalia, explore inks and their additives, understand why the ‘squidge’ factor of your roller matters and discover why an artist’s lino is only half baked. This section explains how to get the best from your papers, inks, rollers and cutting tools, with practical guides on everything from cutting techniques to installing a printing press, from sharpening your tools to signing your work.
Part Two
Part Two is all about drawing and design. This section deals with the often vexing question of how to go from initial vague idea for a linocut to drafting a design and transferring it to lino, ready for cutting and printing. While I hope to persuade you away from too much rigid planning and into a flexible approach to linocut, a strong understanding of designing specifically for lino is helpful and is explained here. As well as designing for print, this section deals with the practical issue of transferring your initial design to the lino and explores different tools for drawing and mark making directly onto lino.
Part Three
Part Three consists of fully illustrated reduction print examples. In this part of the book there are eight different prints, broken down into layers to show how each print is developed and the techniques involved. The colour layers of each print are shown separately, as well as a set showing the build-up of colour layers as the print progresses.
Print one documents a simple reduction print from start to finish, printed in flat colour layers. Photographs showing the marking up and cutting of the lino are included for this print.
Prints two to five feature the same design printed with minor changes to the cutting and major changes to the printing techniques for very different results.
Prints six to eight are more sophisticated prints and show different techniques and design approaches.
Prints nine and ten are case studies from my own editioned work.
LINOCUT PRINTMAKING: A RELIEF PRINT PROCESS
The reduction linocut method I describe in this book is a relief process. Printmaking techniques are generally divided between relief printing and intaglio printing. The two are very different in method and result. Linocuts, woodblocks and wood engravings are all examples of relief printing. Etchings, mezzotint and dry point prints are all examples of intaglio printing.
At the top of this diagram there is an etching plate, inked and the surface wiped clean ready for intaglio printing. Below it is a lino block with the surface inked for relief printing.
I cut this little linocut to give my students a physical reminder of which part of the lino prints and which parts do not.
In a relief print, it is the surface area of the block (the material to be inked up) that is inked up and printed, usually with a roller (brayer). Where material is cut away, that area of the block is lower than the surface area. These lower areas are not inked and do not print. In an intaglio print the opposite is true. The block (or plate) is inked all over and the printmaker deliberately pushes ink down into the cut areas. The printmaker then wipes away the ink from the surface of the block, leaving ink in the cut areas only. It is the remaining ink, lying in the cut away areas, that prints. It is possible to cut and print up lino blocks using the intaglio method, but that technique is not covered in this book.
Understanding that linocut is a relief process and that it is the surface of the lino that prints is very important. As a beginner, it is very easy to become confused between parts of the lino that are needed for printing and must stay uncut, and those parts that need cutting away and will no longer print.
LINOCUT: SINGLE COLOUR, MULTI BLOCK AND REDUCTION
This book has plenty of general advice about linocut, but its focus is the reduction print process for linocut. Reduction printing is not the only method. Below I have described the three common approaches to making a linocut print in very simple terms.
Single colour linocut
Single colour linocuts are made by using one piece of lino and are printed with one application of ink, usually in a solid colour and traditionally in black. All the cutting needed to create the image is completed before the block is inked. The resulting print is a binary one, relying on the cutting of the block rather than on different areas of colour to make sense of the image. Single colour linocuts are often the starting point for beginners as the approach is simple and the equipment needed minimal. However, single colour linocuts can be extremely sophisticated and even the simplest idea needs developing carefully to work well as a binary print.
Bridport Rope Making – a single colour linocut by printmaker Robin Mackenzie, showing a masterful control of tone, design and composition. (Photo: Robin Mackenzie)
Multi block linocuts
Multi block printing is one of the two basic ways to create a linocut with different areas of colour, the other being reduction printing. With multi block printing, as the name suggests, the printmaker cuts a series of different printing blocks. Once cut, the blocks are inked up individually and printed to create the finished print. The printmaker must use a registration system (seeChapter Six, ‘Pressure and Registration’) to line up each block correctly for printing. The registration system ensures that each block fits accurately with the other blocks to create the finished print.
Reduction linocuts
Like single colour linocut printing, reduction linocuts are made from one piece of lino. Unlike single colour linocuts, the piece of lino used in reduction printing is cut and printed multiple times throughout the printmaking process. The printmaker begins by printing the first layer of colour, usually the palest tone. They then cut away any areas of the lino block they wish to remain that first colour. Once cut, the block is inked with the next colour and printed again. The fresh ink covers the paler layer, except where the lino has been cut away. The printmaker then repeats this process, gradually cutting more of the block away, layering the ink in increasingly darker colours until the design is complete.
Small Trees, Big Sky is a reduction linocut. As with most reduction linocut prints, the image is printed from lightest colour to darkest.
WHY CHOOSE THE REDUCTION PRINTING METHOD?
In my work I swap between both methods; reduction printing for linocut, multi block printing for Japanese woodblock. Japanese woodblock requires a multi block approach and I have learned to appreciate the method when working in wood. When it comes to lino, my heart lies with reduction printing.
The Critic is a multi block print with four blocks, one of which has been printed in two colours.
Cherry Trees, Stormy Sky is a Japanese woodblock print. In this technique multiple blocks are cut from wood and printed with watercolour paints combined with rice paste, using brushes instead of rollers.
Here are some pros and cons for multi block and reduction printing, the two basic approaches to linocut printmaking.
Multi block printing
Multi block printing allows the printmaker to print as many prints, in as many colourways, as they please. The printmaker has the freedom to proof (test) print the print as a complete image before final decisions about colour are made. If the printmaker is printing an edition, prints can be made as they are needed, rather than completing the entire edition in one go.
Each block of a multi block print can be printed individually, putting a single layer of ink directly onto the paper, without inks layering on top of each other. This permits a wide range of different contrasting colours on the same print if desired. However, multi block can be costly in terms of time and materials as the printmaker must work with multiple pieces of lino. Once cut, blocks may take up a sizeable amount of storage.
Multi block requires a system to ensure the accurate transfer of the various parts of the design drawing to their correct position on each separate block for cutting. It also requires a registration system (method for lining up the blocks and paper) that will position multiple blocks in the correct place to line up with each other while printing, as well as with the printing paper. This registration system must be available to use again if the printmaker wants to make more prints at a later date.
Reduction printing
The process is economical in terms of lino, as a single piece of lino is used for each print. As the block is destroyed in the printing, it does not need to be stored once cut and printed. The printmaker is only working on a single block, rather than having to prepare, cut and print multiple blocks. However, the printmaker must make all the prints they need from the very beginning of the process, as additional printings later are impossible. As all prints are made at once, the complete edition will need to be stored.
Reduction linocut offers a flexible approach, allowing the print to change and develop as I work. Here I have already begun to cut and print the foreground while still making decisions about the cloudy sky.
With the reduction method, there is no need for a system to line up different parts of the design when transferring the design drawing to the lino for cutting. When printing, registration is a simpler process as the paper only needs to line up accurately with a single block.
Printing repeatedly from one block means the inks build up in layers, requiring the printmaker to think carefully about colour. Layering colour gives the printmaker many interesting opportunities for different inking effects, or it may be restrictive depending on how the printmaker likes to work. Test prints and proofs have to be made during the creation of the print, as the printmaker is working. There is no opportunity to make a complete test proof of the whole print before printing the edition. If prints are damaged during the process and lost, they cannot be replaced.
WHY I PREFER THE REDUCTION METHOD FOR LINOCUT
I like to approach linocut printmaking much as painters work with their canvas, with the freedom to change the outcome based on how the work is developing. I have a design drawing to get me started and an idea of where I want to go with the print, but I like the print to evolve as I work.
Here is the finished reduction print Noonday Squall with the final version of the sky in place.
Sometimes I have to use the multi block method to make demonstration linocuts for printing at shows. To do this, I make my design drawing, decide how it is to be divided up into the different colours and transfer it to the various blocks for cutting. I must decide how the final print is going to look in all but colour choice at the transfer and cutting stage. I can perhaps edit the blocks and make a few minor alterations as I cut, but the fundamentals of the finished print need to be decided in advance of the printing. That’s where I struggle.
My reduction prints are very much the result of making choices at each layer of cutting and printing. I decide where to go next based on what I think the print needs, not on how I planned the print to look. This is particularly true of how I ink the print, as my colours are decided very much as the print is made. Each new colour added is chosen dependent on the colours already printed on the paper. The layering effect of the ink, a characteristic of reduction printing, plays a very large part in the end result. I often use a great deal of transparent ink and when I do, I rely on the underlayers of the ink to bring life and depth to the layers on top.
Lastly, there’s the jeopardy. There is no going back with a reduction print: once cutting and printing starts, it’s a one-way journey from first cut to finished print. It is one of my favourite things about the method. It certainly concentrates the mind and teaches you to be careful. If a dirty thumb print in the wrong place spoils a multi block print, it means an infuriating session of reprinting. In reduction printing, it means your edition is one print down and nothing can be done.
The heightened investment of the reduction print process means much more incentive for creative solutions when things go wrong. When abandoning your block means you’ll lose the entire print run, it does concentrate the mind to invent a solution that pulls victory from disaster! While I owe much of my confidence in my experimental approach with linocut to years of practice, testing and experience, a significant part of it comes from the need to remedy accidents. I have learned from necessity that it is perfectly fine to change and adapt as the print develops and now, I wouldn’t have it any other way.
CHAPTER 1
Lino
It is important to note that the ‘lino’ referred to throughout this book is traditional grey artist lino (sometimes called battleship lino). All the processes described in the book, particularly the transfer methods for marking up the lino for cutting, are designed for use with grey artist lino. It is the material I work with when making my own linocuts and when teaching others to make linocut prints. In most of the photographs I have stained the surface of the lino pink (see ‘Staining’, this chapter) both for ease of cutting and for improving contrast in the photos. For working with other relief printing materials please see the advice later in this section.
A roll of traditional artist lino. It will take a day or so to flatten out for cutting once it has been unrolled.
TRADITIONAL ARTIST LINO
Traditional artist lino is made from a combination of linseed oil and solids backed with jute fabric. As its name suggests, artist lino is made from the same ingredients as traditional flooring linoleum, now sometimes called by the trade name Marmoleum. It pays to be careful about products described as lino. The word ‘lino’ has become something of a catch-all name and is sometimes used as a general description of kitchen and bathroom flooring made from entirely different materials totally unsuited for printmaking.
traditionalThese traditional lino products are designed for printmaking. They are thicker than traditional flooring, but have the same jute backing cloth.
Artist lino comes in grey, tan and brown colours and all are thicker and softer than flooring lino. This softness is due to a shorter drying time for artist lino compared to flooring lino, hence a joke in the trade about ‘half baked’ artistic types needing to work with a ‘half baked’ version of the real product. Grey artist lino is the best quality of the three colour types. It is a smooth material throughout with fine consistent particles, allowing cutting in any direction. Tan and brown artist lino are a slightly coarser version of the grey artist lino. They may not work as well as the grey for cutting and printing fine detail but are still a pleasure to use.
Grey artist lino is still sometimes referred to as ‘battleship’. This is in reference to the heavy gauge lino used by the American Navy as flooring on battleships and submarines. Lino is still used by the military for land-based flooring, but was abandoned by the US Navy for shipping after the Pearl Harbour attack of World War Two, due to its flammability.
HOW LINO IS MADE
In simple terms, the process begins with mixing linseed oil and natural pine rosin together in large boilers. The linseed absorbs oxygen and, in combination with the pine rosin, creates a flexible binder called linoleum cement. The cement is then stored in a heated room until it reaches the right elasticity.
When the lino cement is ready, wood flour is added along with finely ground limestone. Colour pigments are added to the mix, which now consists of lino granules. The granules are then passed through large rollers at high pressure to form a sheet, in a process called calendering.
Rolls of jute backing are fed through a machine to combine it with the lino and both are passed through another pair of calendering rollers. The two rollers are set at individual temperatures and speeds. Working in combination, they press the sheet lino and the jute fabric backing together. The lino is then transported to a drying chamber and hung to dry for several days.
Lino hanging up to cure as part of the manufacturing process. (Photo: Forbo, by Matthias Groppe, Paderborn)
FROM FLOORING TO ART MATERIAL
Lino was invented in England in 1863 by inventor Frederick Walton after he discovered how to solidify linseed oil through oxidization. Realizing that the oil could be combined with cork and other materials to form a floor covering, he established the Linoleum Manufacturing Company in 1869. Walton’s invention swiftly became popular and his business a success. It is pleasing to note that Walton was both a keen art collector and enthusiastic painter himself. Sadly, given his thirst for invention, no mention is made of Walton attempting any lino prints.
It is the artists of Der Brücke Group in Germany who were the first recognized users of lino for printmaking, creating their first linocuts between 1905 and 1913. The exact dates are slightly confusing as their early linocuts were often labelled as woodcut prints. Once discovered, lino was quickly adopted as a printmaking material. Lino’s consistent surface and ease of cutting made it a popular alternative to wood for relief prints, especially for teaching.
ALTERNATIVES TO LINO
There are various other materials on the market for making ‘linocut’ prints. These are newer printmaking introductions such as Japanese vinyl, SoftCut and Speedy Carve. They are popular products and work well for many printmakers. They are often sold in starter kits as an easy to cut introduction to relief printing.
These products are alternatives to lino and many artists work happily and successfully with them. They have different properties to the artist lino referred to throughout this book. (Photo: Handprinted)
A linocut using Speedball’s Easy Carve. An easy and effective way of entertaining a young printmaker and sharing their creative talents among friends and family.
All these materials are designed for relief printmaking and can be cut and printed using exactly the same inks and tools as artist lino. They do have different properties from the artist lino that I use and have written about in this book. If you prefer to work with the alternative materials listed above, the method I have detailed in Part Two for transferring your design to your lino using carbon paper may not work. You will also need to run your own tests for pens, pencils and so on for direct drawing on your chosen block.
In addition to these plastic-based materials specifically designed for printmaking, it is possible to work with more improvised materials such as polystyrene and foam sheets. If you want the pleasure of introducing small children to printmaking, working with foam board or polystyrene and ‘cutting’ with a pencil or biro is great fun. Though I’d still advise using proper printing inks for the best results. Children have a wonderfully inventive approach to working in print. I’ve learned a lot working with free-thinking printmakers under the age of ten.
WHY USE TRADITIONAL ARTIST LINO?
The primary reason that I work exclusively with grey artist lino is down to the material’s behaviour during cutting. When a tool cuts artist lino, the material being removed will snap off without the cutting tool needing to exit the material to complete the manoeuvre. Modern substitutes for lino have a rubbery quality. Where lino would snap cleanly, the alternative materials need cutting away at the end of every cut. This tends to encourage the printmaker to work predominately in scooping cuts as the simplest and most efficient way to move the tool in and out of the material easily. The brittle snap of lino makes it a far more adaptable material for inventive cutting, encouraging the printmaker in a wide variety of mark making and cutting techniques. Once you have learned to exploit the snap of the lino to your advantage when cutting, it is hard to work with a material that refuses to break when wanted.
Artist lino will snap cleanly at the end of each cut, an effective aid to cutting. Lino alternatives require the tool to complete each cut. Pulling the material to remove it risks tearing.
If large prints are your thing, artist lino is available in a roll and is easily cut down for smaller projects.
Artist lino is available for sale in sheets or as a roll. I buy mine on the roll, cutting it down in an assortment of sizes to suit me. The roll also allows me to make much larger prints than I could using the lino alternatives. These alternative materials do come in sheet form in a variety of sizes, but not in roll form at the time of writing.
Artist lino is firmer than the modern alternatives (do not be put off by the word ‘firm’, fresh lino is easy to cut). This makes artist lino more suitable for cutting and printing very fine work, especially when a detail or line is isolated and the material around it cut away. The softer materials, especially when printed in a press, can compress or distort slightly. Fine, isolated details may look a little clumsy in the finished print as a result.
Here, two types of artist lino and an easy cut material are marked up with the same markers, paint and carbon. The lino alternatives may take a mark initially, but their smoother and non-absorbent surfaces means it is likely that marks will smear or wipe away easily, so tests are needed.
The transfer method for reversing and transferring your design permanently from paper onto the lino explained in Part Two of this book works best with artist lino. In addition, artist lino is easy to mark up with a wide variety of pencils and pens, or with a brush and paint for an alternative approach to mark making (see ‘Tools for drawing and marking the lino directly’, Chapter Eight). Modern lino alternatives are not as accommodating to mark up as artist lino and most will not take carbon paper marks or paint.
Finally, I prefer to use artist lino as it is made from a combination of natural, renewable materials. Lino contains no plastic and waste lino can be composted down. Just make sure you clean it and remove the ink before adding it to your compost bin, and be patient as it does take time.
TRADITIONAL ARTIST LINO: THE HARDENING PROCESS
Artist lino has a lifespan. Over time the linseed will harden and lose its flexibility and the material will become increasingly difficult to cut. This process takes at least a year or two depending on the lino’s exposure to sunlight and heat. It is not advisable to wrap lino in plastic to extend its life, but storing it in a cool dark place is helpful.
Lino that is beginning to harden can be improved by brushing a coat or two of linseed oil onto the lino’s surface and leaving it for a couple of days to be absorbed, helping to restore some flexibility. However, this treatment isn’t a miracle cure and will not help once lino has hardened completely. It is best to throw the lino away at that point. It will be almost impossible to use and will make cutting dangerous. Any lino sold to you in a hardened condition should be returned to the supplier.
A linocut print by artist James Boswell, the original owner of the cutting tools I now use. The block dates back to 1952 and was printed again for this book with great success.
The hardening process doesn’t affect the printing of the lino, only the cutting. This is worth remembering if you make a one-colour linocut or a multi block print. I recently printed up a lino block dating from 1952 with no problem at all, getting excellent results.
Always check the lino really has permanently hardened before throwing it away. All lino, however fresh, is naturally stiffer and harder to cut in cold weather. Test how your lino behaves when it is at a comfortable room temperature. Fresh lino should be nice and flexible, slightly bendy and easily cut with sharp tools. It is also likely to smell pleasantly of linseed oil.
Warming lino for easier cutting
Lino that is fresh and suitable for cutting can be warmed for easier cutting if it has been stiffened by cold temperature. Do try to avoid all but the gentlest approach to warming and only do it when really necessary. Over-heating the lino will cause it to expand and become crumbly and very brittle, making it hard to cut cleanly and impossible to use for fine detail. Ideally, all you should do is to return it gently to a comfortable room temperature and maintain that temperature while you cut. This is not always easy in a cold studio, so warming gently by a radiator or in an airing cupboard works well. If you feel the need to apply heat more directly, careful use of a hairdryer on a low setting is an option. Remember, lino that remains very hard even when warm will never soften and should be discarded.
This lino has been overheated by placing it directly on a very hot radiator. It is crumbling away where it has been cut.
BUYING AND STORING LINO FOR PRINTING
Buying lino
Buy your artist lino from a reliable source with a good turnover. Artist lino does deteriorate and harden very slowly over time so it needs to be supplied while soft and fresh. I always buy lino on a roll and cut it to an assortment of sizes, but I tend to work with large sizes and get through a roll of lino quickly. You may prefer to work with pre-cut sizes, especially if you are only likely to use a small amount of lino occasionally. Alternatively, you might club together with another artist or art group and share a roll. That way you can cut it to the sizes you want.
Lino is sometimes sold already mounted onto a thick backing block (see ‘Preparing lino for cutting and printing’, this chapter). The wooden block is there to raise the lino to type height for using in a traditional letterpress printing press. It is more expensive bought this way and will take up more space when stored, but is convenient if you want to use the lino at type height in a press and don’t want to worry about mounting your own lino or adapting the bed of the press.
Storing lino
Once you have bought your lino, check the surface. Lino sometimes comes with tiny crumbs stuck to the surface. These can be scraped off with a thumbnail. This is best done as a routine before the lino is stored. If you forget to do it later, these crumbs might remain until the printing stage and show up as annoying dots of colour surrounded by a tiny halo of unprinted paper in your print. It’s very unlikely that any crumbs you find will have impressed the surface of your lino to the point of damaging it, but return the lino to the shop if your crumb check reveals any dents likely to affect your printing.
Always check your lino for surface crumbs; I use my fingertips to feel for crumbs as they can be hard to spot by eye. I use the edge of my thumbnail to remove them without marking the lino.
Store your lino stacked flat. Avoid leaning it up on its side or laying it over any objects. It is a fluid material and will slump and curve over time when given the opportunity. If your lino has distorted through careless storage, lay it flat and put a weight on top. It will flatten again, quicker in warm temperatures than cold.
If you buy lino on a roll, it is best unrolled and left to flatten out before storing as a flat sheet. If the lino is very cold, allow it to warm to room temperature before unrolling or it may crack. If you leave lino in a roll, it will remain curved and probably need flattening just when you want to use it. You’ll also need to remember to check it for crumbs whenever you need it. I tend to cut my roll of lino, check, sand and stain it, then store it in large sheets after it has spent a couple of days flattening on the studio floor.
Cutting lino to size
Lino is easy to cut using a sharp craft knife (boxcutter) and a heavy metal straight edge ruler. (Always use a proper cutting mat and an appropriate straight edge or safety ruler.)
Once the lino has been lightly scored with a knife, the piece can be folded back and will snap along the scored line.
• Mark out your measurements on the lino’s surface.
• Using the straight edge as a guide, run your knife along your marks to score the surface of the lino rather than make a cut. There is no need to score the lino deeply.
• Pick up your lino and bend it gently along the length of your score mark. The lino will crack neatly along the score line.
• Use your knife to cut through the jute backing to complete the process.
PREPARING LINO FOR CUTTING AND PRINTING
In addition to checking the lino’s surface for crumbs with your thumbnail, there are some other things you can do to prepare the lino and make it easier to cut and print.
Sanding and degreasing
Given that lino was designed first and foremost as a hardy, dirt-repellent flooring, it fights inking a little at first, especially with water based inks. Degreasing the lino will help, as will a light sanding.
A light sanding appears invisible on the lino itself, but will key the surface of the lino, making it easier to ink.
To degrease the lino with water, wipe the surface with a soapy cloth followed by a damp one. Alternatively use a cloth with white spirit (mineral spirits/mineral turpentine). This step can be postponed until after sanding, when it will also remove any sanding dust from the lino.
Giving the lino a light sanding with fine sandpaper will key its surface slightly and improve inking. You need a fine sandpaper, wrapping it around a block will make sanding easier. Give the lino a brief sanding. The plan is to key the entire surface lightly. Aim for good coverage and no visual change to the lino. All you should see is a light dust on your fingertips when you run them over the lino after sanding. Finish by wiping the lino down with a damp cloth to remove any dust, or by degreasing the lino, and allow to dry.
Sanding can be done at any point before using. However, doing your sanding along with checking for crumbs when you first get your lino means one less thing to do when you are ready to print. It’s also much easier to sand a large piece of lino before it is cut up into smaller pieces.
Staining
Staining the surface of the lino with colour before you begin cutting is entirely optional, but can be helpful. Adding a new surface colour provides a contrast with the inside of the lino as you cut, making it much easier to see where you are cutting.
Lino that has been degreased and sanded receives a stain of magenta-coloured oil based printing ink that has been diluted with white spirit into a thin wash.
It is important to choose your stain carefully and make sure it doesn’t affect the finished print. I prefer to use oil based printing ink to make my stain. Even if you too plan on using oil based ink to stain your lino, take the time to do some tests on scrap lino to check your particular ink dries well, is durable and doesn’t transfer to a test print. See ‘Inks’ for details about the inks mentioned in this section.
Since the stain needs time to set and its durability is improved by a long drying time, you may like to stain your lino in advance, along with your sanding and crumb check. If you leave staining until later, it should still be done before transferring your design to the lino or drawing directly onto the lino, as applying the stain can remove your marks.
Oil based ink
Oil based ink makes a good stain in my opinion. It is sensible to use a colour that dries well and provides a good contrast without being so dark that it hides carbon or pencil marks. I use a magenta, which dilutes to a pale bright wash.
Staining the lino with ink can look dramatic and seem risky, but provided it is done carefully there is no transfer to the finished print.
• Dilute the printing ink with white spirit at whatever ratio works for you, I aim for about 1:10, and rub the mixture thoroughly into the surface of the lino with a rag.
• Leave to dry and fix for at least a couple of hours, preferably overnight. The longer the better.
• Once completely dry, the lino is ready to receive your design.
• Once the stain and any carbon drawing have set properly (see ‘Transferring the tracing onto lino with carbon paper’, Chapter Eight) wipe the lino with white spirit to remove any excess stain plus any excess colour from the carbon paper. The aim here is to wipe away any excess, not scrub away the stain and any carbon marks, so go gently.
• Always take a tester print on cheap paper to check for any transfer when you begin printing.
Water based ink
I would proceed with caution when using water based ink for staining lino. It will stain lino, but is very easily lifted and blended into water based printing ink during printing, and it may affect the print colour. It is also far more likely to lift off when you clean the block between layers. However, you could apply a wipe of diluted ink each time you have a new layer to cut, wiping the block clean again with a damp cloth before you go to print.
As an experiment, I used Indian ink to stain the block prior to printing. Although the Indian ink was left to dry thoroughly, the water based yellow printing ink rehydrated it and the Indian ink is appearing on the print through the yellow ink. Cleaning up also proved very messy.
The exception to this rule is using a water based ink to stain lino which is then printed in oil based ink and cleaned with white spirit. The stain will not transfer from the block or affect the print, but it will be less durable than an oil based stain.
Safe wash ink
This makes a less durable stain than traditional oil based ink and tends to wear off more easily. However, it is less likely to lift and mix with the printing ink than water based inks. If you are cleaning with water, I would advise wiping the stain on for cutting and cleaning off before each printing, the same as for water based inks. If you are using safe wash ink with white spirit, it may survive cleaning better as a stain and is unlikely to transfer to the print.
Acrylic paint, Indian ink and other alternatives
There are many materials that suggest themselves for staining lino. If you think you have found a good one, run a test.
• Check the stain is durable and that it doesn’t affect any drawing or carbon marks you need to make on the lino.
• Make sure it doesn’t rub off on your hands and isn’t removed by whatever method you use to clean the lino between printing.
• Make sure the stain doesn’t lift off and mix with your printing ink. Check that any transfer to your paper when printing is temporary and can be resolved by making a couple of trash prints before the real printing begins.
Trimming jute threads from the lino’s backing
The jute fabric used to back the lino is naturally very fibrous and loosely woven. At the edges of cut lino, jute is inclined to fray. Whole threads can come away and little tufts appear. Any stray hairs, threads or tufts will pick up printing ink very readily and dirty the margins of your prints. Always take a knife or sharp scissors and trim the jute threads at the edges of your lino before you print. This is best done when you are ready to use a block, as handling will cause the jute to fray. Trimming in advance is usually time wasted as more trimming is likely to be needed once you start handling the lino for printing.
A print is easily spoilt by ink catching on stray jute threads, so trim the lino before using and keep checking for stray threads as you print.
Check the edges of your lino regularly during your printmaking. Threads can lift at any time. These are easily removed, but can ruin a print if left unnoticed. Trim away any jute threads carefully when the lino is free of ink. It can be tempting to snip off hairs from an inked block, but they inevitably catch and stick onto the block ready to spoil the impression. Also, check and trim any print areas where you have cut the lino deeply enough that the jute shows though to the surface.
MOUNTING YOUR LINO BLOCK TO A BACKING BOARD
There are two reasons for mounting your lino to a board of some sort: one is ease of handling; the other is to aid registration while printing.


