18,49 €
Mehr erfahren.
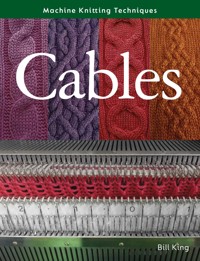
- Herausgeber: The Crowood Press
- Kategorie: Lebensstil
- Sprache: Englisch
Cables are a traditional knitwear favourite and feature increasingly in contemporary fashion collections. By simply crossing stitches over, in effect altering the order in which they are knitted, patterns from the simplest twist to the most intricate directional patterns can be produced on even the simplest knitting machine. Once a few basic techniques have been mastered, the number of cable designs available is virtually endless. With the learning of a few more advanced methods, different directions soon suggest themselves, giving scope for the knitter's own creativity to truly flourish.
Das E-Book können Sie in Legimi-Apps oder einer beliebigen App lesen, die das folgende Format unterstützen:
Veröffentlichungsjahr: 2023
Ähnliche


CONTENTS
1 The Basics of Cable Knitting on the Machine
2 Press Off Relief
3 One Tool Cables on the Single Bed
4 Super-sized Grafted Cables
5 Racked Cables on the Ribber
6 Cables and Fisherman’s Rib
7 Deflected or Moved Ribs
8 3×1 Mock Rib Cables
9 Partial Knit Cables
10 Cable Miscellany
11 Pattern Collection
Further Information
Abbreviations
Glossary of Technical Terms
Index
CHAPTER 1
THE BASICS OF CABLE KNITTING ON THE MACHINE
Hand knitting and machine knitting are so very different and yet at the same time so very similar. Cable stitches illustrate this perfectly: the same directional options apply, and the frequency of twists and size of cable are considerations to be addressed by hand and machine knitters alike. The machine knitter can obviously produce cabled fabrics much more quickly but does not have the creative freedom that a hand knitter has to purl stitches at will and cross large numbers of stitches. Sometimes, however, it’s better to have fewer creative choices, and by working with the ones that are available it’s surprising what can be done. The aim of this book is to offer the machine knitter some techniques and tricks that will enable them to create interesting cable effects without slowing the knitting down too much.
DIRECTION
When crossing two groups of stitches, those on the face side can go either right or left, and unless you are truly ambidextrous, you will find one direction easier to manipulate than the other and therefore can distinguish them as an easy or slightly more difficult transfer. Most of us at some point have crossed stitches in the wrong direction and completely spoiled the look of our cable through a momentary lack of concentration.
The fact that this one error can so dramatically alter the appearance only makes us more careful in future to cross the stitches correctly. (SeeChapter 10 for how to rescue an incorrect twist after knitting.)
One incorrect twist will spoil the whole panel.
Two twists one way, two twists the other way.
Strategically placed twists in opposing directions can, however, be used to great effect and this is one of the basic tools available to develop different cable patterns.
FREQUENCY (NUMBER OF ROWS BETWEEN TWISTS)
The appearance of a cable can be altered greatly by varying the number of rows between twists. Sometimes it can be improved by knitting more between each cable twist, and this obviously reduces the amount of work. Another useful trick is to have varying frequencies, maybe knitting four rows between two cable twists, then ten rows before doing another two with four rows between.
As a starting point, for a regular cable (twisting repeatedly over the same stitches) I would knit approximately a third more rows than stitches in the cable between each twist. For example, a three-over-three cable having six stitches looks good with eight rows between. A five-over-five cable having ten stitches will need thirteen rows, but I would usually knit fourteen rows to give an even number, and very possibly sixteen rows. This would give me four and eight to use as intervals for other transfers that I may wish to do within the same piece of knitting, synchronising the operations to a regular rhythm. Keeping too many times tables in your head at one time can be a little troublesome and is better avoided if possible.
Trellis, or plaited cables (twisting alternately over offset cable elements) usually look better with fewer rows between, so a nine-stitch plait, crossing the three in the centre with alternately the three on the left and right (in opposite directions), works well with four rows between the alternate twists. Here I can make life a little easier for myself by knitting an odd number of rows between the two different twists, so that the carriage is at the left to do one twist in one direction, and the carriage is at the right to do the other twist in the opposite direction; therefore, choose three or five rows instead of four, to reduce the potential for error.
BACKGROUND
The first cables knitted on the machine will usually be within plain stocking stitch fabric, depending on your machine’s capabilities, but other options are available. When first trying simple cables on the single bed machine, it soon becomes apparent that the appearance is enhanced by a needle out of work either side of the cable. Not only does this help the aesthetics, it makes it easier to cross the stitches and also ensures the same stitches are crossed. A background of regular needles out, such as 3×1 mock rib, also works well, particularly with yarns that show off well in ladders, such as cord or tape yarns.
In the same way, when a ribber is acquired, one of the first uses of the extra bed of needles learnt after ribbed welts is a couple of needles of reverse either side of a cable – again, improving the appearance and easing the crossing of the stitches. If you don’t have a ribber, or there’s no ribber available for your machine, it’s worth considering dropping the stitches either side of the cable with each twist and working them back up with the latch tool from the face side.
With two needle beds, another option is to work the cables on one bed, and the background on the other bed, giving knit side cables on a purl side ground. If you are lucky enough to have a plaiting feeder, the effect is a contrast cable on a reverse ground.
YARN TENSION WHEN CROSSING STITCHES
Unlike hand knitting, where cabled stitches can be squashed up together on the two needles, machine knitting involves the crossed stitches returning to the needles a set distance apart (one needle per stitch, as opposed to just two needles with many stitches). The limitations of this become all too apparent when a cable is worked over more than six needles (4×4, for example). Later on, we will look at different methods of helping this situation, but a good start is to consider the size of stitch used. Domestic machines were always sold as being able to knit yarns from fairly fine to fairly thick, which to a large extent is true, but cables will cause you some trouble if you try to knit tighter than the machine would perhaps like. So better to knit looser, with nice big stitches that can be crossed over and taken back to the needles reasonably comfortably, without yarn breakage. For the swatches and exercises shown here, I have used a heavyweight 4-ply or double knitting equivalent yarn that is happy with a tension setting of eight to ten. This produces nice large needle loops with the most scope for stitch transfer. If you have a ribber, or are knitting on a double bed machine, some stitches on the opposite bed either side of the cable will also ease the yarn tension situation, because the yarn going between the beds is a greater length than going from one needle to the next on one bed, and is therefore looser.
Needles out of work and the resulting ladders are a quick way to enhance the work.
Dropped stitches latched up on the reverse are a good option if there is no ribber available.
With the use of a plaiting feeder, the cables really stand out.
Towards the end of each chapter, and especially nearer the end of the book, the instructions become less detailed. This is intentional: whilst slavish following of precise instructions is a good way to replicate a particular stitch pattern, in my opinion it isn’t a good way to learn techniques. Reading the explanation of the methods employed, in conjunction with simple exercises should lead to an understanding and ability to transpose skills to different situations. Quite apart from which, detailed instructions for some of the ideas photographed would make them appear far more complicated than they actually are.
TOOLS
With your machine you will find supplied enough transfer tools to get you started with simple cables such as 3×3 and 2×2. If you can manage two tools in each hand, a 5×5 will also be possible. But a seven-prong adjustable tool is a very sensible addition to a knitter’s tool box. I have two and frequently wish I had a third, as time can be wasted changing to different arrangements as required. Keep your eyes peeled at car boot sales and charity shops for knitting machine accessory boxes which have parted company from the machine; they’ll often be reasonably priced and may have interesting contents.
Other very useful tools to have, though by no means essential, are a garter bar (for turning the work on the single bed machine) and a Silver Reed Shadow lace transfer tool (for transferring stitches from the ribber to the main machine and back). Both of these are no longer available new and command quite high prices second-hand. When viewing second-hand machines for sale on internet auctions, look out for these in the usually jumbled image of the machine accessories, yarn, patterns etc. It’s often a cheaper way of acquiring these items, and the machine can be plundered for spare parts or used to initiate a friend into the joys of knitting by machine.
Though not strictly ‘tools’, hand knitting books of patterns and cable stitches are an invaluable source of inspiration. You quickly become aware of what is possible on your particular machine, what substitutes are practical for different hand knit structures and what techniques are best left alone. The chances are, with all these compromises a fairly different cable pattern from what first inspired you will be the result, which can usually be moved on in a number of directions.
BASIC CABLES EXERCISES
EXERCISE 1: SIMPLE SINGLE BED 2×2 CABLE WITH NEEDLES OUT EITHER SIDE
This simple 2×2 cable has a needle out of work each side. The first four twists have four rows between, then twisting in the opposite direction, five rows between. This illustrates the point that often more rows between twists may be preferable for the appearance and also reducing the workload.
Basic 2×2 cable with a four-row interval between crossings.
EXERCISE 2: 2×2 ‘S’ CABLE WITH LATCHED UP LADDERS EITHER SIDE
The alternating direction of twist forms this ‘S’ or serpentine cable. It can make a welcome contrast to regular twists, although having to work twists one way then the other makes mistakes more likely. This can be helped by knitting an odd number of rows between twists, so that when the carriage is at one side, twist one way, and when the carriage is at the other side twist the other way. Instead of a ladder either side, a stitch has been dropped and re-worked from the reverse with a latch tool. Leaving a needle out of work, then latching up the ladder on the reverse will be much tighter.
This time with a six-row interval and alternating directions crossed to form a serpentine or ‘S’ cable.
EXERCISE 3: 3×3 CABLE WITH REVERSE STITCHES EITHER SIDE KNITTED ON THE RIBBER
Purl stitches either side of a cable always make a difference, adding tone and definition at little extra effort when knitted on the ribber. The yarn crossing between the beds also eases the tension when crossing stitches. You will notice that an extra needle on the ribber has to be filled with a heel of a stitch from the main bed on each side.
Purl or reverse stitches either side of a cable add tonal and textural interest.
Picking up the heel of a stitch to fill an introduced empty needle.
EXERCISE 4: PLAIT WORKED OVER NINE NEEDLES
Worked on the single bed with a needle out either side of nine needles; cross three left with three centre to the right, followed by three right with three centre to the left.
Nine-stitch plait, a traditional classic.
Alternate left and right twists; an odd number of rows between will reduce the risk of error.
As with the ‘S’ cable, an odd number of rows between will make this less prone to mistakes.
EXERCISE 5: STAGHORN CABLE
Two regular twists in opposing directions on a ground of reverse stitches, with six rows between, an extra needle on the ribber in the centre eases the tension on the yarn, which might otherwise burst.
Staghorn cable, repeated twists away from the centre, is another hand knit favourite.
An extra needle on the ribber at the centre eases the tension.
EXERCISE 6: OXO CABLE
This is worked in the same way as the staghorn cable, but with two twists outwards, followed by two twists inwards to completely change the appearance.
Oxo cable: two twists inwards, followed by two twists outwards. The centre needle on the ribber again eases the yarn strain and is hardly visible from the face side.
EXERCISE 7: ALL OVER COIN CABLE
Alternating ‘S’ cables in opposing directions tessellate to form this hand knit favourite. So many cables side by side would be impractical but for the extra needles knitting up on the ribber between each ‘S’.
Alternating ‘S’ cables produce an all over, tessellated medallion cable.


