18,49 €
Mehr erfahren.
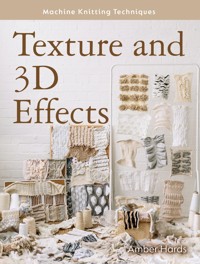
- Herausgeber: The Crowood Press
- Kategorie: Lebensstil
- Serie: Machine Knitting Techniques
- Sprache: Englisch
For machine knitters with a few basics under their belt or for those with more experience, this book aims to inspire and spark new ideas whilst working with traditional methods. It offers plenty of inspiration and encourages you to explore and experiment with confidence to produce exciting, tactile knitwear. It showcases the limitless possibilities of fabrics achievable with domestic knitting machines and demonstrates a variety of techniques, such as using yarns with different properties, the functions of the carriage and machine, and various ways of applying texture to the fabric. Chapters are organised into seven different techniques, with step-by-step instructions and images detailing how each technique is created. Considers yarn types, functions of the carriage and hand manipulation whilst on the machine. Provides tips for working with highly textured or 3D fabrics, from avoiding mistakes and dropped stitches to working out tension squares. Includes three full patterns, to practise working with the techniques on a larger scale
Das E-Book können Sie in Legimi-Apps oder einer beliebigen App lesen, die das folgende Format unterstützen:
Seitenzahl: 189
Veröffentlichungsjahr: 2023
Ähnliche


CONTENTS
Introduction
1 Materials and Stripes
2 Manual Tucks
3 Punchcards
4 Weaving
5 I-Cords, Strips of Knit and 3D Embellishment
6 Partial Knit: Frills, Bobbles, Loops, 3D Scales
7 Lace Holes and Ladders
8 Pattern Collection
Acknowledgements
Index
INTRODUCTION
For anyone who loves textiles, machine knitting has it all: texture, pattern and form all in one. I discovered machine knitting at university and instantly fell in love with it; even after fifteen years I am still learning, and I will never grow tired of the endless possibilities that machine knitting affords. Creating unique fabrics with interesting texture has been my passion ever since, and I think always will be. Knitting machines are an amazing tool to produce modern fabrics with traditional techniques.
When considering how to create textured and 3D fabrics, think about what texture really means. Texture is inherently tactile, but the visual presence of it is important too. Texture can be extreme or subtle. What is the purpose of the texture, what are you trying to convey? Fabrics can be used to evoke a feeling as well as being simply beautiful. Texture can encompass a huge range of tactile components – hard and soft, rough and smooth, coarse and fine – and adding in three-dimensional form can further emphasise a surfaced fabric. There are so many avenues to explore!
Each chapter of this book covers a different machine-knitting technique, which is broken down into simple steps with clear guidance on needle layouts, rows and carriage settings. You will also find many ideas and tips for developing these skills into beautiful textural fabrics and garments. The final chapter features patterns to put your new skills into practice.
It is important to be curious. Discovery is what makes knitting and creating exciting, and there are always things to learn. Push each technique to its limit, work into it, exhaust every possibility. Embrace the happy accidents – trial and error are a huge part of the design process. Practice makes perfect, and slower techniques will become faster with repetition as your hands start to remember the movements and rhythms. This book uses demonstrations on a domestic Brother knitting machine, but many of the techniques can be applied to different models, with small changes in carriage and machine functions.
My aim is for you to use this book as a jumping-off point, and for its content to fill you with ideas and creativity. Machine knitting can be challenging and frustrating, but should ultimately be a fun and rewarding process. I hope that in reading this book you will be as inspired as I have been throughout my own machine-knitting journey.
CHAPTER 1
MATERIALS AND STRIPES
YARN THEORY
Having good yarn knowledge and enthusiasm for experimenting is the perfect place to start when creating textural and sculptural knitwear. Many different textures can be achieved by simply contrasting opposite yarns with one another and combining these with simple techniques. There is an enormous number of different yarns available to use for machine knitting, and understanding their properties can help hugely when making decisions in design and when experimenting with basic techniques. Of course, working with a textured yarn to begin with to create swathes of surfaced fabric works well, but you can also create texture and three-dimensional forms with smooth, light and fine yarns by combining them with more sculptural techniques and mixing them with other yarns.
It can help to categorise yarns by property and then work with opposite compositions in combination to create reactions that will enhance the techniques you choose to work with. It does not need to be an obviously textural yarn to achieve a beautifully surfaced piece, but combining simple yarns with different properties can create some interesting and surprising results. The easiest way to experiment with yarns and to understand their properties is to start by knitting stripes with them. Removing colour from the equation at the beginning can help to focus on the texture of the piece.
Having yarn wraps in your sketchbook can help when choosing which yarns to use, and to see if the colours and proportions work well together.
Unique fabrics can be created simply by alternating between different types of yarn and stitch size. Domestic knitting machines are a wonderful tool to create an immense range of fabrics, from thick and heavy to light and airy. Really understanding the properties of the yarns and using them with different techniques can greatly increase the number of fabrics achievable. Simple and basic machine-knitting techniques can be used to create much more interesting fabrics than they were originally designed for. Experimenting with multiple yarns using a single technique can produce many different results and exciting outcomes and is the best way to learn. Do not be afraid to make mistakes: often that is where you learn, and happy accidents can lead you down unforeseen paths, which makes the whole design process more interesting and fun!
YARN CATEGORIES
When experimenting with samples I combine yarns that have opposing characteristics. Sometimes the simplest of techniques will give completely different results just by changing one yarn.
Thick yarns with thin yarns: Changing between a 4-ply and a 1-ply yarn and large to small stitch sizes will give subtle textural effects. Combining sequences of different numbers of rows and different stitch sizes will distort the fabric in various places.
Samples that are knitted with a variety of different yarns in several stripe patterns create subtle textures in the fabrics.
Stretch with non-stretch: Mixing in an elastic will immediately draw in certain parts of the fabric, enhancing the areas knit with the contrast yarn; this will create more dramatic changes in texture and form.
Textured yarns with smooth yarns: Not all textures need to be huge – beautiful, subtle fabrics can be achieved by alternating between a mohair and a silk or a wool and a bamboo.
Wool versus cotton: Working with wools that felt and yarns that do not can produce some surprising results. Combining these yarns with other techniques adds another dimension.
Shiny yarns with matte yarns: Areas of high shine combined with different stitch sizes can enhance the textures you have created by drawing the eye in.
Traditional yarns versus specialised yarns: Wools, cottons, silks and mohairs can be combined with specialised yarns such as scientific wire, thermosetting yarns, or reflective yarns to help with the structure of the piece.
Combinations: Adding two yarns into the carriage and knitting them together will give marled effects. By using two yarns together and separately you can build a more complex and interesting fabric easily. You can try adding in other yarns to give more structure or body. Nylon monofilament works well to define the stitches, giving stability and body to a yarn, all whilst sitting in the back of the fabric.
WORKING WITH NEW YARNS
When working with a yarn for the first time, especially a more unusual one such as elastic or nylon monofilament, knit slowly and steadily to get a feel for how it knits; check the cone and tension mast frequently as this is often where problems can occur. Make sure to try different tensions – starting off on a higher number tension (looser) is sensible, and then work back down to find where the machine is happy; with time you will work more quickly and with more confidence. Once you have experimented a little you will begin to understand a yarn’s properties, and will be able to ask yourself questions about its suitability for the technique you are trying to use. Does the fibre have a memory and hold its shape? Does it work better with some techniques rather than others? Does it stretch and distort? Will it give you the effect you are looking for? Spending time knitting and analysing certain yarns will help immensely in the design process.
STRIPES
Designing with stripes is often only thought about in terms of colour, and is one of the simplest, most used techniques in design. It is one of the first things taught when embarking on machine knitting, but people often underestimate the simple stripe and forget that designing stripes does not just need to be about colour. Stripes can be used to create texture with significant effect, even when using just one yarn. Knitting stripes with different combinations of yarn is a fantastic way to experiment and learn about the effects of several types of yarn quickly. It is possible to create modern and unusual textured fabrics, using this most basic of techniques. The finished fabrics will have a rippling edge that could be incorporated into the design.
Wool and elastic knitted in a simple stripe repeat creates graphic impactful texture.
There are no rules when combining yarns: use as many different types of yarn as you like in a piece. The only thing you need to bear in mind is that when combining yarns together in the carriage you need to alter the tension: the more you have and the thicker your combined yarns are, the greater the number needs to be. Simply changing the tension for a few rows will give definition and texture to a piece. It is also possible to knit with several yarns in the carriage, to create much thicker stitches, and using different properties of yarns will give marl effects.
If you want to create complex stripe patterns with many different yarns, instead of re-threading the tension unit every time you change yarns, have your two most used yarns threaded up through the machine and then the rest of the cones in front of the machine at your feet. Then manually tension them through the carriage to save time. You can mix yarns that are tensioned through the tension mast in the carriage at the same time as the cones are manually tensioned on the floor.
Designing Stripes
There is a great deal of freedom when playing with stripes: they can be of the same size, have repeats or different proportions, and because it is such a basic technique it can be built upon and expanded very easily. Stripes do not have to be a uniform pattern: ombre effects with small stripes gradually getting larger with thinner to thicker yarns, or completely random numbers of rows with different yarns can yield organic and abstract results.
The wonderful thing about creating pieces on a domestic knitting machine is that you can see the fabric as it is developing and easily note down what you have done. Try sequences of four and eight rows, but then add a section with two rows, eight rows, four rows and eight rows. Change your tension according to the yarn you are using. What happens if you knit some yarns on a tighter tension and some on a looser tension? It is worth remembering that it is easier to work in rows of multiples of two, to avoid long floats across the work, but also if you like the look of that, then incorporate it into the design. If you are not sure where to begin, find some inspiration images of stripes that you like and try mimicking the proportions in your piece.
Several samples using a variety of different thickness of yarns, with organic and ordered stripes. Different stitch sizes enhance the texture.
Scale and proportion are also important to think about: try varying the sizes of the stripes together and see how they behave – could there be areas of densely knitted thinner stripes mixed with thicker, larger bands? The use of larger width stripes can be used to define areas or highlight a specific yarn more. There is no limit to the length of a stripe – it can be taken to the extreme with hundreds of rows, or be as little as a single row. Swapping the yarns around in a piece can also work well, and you could create several repeats of stripes that all work layered together.
Yarn choice will greatly affect the outcome of a technique. Mixing in a mohair and brushing it can soften and blur edges, elastics can create wobbly edges and draw the fabric in, transparent yarns will give clean edges, and wire will allow you to mould and manipulate the piece after it is knitted. You don’t need to create thick, heavy pieces to have a textural sculptural piece: light yarns such as mohair, silk and bamboo can produce wonderfully light pieces that can be manipulated in unusual ways to show off the texture. Mixing in nylon monofilament can add stitch definition, stability and body to a yarn, all whilst being in the back of the fabric.
Mohair combined with scientific wire allows the knit to be pleated when taken off the machine and creates an interesting contrast in hard and soft.
Anything that gathers or works in opposition to elastics can create volume that keeps its shape nicely. Using two different yarns in the carriage at the same time will create a marled self-stripe, which will sometimes knit one yarn in the front and then flip it to the back. It can look beautiful when switching between four different yarns of different textures and yarn counts, some becoming more prominent than others or highlighting a certain texture more. Working in one colour at first can simplify the process if you have not chosen a colour scheme, and will give you a strong grounding in the texture of a piece. Once you have a fabric you like, try adding in assorted colours and you can enhance the depth of a piece even further.
THICKER YARNS
Using thicker yarns, or even several yarns all together, can create dense texture easily. You can run more yarns through the carriage by using fewer needles in action. By transferring stitches and taking needles out of action to a 1×1, 2×1 or even 3×1 format, you can use several yarns at once through the carriage without it jamming. Essentially you are knitting a laddered fabric with floats across, but once the piece is removed from the machine and treated, the floats will draw in and become invisible, giving big stitches and texture. These fabrics tend to have less stretch but they allow you to work with some yarns that ordinarily would not run through the machine.
Sample using several ends of mohair at once to create dense stripes in contrast with the stripes knitted with a single end of yarn. The areas with more than one yarn have a pleasing mottled effect.
STEP-BY-STEP: KNITTING WITH THICKER YARNS
Step 1: If using thicker yarns at the bottom of the piece select your needle layout (1×1, 2×1, 3×1 – whichever is appropriate for the yarn or yarn combination you are using) and cast on with an e-wrap, floating across the gaps. Knit the first few rows slowly and carefully before getting a comb and weight on.
Step 2: If adding yarns in the middle of a piece, take a transfer tool and transfer the appropriate stitches to adjacent needles. Alternatively, if you have a lace carriage, push forwards the needles you wish to transfer to D position (or C position on some models) using a needle pusher, and knit one row with the lace carriage, transferring the stitches quickly and easily. Release the lace carriage with the release button and place back on the left-hand side rail.
Step 3: Push the empty needles back to A position (out of action) so that they do not knit. Pull all the needles with the transferred stitches all the way forwards, and make sure you change your tension dial to the maximum number. Remember that if going from a much lower stitch size to a higher stitch size, or a thinner yarn to a thicker one, pull forwards all the needles to E position to help the carriage form the stitches properly on the needles.
Step 4: If changing to a thinner yarn and a closer knit, bring the needles back into action by pulling them all the way forwards and in two rows a lace hole will have formed. When the piece is taken off the machine these will become slightly less obvious, especially if using a thicker, fluffier yarn.
Step 5: If using the lace carriage to transfer more than one stitch, start with Step 2. Then push the empty needles out of action, and put the needles that you want to transfer forwards to the D position and the remaining needles in B position. Knit one row from right to left and the transfers will be complete.
Sample with several types of thick and thin yarn in an unplanned stripe pattern; the changes in gauge alter the sides of the fabric, and each yarn adds a different surface.
3D STRIPES
Using one type of yarn but multiple ends for some rows and not others will draw in the fabric, creating ridges. Wools work particularly well with this technique as they have good memory. You can either have several cones of the same or similar yarn, or use a cone winder to give you several cakes of yarn. The bigger the contrast in stitch sizes and yarn thicknesses, the deeper the grooves in the knit. Adding in different types of yarn can affect things even more and can build some tactile sculptural fabrics.
Samples with yarns striped with and without elastic to produce three-dimensional textures on both sides of the fabrics. The terracotta stripe in the middle was knitted in three sections that were attached together on the machine.
STEP BY STEP: KNITTING WITH ONE YARN TO CREATE 3D STRIPES
Step 1: Using several ends of the same yarn, make the stitch size a little tighter and knit a few rows. Experiment with how small the stitch size can be. You still want to be able to knit across easily to avoid breaking the machine or bending needles.
Step 2: Change to one end of yarn and change the tension dial to 10 and knit a few rows. Keep alternating between the two to make a 3D fabric.
Step 3: Always remember to pull forwards all the needles when going from a small stitch size to a large one. It is harder for the carriage to push the needles out through the stitches than to pull them in, so by doing this we help the carriage run more smoothly.
Three-dimensional stripe sample experimenting with single and several ends of the same yarn and elastic using different tensions, creating rolling shapes over the fabric.
Once you have some stripes you like, think about using them in different orientations on the body: they could be vertical, diagonal, or even have pieces linked together in different directions. Orientation can dramatically change how the fabric looks and behaves. Also consider that a piece of clothing or textile does not need to be completely covered in stripes or pattern – it could be utilised in defined areas to emphasise shape or silhouette. Contrast them against areas of plain or different patterned knit to see how they react against one another.
As you progress with machine knitting and designing you can also think about stripes in terms of combining multiple techniques. The other techniques in this book can be applied to these stripes to distort and expand them further. For instance, knitting stripes in alternating textured yarns, then a stripe of punchcard, followed by a stripe of manually tucked stitches, repeated over and over will create complex-looking fabrics that will have texture as well as a 3D sculptural element. Perhaps the stripes become the backing for some weaving, or have lace holes and ladders knitted in, to be threaded up and manipulated afterwards. The interaction between different stitches and yarns will create unforeseen textures, which is what makes experimenting so exciting.
THE TEXTURAL DESIGN PROCESS
When designing textural fabrics, it can be helpful to have some inspiring images or subjects to work from. Having a starting point or inspiration will give direction, and help you to make choices about the yarns and techniques to use. Collecting and using imagery of textures in a sketchbook is a great place to start, whether that is in nature or architecture, or even in your own drawings and observations.
Sketchbook with drawings and observations used as reference points for techniques.
Finding inspiration to draw and work from can spark ideas in terms of which yarns to choose, which colours, techniques and scale, and the purpose of the fabric and the forms themselves. Wherever you find it, think about yarns that represent the same qualities you are looking at, and begin sampling from there. Think about the properties of the texture you are trying to achieve. Is it soft mixed with hard, is it in a ruffled texture, bobbled with areas of smooth, what shape is it? Does it have a uniform symmetrical pattern, or is it more haphazard and irregular? How does it move, how was it made, how does it feel, where does it come from? What is the scale and proportion? And then apply those answers to your design process.
Inspiration
For instance, if jellyfish are used as an initial starting point observe their characteristics: they fold up in on themselves, and are a mixture of transparent and densely textured areas; they sort of bounce and float; they have bulbous areas and long, textured tentacles. They have soft colours and light floaty ruffles. These characteristics, alongside drawings, mark making and observations, would influence my yarn choices and techniques. I would choose techniques that fold the fabric, use transparent yarns, and create densely textured areas, and perhaps add a stretch yarn to give a bounce when the fabric moves. By observing and closely examining your source material you can begin to make decisions with the fabrics you create, and then develop your ideas from there. Try mimicking these textures with different techniques and use the resulting samples to develop your design, by changing single elements one at a time. It is with experimentation and play, and often by making mistakes, that some of the best ideas can be developed – plus it is fun!
When designing, I try all sorts of techniques before finding one that I think is really successful or that inspires me. Then I will delve into that particular swatch, trying different variations of yarn, adjusting the scale, using different needle layouts, until I exhaust every possibility and find a swatch I love. Often there are surprises that I would not have thought of, and that is one of the reasons I love machine knitting. Experimenting this way will help you to truly understand what the machine is doing, and will in turn enable you to design more complex pieces. It is important just to give it a go – sometimes the most unlikely pairings give the best results. The easiest way to know if two yarns will work together, or which yarn to choose, is by trying them out. And with time and experience you will gain confidence and knowledge of how yarns will behave, and will get faster at time-consuming methods. I usually play around with the swatches on the stand and body as this often informs and inspires more ideas, and I learn about how the fabric will behave in the process.
Draping


