Erhalten Sie Zugang zu diesem und mehr als 300000 Büchern ab EUR 5,99 monatlich.
- Herausgeber: The Crowood Press
- Kategorie: Lebensstil
- Sprache: Englisch
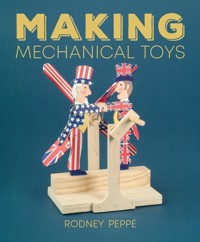
Mechanical toys transcend categories of age with their universal appeal. Whether the mechanism is hidden or revealed, simple or complex, the cycle of movement allows you to simply turn a handle and see the magic work before your eyes. Making Mechanical Toys explains how to make these wonderful and fascinating toys through a variety of bright and exciting projects. The well-known 'Kim' game can be played with the Jungle Box where the animals appear one by one. In MIAOW! the cat never quite catches the mouse who is after the cheese. Detailed descriptions and photographs also bring to life dancing ladies, drummers, bobbing boats and a snappy little alligator clothes-peg toy in this delightful and lavish book.
Sie lesen das E-Book in den Legimi-Apps auf:
Seitenzahl: 193
Veröffentlichungsjahr: 2025
Das E-Book (TTS) können Sie hören im Abo „Legimi Premium” in Legimi-Apps auf:
Ähnliche


For Tatjana, my wife
This is a book of ideas and whenever it inspires other ideas it will have value’ Roger Hill and Orson Welles, Everybody’s Shakespeare (Todd Press, 1934)
First published in 2005 by The Crowood Press Ltd
Ramsbury, Marlborough, Wiltshire SN8 2HR
www.crowood.com
Paperback edition 2025
© Rodney Peppé 2005
All rights reserved. No part of this publication may be reproduced or transmitted in any form or by any means, electronic or mechanical, including photocopy, recording, or any information storage and retrieval system, without permission in writing from the publishers.
British Library Cataloguing-in-Publication Data
A catalogue record for this book is available from the British Library.
ISBN 978 0 7198 4546 8
The right of Rodney Peppé to be identified as author of this work has been asserted by him in accordance with the Copyright, Designs and Patents Act 1988.
About the author
Rodney Peppé trained as a wood engraver at the Central School of Art before spending five years in advertising. As a freelance graphic designer he published his first children’s book in 1968, The Alphabet Book. Since then more than eighty books and two TV series, Huxley Pig (ITV) and Angelmouse (BBC), have followed. Rodney Peppe’s Moving Toys was published in 1980 and this, together with his friendship with the legendary artist-craftsman Sam Smith, led to toymaking. He was a winner of the British Toymakers’ Guild ‘Toymaker of the Year Award,’ the Charles Bolton Cup. He has had one-man shows at the V&A Museum of Childhood, The National Theatre and the Holburne Museum, Bath. In 1995 his work toured the British Isles for eighteen months. His automata and mechanical toys are now held in collections around the world. Automata and Mechanical Toys was
CONTENTS
Preface
Introduction
How to Use this Book
Chapter 1 Nodding Acquaintances
Chapter 2 Clothes-Peg Alligator
Chapter 3 American Sailboat
Chapter 4 Drummer
Chapter 5 A Different Drummer
Chapter 6 Kinetic Crystals
Chapter 7 Love Doves
Chapter 8 Elephant Messenger
Chapter 9 Ark Toy
Chapter 10 Dancing Charlie
Chapter 11 Hooray for Hollywood!
Chapter 12 Mouse in a Spin
Chapter 13 MIAOW!
Chapter 14 Boat and Three Fish
Chapter 15 The Bluebelles
Chapter 16 Two-Headed Strongman
Chapter 17 Jungle Box
Bibliography
Conversion Table
Index
To download the templates used in this book please click here
https://mega.nz/folder/Yo0Unaqa#Y7-Pveh8kVO74OfLoByJdQ
PREFACE
By definition, toys are for children; but they can also be for adults – certainly, mechanical toys have a universal appeal which transcends categories of age. The fascination lies in simple automated movement, whether the mechanism is hidden or revealed. One has only to visit an automata and mechanical toys exhibition to realize the truth of this. It is a different attraction to the one that exists for dolls and model cars which imitate life in their scaled-down forms, reflecting surrogate relationships for real life counterparts. The cycle of movement, however simple, in a mechanical toy allows us to control the motive magic by just turning a crank handle. We are our own magicians and therein lies the fascination.
Rodney Peppé’s ‘The Twelve Days of Christmas’ 838 × 432 × 57mm (33 × 16.96 × 2.25in). Three of the mechanical toys in this book are based on this piece: these are ‘Love Birds’; ‘The Bluebelles’; and ‘Drummer’.
The main differences distinguishing automata from mechanical toys are the running time and number of cams: to put it in a nutshell, automata are devised to execute a series of complicated movements within a time span. The duration and complexity of the cycle distinguishes them from the simpler mechanical toys. Although toys such as those described in this book are widely referred to as automata they are, by the foregoing definition, mechanical toys. The mechanisms of these toys are comparatively simple and they are quite happy to be designated thus.
Makers spend many hours designing and building mechanical toys, many of which are one-offs. It is not surprising then that they become, in the main, gallery toys for collectors and so could be termed elite toys for elitists. In this book I want to remove the ‘elite’ label and make mechanical toys available to everyone, including children who cannot afford to buy such pieces shown in exhibitions. By looking at the plans and photographs and reading the instructions any of the toys in this book can be reproduced to perform as described and give pleasure to both the maker and recipient.
However, I would not wish to give free licence to cottage industrial toymakers to sell these pieces on the open mar-ket. That is certainly not my intention. My granddaughter, on learning that I was doing this book, asked her parents why Grandpa was giving away his designs? A perspicacious question from a bright seven-year-old but I would rather admit to sharing than to giving away my designs. After all, sharing my work with a wider audience is a concept I’m comfortable and familiar with, since I share my stories and illustrations from my children’s books and TV series.
Some automatists and makers of mechanical toys transpose their three-dimensional work into paper or wooden kits. There are a number of excellent examples on the market. In this way these designers have devised a way of making their work more accessible to a wider public. They, too, are sharing their work, giving opportunities to budding automatists to build mechanical toys. Just as I would not expect to buy one of their made-up kits as their original work, I would not expect to find my creations in this book passed off as either my original work or that of the reader. It’s a question of trust between author and reader.
More than twenty years ago, I published a book, now out of print, Rodney Peppé’s Moving Toys. Over that period I have had an intermittent correspondence with readers who have made toys from plans and photographs in the book and sent photographs of their versions. One reader, I remember, sent miniaturized copies of the moving toys which did him credit and pleased me as the unwitting instigator of his project. More sadly, I received letters from a reader in France suffering from a chronic illness. The book had lifted his spirits in the face of adversity, which was gratifying to me. So there are advantages in sharing one’s work, although still I wince if I see it, albeit in surrogate form, optimistically priced on market stalls.
Making Mechanical Toys is a book for anyone wishing to make a special toy for a special person. The ‘hearts and flowers’ element is catered for in several pieces which would make beautiful Valentine’s Day presents. These are ‘Love Birds’, which are based on a section in my ‘Twelve Days of Christmas’ (see illustration opposite); the ‘Elephant Messenger’, who flies above the clouds holding a Valentine’s card in his trunk; ‘Two-headed Strongman’, a surrealist idea based on a painting by Magritte; and ‘Dancing Charlie’, who carries a bouquet for his beloved. There is also an exciting ‘Kim’ game to be played with ‘Jungle Box’, where the animals appear one by one in the jungle. And there’s lots of fun to be had with the cat-and-mouse piece, ‘MIAOW!’, where the cat never quite catches the mouse who is after the cheese. Dancing ladies, ‘Different Drummers’, bobbing boats and a snappy little alligator clothes-peg toy jostle for attention in what proposes itself to be an unequalled opportunity to make mechanical toys.
All the toys were made especially for this book, one after the other, without a break. The plans were drawn concurrently with each toy so there is a visible homogeneity about the pieces without them falling into a particular signature style. They are original designs which have not, with one exception, been sold elsewhere. The exception is the ‘Ele-phant Messenger’, a version of which was sold with five other of my pieces to the Arima Toys and Automata Museum in Kobe, Japan. The themes and influences that overlie the designs are to be found in the areas of graphic design and children’s books; not unnaturally, since these are domains in which I have been active over the years.
A bit of helpful advice might be to tackle the pieces in sustained periods, when you can concentrate, following the plans step-by-step, rather than letting long periods elapse before you return to the project in hand. Remember, as Lloyd-George once said: ‘You can’t cross a chasm in two small steps.’
Happy landings!
INTRODUCTION
This book is a companion to Automata and Mechanical Toys (The Crowood Press, 2002) which features modern makers and describes, with plans and photographs, how to make the main mechanisms to be found in automata. It seemed to be a natural step to follow this up with a book giving examples of mechanical toys and instructions on how to make them. The books complement one another and for those readers who made some of the mechanisms from the first book, the second goes the extra mile by offering seventeen toymaking projects for readers to sink their teeth into. Dental bridgework not withstanding, my sincere hope is that both old and new readers will derive as much pleasure from making the toys as I had in designing and constructing them.
No account of mechanical toys would be complete without mentioning the renowned Cabaret Mechanical Theatre and its artists under the auspices of Sue Jackson, its founder and her daughter, Sarah Alexander. Leading automatists Paul Spooner, Peter Markey, Ron Fuller and Keith Newstead have, with their own individual styles, lit creative beacons over the years which still burn brightly today for others to follow. From a different direction comes Frank Nelson, who is probably the closest link to the classic French automatists of the nineteenth century. Other luminaries in the field such as Tony Mann, Bob Race, Tim Hunkin, Andy Hazell and Jan Zalud have, among others too numerous to mention, left indelible traces of their talent in this magical area of toymaking which is becoming ever more widely known and popular.
Both as a creative source and an outlet for mechanical toymakers, Ian McKay and Fleur Hitchcock provided a selling venue for years at Hitchcocks’ in Bath. They have put this on hold while bringing up a young family, but continue to sell from their Barn at Limpley Stoke, Bath, and run Mechanical Toymaking courses with the occasional exhibition. Other automata and toymaking courses are run at Timberkits ‘Machinations’ in Powys, mid-Wales by Eric and Alison Williamson. In London, ‘Automatamania’, run by Michael and Maria Start in Gray’s Antique Market, by the Bond Street Tube, is well worth a visit.
One figure whose influence on modern automata and mechanical toys spreads like a mantle over a quarter of a century is the artist-craftsman Sam Smith (1908–83). Many modern makers acknowledge Smith as their hero even though he himself was not actually an automatist (beyond making very special jumping jacks). He is often referred to as the father of modern automata, inspiring other makers with his artistry, creativity and superb craftsmanship, both as a carver and painter.
He was also the most generous of men, encouraging makers Peter Markey and Frank Nelson whom he admired. They in their turn inspired others and so the wheel goes round. Another strong influence is Alexander Calder (1898–1976), famed internationally for his large mobiles. He produced, over the years, a cork-and-wire circus (with himself as self-appointed ringmaster) which eventually filled five suitcases. Douglas Wilson, who works in wire, acknowledges Calder’s influence together with that of the wire toys made by children in many African countries.
There is little that connects the automata and mechanical toys of today to those of the past. Yet somehow their provenance in the late nineteenth century is important if only to realize that their exclusivity was very similar to that which obtains today. They were adult toys, not for the nursery, though they were placed in children’s sections in exhibitions. Automata became more and more sophisticated and increasingly lifelike, inevitably pricing themselves out of the market. Perhaps too much realism cheated the imagination, for mechanical toys with simpler mechanisms and less stories to tell, so to speak, flourished. They survived social pressures, changing fashions and unpredictable market trends.
If modern gallery mechanical toys have little to do with late nineteenth-century toys they have even less connection to the jumping pigs, barking dogs, twirling pussycats and somersaulting rodents we see today in department stores and toyshops. Their mechanisms are extremely ingenious and far beyond the scope of gallery toys. Much closer forebears are the cheap wooden toys of the 1820s sold in a shop in London called Edlin’s Rational Repository of Amusement and Instruction. These were simple little movable toys made of wood and cloth with very basic mechanisms (no more than a cam, a bit of wire and some leather) depicting household activities such as spinning, snuff taking and the like.
While automata in the late nineteenth century became increasingly sophisticated and lifelike, pricing themselves out of the market, mechanical toys like these illustrated here survived social pressures, fashions and unpredictable market trends.
The main difference is that whereas those old toys were carved and crudely clothed, the mechanical toys found in galleries and shops today have fairly flat wooden components painted or left bare. It’s true that the old toys would not have sported anything as advanced as a Geneva wheel in its workings for example, so our mechanical toys – the gallery variety – are perhaps a little more advanced, but not much.
Having settled into a new century in a world where international telecommunications are instantaneous and global travel is undertaken in hours, we must ask ourselves if the making of simple mechanical toys, without using modern technology, is at all relevant. A robot, fed on a diet of chips, is in a far better position to perform motive marvels than is our mechanical toy. It is, of course, precisely that lack of technology in the face of cold electronic efficiency, which appeals to the champions of the modern mechanical toy.
Who are these champions? They are the makers who, as artists, merely want to make their art move a little. They are the collectors who, in a financially anaemic field, see antiques of the future. They are the schoolchildren who undertake design and technology activities through the National Curriculum. They are the students who want to follow in the footsteps of Cabaret Mechanical Theatre. They are those who, having once been children themselves, have retained a child’s fascination for simple, ingenious movement. And they are those who make time to take a break from the rapidity of everyday modern living and enjoy the simple quirkiness and wit of a mechanical toy.
HOW TO USE THIS BOOK
The first step when making any toy will be to check that you have the materials required. Measurements are given slightly oversized on the materials panels to allow for handling dowels and cutting panels. If you cannot obtain the materials stipulated, others can easily be substituted. Say, for example, that stripwood is suggested but it is not available to you, then exchange it for plywood of the same measurements. If the thickness is not quite correct, make adjustments; but ensure that any alterations made are compatible with the specifications of the other materials.
It is essential that you read the instructions together with the plans. When the instructions tell you to cut from plywood, the actual thickness is given to you in millimetres on the plans. This relieves the instructions of too many measurements except for the widths of drilled holes, which are shown visually on the plans.
The term ‘temporarily bonded’ is frequently used and means that two pieces of plywood have been fastened together with sticky tape or dabs of glue which can later be removed. This may be useful, for example, when you wish to drill two side panels together to make an accurate bearing for a crankshaft.
When multiple pieces are cut, whether together or not, they are denoted by an ‘ × ’ on the plans preceding the quantity to show the number of pieces to cut.
Once a plan number has been given within the instructions, it is not referred to again until a different plan is required. Thus items to be cut out are all on one plan, unless another plan number is mentioned.
GENERAL NOTES
Transferring designs from this book is mainly done by using photocopies spray-glued to plywood and then cut out as instructed. Use only the minimum amount of glue, as the photocopies are to be peeled off once the designs have been cut out. If they are difficult to remove, white spirit or lighter fuel can be used to loosen them, but take care not to rub the design while wet.
Three of the toys have designs which are copied (two in colour) and retained as the surface design spray-glued to plywood. In these cases, of course, the bonding must be permanent and both surfaces, the back of the print and plywood, should be spray-glued, bonded together and firmly burnished down.
There are instances when you will need to transfer the design by hand. Trace the design onto tracing paper with an HB pencil. Offset the tracing by burnishing it onto another piece of tracing paper and burnish this down onto the wood. The image is not then reversed.
Shaft bearings are shown 1mm (0.04in) wider than the shaft’s diameter, to allow for shrinkage after painting. Although a 6mm diameter dowel shaft will turn adequately in a 6.5mm bearing, this will become too tight after painting.
When fixing cams to shafts, initially they should be friction fitted by using a bearing with the same diameter as the shaft itself. The cams are tight enough to be tested and repositioned but would, in time, become loose on the shaft. When the piece is finally assembled, either glue the area the cam is going to cover, or superglue all around the edge of the cams where they touch the shaft.
Scoring plywood with a craft knife when cutting straight lines provides a guide channel for the scroll saw or fret saw to follow.
Panels should be cut at least 5mm (0.20in) larger than the measurements specified to allow the photocopy to be applied to the plywood and cut out. Use a jigsaw to cut them out roughly.
Drilling collets is made easier if you make a slight central hole with a bradawl for the drill bit to find and settle into. Grip the collet with pliers or a mole wrench to prevent it spinning round in your fingers.
If dowels are to be thinned, use a craft knife to scrape away the excess before sanding.
TOOLS
It is assumed that the reader has a basic set of tools, including a powered scroll saw or fretsaw for making small tightly curved cuts in wood up to 19mm (0.75in) thick. You will also require a jigsaw for cutting out plywood which is too long for the throats of the other saws.
Other tools which you may find useful are listed below:
• A mitre box is a hand-operated metallic device which guides the saw in cutting accurate mitre and right-angle joints. A mitre saw is recommended for the best results where the saw is integrated with the box.
• A power belt sander is ideal for making boxes and squaring-off edges before manually sanding or chamfering them off. It runs a continuous belt around two rollers. Be very careful to keep fingers away from the metal parts where the belt runs through.
• A sanding disc is an attachment for a power drill, made of rubber with a steel shank. It will leave cross-grain scratches but reduces wood quickly. It is much cheaper than a belt sander and good for filing off panel pins on pin wheels.
• A pin hammer is useful for tapping in panel pins and dowel into plywood or stripwood.
• Snipe-nosed pliers are useful for gripping small objects in confined spaces.
• Diagonal wire cutters will be needed for cutting wire close to the surface.
• Mole grips (or wrenches) are ideal for a wide variety of workbench eventualities, ranging from removing stubborn dowels from cranks to gripping collets to prevent them from spinning when drilled.
The following types of knives may be useful:
• A surgeon’s scalpel with a variety of blades (especially No. 11) is very good for light duty, very precise, cutting.
• A trimming or craft knife has disposable blades which can be stored in its housing. A retractable blade has a safety advantage.
• A putty knife is an invaluable tool for prizing apart temporarily bonded pieces of plywood if glued in spot areas. (Otherwise, tape is used for bonding.) A spatula will do the same job.
• Awls and bradawls are used for making starter holes for screws and nails in wood. Always twist them into wood and take care not to press too hard or the wood will split.
MATERIALS
The main materials required for making each toy are listed at the beginning of each chapter. The basic materials used to construct the toys described in this book are plywood, Aeroply, battening (PSE), stripwood, softwood and dowel. Additional materials, such as pop rivets and piano wire, will also be required for some toys.
Birch ply is the best plywood. Check the edges of ply board for gaps that have been filled but, nevertheless, run right through the board. When buying battening (PSE), or any softwood, watch out for splits and knots. Although these are often found in deal, it is otherwise a very nice wood to work with. Stripwood is made from hardwood, as are dowels. Birch dowels are best for rods and shafts as they don’t bend. Try to buy dowels in batches as they can vary in diameter from batch to batch.
PRIMING AND PAINTING
All the toys in this book were painted with acrylic craft colours with a primer of matt white vinyl emulsion. If you want to use casein emulsion paints such as Plaka colour, use ordinary matt white emulsion as a primer. A primer not only seals the surface of the wood, it gives subsequent coats of paint a lustrous base to enhance them. The colours are waterproof when dry.
Two or three coats of paint should be applied, as required, on top of the primer. Sand down lightly between coats. Varnishing and lacquering are not necessary for acrylic colours which have a built-in protective finish with a slight sheen. However, Plaka colours do need such protection to enhance their velvety-matt surfaces. Remember that colours darken with varnishing or lacquering.
Stencilling will be necessary when making one or two of the pieces featured in this book. The first step is to take a photocopy of the design and spray-glue the back so that it can be attached to a blank sheet of paper. Cut out the stencil from the reinforced paper print. Lightly coat the back of the stencil with spray glue and lay it gently on the surface to be stencilled. With a stencil brush or short-haired stiff-bristled brush dab paint into the stencil. One or two more coats will probably be needed to achieve full opacity. When the design has been successfully applied to the piece, carefully remove the stencil.


