18,49 €
Mehr erfahren.
- Herausgeber: Crowood
- Kategorie: Lebensstil
- Sprache: Englisch
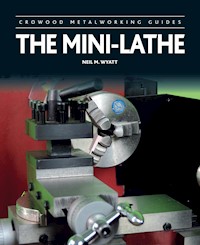
The mini-lathe is a useful tool in the model engineer's workshop. With more choice than ever of more compact machines, a mini-lathe is able to accommodate a wide range of engineering requirements, projects and techniques, as well as being suitable for the novice engineer and for those with limited workshop space. Author and model engineer Neil Wyatt provides a practical guide to purchasing and using a mini-lathe, as well as examining more advanced techniques. The book includes a projects section to show the application of mini-lathe techniques. Topics covered include: choosing a mini-lathe; workshop safety and setting up the lathe; basic through to more advanced machining skills; modifications, additions and tuning of the mini-lathe. This essential reference source is aimed at the novice engineer, home metalworkers and for those with limited workshop space. Fully illustrated with 304 colour photographs.
Das E-Book können Sie in Legimi-Apps oder einer beliebigen App lesen, die das folgende Format unterstützen:
Veröffentlichungsjahr: 2016
Ähnliche


CROWOOD METALWORKING GUIDES
THE MINI-LATHE
NEIL M. WYATT
First published in 2016 by The Crowood Press Ltd Ramsbury, Marlborough Wiltshire SN8 2HR
www.crowood.com
This e-book published 2016
© The Crowood Press 2016
All rights reserved. No part of this publication may be reproduced or transmitted in any form or by any means, electronic or mechanical, including photocopy, recording, or any information storage and retrieval system, without permission in writing from the publishers.
British Library Cataloguing-in-Publication Data A catalogue record for this book is available from the British Library.
ISBN 978 1 78500 129 1
Contents
1 Why a Mini-Lathe?
2 Safety
3 What is a Mini-Lathe?
4 Choosing a Mini-Lathe
5 Getting to Know the Lathe
6 Setting up the Lathe
7 Work Holding
8 Lathe Tools
9 Basic Turning
10 More Advanced Lathework
11 Making Holes
12 Screwcutting
13 Milling in the Lathe
14 Modifications and Accessories for your Mini-Lathe
15 Projects
16 Where Next?
Further Information
Index
1 Why a Mini-Lathe?
Ask a dozen model engineers ‘what is the best lathe for me?’ and you will get two dozen answers! One of the finest writers on the hobby, Edgar Westbury (E.T.W.), said: ‘The so-called “ideal lathe” is in practice a romantic myth.’ He had the perception to realize we all have different needs and the best lathe for each of us will always be a compromise. Mini-lathes provide capacity, capability and many useful features at an affordable price. They may not be ‘ideal’ for everyone but they have proven the best route into hobby engineering for tens or hundreds of thousands.
Most modern books on small lathes have been written by authors more familiar with larger machines or ‘classic’ older lathes. Inevitably, their experience with larger machines colours their approach to these machines.
My own lathe, in regular use for the past sixteen years, is a Clarke CL300M mini-lathe (Fig. 1.1). This is one of the main machines featured in this book. In using the machine I have been pleasantly surprised – while some aspects of the lathe are made to keep costs down, it is rigid, accurate and reliable.
Fig. 1.1 The author’s Clarke CL300M mini-lathe in more or less original condition.
This book deals with what I have discovered during those sixteen years of use, from choosing a lathe, basic safety and setting it up properly, through a range of basic turning skills, to tackling some more challenging machining operations and making useful accessories. I can’t guarantee every single point I cover will apply to every variant of mini-lathe but, by the same token, many of the general principles will apply to any lathe of similar size.
I have made numerous modifications and additions to my machine; some of these are ‘standard’ upgrades, others are of my own devising. Be assured that none of them are essential to using a mini-lathe but also recognize the basic machine has plenty of scope for modification and tuning if you are, like me, a ‘tweaker’.
This book gives most dimensions in metric and imperial units. These are not intended to be exact equivalents, especially where a dimension is given as a guide. For example, a thousandth of an inch is exactly 0.0254mm but I may well write something such as ‘about 0.02mm (0.001in)’.
I would like to thank the many fellow mini-lathe users who both knowingly and unwittingly have helped me over the years with advice, ideas and guidance. In particular, the writings and ideas of Alastair Sinclair and Mike Cox have been a source of ideas and inspiration. They say there are no new ideas in engineering and I apologize if I have unintentionally copied anyone without giving due credit.
I would like to thank Arc Euro Trade, Axminster Tools & Machinery, Chester Machine Tools, Eccentric Engineering, Machine Mart and Warco for permission to use photographs of their machines, as well as SIEG for permission to use extracts from its user manual.
Finally, for a book like this I also needed access to an unmodified machine and various accessories to demonstrate certain points. I would like to thank Ketan Swali of Arc Euro Trade for the opportunity to use its studio to photograph a new, unmodified SIEG mini-lathe and also for his advice on the various subtleties and technical aspects of these worthy machines.
2 Safety
Some readers will groan at this point but, unless one has seen the aftermath of an industrial accident, is easy to be blasé about the risks associated with machine tools.
Lathes are one of the slower and quieter tools so it is easy to get complacent about the risks they pose. However, complacency is a cause of accidents. Even a mini-lathe is capable of causing serious injury from sharp tools, flying swarf (debris) and collisions or entanglement with moving parts. Don’t panic, though. Lathe safety mostly means using your common sense and keeping the working area clean and tidy. Here are some pointers towards the safe use of any workshop lathe but, remember, safety is your responsibility and if you are not sure – ask!
Emergency Stop
Make sure you are familiar with the emergency stop button. It does no harm to use this to stop the lathe in day-to-day operations and the more familiar you are with using it, the faster you will be able to hit it in an emergency (Fig. 2.1).
Fig. 2.1 If things start to go wrong, hit the emergency stop.
Protective Equipment
Unlike many machine tools, lathes do not demand a lot in the way of personal protective equipment. The HSE recommends eye protection is worn when using a lathe and if cutting something such as brass, which can send a vertical shower of small chips into the air, full eye protection is essential (Fig. 2.2). For most turning, many people find a pair of safety spectacles are sufficient but bear in mind that flying swarf is not the only risk – it is possible for loose work pieces to fly out of the chuck at high speed.
Fig. 2.2 A pair of safety googles is an excellent investment.
Electricity
As with any electrical equipment, take the usual care with leads and around the electrical parts of the machine, bearing in mind lathes move and wires can be drawn into machinery. Ensure the plug is wired correctly and any fuses that blow are replaced with the same type and value. If you have an electrical problem or fuses blow repeatedly, consult an electrician. Do not attempt to dismantle or repair any electrical elements of the machine unless you are competent to do so. If you use cutting fluid of any kind, take great care to make sure it goes nowhere near the motor, control box or wiring harness. Finally, some mini-lathes do not have a seal around the leadscrew. This allows swarf to potentially worm its way into the control box, with disastrous results. I have first-hand experience of this happening.
Guards
Older mini-lathes are equipped with tiny guards that serve little practical purpose as they rarely offer real protection in the actual working area and in some cases limit the usability of the machine (Fig. 2.3). A guard that interferes in this way gets left open or removed and is therefore pointless. The better and more recent models of minilathe have better designed, curved guards that are wired to an interlock switch (Fig. 2.4).
Fig. 2.3 The guards on early mini-lathes left something to be desired.
Fig. 2.4 Newer machines have more effective guards.
I have found the easiest and most effective guard is a sheet of polycarbonate about 200–250mm (8–10in) square mounted on an arm fixed to a weighted or magnetic base. This can be cleaned easily and placed so it protects the operator without interfering with the use of the machine.
Cutting Fluids
It may be a surprise to many but the HSE has found health problems, such as dermatitis, asthma and lung damage, from cutting fluid are one of the biggest hazards associated with lathe use. Most mini-lathe owners are unlikely to use floods of coolant and may do most of their work dry or just use small amounts of neat cutting oil applied with a brush or dribbled on to the work. This is less hazardous but it can still get thrown around or give off unpleasant fumes when the work gets hot. Take care to make sure you don’t breathe in fumes or overspray, and consider using barrier cream and/or a facemask.
Gloves and Loose Clothing
Do not wear gloves when working with a machine such as a lathe. If pulled into a moving machine they can lead to terrible injuries. I don’t suppose these days many of us would consider wearing a tie in the workshop but beware loose clothing and keep long hair tied back. A more modern hazard is the drawstrings found on hoodies – they can dangle right over the work as you lean forward for a closer look. The best workshop clothing is an overall with a Velcro fastening. Similarly, don’t use rags near moving work – kitchen roll is much better as, if caught, it will rip.
Lighting
It’s always important to ensure the lathe and work area is well lit. Ideally, use low voltage lighting or ensure any luminaires are proofed against the entry of swarf or liquids. Avoid old-fashioned fluorescent lights that can give the impression the lathe is not rotating if the machine speed synchronizes with the mains frequency. Twelve-volt, LED-based, lights are becoming increasingly popular with machinists.
Noise
Unlike many machines, a lathe is generally relatively quiet and if it is noisy it is probably trying to tell you things aren’t right. For example, a cut may be too heavy, causing shrieking chatter, or an interrupted cut is being taken too quickly or aggressively. There may be times, however, when you can’t stop a loud or unpleasant sound from a particular tool due to some resonance or other. You can keep a pair of ear protectors handy but a pack of earplugs are cheaper and equally effective (Fig. 2.5). Do take care though – it’s easy to be caught unaware by someone entering the workshop when you are wearing earplugs.
Fig. 2.5 Ear protectors are more comfortable than ear plugs.
Tidiness
I live in the real world where workshops are not kept like operating theatres but that does not mean it is sensible to operate a lathe in the midst of chaos. Make sure there is plenty of space for you to move around – specifically that there are no trip hazards waiting to catch you when your attention is on the machine. Keep wires and other tools out of the working area and try to avoid anything that might tempt you to lean over a moving machine.
Pets and Children
Like a movie actor, beware of working with pets and children! The reasons are obvious. I don’t suggest that responsible youngsters should not be allowed in the workshop but do make sure they are properly supervised at all times. Take extra care for their safety and ensure any task you give them is within their capabilities.
SOME DOS AND DON’TS
Do turn the lathe by hand to make sure there are no clashes before starting up.
Do make sure work is held securely and the cuts and feeds you use are within the safe capacity of the machine.
Do check the engagement and direction of the change gears are what you expect – nothing is worse than turning on and seeing the saddle unexpectedly start moving the wrong way!
Do give machining your full attention and avoid distractions in the workshop. You won’t do good work if you can’t focus on it and the majority of accidents are due to inattention.
Do remember you aren’t the only person who may walk into your workshop and switch on the power, so make sure things are left in a safe state.
Do use eye protection and suitable guards.
Don’t, ever, leave chuck keys in the chuck.
Don’t leave the lathe switched on when setting up work or changing tools.
Don’t try to remove swarf by hand. It is sharp and can easily cut or pull fingers into the work. Keep a bit of wire coat hanger with an ‘L’ on the end handy for use as a swarf ‘puller and poker’.
Don’t make electrical modifications or repairs unless you have the skills and experience required.
Don’t leave an unattended machine switched on.
Finally, remember the old adage that you could tell how experienced a machinist was by how many fingers he had lost. Safety is ultimately just common sense and your eyes, ears and fingers are your most valuable assets so take the same care of them as you would any other irreplaceable tool.
3 What is a Mini-lathe?
In recent years, the availability of relatively inexpensive machine tools of Far Eastern manufacture has created an alternative to second-hand machines as a way into model engineering for those on a budget. If you have bought this book, you may already have invested in a mini-lathe or you may be considering buying your first. You may even have a larger or smaller machine and be considering a mini-lathe as a response to changes in your personal circumstances or requirements.
Mini-lathe seems to have become the accepted description for a range of 3.5in centre height lathes, inexpensive and of Far Eastern manufacture (Fig. 3.1). Personally, I dislike the term as it suggests something toy-like; ‘compact-lathe’ would be a fairer description as they fit a lot into a small space. Indeed, a long bed mini-lathe has the same centre height as a Myford Super 7 and takes only 3in less between centres, although it does not have a gap bed. The term ‘mini-lathe’ has, however, become common currency and there is no point trying to coin a different name!
Fig. 3.1 The SIEG Super C3 from Arc Euro Trade.
Fifty or sixty years ago, if you could not afford a large, full-featured lathe one choice you had was a tiny lathe such as the Adept, Flexspeed or Centrix Micro – each of which could truly be described as ‘mini’ and lacked any screwcutting capability (Fig. 3.2). Despite their simplicity, and sometimes crudity, these lathes enabled thousands of people to enter the hobby. Although basic, they were capable of producing good results in skilled hands and those of some owners were modified to become full featured and true precision instruments.
Fig. 3.2 Far less sophisticated, the Super Adept was the ‘mini-lathe’ of its day.
The modern mini-lathe is technically far advanced compared with these historic examples, though it fills a similar niche – meeting the needs of beginners on a limited budget. It has much greater capacity, a built-in variable-speed motor, screwcutting and fine feed, is far more rigid and, with the benefit of modern mass production, is more accurate. Do not make the mistake of assuming these lathes are the machine tool equivalent of the cheap and cheerful tools that often disappoint. Mini-lathes are the small end of a range of industrial machines, not toys, and are capable of almost any model engineering task within their capacity. Indeed, they were originally marketed at well over twice the current price and the only downgrading has been a change from roller to ball bearings in the headstock; a change that can be reversed for the price of a night in the pub.
In the UK, popular models are the SIEG C3 Mini-lathe, Chester Conquest, Clarke CL300M (available from several suppliers including Machine Mart), Axminster SC2 and Warco Mini-Lathe, among others (Fig. 3.3). In the United States there are several further variations. They are all produced to the same basic design by a number of companies in China, notably SIEG, although there are detail differences. You may encounter some even smaller lathes, such as the C0 ‘baby’ lathe, that have a clear family resemblance to mini-lathes (Fig 3.4). Be aware that, although these small machines can be just what some users want, the true ‘mini-lathe’ as described in this book is, generally speaking, the smallest lathe with both the capacity and flexibility that most beginners in hobby engineering will need.
Fig. 3.3 The Warco Mini-lathe is a typical example.
Fig. 3.4 The SIEG C0 is from Axminster. It is much more compact and suited to those who want a smaller lathe to complement another hobby.
There are larger machines of similar design, such as the Chester DB8VS (Fig. 3.5). While these differ in detail, the extra capacity they offer may well appeal to you if you want to tackle larger projects.
Fig. 3.5 The Chester DB8VS might suit those seeking something rather larger than a mini-lathe.
All mini-lathes are fundamentally solidly and accurately built and, while they may lack some features, within the limits of their capacity they are capable of producing first class results. Some suppliers retain inspectors to oversee production in China, others inspect and set up the lathes in the UK. All the above models are available from companies with a sound track record of supporting and understanding the needs of model engineers. Buy from such a reputable dealer and you can expect a machine in good order and the same after sales service as if you had bought a machine costing ten times as much.
Some of the optional extras available are:
♦ Digital readouts on the cross slide and top slide
♦ Built-in tachometer (speed readout)
♦ Quick-change toolpost
♦ Lever-operated tailstock.
None of these facilities is essential. A hundred years (or fewer) ago, most model engineers had treadle lathes and did not even possess a three-jaw chuck, yet this did not prevent the achievement of remarkable results! If you can afford just one of these options, choose the lever-operated tailstock. It is the one extra you will use all the time and it will make many repetitive tasks far quicker. Even so, this is an accessory you can add later at minimal cost.
Mini-lathes have a centre height of just over 3.5in (~90mm) (described as a swing of 7in in the US) and, normally, a gap between centres of 12in (305mm). A few machines have 10in (254mm) between centres; some machines have 14in (355mm) or even 16in (406mm). Once you fit a chuck or have a long tool in the tailstock this difference is significant and the increase in rigidity with a shorter bed is not significant. I would always recommend getting the largest size compatible with the space you have. The headstock mandrel has a bore of 20mm or just over ¾in. The lathe does not have a gap bed.
These dimensions define the size of work the lathe can tackle. The lack of a gap bed is the main disadvantage compared with more expensive machines. If you are a member of a club or have access to another lathe for the odd job, such as turning a flywheel, then this is no great problem. Otherwise, you are limited to work with a radius of 3.5in, unless you fit a temporary headstock raising block and longer drive belt.
While there is a good range of accessories marketed for mini-lathes, do not assume you are restricted to these. Only a few are specific to mini-lathes, such as alternative leadscrews and steadies. Most other accessories for small lathes will fit straight on if purchased in the correct size (such as tools, chucks or centres) or can be easily adapted to fit a mini-lathe (such as quick release toolposts). Mini-lathes have a number 3 Morse Taper (MT3) in the headstock and MT2 in the tailstock, typical sizes for model engineering lathes. These allow the easy and rapid fitting of a wide range of accessories. Some are made especially for these lathes but, as they are usual sizes for small lathes, there are many generic accessories available new and second-hand.
The usual tool-holder is a four-position model, set at the correct height for in tool-bits with little or no packing. Quick release tool-holders are readily available. The toolpost is mounted on a 360 degree swivelling top slide.
Mini-lathes come with a set of changewheels to allow screwcutting and automatic feed. The leadscrew comes in metric and imperial versions, so buy the version that suits your usual preference for screwcutting. Changing over the leadscrew is not a five-minute job but, as we will see, there is an easy alternative.
My choice was a CL300M that had been returned, hardly used, and this is the machine generally featured in this book. Don’t take this to mean the CL300M is better or worse than any other model – I just saw it going cheap and made a snap decision! Having been not been changed significantly since 1998, it does have a lower spec than more recent variants.
It was soon apparent that several standard accessories were missing, including the chuck key and several changewheels, but these were forwarded rapidly and without question. Due to my inexperience, it took me longer to realize that, although without visible wear or damage (the chuck was dated the year before I bought the machine), the lathe was not very well set up. I have since discovered the remedies to a few problems caused by my own inexperience. Along the way I have been pleasantly surprised – while some aspects of the lathe are rather basic (such as the crude bolt to fix the tailstock), it is rigid, accurate and reliable. I cannot guarantee every single point I cover applies to all other mini-lathes but, by the same token, the general principles will apply to any small lathe of similar size.
4 Choosing a Mini-Lathe
When looking at various models of mini-lathe you will be struck by the many versions of the ‘same’ model available. Mini-lathes come out of a number of factories in China and each supplies many importers around the world. The most common are those made by SIEG in Shanghai – the C2, C3 and Super C3 – but these are often ‘badge engineered’ and painted in the colours of the importer (Figs 4.1, 4.2 and 4.3). Others are made by concerns such as Real Bull but all have their roots in the same original design. In the UK importers include Chester with its off-white Conquest, Warco’s Mini-Lathe in their house green, Clarke’s signal yellow CL300M, Arc Euro Trade’s machines in SIEG maroon and Axminster in white and aqua. In the United States there are several further variations, notably from Grizzly (green) and Harbor Freight, again in SIEG factory colours. Aussie has started importing SIEG lathes into Australia. There are many other importers in the UK and around the world.
Fig. 4.1 Chester’s version of the mini-lathe is called the Conquest.
Fig. 4.2 The Clarke CL300M is sold by Machine-Mart and some other suppliers.
Fig. 4.3 The SC2 is a well specified mini-lathe from Axminster.
Although they are all produced to the same basic design as described in the previous chapter, there are detail differences, from built-in tachometers to the quality of the set-up. All these machines are fundamentally built solidly and accurately and, while they may lack some features, within the limits of their capacity they are capable of producing first class results. Don’t be dazzled by this rainbow of colours. If you decide to buy a mini-lathe, I suggest you do two things: First, decide what specification you want and, second, find a supplier with whom you feel comfortable who sells a machine to that spec. Buy from a reputable dealer who specifically serves hobby engineers and be confident you will get the same sales service as if you had bought a relatively huge machine costing much more.
Some machines are marketed by the same company at different levels of specification. For example, Warco’s Super Mini-lathe is 350mm between centres – 50mm longer than the standard machine. It has a brushed 550w motor – 150w more powerful than their standard machine – and it has a digital rev counter fitted (Fig. 4.4). The Super Minilathe’s tailstock features an over-centre, cam-operated lock that is easier to use than the standard spanner and nut adjustment. The tailstock base is also twice the length, thereby allowing for greater stability.
Fig. 4.4 Warco’s Super Mini-lathe has a longer bed than its standard machine.
Another choice you will find is between the C3-type machines, with a brushed DC motor and a geared spindle, and the Super C3 machines, which have a brushless DC motor of greater power output (Fig. 4.5). The C2 was an earlier version with a shorter bed and less powerful brushed motor. For all this variety, the fundamental dimensions and operation of all the different types of mini-lathes are essentially similar.
Fig. 4.5 The Super C3 combines a long bed and brushless motor.
OPTIONS
Let’s run through the main options from which you may need to choose when buying your lathe.
As mentioned before, I would suggest going for as long a bed as you can obtain. Some suppliers may offer an induction hardened bed. This may appeal if you expect your lathe to enjoy a particularly long and hardworking life but should not be seen as a necessity for normal use.
Hardened bedways will extend the life of your lathe before the bed needs to be reground. The amount of hardening that can be applied to a cast iron bed is limited. Mine has unhardened ways and has had a fairly typical sixteen years’ hobby use yet shows no signs of needing a regrind. I would suggest this is a ‘nice to have’ but not essential.
The metric leadscrew option is of greatest importance to those who wish to cut screw threads. It is possible to swap between metric and imperial leadscrews (and half nuts) but, as we will see, metric threads can be cut on imperial machines, and vice versa.
Digital readouts are a point of debate. With the handle-type fitted to a mini-lathe they do not solve issues of backlash but nonetheless some users find them invaluable. They can be retrofitted. A built in tachometer (speed readout) is useful at the beginning but as you get more confident you will ignore the tacho and listen to the ‘cut’ instead.
A lever locking tailstock is a very convenient accessory, though it is not essential and can be fitted as an aftermarket upgrade (Fig. 4.6).
Fig. 4.6 A lever-locking tailstock is a great timesaver.
The option of a brushless motor is a good idea, especially if you hope to work the lathe quite hard. But, unlike a locking tailstock, it is not an easy retro fit. This is not just as a new controller board is needed as well but because the bed castings are different to accommodate the larger motor. That said, nothing is impossible.
None of these facilities are essential. A hundred years ago, many model engineers did not even possess a three-jaw chuck and drove their lathes with a foot-motor (treadle). This did not prevent some achieving work of a standard far higher than I can attain with all my accessories! If you can afford just one of these options, you may wish to choose the lever-operated tailstock, not the high technology readouts. It is the one extra you will use all the time and it will make many repetitive tasks far quicker. Even so, this is an accessory you can add yourself later, either buying a lever tailstock or modifying a bolt-on version.
ACCESSORIES
Standard accessories that are supplied with most, if not all, mini-lathes are (Fig. 4.7):
Fig. 4.7 Typical accessories for a mini-lathe (three-jaw chuck not shown).
♦ 80mm three-jaw self-centring chuck with additional jaws
♦ Chuck key
♦ Change wheels for screwcutting
♦ Allen keys
♦ Spanners
♦ Four-way toolpost
♦ Tailstock centre
A set of cutting tools and sometimes other accessories may also be included. We will revisit all these items in more detail as we get to know the lathe in later chapters.
Other accessories you may see marketed as being for your choice of mini-lathe include:
♦ MT2 tailstock drill chuck
♦ MT2 rotating centre
♦ 80mm four-jaw independent chuck
♦ Faceplate
♦ MT3 centre
♦ Fixed steady (rest)
♦ Travelling (or follow) steady (rest)
♦ Metric/imperial leadscrew conversion set
As you get to know your lathe, you will probably discover a need for many of these, particularly the ones near the top of the list that are almost indispensable. Be aware though that, aside from the faceplate, steadies and the leadscrew sets, these are all standard items that can be sourced from various suppliers.
Indeed, while there is a good range of accessories marketed for mini-lathes, do not assume you are restricted to those on these lists. Most other accessories for small lathes will fit straight on if purchased in the correct size (such as tools, chucks or centres) or can be adapted easily to fit a mini-lathe (such as a quick release toolpost). Mini-lathes have a number 3 Morse Taper (MT3) in the headstock and MT2 in the tailstock, typical sizes for model engineering lathes. These allow the easy and rapid fitting of a wide range of accessories. Some are made especially for these lathes but as they are the usual sizes for small lathes there are many generic accessories available new and second-hand. As for chucks, there are many sources of 80mm bolt-on chucks but check they have the appropriate register to fit the spigot (usually 63mm) of your lathe’s spindle. Larger chucks can be fitted but you may have to machine a suitable backplate.
CUTTING TOOLS
The standard mini-lathe tool-holder is a four-position model, set at the correct height for in (approximately 8mm) toolbits with little or no packing. Quick release tool-holders are readily available and are a real boon but you don’t need one to get started. The toolpost is mounted on a 360 degree swivelling top slide.
There are a number of different sets of tooling sold as ‘compatible’ with mini-lathes but any tool with a in or smaller shank can be used. High speed steel (HSS) tools (ground from a single piece of silvercoloured high-speed steel) are a good place to start. Treat brightly-coloured sets of carbide-tipped tools with caution. Tipped tooling that works well with smaller, lowpowered lathes needs care in the choosing as most carbide is meant for peeling huge, hot chips with powerful machines worked hard. We will look at this later. A set of five or six HSS tools of different shapes will get you off to a good start (Fig. 4.8). Some mini-lathes come with, or have available as a standard accessory, a set of tools, the most useful of which are a set of 6mm square double-ended tools and holder that ensures they are at the correct height.
Fig. 4.8 A set of pre-ground HSS tools are a great help when getting started.
To conclude, choosing a lathe is not an ordinary purchase. This machine could be the heart of your hobby for many years to come so take your time and enjoy the process of choosing and acquiring it. Make sure you also get at least a basic set of HSS tools. If you can obtain some aluminium alloy or ‘free cutting mild steel’ bar of about 25mm (1in) diameter at the same time, then you will have something to ‘practise on’ when you start cutting metal!
5 Getting to Know the Lathe
On close inspection, the mini-lathe is a surprisingly complex bit of equipment, sprouting levers and handwheels in all directions, a gearbox and multiple moving parts (Fig. 5.1). There may be a temptation to dive straight in but most new owners will agree it is worth getting to know what’s what first. In this section we will mostly be looking in detail at an Arc Euro Trade Super C3 lathe and its accessories but any major differences from other types of mini-lathe will be pointed out.
Fig. 5.1 The main parts of a mini-lathe.
At its simplest, a lathe consists of a bed with two pointed centres, between which the work is rotated. Some form of rest or toolholder is attached to the bed so suitable tools can be applied to the work to remove material in a controlled way. The simplest metalworking lathes, the ‘watchmaker’s turns’, are literally just this, a pair of opposed points fitted to a bar, and a toolrest – the work is rotated by pulling a cord wrapped around it back and forth. Like most metalworking lathes, mini-lathes are considerably more sophisticated than ‘turns’ but the basic construction of bed, headstock, tailstock and tool-support is there, just with many added features.
This chapter will look at the functions of the various parts of the lathe. Later chapters will look in more detail at setting up and adjusting these parts, as well as use of the machine. Fig. 5.2 shows an exploded diagram of a SIEG C3 mini-lathe. All mini-lathes have similar construction, although Super C3 lathes do not have a gearbox inside the headstock.
Fig. 5.2 An exploded diagram of a standard C3 (courtesy SIEG).
THE BED
The bed of mini-lathes is a substantial iron casting, ground in the ‘American’ style with an inverted-V along the front (Fig. 5.3). This raised section ensures the accurate alignment of the headstock, saddle and tailstock, and any other accessories fitted to the bed, such as steadies or stops. The underside of the front and back shears of the bed and its top surface are also finished accurately. A central slot allows for the attachment of the tailstock or fixed steadies but it is usually not highly finished as its purpose is just to provide a secure fixing for these fittings, not alignment.
Fig. 5.3 The bed of a longbed mini-lathe.
The bed length is defined as the largest length of workpiece that can be turned in the lathe (rather than the overall length of the machine). They are usually quoted in imperial units and different machines may be obtained with 10in (254mm), 12in (305mm), 14in (355mm) and 16in (406mm) bed lengths. The 10in bed length machines are distinctly cramped compared with the larger versions but these figures are not as clear-cut as you may suppose. Micro-Mark’s 16in bed version relies on the tailstock overhanging the end of the bed by ½in to achieve its specified capacity and if the same is done on my own, nominally 300mm (12in) capacity, lathe it will actually take work comfortably more than 13in long. These figures are also complicated by the actual overhang of the centres used. In practice, most turning is done with the chuck fitted and a rotating tailstock centre, which will reduce the capacity by 75mm (3in) or more.
Serial Numbers
The serial numbers of lathes made by SIEG are normally to be found on top of the rear right hand corner of the bed. The method of stamping can raise the metal around the numbers and you may wish to lightly dress the area around the figures level to ensure the tailstock is not slightly pushed out of alignment when moved to the end of the bed. As is often the case, more recent machines appear to have this done more neatly (Fig. 5.4).
Fig. 5.4 Serial numbers are usually stamped at the end of the rear shear of the bed.
LEADSCREW
Along the front of the bed is a long, accurate screw with an Acme-form thread, either 1.5mm pitch or 16 threads per inch (Fig. 5.5). The pitch of the leadscrew is the sole material difference between most metric and imperial mini-lathes. By using different change gears in the headstock gearbox the leadscrew can be driven at different speeds for thread cutting or automatic feed. Naturally, on an imperial lathe it is easier to cut imperial size threads and metric threads on a metric machine but universal thread cutting is not a problem, as we shall see later. There are oiling points at each end of the leadscrew.
Fig. 5.5 The leadscrew of this imperial mini-lathe is sixteen threads per inch.
MOTOR
At the rear left of the bed is the motor, usually hidden behind a sheet metal guard (Fig. 5.6). This can be either a brushed or brushless motor, with the brushless motors being favoured for flexibility and robustness. The brushless motors are slightly longer and so the beds of the more recent brushless motor lathes are subtly different, and brushed motor lathes cannot easily be converted to brushless.


