20,99 €
Mehr erfahren.
- Herausgeber: Crowood
- Kategorie: Lebensstil
- Sprache: Englisch
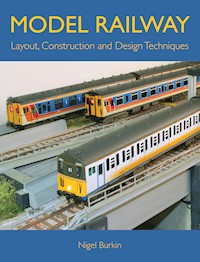
Layout building is perhaps the most exciting, rewarding and challenging aspect of creating a model railway. Making the right design decisions and choosing good construction techniques are vital to ensure success. This book takes you through basic baseboard construction, shelf layout themes and how to link multi-deck designs together, enabling you to make the most of a given space. With different concepts covered, from simple portable layouts to helix construction techniques, Nigel Burkin mixes the best of British layouts with those used routinely overseas and shows you how you too can achieve success and satisfaction in executing your layout design. Topics covered included: Designing for comfort; How to use space efficiently; Practical construction techniques from L-Girder to box frame baseboards; Sub track bed construction, track laying and wiring; Fine tuning the layout for smooth operations.
Das E-Book können Sie in Legimi-Apps oder einer beliebigen App lesen, die das folgende Format unterstützen:
Veröffentlichungsjahr: 2012
Ähnliche


MODEL RAILWAY
Layout, Construction and Design Techniques
Nigel Burkin
Copyright
First published in 2010 by The Crowood Press Ltd, Ramsbury, Marlborough, Wiltshire, SN8 2HR
www.crowood.com
This e-book edition first published in 2012
© Nigel Burkin 2010
All rights reserved. This e-book is copyright material and must not be copied, reproduced, transferred, distributed, leased, licensed or publicly performed or used in any way except as specifically permitted in writing by the publishers, as allowed under the terms and conditions under which it was purchased or as strictly permitted by applicable copyright law. Any unauthorised distribution or use of this text may be a direct infringement of the author’s and publisher’s rights, and those responsible may be liable in law accordingly.
ISBN 978 1 84797 445 7
ACKNOWLEDGEMENTS
During the planning and building of this layout, the comments and suggestions of my friends and fellow operators have been of great help. I would like to thank Graeme Elgar and Eddie Reffin for their invaluable input that helped shape my efforts.
I would like to acknowledge the assistance of David Jones of Dapol, Dennis Lovett of Bachmann Europe plc and Simon Kohler of Hornby for their practical assistance and for allowing me access to new developments. To Jon Jewitt of Sun-ningwell Command Control, together with Digitrax for their assistance with DCC control equipment, which has been used on the MRL N scale layout project. I would also like to thank Alan Murray, formerly of MacKay Models of Paisley, for his support and assistance with Lenz equipment, used on the top deck project.
Research is an important part of creating such layouts. I would not have managed without the assistance of many people at Montana Rail Link. They gave me a great deal of help with information, documents on operations and access to the property. I would like to give special thanks to Pete Lawrenson, Chief of Safety and Security, for his kind assistance and his wife Pat Lawrenson, for her kind hospitality during our field trip.
Finally, and not least, I dedicate this book to my ever supportive wife Sarah, who helped me to build the log cabin that houses the layout. Without her help and determination, 6.5 tons of white cedar would still be lying on the drive!
CONTENTS
Title Page
Copyright
INTRODUCTION
CHAPTER ONE: DEVELOPING A THEME AND FINDING SOME SPACE
CHAPTER TWO: LAYOUT CONCEPTS
CHAPTER THREE: DETAILED LAYOUT DESIGN
CHAPTER FOUR: TOOLS AND MATERIALS FOR BASEBOARD CONSTRUCTION
CHAPTER FIVE: PORTABLE LAYOUT CONSTRUCTION
CHAPTER SIX: PHASE 1: L-GIRDER FOR AROUND THE WALLS
CHAPTER SEVEN: CONNECTING DECKS WITH A HELIX
CHAPTER EIGHT: MULTI-DECK CONSTRUCTION TECHNIQUES
CHAPTER NINE: BUILDING THE PENINSULA
CHAPTER TEN: TRACK, WIRING AND TROUBLE SHOOTING
AND FINALLY…
INDEX
INTRODUCTION
Layout building is exciting, rewarding and perhaps the most challenging part of being involved with model railways. A layout provides a home for our enthusiastically acquired collections of locomotives and rolling stock, becomes a centrepiece we can show to visitors and is an important statement about our creativity too. For many, it provides vital escapism and relaxation in an increasingly stressful world of work. Other modellers use it to transport them back to golden eras remembered from childhood or to model an ‘ideal world’, far removed from reality. Modellers living in urban areas can create miles of idyllic open country in a basement or loft or, in my case, the mountains of Montana in 1:160 scale, in an outbuilding situated in the Scottish Highlands nearly 5,300 miles away from the full size railroad. The social side of the hobby should not be forgotten, and many modellers working on home layouts enjoy the companionship and support of close friends during construction work parties and operating sessions. There is no doubt that the hobby brings benefits and comfort to many people.
Freight traffic has grown on the British rail network in the last ten years. One location that has benefited from the traffic boom, especially in intermodal containers, is Grangemouth in central Scotland. Traffic of a variety of types, in specialized containers, works in and out of this port location, including supermarket traffic. EWS Class 66, No.66099 departed for Mossend and Trafford Park with a service destined ultimately for Europe via the Channel Tunnel on 21 May 2009. Every intermodal unit on that train was a specialized tank of some description, there being no traditional boxes loaded. The location also sees petroleum traffic from the nearby refinery and container traffic from the port itself, which is located further down the line seen in this photograph. That and some very interesting semaphore signals make it a perfect theme for a layout.
During my time in the world of corporate work, railway modelling offered escapism and a way to relax, both on my own as a ‘lone-wolf’ modeller and with friends too. Doing something creative and practical with my hands clears my mind and helps to put things into perspective. If, at the same time, I create a length of the Kent coast main line in 4mm scale, that’s also a very good thing.
The benefits of building a model railway are many, and, over the years, I have found myself travelling to places many hundreds and sometimes thousands of miles from home, on exciting trips to explore and research railways around the world, with layout construction and design in mind; meeting many interesting people in the process and learning a great deal about the many and varied approaches to the hobby, and real life railroading. These experiences would not have been gained from a typical package holiday, but planning them is an interesting step outside the norm, which has broadened my horizons and resulted in long-lasting friendships too.
Building a layout also allows me to practise different skills such as joinery (not cabinet-grade joinery, I hasten to add), track building, layout planning, electronics and landscape creation to mention a few. My imagination plays a key role in helping me to visualize a model railway concept; hours of day dreaming have saved me from insanity in a variety of repetitive and boring work meetings over the years. Doodling track plans is the purpose for which notepads were designed, not taking the minutes. Research can provide the inspiration and drive to create something in whatever available space can be found in the family home. There is a great deal of satisfaction in discovering the ideal location upon which to base a layout theme which will fit a given situation and then having the fun of working out the track formation, discovering the traffic which was operated over the line, and even arranging a field trip to see what remains, to take photographs and make notes as far as possible. A great excuse for a day out!
A fully finished and successful layout has to be the ultimate goal for a modeller. There is little doubt that it will be biggest and most significant investment in time and money any modeller can make and, make no mistake about it – a layout can gobble up a great deal of both, which is why it is so important to get things right, most if not all the time.
A warning: this is not a book of sterile techniques, describing in cold detail the different ways to build a baseboard or two – that’s been done many times before. All I would be doing is repeating such techniques if this book were presented in such a way. Instead, it demonstrates how I filled a 360sq.ft log cabin with the all-important skeleton of a complex model railway, building it from the ground up to the point that trains were running reliably using Digital Command Control systems.
On the way, I used several techniques to achieve my goal and I will state up front that there is nothing unique about any of them, they have all been tried and tested in one form or another before by other modellers, either here or abroad. The point is how to use these methods to make the best of my position and to achieve my railway modelling goals, not to introduce new and far-flung ideas that would be hard for anyone to replicate.
All of the ideas, experiences and lessons learned from making mistakes (as few as possible) described here can be applied to any model railway project. I take the modeller from floor level to finished bench work with track, wiring and running trains, together with thoughts on how I planned the layout and decided upon construction methods. There is nothing ‘fine-scale’ about my approach, nor do I sit on some high plateau of purist techniques using hard to find materials. Instead, I used basic power tools, broke my share of drill bits, cut myself about a dozen times, removed several hundred splinters and swore a great deal too. The ‘layout’ is now structurally complete, as far as the scenery and presentation finishing stage, which is an entire subject on its own and deserving of a separate book. Alas, a lack of space here prevents me from describing the fascinating art of modelling specific structures, infrastructure, scenery, mountains, rivers and trees.
My 360sq.ft is not a great deal of space when compared to some truly enormous basement or museum layouts built by modellers in the United States and Europe, but is still a sizeable commitment when matched with what can be achieved in the average home in the UK or apartment living in a North American city. I use techniques to increase the available real estate in the cabin so I could have long main line runs, 10ft long trains in N scale, and still leave room for a couple of comfortable chairs, my modelling work bench and storage. In designing the layout many influencing factors had to be taken into consideration, and my experiences show that it is possible to have your cake and eat it too, with some careful planning. So, you won’t find a book of track plans, but valuable layout-design ideas on making more room for track, scenery and buildings, together with allowances for human beings too. I look at quick ways of constructing layouts and how I decided upon construction methods from the many available to us.
A BRIEF NOTE ON TERMINOLOGY
I model both British and North American railways, which have different terminologies for full-size features and in layout construction. I freely interchange these terms within the book. A railway in the United Kingdom is also called a ‘road’ or ‘rail road’ in the US. Baseboards in the UK are called bench work and layout tables by our fellow American modellers. Track bed or road bed: which is it? They are both the same. Masonite or hardboard; freight cars or freight wagons; back scenes or back drops; latex paint or emulsion paint, they are broadly the same. Passing loops on a British railway would be called a ‘siding’ or ‘passing siding’ on a North American railroad. Sidings in the UK are just that, while in North America they may be called a stub track, spurs or something similar. A railway station in the UK is a passenger ‘depot’ on the opposite side of the Atlantic. I trust that the terminology is self-explanatory and in no way an attempt to introduce American terminology to British operations and vice versa. But one term you won’t find beyond this introduction is ‘train station’. Yeuch!
A NOTE ON PHOTOGRAPHY
Layouts are large structures and, as construction of my projects progressed, space to set up lights and a tripod became ever more restricted. A very wide angle lens was used to get everything into each shot, with unavoidable lens distortion of some of the images. Please bear this in mind when studying the joinery techniques – my joints are square, believe me, or the layout would not work.
THE LAYOUTS WITHIN THE MULTI-DECK PROJECT DESCRIBED
For clarification, and because this is a complex project, there are three layout themes accommodated on the multi-deck layout concept described here. One is an American N scale theme based on the Montana Rail Link. It is referred to as the MRL N scale layout and occupies the lower two of the three decks of the layout.
Time travel is possible with a model railway. Steam-era railways can be modelled using a huge variety of hi-fidelity ready-to-run products, and both the locomotive types shown in this picture are available in 4mm scale. The preservation scene is also popular, offering the chance to mix a variety of locomotives in one model which otherwise may never have been seen together in the past.
Capturing the action in miniature is the driving force behind the construction of a model railway layout, and scenes like this taken at Sandpoint, Idaho can set the pulse racing. However, you need a great deal of space to model freight trains of this size and the choice of scale is an important factor when making planning and design decisions about train length and the landscape surrounding the railway itself. BNSF 5316, a C44-9W leads an SD40-2 with a lengthy train of auto-rack cars west towards Spokane on 4 July 2007.
I have been fascinated by the railways of south-east England since I became aware of the hobby. Apart from my US railroading interests, the former South-Eastern Division of the Southern Region of British Rail, together with its third rail electrification, has had a strong attraction for me. This is the classic view of Ramsgate depot photographed in May 2009, inhabited by ‘Electrostar’ units these days. It makes an excellent layout design element, and its slam door EMUs may be long gone but not forgotten in my world of railway modelling, as you will soon see.
The top deck is designed to accommodate two layouts, the scenic parts on either side of a double-sided back drop. One is a British outline 4mm-scale theme and is referred to as ‘Folkestone East’, a location on the Kent coast main line. I originally planned to build a piece of Redhill, Surrey on those boards, but re-evaluated that during the design stage. The other theme is planned to be North American HO, with the location undecided upon when work on the layout was started.
SO TO WORK
There’s a layout cabin to fill, piles of timber lying around waiting to be sawn into L-girders, sub-track (road) bed, a helix to build and trains to put to work. I planned to complete the basic structure or skeleton of the layout with some measure of operation in around fourteen months. I hope you enjoy this journey of model railway layout construction as much as I did. If it succeeds in helping you with ideas for your grand design, even in a small way, I shall be nothing less than delighted.
CHAPTER ONE
DEVELOPING A THEME AND FINDING SOME SPACE
Before plans for a grand design layout could be formulated I relied on short, end-to-end linear layout concepts, such as this one based on operations from the two suburban platforms at Reading General Station. Named Platforms 4a and 4b, the layout allowed for large station operations in a compact area. The theme involved modelling just part of the station, together with features suggesting a much larger railway site in EM gauge and representing the British Rail-privatization transition period.
INTRODUCTION
Ideally, before getting down to detailed layout design, the modeller should develop a theme for the planned layout. In my case, a handful of themes were rattling about in my head for consideration, and prototype information for many of them literally overflows out of box files ready for use when I had finally settled on one of them.
Furthermore, a home has to be found for the layout and decisions taken regarding the type of layout concept that will suit the given space, for all these things are linked together. There is a lot of thinking and planning to do, and the available space, time and resources will have a bearing on the preferred theme and the layout concept too. Undertaking a layout that will bust the budget in planed timber alone is not going to achieve anyone’s objectives, nor is working on a theme that will not suit the available space.
I spent hours giving consideration to the ideal theme to suit my space. Developing a theme is quite different from practical track planning and layout design which are covered in the next chapter. A specially constructed outbuilding was left standing for eighteen months before I made any move to build the first baseboard for the grand project. Yes, a couple of small portable layouts took up residence and were worked on in that intervening time, but no progress was made on anything more permanent. The reason was simple: I was mulling over themes and concepts, together with thoughts on how to squeeze as much as I could into the available space without impacting on the atmosphere of this particular building. I had quite ambitious plans to scratch a number of modelling itches more or less at the same time and being able to do that was always going to be a challenge.
Finding some real estate for our railway empires is challenging for most of us, and sometimes the only option is for the layout to occupy family space in the home. That space may be found in a basement, which also serves as a hobby and recreational area, together with space for practical household things such as freezers, washing machines, heating systems and storage. Likewise, the use of a spare bedroom or space in a study or other room in the house means that the layout concept must be considered with care. How will the physical construction of an often large, wooden structure impact on the immediate surroundings?
Space will always be an issue for all modellers, no matter what company or era that they model. One way of developing a theme for a model that might not take up too much room is to look for secondary passenger operations that may rely on short train formations hauled by popular classes, such as the Class 37 powered train, seen in this June 2004 picture of EWS Class 37, No. 37411. An alternative is to explore the available two- and three-car multiple units such as the Class 150s recently released by Bachmann in 2009. The train in this picture, which was taken at Carlisle, consists of four coaches and a locomotive at either end, in what is known as ‘Top and Tail’ mode. Even in 4mm-scale, this would result in a model nearly 6ft in length.
A possible layout theme: the Kent coast, on the electrified line between Ashford and Dover in the privatization transition era, modelled to 4mm scale, EM gauge. I like early summer as a season for this theme and placing it across the time interval between the construction of the Channel Tunnel and around New Year 2000. This would provide a home for my collection of third rail electric ‘slam-door’ multiple units and stretch the time era over about nine years, providing a great deal of interest.
Take a look at the alternatives for housing a layout to which I gave serious consideration: garages are a better option than bedrooms when considering the possible construction mess, but also have to serve other purposes such as storing cars, boats and bicycles – a most strange use for a garage indeed, I hear you say. Sheds, outbuildings and cabins (like my layout space) all offer possibilities and all have advantages and disadvantages of their own. Lofts are frequently chosen for accommodating a layout, but access may be problematic. How will all of this affect your grand design? Let’s take a look at possible layout sites before developing the layout concept.
One of my druthers for a Kent coast theme would be the South-East Travelling Post Office (TPO) service and the earlier Dover–Manchester TPO service. This view shows the South-East TPO at Dover with Class 73 Electro diesel locomotives in charge.
This may be typical of the loft space found in many homes. This loft of mine is dusty with little useful headroom. The pitch of the roof makes much of the space unusable anyway, and equipment such as water tanks, electrical cables and the inverter for solar PV panels may have to be relocated at a significant cost.
Should your layout space be less than perfect, you can overcome some problems with technology: a dehumidifier is a useful device for areas that are relatively damp, such as basements or outbuildings, of which garages are an obvious example.
Rodents are a real nuisance – they eat through cables and damage valuable models. Deter them with ultrasonic devices that are cheap to buy and run. This one is used to protect the contents of my loft and simply plugs into a wall socket.
FINDING A HOME FOR THE LAYOUT
SPARE ROOM
Space in the house is perhaps the hardest thing to dedicate to a layout, unless a spare bedroom is available after the offspring have left home, or a larger house than was needed for the immediate family has been purchased. House room is great for several reasons, including the benefit of good heating as part of the home central heating system. It is secure within brick (or stone) walls with easy access, a power supply will be readily available and a degree of comfort can be enjoyed in the home, which may not be possible with remote sites. After all, the bathroom is probably just down the hall and the kitchen (with important things like the kettle and fridge) nearby.
So why are spare rooms rarely taken up as an option? If my spare room is anything to go by, I could not use the space efficiently. Covering over the window is not an option and having to make allowances for an inwardly opening door (sometimes the door can be rehung, but not always) reduces the quality space for a layout. Furthermore, allowances made for other family members may result in the smallest room only being available and that could be a miserly 10ft by 8ft, or thereabouts. Could you work your grand design into that space without resorting to a very complex piece of joinery and making massive compromises? Also, consider tramping through the house and up the stairs with sheets of plywood, planed timber and other sheet materials. Where are you going to be able to cut them without the resulting mess affecting the adjacent living space? I rejected my spare room for that reason alone – the mess would be difficult to control and tramping in and out every time I needed to cut and smooth wood was going to be a pain. A solution would be to have material sawn to the required specifications by the timber merchant, but that would add to the budget for materials.
As an aside, those modellers with young families have found that the imminent arrival of another child soon puts pressure on domestic living space such as spare bedrooms, and layouts soon take on the appearance of an unnecessary luxury. A lot of hard work could be lost if the room were no longer available. This is where portable layouts have a role to play as a way of enjoying a layout and yet reducing the impact on the domestic arrangements.
Shelf layouts have grown in popularity for those accommodated in the home because they can be attached to a wall with minimal disruption to the rest of the room, especially at a height of around 60in from the floor. Studies and home offices have been known to house small, linear shelf layouts located over the desk or across filing cabinets. Be sure that you do not disrupt normal work activity, and the comfort of operations is also a consideration. It is generally accepted that space should be dedicated to the layout where it does not impact on other household activities. That definitely rules out the kitchen.
CELLARS AND BASEMENTS
If you are fortunate enough to own a house with a cellar or basement (there is a mistaken belief among some modellers in the UK that all homes in the United States have basements) the almost ideal space exists for a layout. The advantages include good security within the home, together with an immediate power supply and probably good access from the living space too. How usable that space turns out to be depends on the design of the home and the services located in the basement, such as heaters, air conditioning and water purification units. Will load-bearing walls divide up the space, creating impenetrable barriers to the construction of the scale permanent way?
I lived in Europe for many years during my childhood and remember homes in Germany with large cellars: dry, clean and with good access from the outside, as well as through the kitchen. Ideal space, you might think. Surprisingly, it was not. The ceilings were low and the space divided up into too many small rooms for utility purposes. When considering a cellar you do need to consider damp-proofing too, and whether the space is accessible enough to bring in layout building materials. Can the space be transformed from a bare brick or block-walled utility space into somewhere pleasant enough to spend time with friends?
ATTICS AND LOFTS
No cellar and no spare bedroom? What’s next? Oh yes, the loft – that space occupied by spiders, dust, insulation and tinkling header tanks for vented central heating systems. Despite all that, it is space and within the security of the house too. But is it suitable for a layout?
Space is always available in a loft and it can be good quality space, depending on the build of the house. I looked at the loft in my cottage and, while it offered over 30ft by 18ft in the main area over the living room, there was very little head room and, as the pitched roof runs down to the walls, that height problem is made a great deal worse. The only truly usable area was 30ft by about 6ft, if I were to keep my head from hitting roofing timbers. The area was claustrophobic and unpleasant. Not ideal, even assuming that I could clad the outer roof area, insulate it against heat, cold and dust and that I could enlarge the very small access hatch.
This underlines the problems with loft space in most houses, yet I know a friend with a lovely 14ft square loft, which he is happily filling with a British outline N gauge layout. Even he has had a few near misses with the loft hatch, and that is with a purpose-built loft ladder! Climbing in and out of lofts is a pain and that could be a factor for modellers past retirement age where mobility is not what it used to be.
Lofts in modern houses have a great deal more timber in them as thinner A-frames are used to hold the roof up. Such structural members get in the way of layout construction and cannot be modified without affecting the structure of the house and its roof. Loft conversions are expensive, but will deliver some valuable quality space. You will need planning permission for such conversions in the UK, the work would have to be properly assessed by a structural engineer and carried out by a competent builder with good references.
The temptation to lay down flooring boards over the insulation in modern houses and to string baseboards along the roof timbers is strong for many and that, together with some wiring work, insulation, painting and other improvements will deliver valuable space, and probably for a reasonable price. However, be aware that some modern houses do not have particularly strong roof spaces: it is enough to hold the roof up in the severest weather, but that’s it. Introduce a lot of modelling equipment, beer and some men playing trains and something might give. Check the specifications of your home and also the warranties before going too far down this route.
Older properties may have roof space already converted as living space such as former servants’ quarters – ideal space, except that it may be divided up into small rooms and with narrow access stairs. When buying a house, look for space for your layout and consider every option. If an older house suits, the roof space may be structurally stronger and more suitable than with a newer house. However, in my case that was not to be, and the added problems of a loft hatch and of dragging materials through the house ruled it out for me.
GARAGES
While being a good place for dealing with the inevitable mess that results from layout building and having with lots of room, a garage is generally draughty and damp, especially if it is used to store a car. Hard concrete floors make it uncomfortable for working on the layout for extended periods and the large door can make insulation difficult. I calculated that converting a garage for layout use would cost the same as an outbuilding or a bespoke cabin. By the time the large doors were made secure, the area insulated and draught-proofed, the costs make the garage an unattractive option. Also, check that the floor is level and even.
On the plus side is the large space made available, and perhaps buying a really good quality wooden garage and converting it for use as a home for a layout may be an option for you to consider. However, if you intend spending the money on something like that, why not go for a machined log cabin, loft conversion or a really good quality garden shed?
SHEDS
Sheds offer a relatively low cost option for a layout building and can be quite large, easy to assemble and easy to buy locally. However, as soon as you start looking at larger sheds, bespoke build is the only way forward and costs then sky rocket. Smaller sheds will escape the planning rules for construction warrants and permits in the UK and in other places too. But start building large structures that take up large areas of the garden and the planning authorities may take a dim view of your plans for a miniature railway empire! Smaller structures can be erected on a simple foundation of paving slabs, but anything larger than a 10ft by 8ft building really should sit on a good, solid concrete base.
The advantage of a shed is the instantly available and dedicated space with no concerns about mess resulting from construction. The concerns I had when considering a garden shed structure for my project included security, damp, the extra cost of insulation and the laying of an electrical cable from the house to the building. Such buildings can become very hot in the summer and difficult to heat in the winter. If I had to do that work, together with spending more on a bespoke shed, there had to be better options available.
OUTBUILDINGS
You may be fortunate in having a larger property with an outbuilding such as a farm steading or barn. Again, work may be needed to make such areas habitable, clean, free of damp and easy to heat in winter or keep cool in summer. Alternatively, go for a self-build log cabin which would cost little more than most large bespoke sheds and offer some very secure accommodation. Such buildings are available as kits and come in set sizes. But it may be that the available shapes do not suit your theme and the extra cost of having such a building assembled could knock it out of the frame.
The costs regarding insulation, damp-proofing and the electricity supply are broadly similar to those involved with building a shed, as are the planning issues. However, as kits, they are usually straightforward to build, very solid and well designed. A log cabin of Scandinavian design was my preferred choice for an outbuilding because it suited my budget and timescales too. I could little afford my ideal – which would have been a large block-constructed building with slate roof, one large internal room for the layout together with a toilet and kitchenette. The cabin cost £6,000, has a large internal space of nearly 360sq.ft and a high roof supported by huge purlins. It took a week to build, and little wonder, because the walls are composed of machined white cedar logs 80mm thick, the floor boards are 35mm thick and the roof timbers 25mm thick. In all, including the pre-assembled, double-glazed doors and windows, the structure weighed nearly 6 metric tons! At £16.65/sq.ft for the building and an additional £1,500 for insulation, wiring and finishing materials, I consider myself very fortunate indeed. With that financial outlay, there is the need to make the best use of the building, including its volume, hence ideas developed for a multi-deck layout to take advantage of the high roof space.
Finding a home: a bespoke 30ft building constructed by Tony Wright for his OO gauge ‘Little Bytham’ layout. A particular theme may require an investment to create the space needed to execute it, and long, steam-hauled East Coast main line trains in 4mm scale warranted this level of expenditure even before a single baseboard had been constructed. (PHOTO:TONY WRIGHT)
Finding a home: the start of my grand project was marked by the ground works for the cabin base, which was composed of a slab of concrete 100mm thick placed on a prepared base of aggregate, sand and a water-bar membrane.
The cabin base is seen placed on the slab and squared off. Note the gravel around the concrete slab for drainage.
Construction consists of assembling the walls of machined logs that lock together using a tongue and groove system.
While this photograph shows the main structure assembled, the detail work of such a project, such as finishing around the windows and doors, together with protective treatments, can take almost as long to complete.
Internally, another damp-proof membrane is placed under the wooden floor, together with insulation material.
PREPARING THE SPACE
Taking time to prepare the layout space is very important if the environment is to be a pleasing and comfortable place to spend time – a lot of time! Give thought to seating, stools, a small table for drinks, storage and to making the layout space as uncluttered as possible. Presentation is important so as not to detract from your lovely model. In my case, I was keen to make the cabin as uncluttered and as clean an environment as possible for guest operators, visitors and my regular operating team. Storage for equipment and materials was important, as was heating and making space for people as well as track.
Comfort and security were considered from the word go; I emphasized the importance of providing a damp-proof membrane when discussing the concrete base with the ground works contractor. The membrane was installed before the concrete was poured. The slab was left to cure for thirty days and allowed to dry for further time so that the water used to make the concrete workable and for the hydration of the cement could escape. The frame of the building was placed on damp-proof material before the structure was erected upon it. Once the building was complete, further damp-proof material was installed under the floor boards, together with as much insulation material as I could squeeze in.
Such is the character of the building, I was reluctant to hide the beautiful timber walls and roof by insulation material. However, it was vital to insulate against heat loss in winter and solar heat gain in summer. My wife Sarah discovered a liquid insulation material based on nano technology that was applied direct to the wood with a paint roller. It reduced the heating load from 4kW of heating to a single 2kW oil-filled radiator in winter while maintaining a healthy 20°C. Consideration was given to an air-to-air heat source pump for heating and cooling, the idea being to control yet further the environment of the building and its contents. After all, there was a lot of expensive equipment in use within those walls. Consideration was also given to carpeting, a seating area for guests and off-duty operators and a music system for playing CDs during construction sessions.
Creating a comfortable atmosphere is very important, no matter the location of your railway. Insulation, heating, cooling and lighting all have their part to play. The cabin was treated with a liquid insulation product to retain heat in winter and reflect solar heat in summer.
Nansulate is the trade name for nano technology insulation that was used in my layout building. Notably, this sort of product could help with the insulation of lofts, sheds, garages and other locations where traditional insulating products would be awkward to apply.
It looks like acrylic varnish and is applied in the same way, with a roller. Painting equipment can be washed with water after application.
The doors and windows are fitted with additional security locks, there is a CO2 fire extinguisher in the building that is suitable for dealing with electrical fires, and the electricity supply in the cabin has its own distribution box with fuses and safety devices. The cable leading from the house to the cabin is an armoured one and, when choosing such cable, buy the highest rated type you can afford. With regard to the electrical installation, I employed the services of a qualified electrician. All of this effort in preparing the layout space may cost additional money and further delay the start of real layout building, but pays dividends over time when the layout is up and operational.
This is me, at work, rolling Nansulate directly on to the wooden surfaces of the cabin. (I must apologize for the awful clothes, but when in scruffy mode …)
ONCE HAVING FOUND SOME REAL ESTATE TO BUILD THE RAILWAY …
We have located the space for our railway that satisfies everyone as far as possible. Yes, there will be some compromises with the choice, but your skills as a modeller can be used to make the best of that space. I hope that you will have considered the access issues, construction mess, heating, ventilation, a power supply and security. The available space has been measured and checked to see whether it is usable and has a chance of fulfilling our ambitions. Now is the time to develop the layout concept.
It may be that you already have an idea of what you would like to model, but without the physical boundaries of the layout space, the actual development of ideas was going no further than a wish list. Thinking back on my ‘mulling-it-over’ phase, it began to reach a stage where my thoughts simply went in circles and no real decisions on the layout concept had been made as I had too many themes to choose from. With eighteen months past, there was no sign of any activity in the cabin, which was beginning to look like a very expensive storage building. What I did have on the credit side of the balance sheet was a clear view of the theme of one possible project. One cannot make a start unless decisions regarding this have been made. Here is a check list of things to consider when developing the layout concept. In essence, it is a different question regarding time and space, as you will see.
THE MODELLING THEME
A modelling (or layout) theme is the overall plan of what you want to model. Most if not all modellers have a theme in mind (or more than one, as in my case), even before the search for space commences, through an interest in a particular prototype and careful research. The choice of themes from the options that may present themselves may be determined by the available space – the two are linked. For example, if a shelf measuring 10ft long and 20in wide is all that is available, any thoughts of King’s Cross station in about 1957 in OO gauge are not going to develop into a realistic theme, no matter how much it is desired. However, a smaller terminus station could be accommodated by that space if a different theme were to be considered. Alternatively, if 30ft by 20ft were to present itself as an ideal environment, the small switching layout theme that may have been in mind would soon grow to a main line with long train action.
A theme is the choice of period in time, railway company, scale, gauge, date or season and geographical location. For example, with my model collecting over the years, I have a number of themes I would like to pursue. I have a liking for US-outline N scale and mountain railroading. Montana Rail Link (MRL) is also part of that theme, my having followed the fortunes of the company since it was formed in the late 1980s. Long-distance mountain railroading plays to the strengths of N scale, enabling long trains with spectacular scenery to match, and all being possible to model in a reasonable space, thanks to the relatively small size of the models. A further factor that made me consider the MRL main line is its use as a bridge route for long-distance trains operated by Burling Northern and its 1994 merger company BNSF. The mix of big six-axle traction, long trains and colour all added up to a fascinating railway scene.
I also enjoy modelling modern railway operations in the UK, having accumulated a large collection of 4mm-scale models, ready for a layout. This saw me doodle several themes on to notepaper, including Redhill on the line to Brighton as a ‘bitsa’ station theme. I considered the junction at the south end of the station where the Tonbridge line diverges as the main layout feature, together with the likely traffic patterns that would make operation interesting. My collection of Southern Region multiple units, together with fine models for the Class 33 offered by Heljan, would have fitted a theme from 1989 to 2002 perfectly. As you will see, this theme was replaced by another, that better matched the shape of my space, and sits perfectly in another part of Southern Region third rail territory.


