22,49 €
Mehr erfahren.
- Herausgeber: Crowood
- Kategorie: Lebensstil
- Sprache: Englisch
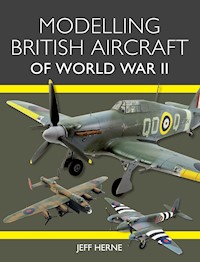
Modelling British Aircraft of World War II provides essential guidance for modellers of all levels of experience. It gives advice on how to get started, from choosing the best kit to preparing your workspace with the right tools, paints and equipment. Tips on the use of reference material, construction techniques and painting recipes are given. The book provides step-by-step building and painting techniques of the following models: 1/48 Hurricane Mk IIc, 1/32 Spitfire Mk IIa, 1/48 Mosquito Mk VI, 1/48 Swordfish Mk II and 1/72 Lancaster B III. Instructional use of after-market detailing kits and accessories is given as well as advice on fitting a base or creating a diorama. Finally, there is a chapter on Royal Air Force camouflage and markings.
Das E-Book können Sie in Legimi-Apps oder einer beliebigen App lesen, die das folgende Format unterstützen:
Veröffentlichungsjahr: 2020
Ähnliche


MODELLINGBRITISH AIRCRAFT
OF WORLD WAR II
MODELLINGBRITISH AIRCRAFT
OF WORLD WAR II
JEFF HERNE
First published in 2020 byThe Crowood Press LtdRamsbury, MarlboroughWiltshire SN8 2HR
www.crowood.com
This e-book first published in 2020
© Jeff Herne 2020
All rights reserved. This e-book is copyright material and must not be copied, reproduced, transferred, distributed, leased, licensed or publicly performed or used in any way except as specifically permitted in writing by the publishers, as allowed under the terms and conditions under which it was purchased or as strictly permitted by applicable copyright law. Any unauthorised distribution or use of this text may be a direct infringement of the author’s and publisher’s rights, and those responsible may be liable in law accordingly.
British Library Cataloguing-in-Publication DataA catalogue record for this book is available from the British Library.
ISBN 978 1 78500 782 8
Contents
Dedication and Acknowledgements
Introduction
1 Preparation
2 Tools, Paint and Chemicals
3 Hawker Hurricane Mk IIc, 1/48 scale Hasegawa
4 Supermarine Spitfire Mk IIa, 1/32 scale Revell
5 Mosquito Mk VI, 1/48 scale Tamiya
6 Swordfish Mk II, 1/48 scale Tamiya
7 Lancaster B III, 1/72 scale Hasegawa
8 Model Bases and the Art of the Diorama
9 Royal Air Force Camouflage and Markings 1939–45
Bibliography
Index
Dedication and Acknowledgements
This book is dedicated to my loving wife Laura and daughter Katelyn, who not only tolerated my countless hours in the shop, but countless hours at the computer putting thoughts and details into words. I am a lucky man to have such wonderful ladies in my life.
Special thanks must be extended to the following people, without whose assistance this work would not have been possible.
Dave Raatz – when I wanted to sleep, he told me to write.
David Holmes – who took the ramblings of a Yank and turned them into respectable English.
Shannon O’Neill, Wayne Dippold, Ronnie MacDonald, Vic Scheuerman, Seb Sherburn, Jeff Barrette, Dave Gayton and Chris Henry at the EAA Museum in Oshkosh, for allowing me access to their photo collections and their aircraft. What better way to research a Mossie than from the cockpit?
Photos credited to Australian War Memorial, US National Archives, Smithsonian National Air and Space Museum, United States Air Force, Canadian National Archives, Archives New Zealand, Fleet Air Arm Museum, Imperial War Museum and British Ministry of Defence are in the public domain or carry an Open Government Licence (OGL v.1). Individual credits are given where known. All other photos are from the author’s collection.
Introduction
HURRICANE. SPITFIRE. MOSQUITO. SWORDFISH. LANCASTER …
These are some of the most legendary aircraft to emerge from World War II. Since their introduction in the 1930s and 1940s, models have been made of them, first in wood, then plastic, and today there are hundreds of kits of these aircraft available to the hobbyist in a huge array of scales and variants. It is safe to say that millions of models of these aircraft have been built over the years by both expert and novice modellers alike.
But what defines an expert modeller from a novice? Many will assume that it is the experience of the builder or the tools and techniques that define what the ultimate end result will be – a model worthy of a place in a museum, or a fair representation of an aircraft in miniature form for your bookshelf.
With the explosive growth of the Internet and social media, scale modelling became a worldwide, interconnected hobby and suddenly modellers were communicating with other like-minded builders all over the planet, discussing kits and techniques and sharing the history we attempt to convey through our models. Despite this tremendous resource of information, after a few minutes online one immediately notices that not everyone is ahead of the curve, qualitatively speaking. As modellers, we develop techniques over time, through trial and error, and when we find something that works tend to become reluctant to change our ways. Sometimes, that can be a hindrance.
As a professional modeller, I am always searching for ways to improve my efficiency, improve my product and minimize the frustrations and hurdles we have all had to overcome in our beloved pastime. At the same time, I have learnt to balance the hobby and the job – despite the fact that both are the exact same thing. Despite four decades in this hobby, I am still learning new techniques and methods, and not necessarily from the ‘expert’ modeller, but from someone new to the hobby who saw a problem and developed a commonsense technique that was superior to mine.
While I cannot promise you that this volume will make you an expert, I can promise you that if you have ever looked upon others’ work and wished you could achieve similar results, then our goal is to reduce your learning curve, minimize trial and error and help you to achieve those same results.
Jeff HerneIxonia, Wisconsin, USA
Chapter One
Preparation
We shall start off under the impression that this is not only your first serious model kit as an adult – but it is the first model you have ever attempted. If you are an experienced modeller this could be a tad repetitive, but you never know what little bits of information you may pick up along the way. If you’re not an expert, start out with the understanding that this is not a race; rather, it is a journey that requires time and patience to master, and once you feel you’ve mastered it, another challenge will come along to motivate your creativity.
Regardless of your skill level or experience, the journey you are about to set upon is not about simply building a miniature version of your favourite aircraft – it’s far more than that. You are, in essence, creating art. Your model will be a reflection of the effort and passion you put into it. Only you can decide to what level you take your work in terms of accuracy and detail. In order to accomplish these goals, you must be prepared with some basic knowledge. There are countless things to consider when building a model. The complexity of the kit, the tools and resources at your disposal to physically construct the kit, and even your attitude going into the project, all contribute to the end result.
Selecting a kit to build is not a random act. For some, it’s the most difficult part of the process. Perhaps it’s the look of the model, perhaps you have a historical connection to the original aircraft or pilot. Whatever the reason, the key to your initial success is choosing a model you are capable of building and completing within a reasonable amount of time. What this means, simply, is to start out with a kit that you can actually finish without being overwhelmed by its complexity or physical size. A single-seat fighter such as a Spitfire or Hurricane will allow you to gain experience and confidence, while also developing construction techniques without being intimidated by the overall scope of the project.
The scale of the kit is also important. A 1/72 Spitfire is an evening’s worth of building, whereas 1/48 and 1/32 scale kits will require proportional amounts of time to complete, as the level of detail inherently increases with the physical size of the model. The construction averages will vary based on the modeller’s skills and experience, but the average modeller should invest fifteen to twenty hours of time on a 1/72 scale Spitfire, twenty-five to thirty hours of time on a 1/48 scale Spitfire, and forty hours or more on a 1/32 scale kit, based on a typical, out of the box build. A super-detailed 1/32 scale model is likely to require several hundred hours of work if done properly.
There are several factors to consider when selecting a scale to start your collection. Using a Spitfire as a reference, we can safely assume the 3:2:1 size comparison, meaning that in the space required by a 1/32 scale Spitfire, you can fit two 1/48 scale kits, or three 1/72 scale kits.
SPITFIRE SCALE DIMENSIONS
How big is big? Choose your scales wisely, especially if space is at a premium:
• the wingspan of a 1/72 scale Spitfire is 6in (152mm)
• the wingspan of a 1/48 scale Spitfire is 9.25in (235mm)
• the wingspan of a 1/32 scale Spitfire is 15in (380mm) (but a 1/32 scale Lancaster has a wingspan of 38.25in [972mm]!).
Cost is also a consideration. The larger the kit, the higher the initial costs involved, not only for the kit itself, but the amount of consumable materials that you will use such as paint and glue, and, of course, your time.
Fig. 1.1 Choose a scale based on your available space, budget and eyesight.
Before we continue, we must consider the complexity of the model in relation to our own physical limitations and experience. While 1/72 scale is an ideal size for successive projects and relatively low costs, the parts are very small and often require the use of magnification, especially for those of us no longer in our youth. As the scale increases, so does the complexity of the sub-assemblies, the total number of parts and the time required to add them to the model. Historically, many modellers find 1/72 too small and 1/32 too large, so they fall into that heavily populated area of 1/48 scale. In 1/48 and 1/32 scales, the availability of aftermarket detail sets means that even a basic kit can turn into an extensive, and expensive, project. Ultimately, it is up to you to decide (Fig. 1.1).
Fig. 1.2 Vintage kits, although nostalgic, are not always up to modern engineering standards. Often available for bargain prices at shows and swap meets, they can be a perfect way to build skills.
Fig. 1.3 Kits range from low-cost entry level to high-cost expert, but the average kit is generally no more expensive than dinner and a trip to the cinema.
Finally, we must come to terms with technology. For older modellers, the kits of our youth are still readily available and at reasonable prices. Be warned, however, that many of these older generation kits from the 1960s and 1970s are not the well-fitting, highly detailed kits we once thought they were. They aren’t bad; they’re simply a product of their time. Do not be tempted by the low prices, as the 1965 Spitfire kit simply does not compare to the 2018 kit (Fig. 1.2). With the advent of computer design, CNC machining and modern manufacturing processes, the old releases from our youth cannot compare to their modern counterparts. This is where a simple Internet search can yield a wealth of information on the kit, its accuracy, level of detail, ease of assembly and cost (Fig. 1.3). Be mindful in your search for a kit, of reissues. Reissues are vintage kits in new boxes, often with modern price tags. Most model company websites provide descriptions of their kits, including whether or not the kit is a new tool or reissue.
Fig. 1.4 While popular British subjects continue to be released, companies have also started moulding more obscure subjects. Although a Lancaster and Spitfire are obvious choices, an American Liberator in the China– Burma–India theatre is not your average RAF model.
There are also dozens of dedicated scale modelling websites with thousands of online kit reviews, offering insight into the project long before you open the box. In virtually all instances, your homework has already been done in the form of online ‘sneak peeks’, in-box reviews and actual feature-length project builds (Fig. 1.4). Keep in mind, though, that online reviews are written by a wide array of modellers and it is not unusual to find contradictory information about the same kit.
Following are various other considerations to take into account when starting out on your modelling hobby.
PATIENCE
If you talk to any experienced modeller, one of the first things they’ll tell you is that this hobby demands patience. In the past, it was possible to buy a kit and have it painted and ‘flying’ within a few hours. Today, many of us still build with this same subconscious mindset – get it finished, on the shelf and move on to the next project. However, if you are in a rush to see how the model is going to look finished, the chances are this will compromise the quality of the model. Patience is critical. Understand each step of the process and treat each component of the model as if it were the model. Building a quality model is not a race. Like anything else we do in life, it requires planning, thought, patience and work. A useful strategy, especially with larger, more complex kits, is to finish a sub-assembly completely, including paint and weathering. Although it may seem illogical to the construction process and the kit instructions, it allows the builder actually to finish something in a timely manner and provides the motivation to continue, knowing that eventually all of these components will come together as a finished piece.
ARTISTIC LICENCE
If you have been around the hobby for any length of time, you will inevitably run into all sorts of people, as in everyday life, who see things differently than you do. Modelling is no different. Where you decide to fit, if you choose to fit at all, is ultimately up to you, as this is your hobby, your model, your art. A model is a miniature representation of an actual plane, tank, or ship, at a single moment in time. An aircraft on the day it was delivered has a very different appearance than the same aircraft six months later, but it is nevertheless the same aircraft. At one point in time, everything is new, clean and with pristine paint. Where you choose to position the ‘snapshot’ of your model is entirely up to you. Most modellers weather their models, making them appear used. Some push those limits and make their models look broken down and war-weary. Other modellers prefer the ‘showroom’ look, with no weathering at all. Many modellers want absolute historical accuracy, right down to the proper colour of dirt on the undersides because, yes, the dirt at Biggin Hill is a different colour to the dirt at Duxford! There is no right or wrong and the majority of modellers tend to fall in the middle of the two extremes, which, ironically, is where we tend to find the average amount of dirt, grime and wear and tear of an operational combat aircraft.
Always remember – there will never be a ‘perfect’ model, regardless of how hard you try. Never lose sight of the fact that this is a hobby, for your enjoyment. If painting your Spitfire in the colours of your favourite football team makes you happy, do it. In the end, your happiness is what ultimately matters. Your stance on artistic licence will change as you build knowledge and experience, as you acquire more references and interact with other modellers who share their knowledge, techniques and resources. Every modeller looks back on their previous work and sees room for improvement. When you finish that first model, it will be your crowning achievement. But there will be errors, omissions, mistakes and inaccuracies. Each new model is a learning experience and an opportunity to apply what you have learnt from the previous one in order to create yet another personal masterpiece. Do not be too hard on yourself, though. If your work is not on a par with everyone else’s, figure out why and work to achieve similar results. It will be frustrating, but the rewards far outweigh the struggles.
So you have a kit selected and have prepared yourself mentally to build your best model so far. There are a few more steps in the process before you start building, so let’s cover some often overlooked subjects.
REFERENCES
Scale modelling requires research and study. Perhaps not initially, when your sole purpose is to build a model and have fun, but eventually you will run into questions that cannot be answered by the kit instructions. Before the Internet, modellers relied on personal reference libraries for their information and, despite the advances in technology and information access, even beginner modellers are inexorably drawn towards gathering reference books to support their projects. There are general information books that, aside from learning the history and lineage of a specific aircraft, do not really offer much in the technical sense. There are historical references, squadron and unit histories, that, in conjunction with the physical operations of the group, offer period photos of aircraft that can be used as marking references, weathering references and so on. The final type of reference is the technical reference, which is the most beneficial reference to the scale modeller, as it delves into the nuts, bolts and rivets of the actual aircraft. There are thousands of references in all varieties of subjects, aircraft-specific, camouflage application and development, operational histories, modernday restorations of vintage aircraft, and even the photo-driven ‘coffee table’ books, whose close-up photos can provide a wealth of information to the modeller (Fig. 1.5).
Fig. 1.5 Access to information will make your model-building project easier. Some of the print references used in this title are fifty years old.
Today, the average modeller has only to type a few lines into an Internet search engine, such as ‘Spitfire Mk. II Merlin engine’, and hundreds of photos magically appear, providing the builder with a wealth of instant information. Regardless of your methods, paper or electronic, researching your model and answering those questions ensures that you’re putting your best into your art. For many modellers, researching a unique paint scheme or a lesser-known variant of an aircraft is as exciting as the actual model, as you’re not only educating yourself; you’re connecting with your work on a much deeper level.
As you spend more time online sourcing references for your model, you will inevitably find scale modelling websites, and there are dozens, some with a specific focus, others more generalized. These sites can be a tremendous asset to the beginner modeller, as they contain kit reviews, feature build stories, conversions, and hundreds of like-minded modellers, all accessible with a click of a mouse. Be warned though – you can spend more time online reading about modelling than actually building!
Chapter Two
Tools, Paint and Chemicals
Now it’s time to prepare your tools and work area. Although veteran modellers will often possess every possible tool imaginable, the simple truth is that a good model can be built with a minimum of tools. A hobby knife with no.11 blade, some sanding sticks, putty, cyanoacrylate (super) glue, liquid cement, quality paintbrushes and the various colours of paint you need are all that’s required to build a decent model. Remember – quality tools are an investment and, if taken care of, will last for decades.
If you do not have a dedicated work area, select a location that’s well-lit and out of the way of pets, children and spouses. The ability to leave your work on the bench while you’re away from the project is critical – it prevents parts loss and it won’t interrupt the build process by forcing you to pack and unpack your project each time you work on it. It might not seem like a big deal at the moment, but later on in the project you will understand the logic (Fig. 2.1).
Fig. 2.1 A well-organized workbench, with tools and paints easily accessible, makes the hobby much more enjoyable.
TOOLS
The bane of all model builders is not having the right tool for the job, especially when it’s most needed. Like anything else we do in life, having the right tools makes the job easier, improves our efficiency and adds to the overall quality of the product we create. If you’re starting in the hobby and intend to stay with it, the collecting of tools should be almost as important as the construction of the model. Although it sounds intimidating, many of the advanced tools that modellers use can often be found around the house – it’s simply a matter of collecting them and having them readily available (Fig. 2.2).
Fig. 2.2 A collection of quality tools is necessary for quality work. The menacing object next to the blue sprue cutters is a tool specially designed to open paint bottles. Although certainly not a requirement, it is a nice tool to have on hand.
Fig. 2.3 Sprue cutters are a must-have tool for your workbench. The back side of the tip provides a clean, flat cut – perfect for removing parts from the sprues without damaging them.
Fig. 2.4 A razor saw is not mandatory, but serves as an excellent scribing tool in addition to making clean, precision cuts in plastic. The photo-etched blades feature extremely fine teeth.
Fig. 2.5 Scribing tools become essential when details are sanded off the model during assembly. They come in a variety of forms, including ultra-sharp knife blades, purpose-designed tools, dental tools and razor saw blades.
A few must-have tools should be procured, including a pair of sprue cutters (Fig. 2.3). These are simply fine-pointed wire cutters and can be found in hobby shops, craft stores and beading shops. Though not included in the list, a razor saw is an extremely useful tool, not only for removing or cutting parts, but also as a scribing tool (Fig. 2.4). These saws are available online and through most hobby retailers. A good hobby knife, scribing tools and surgical and dental tools are all useful items for cutting, scraping and general hobby mayhem (Fig. 2.5).
Fig. 2.6 Like scribing tools, rivet tools are needed to replace details sanded off during assembly. The teeth on the wheels create uniformly spaced indentations to replicate flush rivets.
Fig. 2.7 Rivet tools come in a variety of types, but one of the most effective is the Rivet-R from RB Productions. Individual wheels allow for an array of rivet patterns and it fits into a no.5 hobby knife handle.
If you are a dedicated aircraft modeller, a riveting tool will be a necessary item, primarily for replacing details sanded away during construction. There are numerous fixed-wheel types (Fig. 2.6), or the photo-etched variety, which fits nicely into a hobby knife handle (Fig. 2.7).
There are countless tools available around the house that can benefit the modeller. A pair of fingernail clippers works well for removing small parts from sprues; toenail clippers, for larger parts. Cuticle scissors, clothes-pegs, rubber bands, sewing needles, toothpicks, craft sticks, cotton buds, napkins, small bits of wire, and bottle caps, all have a purpose on the workbench.
In addition to items found around the house, as your skills increase you will require more specialized tools. These specialized tools are not always obvious, but they certainly have their uses – surgical haemostats, jeweller’s files, small drills, a pin vice and eventually a motor tool. Every modeller should have a hair dryer on hand as well, especially if you choose acrylic paint. Each modeller is unique and each will have a specific set of tools used on a regular basis.
BASIC TOOLS FOR GETTING STARTED
Following is a list of the basic tools required when starting your modelling hobby:
• hobby knife with no.11 blade
• a few quality paintbrushes
• sanding sticks of various grits
• basic paint colours and thinners
• sprue cutters/nippers
• liquid cement (MEK)
• cyanoacrylate (super) glue
• cotton buds
• masking tape
• small scissors
ONE HUNDRED AND ONE USES
Miscellaneous items around the house can be helpful in modelling. Here’s a quick list of items you can use:
• bottle caps – perfect for mixing small amounts of paint or holding a few drops of cyanoacrylate glue
• straight pins – placed in a hobby knife blade, straight pins make excellent glue applicators
• clothes pegs – great for clamping small parts while gluing, as well as holding parts while painting
• rubber bands – perfect for clamping fuselages while gluing
• scraps of wire – telephone wire, copper wire from discarded electronics and solder wire are ideal for replicating hoses, fuel, brake and hydraulic lines
• pencils – a no.2 pencil is perfect for replicating worn metal; coloured pencils are excellent for weathering
• pastels – work nicely when applied with a brush to replicate exhaust, rust, dust and dirt
• toothpicks – good glue applicators
• craft sticks – perfect for stirring paint
• sticky notes – ideal for disposable paint and glue palettes and simple paint masks when spraying
• fishing line – especially in small sizes, monofilament is perfect for antenna wires
• candle – not for the ambience, but for stretching sprue
• permanent marker pens – great for marking seams
• paper towels/paper napkins – because you will make a mess
• glass cleaner – works well for cleaning parts and brushes
• glass containers – for mineral spirits or other petroleum-based liquids used for cleaning brushes and tools
• storage drawers – ideal for storing spare parts
• pill bottles – perfect for storing small parts, drill bits, hobby blades
• lighter/matches – for the candle
• magnifying glass – because sometimes an OptiVISOR (see below) is not enough
• flashlight – because you will drop parts on the floor and spend hours on your knees searching for them
• tape – masking tape is especially handy not only for masking, but also for test-fitting parts


