2,99 €
Mehr erfahren.
- Herausgeber: BookRix
- Kategorie: Lebensstil
- Sprache: Englisch
Paracord is one of the most useful items to have on an adventure. From replacing a broken shoe string to making a fishing line, it has a wide variety of uses that come in handy in both day-to-day situations and wilderness scenarios.
DIY survival bracelets make great gifts since you can personalize the size and color. You can even make your four-legged friend a new collar.
This DIY guide will show you how to craft your own bracelet using a cobra weave technique and many other paracord projects. Once you’ve got the technique down, use your imagination to make presents for all your adventurous friends and family.
This book "Paracord for beginners" gives you the complete step-by-step instructions for several paracord projects. Learn to make strong paracord knots, paracord survival bracelets, wrist lanyard, dog collar, dog leash and much more. All projects contain pictures for each step so you can easily make all these yourself.
ORDER YOUR COPY NOW
Das E-Book können Sie in Legimi-Apps oder einer beliebigen App lesen, die das folgende Format unterstützen:
Veröffentlichungsjahr: 2023
Ähnliche


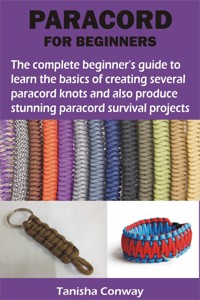
PARACORD FOR BEGINNERS
The complete beginner’s guide to learn the basics of creating several paracord knots and also produce stunning paracord
I dedicate this book to God and to my wonderful family.BookRix GmbH & Co. KG81371 MunichTitle page
PARACORD FOR BEGINNERS
The complete beginner’s guide to learn the basics of creating several paracord knots and also produce stunning paracord survival projects
Tanisha Conway
Table of contents
NOTE
This ebook is a guide and serves as an initial guide. Please also get professional advice
CHAPTER ONE: Creating your own Paracord Survival Bracelet
Paracord is one of the most indispensable equipment on a trip. It is useful in both day-to-day and wilderness settings, from repairing a broken shoelace to creating fishing line.
The ability to customize the size and color of DIY survival bracelets makes them ideal presents. You may even build a new collar for your canine companion. Our do-it-yourself tutorial will demonstrate how to create a cobra weave bracelet. Once you have mastered the method, utilize your creativity to create gifts for all your adventurous friends.
Materials:
1/8 in. Your choice of diameter and color(s) of paracord, length determined by wrist measurement*
¾ in. plastic buckle with side release
* One inch of bracelet length equals about one foot, or twelve inches of rope. Therefore, if the circumference of your wrist is 8 inches, cut 8 feet (96 inches) of cord (see step 2).
Tools:
Ruler or tape measure
Scissors
Lighter
CHAPTER TWO: Four Strong Paracord Knots
Sometimes, learning the proper knot may save a person's life. For example, you must escape a POW camp and have a stack of bedsheets in your chamber (it's a five-star POW camp). How would you tie the bedsheets together so that you could bring them with you on your Siberian expedition to keep you warm? At the conclusion of this article, you will be able to choose the proper knot.
The solution is the Kamikaze Knot.
You should NEVER, EVER, EVER use it! There is a purpose behind the designation.
Here are four very incredible knots you can tie with paracord that every survivalist should know.
Four Strong Paracord Knots
Materials required to tie these four paracord knots:
• Paracord
• Scissors
• 1″ PVC (for practicing on) (for practicing on)
Clearly, you do not need this quantity. Two 2-foot strands should enough.
Simply scissors.
It is not required to be PVC pipe. The Constrictor Knot may be practiced on anything circular.
The Constrictor Knot
The Constrictor Knot resembles a hitch, but it is categorized as a knot owing to its propensity to bind so tightly that it becomes permanent. This knot is often tied with thinner rope (twine) and needs a circular surface to bind. It is ideal for creating rope ladders.
1st Step: Wrap the cable completely around the pipe once.
If you lack PVC pipe, you may use a broom handle. Or a flagpole. Or a cucumber if you choose.
So far, so good
2nd Step: Continue wrapping the tape around the pipe.
3rd Step: This time, thread it between the two existing strands from the previous step.
4th step: Thread the wire through the loop as indicated
5th Step: pull tight
That is an attractive knot
The Double Fishermen's Bend
If you need to combine two ropes into one, the Double Fisherman's bend is the solution. This line is notorious to fuse together under severe weights, making it tough to unwind. Under modest weights, however, the line is adjustable, and this knot might be used to create new backpack straps.
1st step: First, cross the two ropes over one another.
2nd Step: simply cross the black rope around the blue colored rope and also behind itself.
3rd Step: Double-wrap the black rope around both ropes.
4th step: Fourthly, thread the black rope through the loop.
5th Step: Pull Tight
Note: the subsequent procedures are identical to the preceding ones (but of the other strand of paracord)
6th step: Cross the blue cord behind the black cord.
7th Step: Wind it twice around both paracords
8th Step: Thread the cable through the loop.
9th Step: Tighten it
10th Step: Pull each paracord's ends together until the knots are formed.
Zepplin's Bend
If you need to combine two ropes with a reliable knot and then separate them, the Zepplin Bend is just as strong as the Double Fisherman's Bend and is as simple to undo.
1st step: Create a U-shape with each paracord.
2nd step: Create two loops in this step (note that the blue paracord loops over while the black paracord loops under)
3rd Step: Thread the blue paracord through the black paracord's constructed loop.
4th step: Keep on threading the blue paracord through the loop in itself for the fourth step
5th step: Repeat the last two steps using black paracord (Thread through the loop in the blue paracord and through the loop in itself)
6th Step: Ensure you pull tightly
The Kamikaze Knot
The Kamikaze Knot is the bad boy of survival knots and should only be used in life-or-death situations. The Kamikaze Knot is a version of the Sheepshank Knot, and it is tied the same manner, with the addition of a cut at the end of the configuration.
There is dumb, stupid, stupid to utilize this unless it is an absolute need.
In order to facilitate this recovery, the rope is linked in a manner that forms a temporary bypass around the cut; one that only binds under strain. After reaching the bottom and releasing the strain, the rope will fall to you. Obviously, if you strike a little ledge while descending and lose your grip on the rope, you may plummet to your death at any time.
There is dumb, stupid, stupid to utilize this unless it is an absolute need. Have we previously stated this?
1st step: form an S-shape with your paracord.
2nd step: Create a loop at the bottom of the S-shape in the second step.
3rd Step: Pull the "Stop "'s part through the loop.
4th Step: Form a loop in the "Stop "'s part.
5th Step: Insert the bottom of the "S" into the loop.
6th Step: Pull both ends of the paracord to tighten the knot.
This pattern of opposing loops forms a knot. Nothing is attached to them. The free end of the paracord on the left would be secured to a fixed place, while the remaining paracord or rope on the right would be used to descend. When the system is loaded, these two loops intertwine and hold the knot together.
7th Step: Using scissors, sever the center strand.
When the two ends of the paracord are pulled together, the loops will join and secure the two sections together. This is more effective with coarser rope, since it aids in binding.
Repeatedly practice tying these knots until you know them by heart, and then practice them again. Once you've mastered them, check out our other interesting paracord ideas.


