20,99 €
Mehr erfahren.
- Herausgeber: NAG
- Kategorie: Lebensstil
- Sprache: Englisch
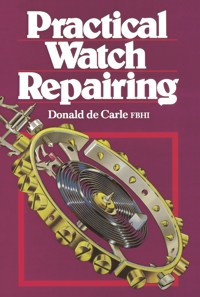
Here is a unique book. It describes the theories and processes of repairing and adjusting the modern watch in precise and meticulous detail: a thing which has never been done so completely before in the many books on the same subject. As a text book it is a revelation. Taking nothing for granted, except the ability to read and comprehend a simple description of mechanical processes, de Carle takes his reader through every stage and every operation of watch repairing ...and to deal with them thoroughly is quite a programme - it takes 300 pages containing 24 chapters, two appendices and 553 illustrations. The fine draughtsmanship and accurate technical detail of the illustrations set a new standard. Practical Watch Repairing can justifiably claim to be the best illustrated book on practical horology yet issued, and one of the best of its kind on any subject. The publication of the book marks the beginning of a new epoch in the study of the mechanics of horology.
Das E-Book können Sie in Legimi-Apps oder einer beliebigen App lesen, die das folgende Format unterstützen:
Seitenzahl: 610
Veröffentlichungsjahr: 2020
Ähnliche


PRACTICAL WATCH REPAIRING
Practical Watch Repairing
Third Edition
Donald de Carle F.B.H.I.
Illustrations byE. A. Ayres
N.A.G. Press
First published in 1946
New editions 1953, 1964 and 1969
This edition published by NAG Press, an imprint of The Crowood Press Ltd, Ramsbury, Marlborough Wiltshire SN8 2HR
www.crowood.com
This e-book first published in 2020
This impression 2018
© NAG Press and Donald de Carle 1964, 1953, 1964 and 1969
All rights reserved. This e-book is copyright material and must not be copied, reproduced, transferred, distributed, leased, licensed or publicly performed or used in any way except as specifically permitted in writing by the publishers, as allowed under the terms and conditions under which it was purchased or as strictly permitted by applicable copyright law. Any unauthorised distribution or use of this text may be a direct infringement of the author’s and publisher’s rights, and those responsible may be liable in law accordingly.
British Library Cataloguing-in-Publication Data
A catalogue record for this book is available from the British Library.
ISBN 978 0 7198 3106 5
CONTENTS
PREFACE AND ACKNOWLEDGMENTS
CHAPTER 1. WORKSHOP AND WORK-BENCH. First essentials. Necessity for practice. Equipment for success. Working in comfort. Work-bench, seat. Lighting, natural and artificial
CHAPTER 2. ESSENTIAL TOOLS. Screwdrivers, large and small. Using screwdrivers. General and special purpose tweezers. Using tweezers. Oilers, oil pots and stands. Eye-glasses, nippers, pliers, hammers, hand-removing levers, bluing pan, pegwood and pith
CHAPTER 3. CASE, DIAL AND HANDS. The case and its components. Opening the case. Removing hands and dial. Removing movement. Correct handling of movement
CHAPTER 4. THE MOVEMENT, COMPONENTS AND DISMANTLING. Every part of movement illustrated. Standard names for watch parts. Examination in detail. Adjustments to motion work. Dial fitting. Checking endshake and sideshake of train and balance
CHAPTER 5. LEVER ESCAPEMENT, EXAMINATION AND CORRECTION. Layout and functioning. Examination and adjustment. Examination of lock. Adjusting pallets. Correcting run to the banking. Correcting the draw. Angle of pallets. Outside and inside shake. Angle of lever. Removing balance spring. Adjustments to lever. Fitting new guard pin. Fitting new ruby pin. The double roller and balance staff.
CHAPTER 6. PIN PALLET ESCAPEMENT. Correcting lock. Adjustments to lever. Repairing guard pin. Correcting impulse. Fitting new pallet pins. Correcting banking. Movements described and illustrated
CHAPTER 7. THE TRAIN: GEARS AND TOOTH FORMS. Arbors and pivots. Uprighting and bushing. Engaging and disengaging friction. Gear tooth forms: epicycloidal cycloidal, circular arc, involute. Gear wheels and pinions. Use of sector, micrometer and vernier gauges. Testing and correcting depths. Using depthing tool, wheel stretching tool, wheel topping tool. Wheel cutting
CHAPTER 8. THE BARREL AND MAINSPRING. Repairs and adjustments to barrel. Correct fitting of arbor. Proportions of mainspring. Mainspring winders. Cleaning, handling, and re-winding mainspring. Fitting new ends to mainspring. Fitting new hook to barrel. Mainspring slipping devices. Author's patent device. Re-coiling clicks
CHAPTER 9. HAND CLEANING AND OILING. Cleaning dial, pallets, small parts, balance spring, train wheels. Correct oiling of jewels. Oiling escapement. Original watch oiling chart. Movement holders
CHAPTER 10. THE CLEANING MACHINE. Preparation of parts. Using machine. Care of solutions
CHAPTER 11. KEYLESS WORK. Faults and their remedies
CHAPTER 12. SPRINGING AND TIMING. Conventional signs. Setting to exact time. The compensation balance. The function of timing screws. Testing in temperatures. Temperature screws. Reducing balance screws. Temperature adjustment chart. Poising. Plain balance. Advantages of Elinvar and beryllium. Balance spring charts. Fitting new balance spring. Vibrating. Pinning at centre. Position of centre pinning
CHAPTER 13. BREGUET OVERCOIL. Designing the Lossier curve. Designing curve to apply overcoil to flat spring. Forming overcoil. Special tools for forming overcoil. Pinning at stud
CHAPTER 14. TIMING IN POSITIONS. Measuring arc of vibration. Necessity for correct pinning of balance spring. Use of watch timing rack. Pinning point chart. Altering curve of overcoil. Altering end of staff pivot. Index pin adjustment. Poising for positional adjustment. Centrifugal force. Positional adjustment. Isochronism test. Accumulated daily error chart. Timing in positions and temperatures. Correction chart for gaining rate. Correction chart for losing rate
CHAPTER 15. MAKING NEW PARTS. Polishing materials. Polishing. Filing. Making balance cock. Making click spring. Chamfering tools and cutters. Overhand and underhand polishing. Using the bolt tool. Polishing and finishing steel
CHAPTER 16. TURNING. Sharpening the graver. Preparing and using the polisher. Forming pivots. Making pivot runners. Fitting balance. Burnishing pivots
CHAPTER 17. THE LATHE AND ITS USE. Driving by hand, foot or motor. Split chucks and their use. Polishing on the lathe. Turning a balance staff on the lathe. Parting off. The Jacot tool. Making cutters. Use and maintenance of burnishers. Use of wax chuck. Turning between centres. Use of safety pulley. Truing a balance. The step chuck. Callipers and guide. American style callipers. Fitting new centre-pinion. Turning round shoulder. Fitting to wheel. Fitting new cannon pinion. Using special tool. Polishing undercut. Turning new winding shaft. Filing square. Tapping in the lathe. Fitting a new pivot. Making a drill. Making, hardening and tempering drills. Pivoting tool. Straightening balance staff pivots. Straightening a pivot. Lathe work on the barrel. Special cutters. Use of slide rest. Using screw head tool. Universal chuck. Brass chuck. Lantern chuck. Self-centring drill. Drilling brass. Topping tool. Wheel cutting. Lapping. Filing a square hole. Removing rust from steel work
CHAPTER 18. THE ENGLISH LEVER. Examination of ¾-plate going barrel movement. English lever escapement. Ratchet tooth escapement. Club tooth escapement. Marking the jewels. Deep locking. Cleaning the train. English lever fusee movement. Making new fusee click. Fitting new fusee ratchet. Fitting new click. Checking maintaining power. Fitting square hook to mainspring. Cleaning and fitting fusee chain. Full plate English lever movement. Using adjusting rod
CHAPTER 19. FRICTION JEWELLING. Friction jewel-setting equipment. Special tools and accessories. Replacing rubbed-in jewel by friction jewel. Fitting new friction jewel. Fitting balance jewel. Fitting end-stone. Fitting rubbed-in jewel. Setting a jewel by hand
CHAPTER 20. SHOCK-RESISTANT JEWELLING. Theory of device. Methods of construction. “ Incabloc,” “ Parechoc " and “ Shockresist ” systems detailed. Cleaning and oiling
CHAPTER 21. MAGNETISM AND DEMAGNETISING. Magnetism. How it affects the watch. Parts affected. Demagnetising. Detecting magnetism. Machine from mains. Machine from battery. Machine using battery and vibrator coil. Demagnetising without mains or battery
CHAPTER 22. WATER-RESISTANT CASES. Why not waterproof. Sub-mergence test. Testing under pressure. Vacuum test. Where water enters the case. Methods of sealing pendant and bezel. Special case-opening tools and how to use them. Universal opening tools. The “ Waterproof ” guarantee
CHAPTER 23. THE BULOVA TUNING FORK WATCH. The movement. Tools required. Removing the movement. Diagnosis procedure. Procedure for regulation. Checking the electronics. Checking the mechanics
CHAPTER 24. TIMING MACHINES. Use of the rate recorder. Vault diagnosis
APPENDIX I. Some of the 101 reasons likely to cause a watch to stop
APPENDIX II. A standard of workmanship. Fourteen points of horological service
INDEX
PREFACE
THEABSORBING and everlasting subject of watch repairing has been dealt with in books in many languages. At first glance the production of yet another would appear superfluous; even one in addition to my own previous book on the subject, published by Pitman’s under the title of With the Watchmaker at the Bench. Readers of the present volume will be able to judge. The work of producing PRACTICAL WATCH REPAIRING occupied all my spare time for some three years, and I do not regard it as less than a valuable investment in experience and a humble effort to be of service to my fellow craftsmen.
My publisher, Arthur Tremayne, from whom came the inspiration for the work, convinced me in the early stages of writing it that perhaps the majority of textbooks took too much prior knowledge for granted, and that only a book about watch repairing which did not disdain to explain even the most simple processes and operations could give the student full return for his outlay.
“I want a textbook,” said Tremayne, “that a watchmaker can understand, even if he can’t read.” A fairly tall order, needing a throw-back to hieroglyphics or picture writing to carry out to the letter, but as a student of many textbooks, indeed, of as many as I could lay hands on since I first aspired to be a craftsman horologist, I understood exactly what was required. Although some readers of this book may consider parts of the subject laboured, I feel sure that many more, among them those of the younger generation, will appreciate the fact that I have left so little to guesswork, and will pay tribute to the publisher’s prodigious and insatiable appetite for drawings and blocks, to say nothing of the skilful labours of my friend E. A. Ayres, the illustrator.
The several charts and tables, most of them being original and specially compiled for the purpose, should attract particularly the attention of experienced craftsmen. In constructing them have endeavoured to provide useful information by the most direct and compact method in a form to encourage quick reference as routine.
The preliminary publication of the book as a serial from June, 1943, to December, 1945, in the pages of the HOROLOGICAL JOURNAL gave it a preview of inestimable value, bringing to light errors and omissions which wickedly dog the author of any work calling for accurate description of mechanical detail. It has also brought valuable criticisms of both the letterpress and drawings, all of which have been received most gratefully and corrections made where necessary.
As the work proceeded it was realised that a job had been started which need never end, because the designing of watches has not stood still since the first watch was made and will go on developing and progressing until the end of time itself. But the fundamental design of the lever watch may be regarded as stable, with future development more likely to be by way of the introduction of new materials or the elaboration of mechanisms which add other functions than timekeeping to the watch. The motive power with the train and escapement combine to make a very highly developed piece of mechanism, and it is mainly to this that I have devoted the book, wishing and hopeful that it will assist in creating an aspiration for fine craftsmanship, giving very practical help in its attainment.
Acknowledgments and thanks are due to my early teachers in the craft, to writers of innumerable existing textbooks and articles, to my illustrator, Mr. E. A. Ayres, to Mr. Hillyard T. Stott for his special assistance in the chapter devoted to magnetism, to Professor D. S. Torrens for reading the proofs and for kindly help and criticism at all times and, finally, to Mr. Arthur Tremayne, the Editor of the HOROLOGICAL JOURNAL, who, in his role of publisher, has supplied the driving force without which the book would never have appeared.
D. DE CARLE.
PINNER, MIDDLESEX.May, 1946.
PREFACE TO SECOND EDITION
IT GIVES great satisfaction to any author to know that his book has been successful and I am no exception. Since 1946, PRACTICAL WATCH REPAIRING has run to four impressions in this country; it has been published in America and translated into Italian and Spanish.
This second edition has been designed to bring the book completely up-to-date. Corrections have been made and the latest information added, particularly in relation to watch timers.
Again I should like to record my thanks to horological friends who have taken so much trouble to offer helpful criticism and suggestions.
D. DE CARLE.
PINNER, MIDDLESEX.August, 1953.
PREFACE TO THIRD EDITION
THE WORLD of horology is moving fast, in fact almost in step with other sciences and technologies, such as space travel and surgery.
It behoves the watch repairer to take notice of what is happening around him. There is little doubt that in the future watches will be wholly electronic. It may be some years yet—it is anybody’s guess—but I would say within the next 25 years. If the Swiss do not go ahead the Japanese will.
With this in mind, a chapter on the tuning fork electronic watch has been added, and watch repairers should start to become interested.
In addition a revised chapter on timing machines has been included in this new edition.
D. DE CARLE.
PINNER, MIDDLESEX.June, 1969.
CHAPTER ONE
WORKSHOP AND WORK-BENCH
THIS BOOK is specially written for the beginner who intends to make watch repairing and adjusting a life study, as should all who hope to get a living by it. It will describe the first steps of the work in a manner which may appear too simple; but even if the reader has already travelled some way along the road to proficiency he is requested not to skip the elementary preliminary details, for.these are the foundation upon which the more advanced practice is built. The information given is based on my own practical work, the knowledge acquired in the appreciative study of all the currently available horological literature, and the experience gained while responsible for an important horological repair shop handling many thousands of watch repairs a year. The theories and practices to be explained have been tested and approved by the many readers of my previous book on the subject, With the Watchmaker at the Bench, and their helpful correspondence has been of great assistance.
Watch repairing is work which calls for a vast amount of intelligently concentrated application. It must be understood from the start that it cannot be picked up; it demands the most careful study.
Although it is essential that the advanced repairer has a complete knowledge of the theory of the lever escapement, it is not necessary for the beginner to acquire this knowledge before starting practical work. It is impossible to learn the adjustments of a watch movement without first being fully acquainted with the form and function of each component. Modern watch movement design is still a long way from standardisation, but provided it contains no complications, such as chronograph, calendar or repeater actions, each movement design follows the same straight-forward plan despite many differing layouts, and it is therefore safe to assume that a useful repairing technique can be successfully acquired by practical application. Theoretical knowledge, without which no advanced work can be done, will be gained just as quickly as the student can grasp it. Let him put his heart into his practical work, and the necessary theoretical knowledge will be easily and quickly absorbed.
Every watch repairer must aim at acquiring keen sight and a deft touch. He must have the fullest muscular control of his wrists and fingers, and be capable of peering closely at his work through an eye-glass for long periods at a stretch without tiring. These attributes of the repairer, if they are to be employed successfully, call for a high degree of bodily comfort, a clear head, a contented mind and a determination to succeed.
It may be said that all mechanical work calls for similar personal characteristics and application. It does; but if one compares an aptitude for work on large mechanisms, such as a motor car engine, with heavy tools and adjustments which are readily measureable, with the aptitude required for work on a watch movement, where the clearances and adjustments cannot be measured except by the eye or by a delicate touch, and when these adjustments are made to parts which, when dismantled, can be dispersed with a breath or crushed with a fingernail, it becomes evident that it is a highly specialised type of work.
Therefore I warn the beginner at watch repairing that he must be prepared to study closely, to sit close to the bench and to work to close limits. If he is prepared to do this and has a keen sight and a cool temperament then, with the necessary study and practice, he can succeed.
The key-word is PRACTICE. Study is necessary, but practice is essential.
The first points to consider are the surroundings of the workman, his workshop, his lighting, both natural and artificial, his bench, and his seating accommodation. Next will be the tools he works with. Throughout this book the tools to be used on each job will be described when that part of the work is under discussion. In this trade, as no doubt in many others, no workman, be he ever so skilful, has every possible tool for every possible job ready to hand, and the watch repairer will discover ideas for tools of his own conception and will delight in making them.
The essentials for success are scrupulous cleanliness, a clear bench and good light. A clear bench is contrary, perhaps, to the ideas of the majority of watch repairers, who seem to accumulate on the bench many tools, some in use, and others of no immediate use, together with a confused collection of litter consisting of old material, work in hand, oil pots and a host of other things. The result is that tools get damaged or lost, and the time taken in rectification and search mounts up to many costly hours in the course of a year.
The beginner at the job has a fair chance of forming better habits and it is hoped that he will determine to keep a clear bench with trays, drawers and boxes to hold his various tools, keeping each in its regular place, out of the way of his current work yet within easy reach when required.
When one is engaged on a job demanding close, almost intense, mental and physical application, the immediate surroundings of the work-bench are of prime importance. One finds watch repairers given very poor quarters in many establishments, accommodated at the rear of shops behind screens, or poked into dusty, ill-lit corners with insufficient room, a prey to draughts and petty distractions that militate against the concentration and application necessary to such exacting work. In such conditions it is no wonder that repairs are often costly and unsatisfactory.
The small calibre wristlet watch has produced changed conditions in the manufacturing processes in the factories; new conditions must be also introduced in the repairers’ workshops to enable the finer, closer work to be done.
The vogue of the small watch movement is certain to persist. It is certain that many more small watches will be used in the future than in the past, with every prospect of their becoming flatter than hitherto. If watches are not small they will be complicated by actions other than timekeeping. The point here is that watch repairing is passing out of the realm of mechanics into that of a mechanical science, and this feature should be taken into consideration in planning and fitting-up the workshop and bench. It is a vital point for the beginner and of primary importance to the employer.
To sum up: Banish damp, dirt, draughts and distraction. Encourage comfort, warmth, quiet. Provide good light, good ventilation, good tools and a liberal supply of materials. Good and profitable work should result.
Although I am going to describe working conditions of an ideal character, it does not prevent the beginner from making a start in a simple way. But do not think that any good can come of trying to do work on the corner of an odd table. Take the job seriously and at least fit up a shelf to serve as a bench. Fix it across a window, let it be at least 36 to 38 inches from the floor and from 15 to 20 inches wide. The length is immaterial so long as it provides room to rest the elbows while at work.
Fig. 1. An ideal work-bench.
An ideal bench is illustrated in Fig. 1. This provides a roomy bench protected from sudden draughts, and with a bead along the front edge, a comfortable footrail, a shelf for the heavier tools which are kept in wooden cases or boxes, and drawers for tools and equipment, with a cupboard for the lathe.
Set the bench facing the light, which should be a window open to the sky and, for preference, facing due north. A northern aspect gives a soft white light which, for the watch repairer’s purpose, is practically shadowless. If a north light is impracticable, means for shading strong sunlight should be provided. An eyeshade is an added advantage.
Fig. 2. The Terry Anglepoise Lamp.
An articulated fitting should be employed for artificial light as this enables the light to be brought close to the work. Furthermore, it can be arranged at any suitable angle and, once set, will maintain that position. It is an advantage to be able to bring the light close to the work as this allows a comparatively small lamp to be used, which means less heat near the eyes and head. It also costs less to run. A good type of fitting which is finding favour with repairing horologists, as with other workers, is the Terry Anglepoise, as illustrated in Fig. 2. For ordinary drop pendants, the shade I prefer is made of metal, green enamel on the outside and white on the inside. Green and white lined card shades are obtainable but they turn a dirty white or even brown on the inside in a short period and the light is not then so well reflected.
Fig. 3. Tan-Sad chair adjustable for height of seat and back.
The height of the stool is important. No general rule can be made, but it should enable the watch repairer to sit comfortably without the necessity of crouching down at the work. He should feel quite at ease. No two people are alike in this respect and it is well worth spending some time to accomplish the desired result. You will find that it has not been time wasted. The Tan-Sad Chair Company, London, E.C.1, make a very useful adjustable seat with a convenient back rest (see Fig. 3).
If there is more than one man in the shop I still advocate the type of bench described and illustrated above, as it promotes steadiness. One man may wish to file or hammer, while another, who may be engaged in touching a balance spring, will require the bench to be absolutely steady. In the Swiss factories, where there are several men in the same shop, they employ a long narrow substantial bench about 15 inches wide, firmly fixed in just one long run against the window; but here all the men (or women) may be doing the same type of work, so that if one makes the bench vibrate they will all be doing the same, and nobody will be inconvenienced. In an ordinary repair workshop, where every variety of watch passes for repair and various operations to each watch are carried out, it is far better for each man to be a separate working unit.
Attention should be paid to the floor. A composition flooring with a radius where it meets the wall is ideal. Good plain brown linoleum with a wooden bead nailed round the skirting is the next best. Most of the parts of a watch are light in colour, gilt or white plates, gilt wheels and white pinions, blue screws are the exception, but the majority of the parts are light and they will show up well on a dark background, and should they fall to the floor they will be more readily discovered.
CHAPTER TWO
ESSENTIAL TOOLS
So much for the workshop and bench. Now for a few words about your tools, or rather the manner in which to obtain the best results from screwdrivers, tweezers, pliers, nippers and other simple but very essential universal equipment.
Fig. 4. The correct shape for screwdriver blade.
Fig. 5. The wrong shape damages screw heads.
Four screwdrivers are usually sufficient for all ordinary purposes and the most useful sizes are those with blades made from wire or rod of 2.5mm., 2mm., 1.25mm. and .75mm. diameter. Some manufacturers give sizes to their screwdrivers but the numbers do not seem to bear any relation to a measurement and are not universal, so that the measurements I have given are the best indications of the sizes. The blades of the screwdrivers should receive constant attention. The business end must be shaped, not to a knife edge, but with an edge as illustrated in Fig. 4. The taper of the blade should be reasonably long so that when it is inserted in the slot of a screw it will not, when a little pressure is exerted either to unscrew or screw up, have the tendency to slip up out of the slot and so maul the screw head. Fig. 5 shows a screwdriver blade as it should not be.
The blades should be hardened and tempered. This is usually the case with tools which are purchased from the tool shop, but should you find when filing to remake that they are soft, do not hesitate to remove the blade and harden and temper it. Eventually you will find that this is time well spent.
Fig. 6. Using the large screwdriver.
Fig. 7. Using the smaller screwdriver.
The manner of holding the screwdriver should be obvious, but some watch repairers handle tools so awkwardly that a word of advice may not be out of place. The large 2.5mm. driver is used for large pillar plate screws and such like, and a certain amount of power is necessary to give greater control over the tool. The best way to ensure both these points is to hold the screwdriver as illustrated in Fig. 6. The other three screwdrivers are used for lighter work, and better control can be exercised if a lighter or more delicate touch is exerted. To ensure this hold the screwdriver as demonstrated in Fig. 7.
Fig. 8. Recommended shapes of fine pointed tweezers.
Fig. 9. Small and large curve - point tweezers.
We all have likes and dislikes about tweezers. I prefer Dumont Swiss-made tweezers, or at least something of a similar design; they are the solid type. Three pairs of flat tweezers meet most requirements: two stout pairs and a fine pair for balance spring work, see Fig. 8. For balance spring over-coil forming I suggest two pairs to start with. As will be seen from a glance at Fig. 9, they vary in curve.
There are dozens of various types of tweezers, and it is fascinating to peruse the tweezers section of a good tool list—indeed, the whole catalogue, for that matter. There are tweezers for almost every conceivable job. In fact, you may be persuaded that the tools do the work but, as you will find in practice, that is far from the truth, so start off with the essential tweezers first, indulging in fancy types later.
Fig. 10a. The points of good tweezers should remain parallel when holding small parts.
Fig. 10b. If points curl up like this (exaggerated) drawing they must be trimmed.
Tweezers require an occasional overhaul. A good test by which it can be ascertained whether the tweezers are in good condition or not is to place a human hair on a sheet of glass. If the tweezers are in good trim it should be possible to pick up the hair with them without any difficulty. A further test, and an important one, is to grip a thin piece of metal, such as a mainspring, exerting some considerable pressure, and the points of the tweezers should not curl up. See illustration (Fig. 10a). If the tweezers do not comply with these tests they must be trimmed up, and the best way to do this is with an Arkansas slip. It may be necessary in the first place to bend the nose of the tweezers slightly; if they arc parallel there is the danger that when something is gripped tightly the points curl up, which may result in the piece snapping out, which may either damage it or cause it to be lost (Fig. 10b).
Fig. 11a. Large oiler for clock oil.
Fig. 11b. Small oiler with enlarged view of point.
Fig. 12. Oil stand with pots for heavy and light oil, pith holder and oiler groove.
Make yourself two oilers, a fine one to oil jewel holes, and a larger one, to hold clock oil, for oiling the mainspring and some of the larger parts. An ordinary sewing needle answers very well for the fine oiler. Let down to a blue and file as shown in Fig. 11b, flatten the end and shape up with an Arkansas slip to the shape of a drill, the rounded end type as used for drilling steel. The larger oiler is the same shape. Fit both into handles about three or four inches long. I find that long handles are more convenient than shorter ones. Wood handles are quite good but the ideal, in my opinion, and the type I use, are made of bone. A mapping pen holder is ideal, and I find it very comfortable. A hexagonal collar on the handle keeps the point safe and stops rolling. The Swiss and Americans favour oiling trays consisting of two or three oil pots fitted on a stand with a rack for the oilers. An excellent system this, the oilers thus being always at hand. In the illustration (Fig. 12) a holder is shown fixed to the tray which contains pieces of pith to clean the oilers or to act as repositories when in use.
Fig. 13. 3" focus eye-glass.
Fig. 14. focus eye-glass.
Two or three eye-glasses are necessary; a double lens glass with a inch focus is essential for examining jewel holes and pivots. It is a mistaken idea to assume that the wearing of an eye-glass weakens the sight. Look round amongst your horologist friends and see if there is a predominance of men wearing spectacles. I do not think you will find there is a greater percentage than the rest of the community, and the reason is that we do not strain our eyes to observe something small without adequate assistance. I do not advocate the regular use of a strong glass as this tends to render it less effective when the real necessity for its use arises, but I am definitely of the opinion that the general eye-glass is far from harmful.
A two-inch glass is useful when examining depths, adjusting the balance spring, etc., and a three-inch glass for general use. The double glass obviously reveals itself by its shape, but it is advisable for the others to be of different colours or one, say, of the open wire collapsible type, so that you readily distinguish the glass you wish to use. Like other tools, eye-glasses need some attention to make them more serviceable. The solid frame type of glass is inclined to steam up when the heat of the eye is greater than that of the atmosphere, and to prevent this three or four holes about inch in diameter should be drilled in the sides. If this is not effective, wave the glass in the air to cool the inside: it is better and quicker than wiping it.
Fig. 15. Nippers
Two pairs of nippers are necessary, one fine and the other a little heavier. Nippers when purchased from the tool shops have the cutting edges shaped as illustrated in Fig. 15. That is quite in order for the heavier pair, but the fine pair should be filed up as illustrated. We are then able to get up close for cutting or when removing a close fitting tight part such as a short pin from a plate. A little time occasionally spent in keeping such tools in good trim saves a lot of time eventually.
Fig. 16. Pliers Square nose. Tapered nose. Round nose. Brass lined.
Four pairs of pliers are necessary and these should be as illustrated in Fig. 16. A pair with a square nose for general use, the narrow tapered nose for more delicate work, round nose for manipulating wire, etc., and a pair of brass lined pliers for holding finished surfaces, such as are encountered when removing a snap-on cannon pinion.
Pliers when new are usually left with the inside of the jaws very rough. In watch work generally such a rough surface is not necessary, so file or stone at least the majority of the ridges away.
Three hammers are necessary, all of distinctly different types: an ordinary flat face type, one with a rounded face for riveting, and the third either all of brass or having the face lined with brass. A hammer such as this last is useful when tapping a finished surface to ensure that a burr will not be made. If it cannot be bought, a brass pad should be screwed into a steel hammer head.
Fig. 17. Hand-lifting levers, with enlarged detail.
Hand removing levers can be made, the illustration (Fig. 17) being self explanatory. They are made of brass about 2mm. wide, 1mm. thick and 4 to 4½ inches long.
Fig. 18. Bluing Pan.
Fig. 18 illustrates a bluing pan. This is an indispensable tool and is useful not only for bluing screws, etc., but also for heating pallets when adjusting the stones.
Fig. 19. Using the pith holder.
Fig. 20. How NOT to clean a tool.
Fig. 21. Bellows.
Every watch repairer’s bench should be provided with a pith container, such as an old French clock barrel (Fig. 19) cut down to half its original height, packed tight with pieces of pith placed in endwise. The container should be something reasonably heavy; pith itself is very light and if it is not securely held by packing tightly into the container it will be picked up by the tool during cleaning and so defeat its object. Pith is useful for cleaning the blades of screwdrivers, oilers, points of tweezers, etc., the habit—and it can become a good habit—being to stab such tools into the pith before using. This practice is much to be preferred to the usual habit of twirling screwdriver blades and oilers on the pad of the little finger (Fig. 20). I have even seen men wipe an oiler on the lapel of the coat, probably picking up more foreign matter than they remove, and then using it to apply oil ! Bellows (Fig. 21) should always be available and also one or two glass dust shades, for which broken wine glasses do very well. I shall refer frequently to all these things in their proper place, and numerous other tools in addition will be described as we proceed.
There is no doubt in my mind that knowing which tool to use and how to use it, is to be well on the road to success.
Fig. 22. Fitting the board paper.
Finally, a piece of white paper about 12 in. × 8 in. should be secured to the bench. A convenient method is to fit two pieces of mainspring under the bead in the front of the bench, so that they may act as clips as illustrated (Fig. 22). It is not necessary to secure the paper further, the oil pots and dust shades hold the farther side flat. A supply of tissue paper cut to size, about four inches square, should be at hand together with a supply of pegwood and pith.
Just a personal word here before we start work. Watches are fine delicate instruments, and one of our main objects is to make them as clean and dust-free as possible, so see your hands are clean. I have seen watchmakers handle movements with enough dirt under one finger nail to stop a dozen watches. With short nails, and nice clean hands (our finest irreparable tools, and they are worth looking after) we shall stand a better chance of success.
CHAPTER THREE
CASE, DIAL AND HANDS
WE ARE now ready to commence work. For convenience let us examine a movement together. It best suits our purpose to take a popular type as being more likely to be commonly encountered in the general run of repair work, and a 13 ligne wrist watch (1 inches diameter) with a modern Swiss straight-line lever movement is undoubtedly the best choice. During the examination or repair it may be necessary to fit new pieces, such as a balance staff or a guard pin, and these items will be dealt with under their separate headings.
As considerable confusion is caused by the lack of a recognised standard list of names for watch parts, large scale drawings of a movement are reproduced on pages 21 to 26. These consist of views of the complete movement from the back and under the dial, and also of each part (except jewels and screws) drawn separately. All parts are clearly named.
All that part of a watch which is not the case is known as the movement. It includes the dial and hands and also the winding shaft and the winding button.
When the watch is received for repair it is advisable first to make an intelligent general examination of the watch as a whole, both case and movement. By intelligent, I mean that we must examine the movement with the intention of diagnosing the cause of the watch’s failure to give good service. If it is just a matter of cleaning to re-oil, because the watch has been running beyond the prescribed time, then the cause is obvious, but for deeper trouble than that we must proceed first to examine the case. If it is bruised, make a special examination of the escapement and balance staff pivots; the watch may have had a blow. Make sure the glass gives ample freedom for the hands. Failure to ensure that the hands are free of the glass and of each other is the cause of a high percentage of watch failures, the remedy is obvious. If when the case is opened you find the movement has an abnormal amount of dust in it, examine the case to find the reason; it is useless to clean the movement and then replace it in a dust trap. A test made some time ago proved that dust penetrated what appeared to be a perfectly fitting case. The test was this: a watch was brought to a temperature of about 86 deg. F. (the average temperature of the pocket) and while still warm it was placed in a bin containing flour and allowed to remain there until the watch cooled down to the normal temperature in the bin, which was about 65 deg. F. The watch was then removed and the case opened, and upon examination the movement was found to be covered with flour. What happened was that with the heat the air had expanded. During the cooling off the air had contracted and to replace that lost, fresh air was sucked into the case and, with it, as we have seen, dust. So take particular care to examine all cases, and if they appear to be a good tight fit and, notwithstanding that, the movement was covered with dust, steps must be taken to render it more dust proof before the wearer finally takes delivery.
These observations apply also if it is desired to improve the water resisting properties of the case. Most watch cases will resist the entrance of water for momentary periods. That is, if a good watch is dropped into water and recovered immediately, very little harm may come to the movement, but continual soaking or use in a damp atmosphere, such as that encountered in the tropics, or in laundries and factories, is extremely detrimental to the movement, and a simple treatment applied to the case will greatly improve the resistance of the watch to climatic conditions. When the final regulation is finished and it is not necessary to open the case again, mix a little beeswax with vaseline or petroleum jelly, one part beeswax to four parts vaseline, heated to make a stiff mixture, and smear this on the edges of the bezel and the back, so that when the back and bezel are snapped on, they close on to a film of wax. Also apply wax to the winding button so that when it is fitted on to the pendant it works in wax, and run wax round the edge of the glass.
Before proceeding to the subject of opening cases, which it is advisable to study before going much further, it should be mentioned that the metal frame in which the glass is fitted is known as the bezel, the body of the case into which the movement goes is termed the middle, while the back of the case is obvious. The back and bezel of the case will be fitted to the middle in one of three ways. They will snap on, be jointed, that is, hinged on, or they may screw on. Cases will frequently be found with a combination of these methods of fitting. Although it was a regular practice in the old days, it is now rare to find a bezel jointed to the watch; it is snapped or screwed on. Sometimes there are two backs to a case, one inside the other, the inner case being known as the dome. Many cases are now made so that the back and middle are in one piece, the movement fitting into the case from the front, the bezel being the only detached part. These are known as two-piece cases and, because they reduce the crevices through which dirt and damp can enter, are being favoured for wristlet more and more by designers.
The shapes of watch cases are legion. Undoubtedly the round case is the best from the aesthetic point of view as well as being the easiest to make and the best in use, but fashion must be served, and shapes will continue to vary. The application of the watch to the wrist is the primary cause of variation in the shape of cases and has also called for fittings for bracelets and wristlets, which have come to be known as lugs. The small tube through which the winding shaft enters the case is called the pendant, a term existing from the days when only pocket watches were known and the pendant carried a bow, to which the swivel of the watch chain was attached.
Fig. 22a. Pocket watch case.
Fig. 22(b). Two-piece case.
Leaving style for a moment and the very important question of waterproof cases, to which a whole chapter is devoted, let us now consider the safest method of opening the watch case. The first step is to determine the method of opening, and if it is not obvious do not start right away with a knife blade or screwdriver without having decided if the case actually snaps on. It may screw on or, if it is a waterproof case, have a special method of attachment.
Examine the edge of the back or the bezel for signs of previous opening. If it is a plain snap-on it is probable that a small portion of the case is filed away to give room for the knife or case opener to enter or for the thumb-nail to bear on. Sometimes there is a small lip provided for the same purpose. If a screwed-on case is suspected, lay the watch flat on the palm of the left hand glass down, place the palm of the right hand on the back and, with firm even pressure, apply an unscrewing motion with both hands. This usually moves the tightest screw. Some considerable force may be necessary but let that force be intelligently applied.
Fig. 23. The correct way to open a watch case.
If you are satisfied that the back is not screwed on then proceed to open it with a blade. Hold the watch firmly in the left hand and the opener in the right as in Fig. 23. Insert the blade at the right place, that is, in the file mark or behind the lip. If there is no lip or mark, insert it opposite the joint; but if there is no joint, then near the winding button, but not in such a manner that the blade when twisted causes pressure on the button. When the blade is well in between the back or bezel and the middle, give it a turn over so that the bottom edge of the blade levers on to the snap-edge or rim on the middle and the side of the blade pushes off the part you are endeavouring to remove. Do not turn the blade lengthwise so that the sharp edge cuts into both the parts being disengaged, doing this will only mark or damage the case and will not open it so easily.
Opening a case should be such a simple matter, but I have seen men gouging away with a screwdriver as if trying to bore a hole in it—and almost succeeding ! Often watches are found with cases badly damaged through clumsy attempts at opening. Screw cases sometimes bear evidence of attempts to force them open with a knife, and in such circumstances the thread is usually ruined. Joints are frequently strained, especially in shaped cases, because the opener has not been inserted opposite the joint. Opening a case without retaining full control over the opener often causes that instrument to slip across the back of the movement, badly scratching the plate in the process. Damage such as this must be avoided, and it can be avoidedwith just a little forethought and care. If the opener is held, as in the illustration, with the first finger as near the top of the blade as possible, it will act as a guide and a stop, and also give considerable pressure at the right spot with perfect safety.
The case being open, the movement can now have attention. Having opened the bezel let us next remove the hands, not only for safety but also because it is more convenient to do so before taking the movement out of the case. Make a pair of small levers as illustrated in Fig. 17 (page 9); they will remove the tightest hands without any risk of damage to the dial, even if it is made of delicate enamel. When using the levers on a metal dial it is advisable to place a small piece of paper under them to prevent marking the surface. Should there be a seconds hand it can be removed with the levers if there is sufficient space between the boss of the hand and the dial. Usually these hands fit so closely to the dial that it is not possible to get the levers underneath, and it is very dangerous to force a lever under one side, or to attempt to prise off a tight hand with the tweezers or screwdriver. It is better to remove the dial and the seconds hand in one operation. When the dial has been loosened ready for removing, prise it up with the blade of a knife near the seconds hand, and the hand will come away with it quite easily and safely on both metal and enamel dials. So far, the movement is still in the case, so that if it is not possible to remove the seconds hand with the levers it is advisable to let it remain until the movement is out of the case.
Fig. 24. Letting down the mainspring.
Fig. 25. Correct way to hold watch when removing movement.
Fig. 26. Removing a tightly fitting movement.
To take the movement out of the case, first loosen the pull-out piece screw 1 to 1 turns and draw out the winding shaft. At this point it should be noted that there are two systems of fitting the winding shaft. The positive, with a long winding shaft, is used almost in-variably by Swiss manufacturers and is the type mostly met with in Great Britain. American manufacturers favour the negative system where the winding stem is short and fits into a small square hole in the top of the movement. Therefore, in American cases the winding shaft will not be removed but the button will be pulled out to the set-hands position. Having removed the winding shaft or pulled the negative-set button to the set-hands position, take the watch in the left hand as Fig. 25, with the joint of the first finger resting on the dial and the second and third fingers holding the case. Release the movement by removing the case screws, or giving them a part turn if they have half heads, so that they are free of the case. Case screws with half heads are usually called dog screws. If you now ease the first finger of the left hand the movement may be free; I say may, because more often than not the movement sticks. If the movement is tight in the case turn the watch over, place a piece of tissue paper over the movement and apply a little pressure on the back plate at the extreme edge of the movement immediately opposite the pendant. Sometimes a steady-pin is located near the shaft. Hold the watch down on to the bench while doing this so that the released movement will just roll over on to its dial. See Fig. 26.
With the modern two-piece case, the movement is merely laid in and the bezel snapped or screwed on over it. The procedure with these watches is first to remove the bezel, then to pull the winding button into the set-hands position, and carefully ease the movement out by means of the winding shaft. Should it jam at any point a careful levering up with the small screwdriver, making sure that the screwdriver is under the shoulder of the plate and not just under the dial, will help it out.
With the movement out we next remove the dial. Many modern watches are fitted with side screws to hold the dial in position. Do not remove them, but unscrew sufficiently to allow the dial to come away without exerting any force. It is important that force should never be used on a dial. If it is enamelled cracking is almost inevitable, and if the dial is made of metal, pressure will cause the dial to show a bump or indentation where the dial feet are fitted. When the dial has been removed, screw the dial screws up again directly to prevent them from working out and being lost.
Fig. 27. How NOT to handle a watch movement.
The correct handling of a movement is a special technique which should be practised from the start so that even in moments of crisis—and many arise in the life of the watch repairer—the movement will be held without danger. It is a bad practice to allow the fingers to touch the plates or the dial (see Fig. 27) for not only does it stain and mark but, in the case of a finished movement so held, the oil may be sapped away from the pivots. Make it a definite habit always to hold the movement correctly, and when the work is finished take the further precaution of holding the movement not only by the edges but in tissue paper also. There may be moisture or dust on the fingers, so slight as not to be visible but, as the barrel teeth project so that the fingers can come into contact with them, this moisture, dust or perspiration can be conveyed thereby to the centre pinion. Rusting centre pinions are sometimes encountered, and I am of the opinion that this is the cause.
Fig. 28. The correct method.
When they are removed it is advisable to place the dial and hands away in a safe place as they are so easily damaged. Put them in a box or drawer, one of those miniature nests of drawers kept on the bench is most useful for this and many other purposes. The dial and hands will not again be wanted until the movement is finally reassembled.
When speaking of the main parts of the watch movement, the plates and bridges (which, when single ended, are known as cocks) are together called the frame. When viewing the movement in the case from the back, the plate visible is called the top plate. The plate which is actually the foundation of the watch movement and to which the dial is attached is known as the bottom plate.
CHAPTER FOUR
THE MOVEMENT, COMPONENTS AND DISMANTLING
WHEN the dial and hands are removed the face of the bottom plate carrying the motion work is visible. The motion work is the small reduction gear between the hour and minute hands. Remove these wheels and place them for the time being under a glass cover on the board paper. Old wineglasses broken at the stem make excellent work covers, and the watch repairer should make a point of collecting several of these in various sizes as and when he is able. All parts as they are removed should be placed under cover. It saves them from getting lost, damaged, damp or dirty, and even if the parts are in need of cleaning, it is still advisable to place them under a cover. It is a good habit, and one well worth cultivating.
Now turn the movement over and proceed to remove the balance. Be careful when the movement is on the bench with the bottom plate down, there will be two important parts projecting: the centre arbor which holds the cannon pinion and, if the watch has a seconds hand, the fourth wheel pivot, which projects through the plate. Keep these in mind when working on the movement from the back plate. Therefore hold the movement by the edge with the thumb and fingers so that it is bedded on the fleshy parts of the fingers, touching the bench only at the point where pressure is to be applied. With a screwdriver of the correct size, that is, one to fit the full length of the screw slot, take the screw out of the balance cock and with the stout tweezers carefully prise up the cock at the foot end. You will see a small slot cut out of the bottom of the foot to allow the point of the tweezers to enter. Hold the cock with the tweezers while you carefully prise it up and, when it is free of the steady pins, lift it off with the balance still attached. Take care that no undue force is employed. When the cock is free, the balance may be inclined to stick owing to the safety roller catching up on the lever fork, so that it is imperative that the balance be not pulled away for fear of distorting the balance spring. Should there be any inclination for the balance to stick, hold the balance cock still, keeping the right hand steady, and give a slight turn of the left hand to rotate the movement; this should disengage the lever. It may be necessary to rotate the movement both to the left and to the right before the balance is free.
When the balance is tree of the movement do not let it dangle at the end of the balance spring, but lower it steadily to the bench and, as the bottom pivot touches the bench, carefully turn the balance cock over with its index downwards, so that it rests flat. The balance will be inclined to turn over with the cock and it will facilitate matters if when turning the balance over you gently draw the balance along sideways a little while it still touches the board paper. If the balance does not turn over in the manner described, lift it carefully with the tweezers and place it so that the top balance pivot, now at the bottom, rests in the jewel hole.
This procedure of turning the balance is perfectly safe with the great majority of watches, but not all; some watches are fitted with a soft balance spring. These soft springs are usually white in colour and if there is any doubt as to the hardness of the spring place the movement aside on the bench for a moment. Lower the balance so that the bottom pivot rests on the bench, then, holding the cock firmly with the left hand, loosen the balance spring stud screw, and the balance may fall away. Sometimes the curb pins will continue to hold the spring, and this is brought about by the downward pull of the balance causing the spring to twist between the pins and so become wedged. To release the spring give it a gentle turn with the fine tweezers held as near the pins as possible. There is also a type of balance spring stud which is secured to the top side of the balance cock, the stud lying along the top of the cock. Some Swiss, and most English watches, are made in this way, and in such instances the stud is unscrewed first while the balance cock is still in the movement, and upon the balance cock being lifted up, the balance and balance spring are left behind. The majority of watches with this type of stud are pocket watches, but there are a few wrist watches employing this principle to be found.
Assuming that the balance and cock have been removed complete and now lie on the bench upside down, take the foot of the balance cock between the thumb and first finger of the left hand, still holding it on the bench, unscrew the stud and lift the balance off the cock. It is not necessary or advisable to lift the balance cock during this operation. When lifting a balance away from a jewel hole, whether the balance is in the movement or just lying on the upturned balance cock, always give it a straight-up lift in order to avoid injuring the balance staff pivot. After releasing the balance spring stud retighten the screw.
Now turn the movement over and release the cannon pinion. For this operation hold the movement firmly in the left hand by the edges of the bottom plate and lightly grip the pinion with the brass lined pliers, giving it an anti-clockwise twist and a slight pull at the same time.
Turn the movement over again (be careful of the fourth wheel pivot) to commence dismantling the train, but before going any further make sure that the mainspring has been let down or, if it has not, wedge the train with a piece of pegwood. It is important always to test the mainspring tension of a watch train before touching the pallet cock. This is simply done by light pressure on the cross arm of the centre wheel or by gently touching over the lever.
The experienced man will remove the pallet cock and lift out the pallets, allowing the spring to run down under control of a finger brake on the edge of a wheel, but the safest method of letting down the spring is to hold the watch as Fig. 24


