18,49 €
Mehr erfahren.
- Herausgeber: Crowood
- Kategorie: Fachliteratur
- Sprache: Englisch
If you have never fixed a roof tile or slate before but have wondered how to go about repairing or replacing them, then this is the book for you. Many of the technical books about roof tiling and slating are rather vague and conveniently ignore some of the trickier problems and how they can be resolved. In Roof Tiling and Slating, the author rejects this cautious approach. Kevin Taylor uses both his extensive knowledge of the trade and his ability to explain the subject in easily understandable terms, to demonstrate how to carry out the work safely to a high standard, using tried and tested methods. Topics covered: considers the various types of tiles, slates and roofing materials on the market and their uses, how to estimate the required quantities, and where to buy them; discusses how to check and assess a roof and how to identify and rectify problems; describes how to efficiently 'set out' roofs from small, simple jobs to larger and more complicated projects, thus making the work quicker, simpler and neater; examines the correct and the incorrect ways of installing background materials such as underlay, battens and valley liners; explains how to install interlocking tiles, plain tiles, and artificial and natural slates; covers both modern and traditional methods and skills, including cutting materials by hand without the assistance of power tools; provides invaluable guidance on repairs and maintenance issues, and highlights common mistakes and how they can be avoided.
Das E-Book können Sie in Legimi-Apps oder einer beliebigen App lesen, die das folgende Format unterstützen:
Seitenzahl: 225
Veröffentlichungsjahr: 2012
Ähnliche


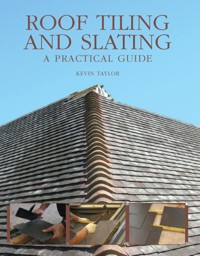
ROOF TILING AND SLATING
A PRACTICAL GUIDE
KEVIN TAYLOR
Copyright
First published in 2008 by The Crowood Press Ltd, Ramsbury, Marlborough, Wiltshire, SN8 2HR
www.crowood.com
Revised edition 2013
This e-book edition first published in 2013
© Kevin Taylor 2008 and 2013
All rights reserved. This e-book is copyright material and must not be copied, reproduced, transferred, distributed, leased, licensed or publicly performed or used in any way except as specifically permitted in writing by the publishers, as allowed under the terms and conditions under which it was purchased or as strictly permitted by applicable copyright law. Any unauthorised distribution or use of this text may be a direct infringement of the author’s and publisher’s rights, and those responsible may be liable in law accordingly.
ISBN 978 1 84797 471 6
Dedication This e-book is dedicated to all the great people in the roofing industry whom I have met over the years, but especially to my father Alan, sadly no longer with us.
Disclaimer The author and publisher do not accept responsibility, in any manner whatsoever, for any error, or omission, nor any loss, damage, injury, adverse outcome or liability of any kind incurred as a result of the use of any of the information contained in this e-book, or reliance upon it. Readers are advised to seek specific professional advice relating to their particular house, dwelling, project and circumstances before embarking on any roofing, slating, tiling or building work of any kind.
Contents
Title Page
Copyright
Preface and Acknowledgements
Introduction
1 Tools and Equipment
2 Materials
3 Roof Types, Details and Design Considerations
4 First Essential Steps
5 Installing Background Materials
6 Interlocking Tiles
7 Plain Tiles
8 Natural Slates (Regular Sized, Centre Nailed)
9 Artificial Slates (Fibre-Cement)
10 Basic Flashings
11 Repairs and Maintenance
Appendix: Estimating Materials
Glossary
Useful Contacts
Index
Preface and Acknowledgements
I left school not knowing what I wanted to do for a living and so I decided to work for my father’s roofing company, for what I thought would be a few weeks until I found what I considered to be a proper job. Twenty-five years on and counting I am still in the roofing industry, despite several half-hearted attempts to leave it; it is, as they say, ‘in the blood’.
I hope that, as well as providing actual guidance on slating and tiling, this book will help in some way to encourage more people into what is still a cracking little trade; yes, it is hard work and you have the weather in the winter to contend with, but the freedom, the variety, the sense of pride on seeing the finished roof (something which lasts for years as you drive by places with which you have been involved), the banter on site, and the useful money you can now earn more than make up for the drawbacks.
It is true to say that roofers have not always enjoyed the best of reputations, but I have to say that, in my experience, most of the ‘cowboy’ roofer stories involve people who are not really roofers at all. If more homeowners went to reputable firms rather than the ‘unmarked van and mobile phone-only brigade’ then they would see that most do a good job at a fair price.
Roofing in general is full of people who are knowledgeable, skilful, passionate, cynical, funny, opinionated, resourceful and argumentative, but rarely dull. Many of them – depending on their age, regional differences or personal grudges – may read this book and no doubt disagree with some of it, but I have not tried to write a technically perfect manual that covers every eventuality. Instead, I have tried to write a book that covers commonly used methods, which are simple to understand and to follow.
Most of the photographs here were taken in a workshop situation on training rigs rather than on site. This allowed me to set up the exact situations I wanted, so I would like to thank the staff at Sandtoft Training and Assessment Centre (STAC) in Doncaster for allowing me to use their facilities.
Introduction
Slating and tiling embraces a vast area of materials and situations, from re-tiling a front door porch to the restoration of a cathedral and everything in between. To cover all of these crafts and techniques and to make the text appropriate for the many types of person who potentially make up its readership could take many volumes to complete. Thus to cover the basics has proved quite difficult to do within one book of manageable size, but you will find that most of the common skills required in roof slating and tiling are covered in chapter 6, dealing with interlocking tiles, since these are by far the most frequently used material. To get the most out of the book you should read it as it has been printed, at least until the end of chapter 6.
This book is aimed at serious DIYers, self-builders, students, improvers and those new to the trade, but it may also prove useful for more experienced roofers. It covers the tools, techniques and tips needed to install common materials, interlocking and plain tiles, natural and artificial slates on small to medium-sized projects with standard roof shapes and details. The book provides easy-to-follow instructions and techniques, tips on what to do (and what to avoid) and, above all, guidance on good practice. Its purpose is to help the reader to achieve a good quality roof, which will be durable, looks professional and, above all, keeps the water out.
While I have tried to ensure that the methods are in line with all the current British Standards (BS) and Health and Safety requirements, the book is not meant to be a substitute for them. Had I done so, it would have turned into a very long, vague, highly technical and possibly very dull piece of work, full of ifs, buts and maybes. Professional roofers and those who are intending to work on commercial projects should refer to the following publications as a minimum:
BS 5534: Code of practice for slating and tiling (including shingles)
BS 8000, Workmanship on building sites Part 6: Code of practice for slating and tiling of roofs and claddings (under revision at the time of writing) Health and Safety in Roof Work – Health and Safety Guidance 33 (HSG33)
The first two are produced by the British Standards Institute and the third by the Health and Safety Executive. If you are intending to do your own lead work in a commercial environment I would also recommend a fourth publication – the Lead Sheet Manual produced by the Lead Sheet Association (LSA). I have provided details on how to get all these publications in the contacts list at the back of the book.
THE FUNCTION AND PURPOSE OF SLATING AND TILING
The main function of slating and tiling is, of course, to keep the building watertight, to give it a good hat if you like. But slating and tiling are about much more than that, they are highly visual parts of a building, which add to the character of our townscapes in every aspect, from domestic dwellings to buildings of high historical importance.
One side effect of reading this book, I hope, is that you will feel compelled to look up at roofs and to comment on them in your daily life and wherever you go. Those of us in roofing will recognize this affliction (and so, I suspect, would our partners). If you travel about this country extensively you start to notice the character that roofing materials add to places. For example, the clay pantile roofs in areas such as Norfolk and Lincolnshire, the stone slates in the Yorkshire Dales, the different types of natural slate found in Wales, Scotland and the South-West, and the clay plain tiles that give so much character to many of our older domestic properties. Sometimes these materials are deemed to be so important to a building that they are relaid wherever possible, a process that I and other supporters of our heritage just love to see.
While much of what we do has not changed perhaps for hundreds of years, there is another side to roof slating and tiling and that is the new materials and techniques that have emerged and continue to do so. Concrete interlocking tiles and artificial slates have provided a cost-effective range available in a variety of finishes and colours for the new build and refurbishment market, we have modern roof windows which are relatively easy to install, dry-fix systems that replace sand/cement mortar with plastic alternatives, and high-tech roofing felts (underlay) that can ‘breathe’ to help to combat condensation. These new materials are also shaping our townscapes and have added enormously to the ‘pallet’ of roofing materials that can now be offered by the roofing industry.
DESIGN CONSIDERATIONS
What roofing materials you use depends on how much you want to spend, how you want the roof to look and, in many cases, what the local authority will allow you to do.
Cost
With regards to cost, it is not just the price per tile or slate that matters, it is how long it will take to lay it and the other materials that go with it. In general, concrete, interlocking, tiled roofs are at the cheaper end, with clay plain tiles and natural slates being the most expensive. Somewhere in the middle are concrete plain tiles, artificial slates and a range of interlocking and traditional clay roof tiles. All the roofing materials sold by reputable merchants and manufacturers in the United Kingdom have to pass stringent tests so all should provide you with a sound weatherproof covering; provided, of course, that they are fixed properly.
Quality
What you will pay extra for is mainly to do with aesthetics and long-term durability. A good quality slate or clay tile, for example – apart from perhaps darkening – will change little in appearance throughout its useful life and can normally be reused (hence there is also an environmental recycling factor with some materials). Cheaper materials tend to become discoloured and hosts for moss, lichen and other plant growths, some within just a few years of being laid and are rarely, if ever, reused. However, some roof-tile manufacturers do have the facility to recycle old tiles.
Planning Issues
If you are re-roofing then the first thing you need to do is to approach your local authority and ask to speak to the planning department and building control. There are three important reasons why you should do this.
Restrictions
The first is that your property may be in a conservation area or there may be restrictions on the range of materials you can use for aesthetic reasons. This does not necessarily mean that the property has to be hundreds of years old or be listed, it may well be that local authority policy is to retain a certain look to the buildings in a particular area.
Structural Issues
The second is that the roof structure may need to be inspected and approved to ensure that it is of an adequate strength and condition to be re-roofed with the new materials, especially, of course, if there is a suspicion that the new materials will be heavier than the existing ones.
Conservation of Heat and Power
The third concerns a recent change in the Building Regulations in relation to the conservation of heat and power (Approved Document Part L). If you are replacing more than 50 per cent of a roof then it is very likely that you will be required to upgrade your insulation as well. Of the three reasons, this is the most current and the one most likely to have an adverse effect on you later on if you ignore it. The local authority can insist that the work is done (often more awkward or expensive later on) and you may experience problems selling the property until it has been carried out.
HEALTH AND SAFETY
Working at Height
Working at heights requires special precautions for obvious reasons. Falls from height still account for one-fifth of the deaths in the construction industry; they are the biggest killer in the industry, yet still people chance their arm, especially in the domestic market. Having seen one former colleague suffer an accident that meant that he could never walk again, another break his leg and countless near misses, I can tell you that it is just not worth risking your neck to save money or to win contracts. People often say that health and safety are expensive, but there is a saying to the effect that ‘if you think health and safety are expensive then you should try accidents’, and in our litigious world it was never truer. Approximately 8.5 per cent (about £4.75bn) of tender prices are lost due to deaths and injuries and the resulting claims and court actions in the construction industry.
For any short-term work (less than an hour) the minimum safety equipment required on a pitched roof is an access ladder plus a roof ladder. However, if you have good edge protection and you can use the battens (which must be in good condition) as footholds, then normally you do not necessarily need a roof ladder.
For anything more extensive than a few roof repairs you should have a suitable working platform. This can be anything from a lightweight, quick-form tower (from a hire shop) to a full tube and fitting scaffold. The choice is based on the risks involved, but certainly for full new or re-roofs you should employ a competent scaffolder to erect a scaffold fit for purpose. The working platform should be as close to the eaves as possible (set no more than 300mm down), because you should be able to step safely on and off the roof without any risk of injury.
You should also ensure that, if there is any chance that you could fall through a roof (that is, between the rafters), you should consider the risks and put the correct controls in place. Internal protection can range from boarding out above the ceiling joists, to air bags and full safety netting on larger projects.
The following checklists should help with regard to providing a safer working environment while carrying out roofing work:
Access ladders must:
be set at an angle of 75 degrees (a ratio of one out, four up);securely lashed or clamped (preferably at the top) or footed by another person;extend at least 1m or five rungs over the step-off point;be climbed and descended by using at least three points of contact (that is, two feet and at least one hand).Roof ladders must:
be of sufficient length to reach the access ladder;be factory-made to recognized quality standards, not hand-made from timber;be lashed to the access ladder close to the step-off point.Working platforms must:
be fully boarded and close to the eaves;have a handrail at 950mm or more up from the working platform;have an intermediate safety rail between the working platform and the handrail;have toe-boards with a minimum height of 150mm;be fitted with brick guards or similar, especially when stripping roofs.Personal Protective Equipment (PPE)
Personal protective equipment is the last resort in health and safety. This means that, if you have to put yourself at risk to do the work because there is no other way of designing out the hazards, then you need to wear the right equipment. The standard PPE for a roofer would include a pair of heavy-duty gloves to wear when loading the tiles or slates, appropriate protective footwear, a hard hat and, when mixing or using a disc cutter, eye protection, ear defenders and dust masks. When choosing PPE you should always ensure that the items are fit for purpose, especially eye protection, which should be selected to cope with any impact force that may be placed on it. If in doubt, then always buy from a reputable hire shop or DIY store and explain what you want the PPE for before buying it. But, whatever you do, do not just go for the cheapest, getting the right equipment could save you from a bad injury.
A selection of personal protective equipment used by roofers (clockwise from the top: hard toe-capped boots, heavy-duty gloves, high-impact goggles, disposable dust mask, ear defenders and hard hat).
Dust Suppression
From 2012 it is a legal requirement to use dust suppression when cutting all roof tiles and related materials, due to the risks involved with the inhalation of silica and other dusts. The standard method is to use water attachments, which are available to fit most disc cutters. The appropriate PPE must also be worn by users and others who may be at risk.
Lowering and Lifting Materials
Wherever possible, you should try to avoid carrying things up or down a ladder because of the risks involved with your falling or dropping something. Often, of course, on small projects and one-offs it is not practicable to hire or buy specialist equipment, but I shall briefly cover the main ones in use for those who may be intending to work in more commercial environments.
Forklift Truck
Virtually every site will now have a forklift truck to move, load and unload lorries and raise and lower materials. Only trained and designated people should operate the forklift. Materials raised to working-platform level should be placed on special loading bays designed to take their weight, not on the main scaffolding.
Vertical Cage Hoist
Cage hoists are normally used on buildings that are of three storeys or more and, in particular, where there are many pedestrians such as a town centre or in public buildings. They should be erected and dismantled by approved, competent people only, and the user must have undergone the correct training (often training is carried out on the job, by the hire company).
Inclined Hoist
The roofs on most one- and two-storey properties can be serviced by an inclined hoist. There is a range of these available, normally they are designed to take bricks and blocks as well as slates and tiles up to the working platform and they do this via a series of raised plates attached to a belt or chain driven by a fuel-powered generator at the bottom. Unlike a cage hoist, which is for others to erect and dismantle, most inclined hoists are set up, used and taken down by the roofer. When purchasing one of these hoists the companies often offer free training on how to do this safely.
Chute
When stripping a roof it is important to ensure that you use a chute or some other safe means of lowering the materials (for example, in a container by forklift truck). This is particularly important in areas where you would expect to find many pedestrians or on a public highway. Chutes should be erected and dismantled by a competent person, normally the same one who erected the scaffold.
Gin Wheel
For small loads that can be properly secured and pulled up by hand, gin wheels can prove an effective, low-cost item. Apart from the obvious point of not trying to lift or lower more weight than you are physically comfortable with, the important things to remember are that the gin wheel should be in good condition and correctly fixed to the scaffold, the rope must be also be in good condition, the area below cordoned off (just in case), the method of hooking and unhooking pre-established and the user wearing gloves.
MEASUREMENTS
Metric vs. Imperial
Many slaters and tilers still work in imperial measurements and some (like me) switch between imperial and metric to suit the situation. But, if you are new to the trade, I would encourage you to use metric only for two main reasons: first, because converting from one to the other can cause errors, and secondly, most things (including setting and marking out) are much easier to learn in metric. By now, of course, we should all be working in metric, and so, at the risk of upsetting some of my peers, I have (apart from the occasional reference to explain a point) tried to avoid imperial measurements throughout this book.
CHAPTER 1
Tools and Equipment
This chapter deals with the tools and equipment needed and advice on how to make the right choices.
HAND TOOLS
The tools in a roofer, slater and tiler’s bag or tool box will vary from firm to firm and from region to region, and so will the terminology describing them. The list below is from my own tools and those which are most commonly used throughout the industry. Much, of course, depends on the type of work you are doing, so I have included a brief description of what each tool is used for to help you decide what you may or may not need.
Measuring Tape
Retractable tapes come in all sorts of quality and length, but for measuring roofs and for general use go for a heavy-duty, retractable tape in excess of 7m long.
Folding Rule
Many roofers (including me) prefer to use a folding rule rather than a tape in certain situations. Go for a 1m folding rule that shows metric and, if possible, imperial measurements as well.
Gauging Trowel
The trowel most commonly used by roofers is the gauging trowel (about 175mm in length). It is big enough to bed mortar with and small enough to point with. Go for a forged trowel, which means that the blade and the handle are all of one piece of metal; the cheaper ones are welded together and not really robust enough for roofing work.
Nail Pouch
There is a wide variety of nail pouches available, some are more tool belts than pouches and, while the odd extra pocket or loop is handy at times, a simple nail pouch with two separate compartments should be fine in most situations. This will allow you to separate batten nails and clout nails for ‘lathing and felting’ and then tile and slate nails and clips (if applicable) when fixing the roof covering.
Chalk Line/Wet Red Line
Lines are useful for striking lines when battening and setting out for tiling, for example. If you are using a wet line choose one that is quite stiff, absorbent (that is, not nylon) and well made. The sign of a good line is that it does not separate when twisted backwards and forwards in the fingers. The colouring used is normally red cement dye mixed with water. If you prefer a chalk line then buy a heavy duty one and fill it with a coloured chalk.
Trimming Knife
This is still commonly referred to in the trade as a ‘Stanley knife’, although that is strictly a trade name. They are used mainly for cutting underlay. Straight blades will cut most types of felt and underlay, but if you are using bituminous felt I would recommend hook blades.
Cordless Drill/Screwdriver
By all means have a manual drill and a few straight and cross-bladed screwdrivers in your tool bag as a backup and for small jobs, but, if you are going to be doing a lot of dry fix or installing roof windows, then a cordless drill (the higher the voltage the better) plus a selection of masonry bits and screwdriver bits are essential.
Roofers’ gauging trowel.
Nail pouches.
Selection of slating tools (clockwise from the top: slate-holing machine, slate knife, slate ripper, break iron, pick hammer and hand-held cutters).
Slater’s ‘Break or Bench’ Iron and Slate Knife
A break iron is basically an anvil for cutting natural slates in conjunction with a slate knife. These are the traditional tools used to cut slates and are still widely used, despite the introduction of hand-held cutters, especially when it comes to the heavier, thicker slates.
Slate-Holing Machines
Now many natural slates come pre-holed, but you do pay a premium for that service and there are some occasions when it is preferable to hole the slates yourself. Slate-holing machines can have a punch- or borer-type action and come with adjustable guards to set the holing position. Traditionally, a slater’s apprentice or labourer would set up a bench with a break iron, slate knife and holing machine and it would be his job to grade (into three or more thicknesses) and hole all the slates and cut the fittings (half slates, under-eaves, topper slates and so on) for the craftsman.
Slate Cutters (Hand-Held)
Used for cutting thin, natural slates and artificial, fibre-cement slates.
Claw Hammer or Lath Hammer
Which hammer to use for lathing and felting is a matter of personal preference. At one time, nearly all roofers used a lath hammer (the modern ones are actually plastering drywall hammers) because you were allowed to chop the battens rather than saw them, as happens now. For most roofers, it seems that a decent claw hammer is now the weapon of choice.
Pick Hammer
This is the traditional slater’s hammer, with the pick being used for making holes in situ and the small head providing the accuracy needed to nail slates without breaking them.
Cross pein (tiling) hammer.
Cross Pein Hammer
I have always carried one of these in my tool box since I was an apprentice because it is very handy for chipping away bits of tile, taking nibs off and for picking up and nailing roof tiles. I have not seen them often over the years so perhaps it is a local preference, but if you are doing much roof tiling then I would recommend that you get one; buy a decent make and go for one with some weight to it (say 250 to 300g).
Tile Nibbler
This tool is designed for cutting clay and concrete plain tiles (the blades are adjustable) without having to resort to power tools. The tile is marked and passed through the blades as they are worked up and down, taking off about 10 to 12mm at a time. For the best results the tile should be scribed first.
Tile Scribe
Scribes are useful when hand cutting because they give you a better chance of making the cut in the first place and the results are normally much neater. Go for one with a good handle that you can grip so that you can apply the appropriate pressure when scribing.
Basic Lead-Working Tools
As the name suggests, snips are used for cutting thin metal and in roofing that normally means sheet lead. The dressers are used to beat the lead into place and the chisels for chasing out masonry joints and positioning the lead into the joints.
Saws
Since truss rafters became popular, it has been standard practice to saw battens rather than to chop them with a lath hammer. You should choose a fine-tooth saw or a bow saw, some roofers carry both.
Hand Board
Along with a suitable heavy-duty bucket, I would recommend the use of a hand board for applying mortar and especially when pointing.
Tile nibbler and scribes.


