
23,99 €
Mehr erfahren.
- Herausgeber: Crowood
- Kategorie: Lebensstil
- Sprache: Englisch
This fascinating volume tells you everything you need to know about how to build an 00 gauge Tilbury Tank locomotive or, indeed, any similar type of tank. Written in an engaging, encouraging and easily understable style, this new work is a worthy successor to the author's first book, Scratch-Building Model Railway Locomotives, which was short-listed for the Ian Allan Railway Book of the Year Awards in 2014. Containing scale diagrams, step-by-step photos, sketches and specially commissioned artwork, the book celebrates the history of Tilbury Tanks and demonstrates a range of different techniques that will prove invaluable in constructing models of these charismatic little locomotives. If you have not yet taken the plunge and begun scratch-building, or if you want to complement your growing scratch-building skills and knowledge, this is the book for you. Considers how to begin the process of scratch-building a particular prototype, with particular reference to problem-solving and research; discusses the tools, products and materials used to build the model and examines how to complement scratch-building with etched parts and castings; covers the more complex tools and jigs that are employed for impressing rivets, rolling boilers and soldering chassis; examines the fault-finding methods used in order to get a simple chassis successfully up and running; explains the choices involved in providing springing and beam compensation; provides simple solutions for achieving a good paint finish. Brimming with useful hints and advice, this new book tells you everything you need to know about how to build an 00 gauge Tilbury Tank locomotive, or any similar tank and is beautifully illustrated with 286 colour photographs and diagrams including sketches and specially commissioned artwork.
Das E-Book können Sie in Legimi-Apps oder einer beliebigen App lesen, die das folgende Format unterstützen:
Veröffentlichungsjahr: 2016
Ähnliche
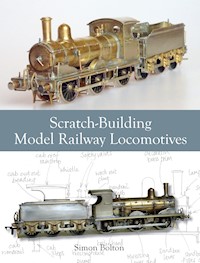


Scratch-Building Model Railway
TANK LOCOMOTIVES
THE TILBURY 4-4-2
Simon Bolton
THE CROWOOD PRESS
First published in 2016 by
The Crowood Press Ltd
Ramsbury, Marlborough
Wiltshire SN8 2HR
www.crowood.com
This e-book first published in 2016
© Simon Bolton 2016
All rights reserved. No part of this publication may be reproduced or transmitted in any form or by any means, electronic or mechanical, including photocopy, recording, or any information storage and retrieval system, without permission in writing from the publishers.
British Library Cataloguing-in-Publication Data
A catalogue record for this book is available from the British Library.
ISBN 978 1 78500 142 0
Dedication
To Don Wilson and Angela Leonard for their care and understanding.
Acknowledgements
My thanks to the following: Paul for his unending help and support; David Coasby for his wit and wisdom; Sam Manley and Jonathan Clay for their superb artistic contributions; the members of Shropshire & Herefordshire Area Group for their advice and biscuits; Richard Stanton and Neil Briggs for the use of their photos; Sophia Brothers from the Science & Society Picture Library; the various credited photographic companies for curating such a great resource; all of the readers and reviewers of my first book for their helpful and enthusiastic feedback. I’d also like to thank all those society members and website forum contributors for their assistance and kind comments.
All photos and drawings, unless otherwise credited, are by the author.
Disclaimer
The author and the publisher do not accept any responsibility in any manner whatsoever for any error or omission, or any loss, damage, injury, adverse outcome, or liability of any kind incurred as a result of the use of any of the information contained in this book, or reliance upon it. If in doubt about any aspect of railway modelling readers are advised to seek professional advice.
CONTENTS
PREFACE
CHAPTER ONE: SCRATCH-BUILDING FUNDAMENTALS
CHAPTER TWO: TILBURY TANK RESEARCH
CHAPTER THREE: THE WORKPLACE
CHAPTER FOUR: DESIGNING THE CHASSIS FRAMES
CHAPTER FIVE: BUILDING THE CLASS 51 FRAMES
CHAPTER SIX: FILING AND FORMING THE FRAMES
CHAPTER SEVEN: FITTING THE LEADING AND TRAILING TRUCKS
CHAPTER EIGHT: FITTING THE MOTOR AND DRIVING WHEELS
CHAPTER NINE: THE CYLINDERS AND CONNECTING RODS
CHAPTER TEN: CLASS 51 FOOTPLATE AND CAB
CHAPTER ELEVEN: CLASS 51 BOILER AND SMOKEBOX
CHAPTER TWELVE: BUILDING UP THE CAB SIDES AND TANKS
CHAPTER THIRTEEN: TANK TOPS, BUNKER END, CAB DOORS AND BEADING
CHAPTER FOURTEEN: BUILDING THE CLASS 79 CHASSIS
CHAPTER FIFTEEN: CLASS 79 BODYWORK
CHAPTER SIXTEEN: BUNKER, TANKS AND A WRAP-OVER CAB FOR THE CLASS 79
CHAPTER SEVENTEEN: DETAILS, DETAILS
CHAPTER EIGHTEEN: PAINTING AND DECORATING
POSTSCRIPT
FURTHER READING AND RESOURCES
INDEX
PREFACE
Mica Levi, one of the very few contemporary female film-score composers, once said:
To me, a good way to spend your time is doing something that’s exciting and challenging, something you can’t get quite right.
I think that’s the finest reason for scratch-building model railway locomotives and the best definition for it that you are likely to find.
Levi wrote the stunning score for the film Under the Skin which is a chilling tale of dastardly alien goings-on in downtown Glasgow. Her music adds a truly disturbing dimension to the film (especially for the Glaswegian men who meet Scarlett Johansson for the first and only time).
Since my previous book Scratch-Building Model Railway Locomotives was published I’ve been privileged to receive a great deal of informed and lively feedback. Besides some very pleasant compliments, a common comment was that starting off in scratch-building might be more daunting than I had hinted at. Starting anything that you are unfamiliar with is often daunting; I just didn’t want to put you off.
The author at his workbench. RICHARD STANTON
I think Levi expresses the feeling beautifully of being daunted and excited by what you are attempting to do, something that you can’t get quite right.
For another perspective, I recently read Mary Roach’s brilliant book Gulp: Adventures on the Alimentary Canal, which describes the journey that food takes through the human digestive system. It’s an alarmingly good read. At one point the author cheerfully tells us that the most nutritious part of any animal is the gizzard. Those gory bits and pieces are so full of vitamins that they are happily regarded as vegetables in plant-poor environments. It seems we are only stopped from regularly necking wholesome viscera because of cultural pressures. Apparently, we can become accustomed to and grow to like almost any foodstuff as long as we persevere – even liver (the curse of many a school dinner), or perhaps kiviaq (auk, left to ferment for a few months in a seal skin), which wasn’t regularly served up with our mashed spuds.
‘What’s the point of all this?’ you shriek, soldering iron quivering in your expectant paw. When do we get to touch metal?
Well, the argument I’m trying to construct here is that if you can open yourself to new experiences – new difficult experiences – then with a bit of work you will find that you really like them. And after a while you will become really good at them.
In the same light I would like to pay tribute to Don Wilson, to whom I have dedicated this book. When I was at secondary school, where he and his lovely wife Angela taught, I and some other waifs and strays attended a model railway club at their nearby home. Don had only recently lost his sight through diabetic complications, yet he seemed to treat this as only a minor impediment to his modelling. He nurtured the skills of each of us with humour and great patience, encouraging us to scratch-build rolling stock and buildings for his O-gauge garden line. This had a flavour of the London & North Western Railway (LNWR) in North Wales after the 1923 grouping and the locos tended towards the London, Midland & Scottish (LMS) with a LNWR pedigree. They were professionally built for him and he would eagerly feel the detail and form of each new model to test the accuracy of their construction. He could tell by memory and touch if the slightest detail was missing or misshapen.
Don died of further complications tragically early and I have never forgotten the inspirational effect that he had on me, both personally and in my modelling. He and Angela provided an environment of care and trust which allowed us to be challenged and to accept that mistakes were an important element in improvement and eventual success. Angela, incidentally, provided her own challenges for Don by having an enormous pond constructed in the centre of the garden. It was stocked with majestic koi carp, and occasionally Don himself would have to be fished out – always in good humour, as far as I was aware.
This then is my ongoing mission to inspire you, as Don did me; to hone your scratch-building skills, make mistakes, persevere and boldly go where no model locomotive modeller has gone before. The book complements and develops beyond my first book, which detailed the building in OO gauge (4mm scale) of a London & North Eastern Railway (LNER) J15 0-6-0 loco and tender. Only here you get to build a Tilbury Tank (or two).
While some of the methods are necessarily the same – there are only so many ways you can turn a big bit of metal into a collection of smaller bits joined together to form a model locomotive – I have incorporated some alternative ways of doing things along with ideas and techniques that I’ve come across more recently. New hand tools, further methods and some slightly more expensive machinery are described and introduced in a manner that I hope you will find entertaining, informative and inspirational enough for you to get to the work surface and have a go at some scratch-building.
Don Wilson getting to grips with his latest gift, a very welcome Christmas present from Angela. ANGELA LEONARD
Tilbury Tank No. 41961 on night duties, by Jonathan Clay, based on a photograph by E. E. Smith in the N. E. Stead collection.
Learning never stops, you know; it is a product of our inbuilt curiosity that we strive to improve the skills that we already have. Otherwise, why would I spend so much valuable time practising the violin? We are never going to stop making things with our hands, and one reason why we are such a fantastically successful species is because we are driven to pass on skills to each other. Our hands twitch to make objects. If you doubt this, try reading Touch: The Science of Hand, Heart and Mind by David J. Linden, which describes why we like doing stuff with our fingers and how we have an emotional connection to the things we make.
While you digest that philosophical outburst, let us continue gently on our way to matters railway modelling.
CHAPTER ONE
SCRATCH-BUILDING FUNDAMENTALS
Scratch-building can be great fun, very satisfying – and absolutely infuriating. It calls on a variety of skills and attributes, so before we get into the creative and practical side of things, here are a few thoughts on the fundamentals of scratch-building to help you on your way.
Since I produced my last book, a very pleasant ready-to-run model of a J15 has come on to the market, which is a good thing as they are charming little locos and I’m glad to see more of them. A small part of me felt slightly miffed that, having lovingly and laboriously produced something that most other people didn’t possess, suddenly there was one available to everyone. But when I look at my own model, especially since I painted it (see Chapter 18, Painting and Decorating), I’m even more pleased to have invested time and skill in making the one I have.
I must admit here that a reason I chose to build some Tilbury Tanks was because although they often appear on most wanted lists for ready-to-run locos, they’re generally not so high up that they won’t appear immediately this book is published.
WARTS AND ALL
Scratch-building, for me, is an exercise in continuous problem-solving, one solution informing the foundations of the next problem. The more experienced you become the less time it takes to come up with a viable solution (as opposed to a number of non-viable ones that end up in your ‘useful’ scrap box). As we progress through the book I will outline some of the problem-solving processes I went through in order to produce the models. You will find that with experience you can make things up as you go along. The key is not to be daunted by the possibility of making mistakes. I firmly believe that you can learn a lot through making mistakes. The next time you try something you’ll probably do it better and it should take a lot less time. If you have a memory like mine, try writing it all down as a book – I’ve found that process very helpful. Or you can plan things properly before you start, which sounds ideal in principle but just doesn’t work for me.
Preserved Class 79 Tilbury Tank Thundersley. DAVID COBBE
PATIENCE
Another biological imperative: we all have a facility for patience derived, presumably, from the ability to wait patiently in a bush in anticipation of supper strolling innocently into grabbing distance. Patience is a virtue. Sometimes it walks out on us and we have to recognize that and give the soldering iron a rest before things turn nasty.
INSPIRATION AND LEARNING
I’m constantly amazed that craft knives can cut brass and nickel; after all, they are all made of metal. It comes as a bit of a revelation to understand that some materials are harder than others; that hack-saw blades can cut through copper pipes, and diamonds through glass. An understanding of the materials and processes that you are using can help things along nicely and you really only get that through experience. So, where to start?
The methods I use are ones that I have been taught and practised, read avidly about, or watched other people demonstrating, on video or in real life. I invite you to pick and choose, to practise and find preferred methods that work for you. I find that my construction skills evolve and improve continually. I can trace their beginnings back to making a model of Tracy Island for my Thunderbirds by watching Anthea Turner do it on Blue Peter. I thought: well, I can do that. And I did.
TOY PROJECTS
Have fun and enjoy the freeing effects of making toys. It’s marvellous; you can try out methods you’ve been wary of using in case you wreck a cherished project. Simply allow your mind to take a flight of fancy that is normally more appropriate to the corridors of a science-fiction convention. I’ve had a go at a number of ideas and proudly produced an 0-gauge Dalek train for a local bookshop’s window display (featured on my website if you’re curious). It’s a remarkably freeing exercise. Or have a go at something unrelated to railways. Military modelling in particular is a cornucopia of good ideas.
THE REAL THING
Well obviously you have to like the real thing and where better to go for inspiration than a preserved steam railway. I am fortunate to live near the Severn Valley Railway and any excuse finds me standing on the platform at Bewdley. There are plenty of themed galas across the network of heritage railways nowadays which means you get a chance to dress up, too, if you like that sort of thing.
You’ll discover fabulous steam and diesel locos and rolling stock and get to experience (and breathe) that special atmosphere unique to steam railways. One autumn, in the early evening, I stood on the station overbridge at Bewdley and amidst the mist and fog a goods train clanked and squealed underneath. I’m too young to have any memories of those noises and it was quite a revelation.
‘1940s Weekend’ at the North Norfolk Railway. ‘Don’t tell him, Pike.’ PAUL SAYERS
Nothing quite beats the excitement of going on a drivers’ course to provide unmatched memories, although all of the goings-on during a visit will help you understand how a real railway works. This then feeds back into how you run your own trains.
THAT MODELLING FEELING
Shropshire & Herefordshire Area Group are a talented bunch of finescale modellers. I’ve been lucky enough to become a member and seen some fantastic layouts and been permitted to operate them. Besides benefitting from the advice of highly experienced modellers, I’ve recently learned a great deal about operating model railways the way they were in reality, or thereabouts. I now (nearly) know all the signal-box bell codes from the Lancashire & Yorkshire Railway operations manual. Where else can you learn that sort of thing, other than at a model railway club?
RESEARCH
As with all projects I very much enjoy the research process. The more facts and figures you amass the more likely you are to make a good job of the finished product. It can be a good excuse for putting off making a start so make sure you get out of your armchair and start waving some tools.
PICTURES
Get lots and lots of pictures from books, magazines and the internet. That will help you choose the look of the loco. Read up on its history to find out how it changed throughout its life – like us, they certainly do.
DRAWINGS
Find or produce your own drawings to appreciate the size and shape of your project. The proportions of the component parts are particularly important in order to capture the character of each unique locomotive. There are lots of drawings available from back numbers of magazines and a fair number of books are dedicated to the subject of locomotive drawings.
The National Railway Museum (NRM) is very obliging and will provide you with a great deal of information by email, phone or in person at their dedicated research library and archive centre in York. Just ask them, they are there to help. There are a huge number of diagrams available with lovely General Arrangement (GA) drawings that can be supplied in paper or digital form. The digital version is fantastic as you can enlarge it at will on the computer screen, and if you are good with computers you could even print it at exactly the size you want. I use a photocopier instead.
Operating the P4 layout ‘Kerrinhead’ in Gavin Clarke’s spacious loft.
Research materials for the Tilbury Tank: books, photos, magazines and drawings.
GAs are difficult to follow: they have a huge amount of information on them, rather like an X-ray or a CAT scan of your own multi-interlocking innards – and they are equally fascinating. Versions known as ‘pipe and rod’ drawings can be simpler and could well have all the information you need; ask the NRM if you are not sure.
What you can easily do with either type of drawing is read off the measurements of key elements such as the length of the footplate, the outside diameter of the boiler and the size of the wheels. Knowing these fundamentals helps you to work out everything else.
I bought a huge paper copy of the GA for the Tilbury Tanks from the NRM in addition to the digital version because I like paper and I like putting stuff up on my workshop wall.
Warning: having lots of different drawings can be confusing, so do try to stick to one or you may end up taking all of the right measurements but not necessarily from the same drawing.
Some drawings can be less accurate than others and here is where photos of the original are so important. If something looks wrong on your drawing, check it against the photos. Digital photos are great for zooming in on. You can make reasonably accurate estimates of an unknown span, such as the depth of the cab window, by measuring directly from a photo if you are aware of some of the larger measurements.
Beware of creeping errors. It has been pointed out to me that you should always start from the same place, the ‘datum’, and measure everything, as far as you can, from there. That is sound advice. However, you don’t need to worry too much about a half-millimetre here and there – life’s too short. And anyway, as you creep along making further errors in your build you will have to do a bit of cunning compensation as you go.
A beautiful example of a tinted GA drawing for the Class 51 Tilbury Tank. NRM/s&SPL
If you would prefer to spend your modelling time modelling rather than drawing, I have included my own diagrams for the builds in this book. Exactly the same warnings apply.
KIT-BASHING
When you have mastered the skills of scratch-building, you will find kit-making comparatively easy. After all, the tricky bits in kits are simply scratch-built items pre-shaped for you; they just need to be married together in pleasing harmony.
Many kit manufacturers supply you with lots of spare bits and pieces to make the many subsequent variations that were only dreamed of by the initial locomotive designer. So what are you going to do with all of those spare parts? Why not use them to build another loco?
One final diversion before we turn our thoughts once again to Tilbury Tanks: scratch-building involves all of the skills and attributes I have mentioned and more. While there is a worry that these skills are being irrevocably lost, you only need to look at the initiatives of various preserved railways as they take on new apprentices, passing on the knowledge of steam locomotive engineering to people too young to have ever seen the real thing in revenue-earning service, to know that this is not the case. I find that very encouraging. And think about the resurgence of vinyl records. And books. The future is out there, ready to be scratch-built.
SCALE
Please note that the scale drawings in the original printed copy of this book are all reproduced to a scale of 4mm/ft. In this e-book please use the scale bar on the drawings to check scale; each foot should come out as 4mm long, so 10 foot should be 40mm. Resize them by photocopying if necessary. In fact, it’s a good idea to get into the habit of checking all your drawings wherever they come from.
A beautiful Class 1 Tilbury Tank. From the London Road Models kit, superbly built and painted by Neil Briggs. NEIL BRIGGS
CHAPTER TWO
TILBURY TANK RESEARCH
If you are being put off scratch-building because of the prospect of having to do lots of research, don’t be. It can be as simple as getting hold of a single drawing or you could go and measure the real thing, if you are lucky. This is how I went about the very enjoyable task of investigating the Tilbury Tank.
MY RESEARCH PROCESS
DECIDING WHAT TO BUILD
When I was looking for an interesting locomotive to scratch-build, I ran a few searches on model railway websites under the words ‘wish list’ and ‘wanted ready-to-run’. A number of less well-known alternatives came up including small industrial steam and diesel locomotives, medium-sized steam cranes, tramway engines and metropolitan steam locos.
After checking various possibilities, I narrowed the search down to large mainline tank locomotives and came up with the London, Tilbury & Southend Railway’s Tilbury Tank. These were very attractive 4-4-2 tank locos with outside cylinders and simple motion. They were sufficiently long-lived to survive into the post-war British Railways era from the early days of the LTSR through (rather surprisingly) the Midland Railway and LMS. Suprisingly, because the line runs through stalwart Great Eastern territory. The line and the tanks have a fascinating history and a list of relevant books is included under Further Reading and Resources for those wishing to delve further.
I remember being taken by my gran from West Ham to Southend along the line to see the pier. I don’t recall any steam locos but the green-liveried electric multiple units were rather atmospheric. So there’s an emotional connection of sorts. And, brilliantly, I found out there was a preserved example – No. 80 Thundersley – currently on loan from the NRM at Bressingham Steam Museum in Norfolk. It fitted the bill exactly.
There were, as usual, a number of different classes and rebuilds and so on and I wasn’t sure exactly what Thundersley was. I asked for advice on sourcing drawings on RMweb and was instantly provided with lots of drawings, a very reasonable offer for an excellent book and some lovely old photos of Thundersley in steam in the open air at Bressingham. Fantastic.
It turned out that Thundersley was essentially a Class 79 tank, modified under the ownership of all and sundry and then retrofitted back to its original(ish) form before being preserved.
I emailed Search Engine, the library and archive centre at the NRM in York, asking for help in identifying a GA drawing for a Class 79 loco. They swiftly got back to me with exactly what I wanted. It can take a few months for your copies to arrive but they are well worth waiting for. The Class 37 and 79 locos are essentially the same; it even says so on the drawings.
WORKING OUT HOW TO BUILD IT
Once you have decided what you want to build you then have to work out how to build it. Experience helps: the more models you have built before, the more likely you are to have a strategy. Modifying ready-to-run locomotives and building kits will give you an insight into how models are put together – where motors are fitted and so on.
A good way to continue is to see how the real thing is constructed. You won’t be able to build a model that is an exact scaled-down version of the original – the physical properties of the universe just won’t let you. However, you will be able to see how various constructional problems were solved by the locomotive engineers of the day.
For an understanding of how steam locomotives work, I can recommend two very good books. R. Barnard Way’s Meet the Locomotive is a classic, first published in 1947 and reprinted in recent years by Ian Allan. This layman’s guide has a series of simple, charming line drawings and concise descriptions of how a steam locomotive works, and was written at a time when they still did. On a more ambitious scale, Drew Fermor’s Haynes ‘Owners’ Workshop Manual’ for the GWR/BR (WR) Castle Class is an ultra-modern working manual on how to build, run and maintain a Great Western Railway (GWR) Castle class locomotive – should you wish to. It is, quite simply, brilliant.
An atmospheric painting of Thundersley by Jonathan Clay. JONATHAN CLAY
Luckily for me, Thundersley is easily accessible. If there isn’t an example of the precise loco you want to build then look for something similar. There are only so many ways of building, for instance, an efficient pony truck and the engineers of the real things were not shy in using the ideas of others. For example, GWR’s chief mechanical engineer G. J. Churchward happily ‘adopted’ the bogie design of the French engineer Alfred de Glehn on his very successful standardized 4-6-0s – I think he asked him first. In fact he purchased a couple of locos, brought them to the Swindon works, tried them out and copied bits of them. It happens all the time. In the same vein, you could look at how kit manufacturers tackle various constructional problems.
SITE VISIT
Before you take your camera and head for a preserved railway line or appropriate museum, it’s a good idea to make a list of all the things you want to take a look at, otherwise when you get home you will inevitably discover that you have missed something vital. (Mind you, even if you find a suitable photograph to resolve that particular problem, you might well be looking for an excuse for a second visit.)
Thundersley details sketched in situ.
For my Tilbury build, I wanted to know how the ‘wrap-around’ cab was constructed. It surely couldn’t have been made in one enormous piece with the tank and cab sides bent round, which is how I might have attempted it on the model. The later rebuilt locos at least must have had their roofs attached to the existing cab sides in some way. Photos showed evidence of a suspicious row of rivets and a joint line at the cab sides, so I particularly wanted to make a close inspection there. (By the way, the correct name for the cab ‘sides’ and so on is, I believe, ‘sheets’. As a sailor used to applying that term to the sail ropes of a dinghy, I find this confusing. So ‘sides’ it is for me.)
Another item on my checklist for Bressingham concerned the chassis. It was difficult to determine the exact shape of the chassis frame, particularly in the area between the driving wheels and the bogie, so I wanted a good poke around under there when I got to the museum.
Which brings me to accessibility. It’s great if the object of your attention has been left outside in the sunshine to allow you easy access and good light for photography but you can’t guarantee that. When I visited the Bluebell line and wanted to take a look at their lovely Adams Radial tank loco I wasn’t so lucky. It was tucked away in the back of a shed with rather poor lighting and not much space around it. The photos were not particularly good, though still helpful. Preserved railways do occasionally give their less commonly seen stock a bit of an airing and it’s always a good idea to make contact in advance to ensure that what you want to get at is at least accessible if not running about outside.
Regardless of accessibility, it’s always a good idea to take a sketch pad in addition to a camera. You don’t have to be Leonardo da Vinci, just make sure you understand your own drawings and annotate them to help you remember what you have drawn.
It’s also advisable to take a tape measure. Failing that, stand an acquaintance of known height up against the loco so that you can make an informed estimate of various measurements. For the smaller bits and pieces, I sometimes use my arm or fingers as a point of reference.
An amicable acquaintance stands at 5ft 8in against the side tank of Thundersley.
The information I gathered from my trip to Bressingham was extremely useful. It answered many questions and I’m grateful to David Atkinson for arranging an out-of-hours visit in exchange for a donation to the museum. In fact everyone I have dealt with while researching this project has been enthusiastically helpful. So no excuses, get out there and research. Unless you are going to build a Tilbury Tank, in which case it’s all here. Or nearly.
Let’s find out a bit more.
THE TILBURY TANK
The Tilbury Tanks are 4-4-2s. They have four little wheels at the front, four big driving wheels in the middle and a pair of small, carrying wheels at the back. This means that we can have a good look at making and setting up leading trucks (the front four wheels) and trailing trucks (the back two). Not only that, unlike the J15 tender loco, the Tilburies have outside valve gear, so we will get to construct some cylinders and the single slide-bar operating system with its collection of connecting rods.
Tank locos are by their very definition different to tender locos in that they carry all their water in tanks dotted about the loco and their coal in a bunker behind the cab. As there is no tender trailing loyally behind them, they don’t have to be turned around in order to run in the opposite direction – as long as it is reasonably easy to see out of the back. If they needed to be bigger to cart larger loads of people or goods around, or travel greater distances, then further sets of wheels at the back or front were necessary to carry the extra weight of water, coal and locomotive.
The LTSR had a variety of other locos including a couple of 0-6-0 tender locos (which you could build using my previous book), some 0-6-2s and some truly magnificent Baltic tanks that were 4-6-4s and real whoppers.
In homage to Meet the Locomotive, I have included a drawing in the same style showing the Tilbury Tank’s outside working parts.
I’ll now take you on a brief journey through the different types of Tilbury Tank.
CLASS 1
These were the original and most diminutive of the 4-4-2 tanks, with narrower boilers and smaller wheels than their later cousins. They were gradually rebuilt by the Midland Railway and the LMS with (besides other bits and pieces) various different chimneys, domes, smokebox doors and extended smokeboxes. Some of them were smothered in rivets, others had theirs discreetly disguised. A few had their cab roofs changed to the wrap-around or ‘hooded’ model that all the final forms took. They carried a wide range of liveries and looked great in all of them. They also had a fantastic selection of names derived from places on the line, the best by far being ‘Barking’.
We don’t need to scratch-build a Class 1 because London Road Models do a very nice kit (see Chapter 1).
CLASS 37
Class 37 locos had larger wheels and a wider boiler; the cylinders were very slightly bigger too. They were a couple of feet longer than the Class 1 and as all of the subsequent 4-4-2 tanks were of the same length with a basically identical chassis it makes building more than one type much easier for us. The usual chimneys and so on were gradually replaced and many were extensively rebuilt with larger boilers and wrap-around cabs. You can tell a rebuilt 37 from a 79 by the ledge under the widened side tanks allowing some foot room for the cleaners.
CLASS 51
These were virtually the same as the un-rebuilt Class 37 with a slightly larger boiler, tanks and coal bunker. They are thought by some to be the best-looking of the lot.
CLASS 69
These were the exception to the 4-4-2 tanks and were used as freight locomotives. With their 0-6-2 wheel arrangement, I don’t think they look anywhere near as striking as the others. There is a set of body and chassis etches available from Worsley Works Models so we don’t have to worry about this one either.
CLASS 79
This is where Thundersley comes in. Four of these were built by the LTSR and they are virtually identical to the Class 37 rebuilds (on which they were based) with a bit of jiggery-pokery to the side tanks and bunker. They also had very slightly larger cylinders (we are talking scant inches here). The design was so successful that the Midland Railway built some more, as did the LMS. In their later lives these locos could be seen all over the country, including the Midlands and East Anglia, and some even made it up to Scotland. They just managed to sneak into the 1960s before being withdrawn.
The outside working parts of a Class 1 Tilbury Tank.
DECISION TIME
I have photographs of both Class 51 and 79 hauling passenger trains on St Pancras to St Albans services, a line I have used a great deal, which endears them to me even more. As I have detail photographs of Thundersley, a Class 79 would be the obvious choice although I wanted a loco from the BR era (I’m not a fan of the more ornate liveries; I like simpler styles of painting). That would mean I would have to build a loco with extended smokebox and hooded cab, both of which are slightly more complex than the earlier versions.
Inspiration struck: as the Class 51 locos are almost the same, with more or less the same chassis, I could build a Class 51 with ordinary cab and smokebox and a later-type Class 79.
For a more detailed description of all these locos, I can thoroughly recommend London, Tilbury & Southend Railway and its Locomotives by R. J. Essery. Buy it, borrow it or order it from your local library; it’s a brilliant read with lots of lovely pictures.
I will close this chapter with a mention of the Baltic Class 4-6-4 tanks of the LTSR. They are magnificently huge and I thought my drawing might whet your appetite for a further scratch-building project.
Baltic Class 4-6-4 LTSR tank.
CHAPTER THREE
THE WORKPLACE
THE SCRATCH-BUILDER’S NATURAL ENVIRONMENT
As I am presently living in a large rented house, I have graduated from the kitchen table to a spare bedroom that serves as a workroom. My current bench is a base-board, destined one day to become part of a layout but in the meantime being pressed into alternative service. As it is nearly at chest height it is also very good to stand at, which improves sight lines, is better for your back and can add numerous knee miles to your worn-out cartilages. A bar stool serves for when the cruciate ligaments need a bit of a rest. (By the way, you use lots more calories standing up than sitting down.)
There is lots of natural light in my workroom during the day and I’ve got various daylight bulbs and work lights for close-up viewing when things get a bit dim. My head-based magnifier is invaluable too. The window is large and supplies abundant ventilation for a variety of fumes and even allows for airbrush painting, neither of which were at all popular when I worked in the kitchen.
WORKBENCH ORGANIZATION
Try to keep the tools you use most frequently near to the work area and those you use less often further away. Those that you use very rarely can end up on the other side of the room as long as you have a good idea where they are. No doubt everything will creep forward like wolves around a campfire and your work area will shrink until it becomes the patch of floor at your feet. We can but try, though.
If it wasn’t for gravity, how would we know where to find all those missing bits and pieces? Protecting the rented carpet I have a plastic/canvas car cover that makes a pinging sound as small and irreplaceable objects hit it, much aiding their recovery, though some of them still manage to ricochet into the middle distance. Without such protection, anything white-hot escaping from the bench, after paying brief attention to the fingers, would hit the carpet or parquet flooring and leave indelible marks.


