11,99 €
Mehr erfahren.
- Herausgeber: Batsford
- Kategorie: Lebensstil
- Sprache: Englisch
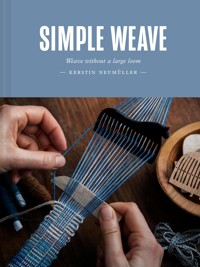
SHORTLISTED in The Creative Book Awards 2024. An introduction to weaving without large looms, with 15 weaving projects and a guide to making your own tools. In Simple Weave, the world of weaving opens beyond gigantic looms and inaccessible patterns. Kerstin Neumüller demonstrates how you can weave with tools that are easy to make yourself and often small enough to fit in your pocket. Here lies inspiration for those who have never woven but are eager to try, as well as for experienced weavers interested in working with flexible and portable tools. Practical and beautiful keepsakes to make include Scandi-style bands, bracelets, pencil and laptop cases and a wall hanging. Kerstin also shares her journey from textiles to woodworking, offering instructions for how to make your own pocket-sized weaving tools. The book is divided into three accessible chapters: • Techniques and basic weaving theory. • 15 achievable weaving projects including bands, a pencil case, coasters and tea towels. • Making your own tools. This section includes descriptions of how to carve a heddle, make a weave stretcher, carve a backstrap loom and make a frame loom. Enjoy the mindfulness and rhythm of this traditional craft and create bespoke, contemporary pieces to fit your own style.
Das E-Book können Sie in Legimi-Apps oder einer beliebigen App lesen, die das folgende Format unterstützen:
Seitenzahl: 103
Veröffentlichungsjahr: 2023
Ähnliche


Contents
Foreword
PART 1: TECHNIQUES
What is weaving?
Glossary: Weaving lingo
Choosing weaving yarn
The warp
Quick warp for short bands with a rigid heddle
Warp on a table
Warp with a warping mill
PART 2: WEAVES
Weaving using a rigid heddle
Warp-faced rep patterns
The mouse tracks band
The mimosa band
The jay band
The birch lichen band
Balanced weave
The pencil case weave
Face pads
Band with Scandinavian pattern
Weft-faced rep weave
Band with kelim squares
Band with wedges
Coasters
Weft-faced rep using a frame loom
Sunset over the mountain
Weaving on a backstrap loom
Plaid tea towels
Scrap fabric potholders
Laptop case in spaced rep weave
Hand towels
After treatments
Finishes
Techniques and troubleshooting
PART 3: TOOLS
DIY tools
Carton heddle
My tools
From log to blank
Carve a rigid heddle
Make a weave stretcher
Carve a backstrap loom
Make a frame loom
Afterword
Further reading
Foreword
A few years ago I got struck by a sudden urge to weave. A loom was ordered, but what should have been five weeks waiting time turned into 6 months and there I was, pacing around with an unmet weaving urge that grew bigger and bigger. Eventually I got out an old rigid heddle that my grandfather had made 40 years ago and warped a band, so that I at least could weave something. When the loom finally arrived, I was too busy with the bands to unpack it! Weaving without a loom can sound limiting, but you actually avoid a lot of the preparation work that is otherwise associated with weaving, and I don’t like the idea of having to be tied to one particular place to be able to weave.
Time passed and one day a juniper bush came down during a spring storm on my family farm. I needed a few sticks to wrap yarn around, so I took a piece of the trunk and started carving. One of my yarn sticks ended up quite flat and wide, and my grandfather’s heddle came to mind. What if I too could…? And before long, I had carved my first heddle.
Carving your own weaving tools doesn’t have to take up more space than it takes to weave with them, and it’s also a lot of fun. For me, a textile craftsperson through and through, the step into the world of woodcraft felt enormous, but making my own tools, adapted for my own needs and preferences, opened a wealth of new possibilities. I have found that I no longer need to form my weaving process around which tools I have to hand; now I form the tools to fit the process instead!
Kerstin NeumüllerVevelsta, 2021
What is weaving?
Weaving is made up of two basic components: one thread system called warp and one called weft. The warp is, in most cases, held taut with the threads arranged next to each other, and the weft is passed through the warp threads.1 The most basic weaving technique is plain weave, where the weft runs over every other warp thread and, therefore, under alternating warp threads. You could sit yourself down and pick up every other thread each time you want to add weft, but this is very time-consuming so most weaving techniques involve some kind of heddle. Heddles are usually made up of tied thread loops that the warp threads run through, and by pulling the heddle, you can raise the required warp thread. When you gather many heddles together onto a bar to enable you to raise a particular group of warp threads, that bar is called a shaft.2
The space that is formed when you raise a shaft, separating the warp threads, is called the shed, and this is where the weft is passed through from one side of the weave to the other, which is called ‘making a pick’. The actual weaving is done through a repetitive rhythm of opening a shed, passing through the weft (pick), changing the shed and finally, packing the weft by beating into the new shed with an implement. For small weaves I usually use a straight, flat, wooden stick that I call a pick-up stick.3
Glossary: Weaving lingo
BALANCED WEAVE – A weaving technique where weft and warp are equally visible.
BEATING – Packing the weft by beating with an implement in the shed.
CLEAN SHED – When the shed opens without any warp threads out of place or misaligned.
COTTOLINE – Yarn made from 40% linen and 60% cotton.
CUT OFF – When you have finished weaving and want to remove the weave from all the tools you cut the warp threads off the back edge of the weave.
HEADER – Weaving a few picks using a thick yarn or scraps to even out the spreading of the warp threads before the actual weave starts.
HEDDLE – A loop made of thread that runs around a warp thread.
HEDDLE BAR – A smooth, straight stick that you can attach heddles to.
LEASE STICKS – Two smooth sticks that sit in the warp and hold the warp threads in place. I drill holes in the ends of my lease sticks so that I can tie them together, which prevents them from sliding out of the warp.
PLAIN WEAVE – The simplest of all weave structures, almost exclusively used in this book.
RIGID HEDDLE – Tool for weaving with holes and slits that the warp runs through.
SET UP A WEAVE – A catch-all term for all preparations before you can start weaving, from warping to weaving a header.
SHED – The gap that is formed in the weave when you raise a shaft or a rigid heddle, causing a group of threads to be lifted. Can also refer to the group of threads that is lifted when the heddles are raised, as in the expression ‘one of the sheds’.
SHED STICK – A stick that is inserted to the warp of a backstrap loom and forms a shed if it is tilted to one side.
THREAD THE HEDDLES – Arranging all the warp threads into place in the heddles.
WARPING – When you arrange all the threads to be included in the warp into place.
WARP – Makes up about half of the threads in a weave. The warp is tightly stretched and the weft is added in between its threads one thread at a time.
WARP CHART – A type of diagram that describes which order the warp threads should sit in.
WARP-FACED REP – A weaving technique where the warp completely covers the weft.
WARPING MILL – A tool that is useful for setting up wide and long warps.
WEAVE STRUCTURE – The system according to which the threads run over and under each other in a weave.
WEFT – The yarn that is passed in between the warp threads and thereby lock them into place, in order to create a fabric.
WEFT-FACED REP – A weaving technique where the weft completely covers the warp.
Choosing weaving yarn
There are many types of yarn designed for different uses. Weaving yarns are often a bit more compact and stronger than, for example, knitting yarns as they need to be able to take more strain. When choosing warp yarn, you need to watch out for yarns that are spun too loosely since changing shed will create friction between the individual strands of yarn, and if you are unlucky the yarn fibres can catch in each other which will result in them eventually wearing down. This happens often if you use single-ply yarns for the warp, and therefore I recommend beginners to always choose yarns that are made up of two strands or more for the warp for their projects. Once you feel a bit more confident you will be able to judge for yourself whether a yarn is strong enough or not.
Otherwise, there’s not much stopping an eager weaver. The thickness of the yarn is less important for a project’s viability, and everything from sewing thread to rope can be used in a weave.
A rule of thumb that becomes more important to me as the years pass is to not use ugly craft materials when trying to make something beautiful. As an example, I wouldn’t make a dress from a faded sheet covered in lint, because it doesn’t matter how well you sew, the material will always speak for itself. This piece of advice I also give when it comes to weaving – don’t spend time making a project with material that doesn’t feel completely right. Don’t be tempted by a ball of cotton yarn with a lot of knots in it, thinking ‘it doesn’t matter, it will still make a good warp’. No, it won’t. It can also be about a colour that is almost the one you want, but not quite. Think about whether you will be happy with the result before you start!
THE IMPORTANCE OF THE WEFT
The weft’s thickness and colour can have a big impact on the appearance of the weave. When I do warp-faced rep weaving I prefer using a fairly thin weft, since I think the pattern design looks nicer when I do, but I have also noticed that the weft can actually be too thin. A typical sign of needing a thicker weft is that the threads don’t sit neatly next to each other, but instead tend to cross over and under each other. What happens is that the warp threads don’t have enough to bend around, but if you use a thicker weft yarn, the threads will line up neatly.
It’s fun to try out how thin and thick weft strands behave in a balanced weave, and in weft-faced rep weaves these variations are very important to the appearance of the surface since the weft covers the warp completely. Here, the weft presses the threads of the warp apart and the width of the weave can fluctuate depending on the thickness of your weft.
Too thick a weft, on the other hand, can make your intended pattern appear drawn out, and the textile can get a loose and soft character to the weaver’s despair (or delight).
It can be helpful to wrap the weft yarn around something to prevent it from tangling while you weave. For wide weaves I use a shuttle that looks like the one in the illustration below, but when I weave a band or for small weaves, I usually just cut an arm’s length of weft yarn at a time and weave with that without wrapping it around anything, as I think it makes the weaving run smoother.
SPLICING THE WEFT
Sooner or later the weft yarn will run out and it will need to be spliced before you can continue weaving.
If you are weaving a rep band, you can splice by letting the new warp double up with the old one for one pick and then leave the old weft thread hanging while you continue weaving with the new weft. This way, both the new and the old ends will get locked in place and there’s no risk that the band will unravel. Once I’ve finished the band, I cut off all hanging weft threads as close to the band’s edge as possible, and they won’t be visible afterwards.
If you are weaving a balanced weave, you can splice by including the yarn for a few centimetres in the next shed and then leave the end at the back of the weave. Then when you add the weft thread that should sit in that shed the short end will get locked into place. The new yarn end will be locked into place the same way in the following shed.
If you are making a weft-faced rep weave, you can splice by crossing over the weft ends in the same shed and leave them to protrude at the back. Once you have finished weaving you take a needle and secure all the threads that hang at the back with a couple of stitches and then cut them off.
Wrapping yarn around a piece of cardboard is a quick way to check whether two colours work together.
CHOOSING COLOURS
„Ich bin wirklich begeistert. Auch die Möglichkeit des zusätzlichen eReaders im Abo finde ich persönlich toll.”
Happy Booktime

„Die Auswahl von Legimi ist großartig.”
Bücherleser

„Der Leser findet seine E-Books/Hörbücher sehr schnell und sie lassen sich, ob mit oder ohne Internetverbindung problemlos öffnen.”
Wurm sucht Buch

„Ich finde das Angebot von Legimi richtig toll.”
TheSarahStory

„Besonders schön finde ich die große Auswahl an möglichen Abo-Modellen und besonders die Abos mit eReader.”
Miss Foxy Reads

„Ich muss sagen, dass ich von dem E-Reader mehr als positiv überrascht bin.”
Wortmalerei

„Das ist wirklich eine großartige Idee und mal was ganz Anderes.”
Mikka liest das Leben...

Tausende von E-Books und Hörbücher
Ihre Zahl wächst ständig und Sie haben eine Fixpreisgarantie.
Sie haben über uns geschrieben:
Dabei gewährt der E-Book-Anbieter größtmögliche Freiheiten

Größter Vorteil die Möglichkeit, in der aktuellen App komfortabel zwischen E-Book und Hörbuchversion eines Titels

Spotify for E-Books
