19,99 €
Mehr erfahren.
- Herausgeber: John Wiley & Sons
- Kategorie: Wissenschaft und neue Technologien
- Serie: Teach Yourself VISUALLY (Tech)
- Sprache: Englisch
Master one of the most popular word processors ever with this essential, visual reference Teach Yourself VISUALLY: Word 2019 provides readers with a thorough and visual exploration of the 2019 edition of Microsoft Word. Written by the celebrated author of over 100 books on computing, Guy Hart-Davis, Teach Yourself VISUALLY: Word 2019 allows you to quickly get up to speed with one of the most popular word processors on the planet. The book covers all the topics you'll need to comprehensively master Word 2019, and includes: * Full-color, step-by-step instructions showing you how to perform all the essential tasks of Microsoft Word 2019 * How to set up and format documents, edit them, and add images and charts * How to post documents online for sharing and reviewing and take advantage of all the newest features of Word Newly updated to include the latest features of Microsoft Word, like how to collaborate on documents in real time, draw and write with the digital pen, new accessibility options and the new Resume Assistant, Teach Yourself VISUALLY: Word 2019 belongs on the shelf of anyone who wants to improve their effectiveness with this essential word processor.
Sie lesen das E-Book in den Legimi-Apps auf:
Seitenzahl: 344
Veröffentlichungsjahr: 2020
Ähnliche


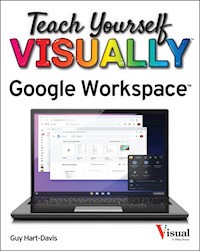
Teach Yourself VISUALLY Word 2019
Published byJohn Wiley & Sons, Inc.9200 Keystone Crossing, Suite 800Indianapolis, IN 46240www.wiley.com
Published simultaneously in Canada
Copyright © 2020 by John Wiley & Sons, Inc., Indianapolis, Indiana
No part of this publication may be reproduced, stored in a retrieval system or transmitted in any form or by any means, electronic, mechanical, photocopying, recording, scanning or otherwise, except as permitted under Sections 107 or 108 of the 1976 United States Copyright Act, without either the prior written permission of the Publisher, or authorization through payment of the appropriate per-copy fee to the Copyright Clearance Center, 222 Rosewood Drive, Danvers, MA 01923, (978) 750-8400, fax (978) 646-8600. Requests to the Publisher for permission should be addressed to the Permissions Department, John Wiley & Sons, Inc., 111 River Street, Hoboken, NJ 07030, 201-748-6011, fax 201-748-6008, or online at www.wiley.com/go/permissions.
Wiley publishes in a variety of print and electronic formats and by print-on-demand. Some material included with standard print versions of this book may not be included in e-books or in print-on-demand. If this book refers to media such as a CD or DVD that is not included in the version you purchased, you may download this material at http://booksupport.wiley.com. For more information about Wiley products, visit www.wiley.com.
Library of Congress Control Number: 2020937948
ISBN: 978-1-119-72448-3
Trademark Acknowledgments
Wiley, the Wiley logo, Visual, the Visual logo, Teach Yourself VISUALLY, Read Less - Learn More and related trade dress are trademarks or registered trademarks of John Wiley & Sons, Inc. and/or its affiliates. All other trademarks are the property of their respective owners. John Wiley & Sons, Inc. is not associated with any product or vendor mentioned in this book.
LIMIT OF LIABILITY/DISCLAIMER OF WARRANTY: THE PUBLISHER AND THE AUTHOR MAKE NO REPRESENTATIONS OR WARRANTIES WITH RESPECT TO THE ACCURACY OR COMPLETENESS OF THE CONTENTS OF THIS WORK AND SPECIFICALLY DISCLAIM ALL WARRANTIES, INCLUDING WITHOUT LIMITATION WARRANTIES OF FITNESS FOR A PARTICULAR PURPOSE. NO WARRANTY MAY BE CREATED OR EXTENDED BY SALES OR PROMOTIONAL MATERIALS. THE ADVICE AND STRATEGIES CONTAINED HEREIN MAY NOT BE SUITABLE FOR EVERY SITUATION. THIS WORK IS SOLD WITH THE UNDERSTANDING THAT THE PUBLISHER IS NOT ENGAGED IN RENDERING LEGAL, ACCOUNTING, OR OTHER PROFESSIONAL SERVICES. IF PROFESSIONAL ASSISTANCE IS REQUIRED, THE SERVICES OF A COMPETENT PROFESSIONAL PERSON SHOULD BE SOUGHT. NEITHER THE PUBLISHER NOR THE AUTHOR SHALL BE LIABLE FOR DAMAGES ARISING HEREFROM. THE FACT THAT AN ORGANIZATION OR WEBSITE IS REFERRED TO IN THIS WORK AS A CITATION AND/OR A POTENTIAL SOURCE OF FURTHER INFORMATION DOES NOT MEAN THAT THE AUTHOR OR THE PUBLISHER ENDORSES THE INFORMATION THE ORGANIZATION OR WEBSITE MAY PROVIDE OR RECOMMENDATIONS IT MAY MAKE. FURTHER, READERS SHOULD BE AWARE THAT INTERNET WEBSITES LISTED IN THIS WORK MAY HAVE CHANGED OR DISAPPEARED BETWEEN WHEN THIS WORK WAS WRITTEN AND WHEN IT IS READ.
FOR PURPOSES OF ILLUSTRATING THE CONCEPTS AND TECHNIQUES DESCRIBED IN THIS BOOK, THE AUTHOR HAS CREATED VARIOUS NAMES, COMPANY NAMES, MAILING, E-MAIL AND INTERNET ADDRESSES, PHONE AND FAX NUMBERS AND SIMILAR INFORMATION, ALL OF WHICH ARE FICTITIOUS. ANY RESEMBLANCE OF THESE FICTITIOUS NAMES, ADDRESSES, PHONE AND FAX NUMBERS AND SIMILAR INFORMATION TO ANY ACTUAL PERSON, COMPANY AND/OR ORGANIZATION IS UNINTENTIONAL AND PURELY COINCIDENTAL.
Contact Us
For general information on our other products and services please contact our Customer Care Department within the U.S. at 877-762-2974, outside the U.S. at 317-572-3993 or fax 317-572-4002.
For technical support please visit https://hub.wiley.com/community/support.
Sales | Contact Wiley at (877) 762-2974 or fax (317) 572-4002.
About the Author
Guy Hart-Davis is the author of more than 150 computer books, including Teach Yourself VISUALLY iPhone 11, 11 Pro, and 11 Pro Max; Teach Yourself VISUALLY MacBook Pro and MacBook Air, 5th Edition; and Teach Yourself VISUALLY Android Phones and Tablets, 2nd Edition.
Author’s Acknowledgments
My thanks go to the many people who turned my manuscript into the highly graphical book you are holding. In particular, I thank Devon Lewis for asking me to write the book; Lynn Northrup for keeping me on track; Liz Welch for skillfully editing the text; Doug Holland for reviewing the book for technical accuracy and contributing helpful suggestions; Evelyn Wellborn for proofreading the book minutely; and SPi Global for laying out the book.
How to Use This Book
Who This Book Is For
This book is for the reader who has never used this particular technology or software application. It is also for readers who want to expand their knowledge.
The Conventions in This Book
Steps
This book uses a step-by-step format to guide you easily through each task. Numbered steps are actions you must do; bulleted steps clarify a point, step, or optional feature; and indented steps give you the result.
Notes
Notes give additional information—special conditions that may occur during an operation, a situation that you want to avoid, or a cross reference to a related area of the book.
Icons and Buttons
Icons and buttons show you exactly what you need to click to perform a step.
Tips
Tips offer additional information, including warnings and shortcuts.
Bold
Bold type shows command names, options, and text or numbers you must type.
Italics
Italic type introduces and defines a new term.
Teach Yourself VISUALLY Word 2019
To view this book's Cheat Sheet, simply go to www.dummies.com and search for “Teach Yourself VISUALLY Word 2019 Cheat Sheet” in the Search box.
Table of Contents
Cover
Chapter 1: Getting Started with Word
Open Word and Use the Start Screen
Understanding Office and the Cloud
Explore the Word Window
Sign In to Your Account
Work with Backstage View
Change the Color Scheme and Background
Locate Commands on the Ribbon
Give Commands Using the Keyboard and Mouse
Using Word on Tablets and Phones
Using Word in OneDrive and Microsoft Teams
Work with the Mini Toolbar and Context Menus
Enter Text in a Document
Move the Insertion Point Around a Document
Switch Document Views
Understanding Document Views
Work with the Navigation Pane
Using Focus Mode
Using Immersive Reader
Chapter 2: Creating and Saving Documents
Start a New Document
Save a Document to Your Computer
Save a Document to the Cloud
Recover an Unsaved Document
Save a Document in a Different Format
Save a Document in PDF or XPS Format
Set Options for Saving Documents
Open a Word Document
Open a Document That Uses a Different Format
Open a Document from the Cloud
Switch Between Open Documents
Compare Two Documents Side by Side
Chapter 3: Entering Text in Documents
Insert and Add Text
Insert Symbols and Special Characters
Create a Hyperlink
Delete Text
Insert Blank Lines
Undo, Redo, and Repeat Changes
Select Text
Mark and Find Your Place with Bookmarks
Move or Copy Text
Share Text Between Documents
Move or Copy Several Selections
Take Advantage of Paste Options
Chapter 4: Editing and Proofing Text
Work in Read Mode View
Zoom In or Out
Translate Text
Set Options for Additional Actions
Using Additional Actions
Search for Text
Replace Text or Other Items
Count Words in a Document
Automatically Correct Mistakes
Automatically Insert Frequently Used Text
Check Spelling and Grammar
Find Synonyms, Antonyms, and Definitions
Chapter 5: Formatting Text
Understanding How Word’s Formatting Works
Change the Font
Change the Font Size
Emphasize Information with Bold, Italic, or Underline
Create Superscripts and Subscripts
Change Text Case
Change Text Color
Apply Text Effects
Apply a Font Style Set
Apply Highlighting to Text
Apply Strikethrough to Text
Copy and Paste Text Formatting
Remove Text Formatting
Set the Default Font for All New Documents
Chapter 6: Formatting Paragraphs
Change Text Alignment
Set Line Spacing Within a Paragraph
Set Line Spacing Between Paragraphs
Create a Bulleted or Numbered List
Display Formatting Marks
Hide or Display the Ruler
Indent Paragraphs
Set and Use Tabs
Add a Paragraph Border
Review and Change Formatting
Compare Formatting
Apply Formatting Using Styles
Switch Styles
Save Formatting in a Style
Expand or Collapse Document Content
Modify a Style
Add Paragraph Shading
Chapter 7: Formatting Pages
Adjust Margins
Insert and Manage Page Breaks
Control Text Flow and Pagination
Align Text Vertically on the Page
Change Page Orientation
Insert a Section Break
Add Page Numbers to a Document
Add Line Numbers to a Document
Using the Building Blocks Organizer
Add a Header or Footer
Vary Headers or Footers Within a Document
Add a Footnote
Add an Endnote
Find, Edit, or Delete Footnotes or Endnotes
Convert Footnotes to Endnotes or Vice Versa
Generate a Table of Contents
Add a Watermark
Add a Page Border
Apply Document Themes and Style Sets
Create Newspaper-Style Columns
Chapter 8: Reviewing and Finalizing Documents
Track the Changes to a Document
Lock and Unlock Tracking
Review Tracked Changes
Collaborate in Real Time on a Document
Compare Two Versions of a Document
Combine Changes into a Single Document
Work with Comments
Work with Protected Documents
Inspect a Document Before Sharing It
Mark a Document as Final
Create a Master Document
Work in a Master Document
Chapter 9: Working with Tables and Charts
Create a Table
Change the Row Height or Column Width
Move a Table
Resize a Table
Add or Delete a Row
Add or Delete a Column
Set Cell Margins
Add Space Between Cells
Merge Two or More Cells into a Single Cell
Split One Cell into Two or More Cells
Split a Table into Two
Add a Formula to a Table
Align Text in Cells
Add Shading to Cells
Change Cell Borders
Format a Table Using a Table Style
Add a Chart
Understanding Word’s Chart Types
Chapter 10: Working with Graphics
Add Decorative Text Using WordArt
Add a Picture
Insert an Online Picture
Insert a Video
Add a Screenshot
Add a Shape
Add a Text Box
Move or Resize a Graphic
Understanding Graphics Modification Techniques
Understanding Text Wrapping and Graphics
Wrap Text Around a Graphic
Work with Diagrams
Chapter 11: Customizing Word
Control the Display of Formatting Marks
Customize the Status Bar
Hide or Display Ribbon Buttons
Add a Predefined Group to a Ribbon Tab
Create Your Own Ribbon Group
Create Your Own Ribbon Tab
Customize the Quick Access Toolbar
Create Custom Keyboard Shortcuts
Create a Macro
Run a Macro
Chapter 12: Printing, Sharing, and Mail Merge
Preview and Print a Document
Print on Different Paper Sizes
Print an Envelope
Set Up Labels to Print
Share a Word Document on OneDrive
Email a Document as an Attachment
Create Letters to Mass Mail
Create Labels for a Mass Mailing
Index
End User License Agreement
Guide
Cover
Table of Contents
Begin Reading
Pages
i
ii
iii
v
2
3
4
5
6
7
8
9
10
11
12
13
14
15
16
17
18
19
20
21
22
23
24
25
26
27
28
29
30
31
32
33
34
35
36
37
38
39
40
41
42
43
44
45
46
47
48
49
50
51
52
53
54
55
56
57
58
59
60
61
62
63
64
65
66
67
68
69
70
71
72
73
74
75
76
77
78
79
80
81
82
83
84
85
86
87
88
89
90
91
92
93
94
95
96
97
98
99
100
101
102
103
104
105
106
107
108
109
110
111
112
113
114
115
116
117
118
119
120
121
122
123
124
125
126
127
128
129
130
131
132
133
134
135
136
137
138
139
140
141
142
143
144
145
146
147
148
149
150
151
152
153
154
155
156
157
158
159
160
161
162
163
164
165
166
167
168
169
170
171
172
173
174
175
176
177
178
179
180
181
182
183
184
185
186
187
188
189
190
191
192
193
194
195
196
197
198
199
200
201
202
203
204
205
206
207
208
209
210
211
212
213
214
215
216
217
218
219
220
221
222
223
224
225
226
227
228
229
230
231
232
233
234
235
236
237
238
239
240
241
242
243
244
245
246
247
248
249
250
251
252
253
254
255
256
257
258
259
260
261
262
263
264
265
266
267
268
269
270
271
272
273
274
275
276
277
278
279
280
281
282
283
284
285
286
287
288
289
290
291
292
293
294
295
296
297
298
299
300
301
302
303
304
305
306
307
308
309
310
311
312
313
314
315
316
317
318
319
320
321
322
323
324
325
326
327
328
329
330
331
332
333
334
335
336
337
338
339
340
341
Chapter 1
Getting Started with Word
In this chapter, you meet the Word working environment, including the Word Start screen and Backstage view, and you learn the essentials of navigating the interface with the keyboard and mouse and entering text using the keyboard. You also learn about using Word on tablets, phones, OneDrive, and Teams.
Open Word and Use the Start Screen
Understanding Office and the Cloud
Explore the Word Window
Sign In to Your Account
Work with Backstage View
Change the Color Scheme and Background
Locate Commands on the Ribbon
Give Commands Using the Keyboard and Mouse
Using Word on Tablets and Phones
Using Word in OneDrive and Microsoft Teams
Work with the Mini Toolbar and Context Menus
Enter Text in a Document
Move the Insertion Point Around a Document
Switch Document Views
Understanding Document Views
Work with the Navigation Pane
Using Focus Mode
Using Immersive Reader
Open Word and Use the Start Screen
Microsoft Word is the world’s most widely used word processing app. As of this writing, the current version of Word is Word 2019, which runs on Windows 10 and on macOS. This book focuses on Word 2019 for Windows. Microsoft also provides versions of Word for Apple iOS devices, which are the iPhone and iPod touch; for iPadOS, the iPad’s operating system; and for Android, Google’s operating system for smartphones and tablets.
To use Word, you first launch it. This section shows you how to pin Word to the Start menu or to the taskbar, and how to launch it from those locations.
Open Word and Use the Start Screen
Pin Word to the Start Menu or to the Taskbar
Click Start ().
The Start menu opens.
Locate the Word icon () and entry. For example, scroll down.
Note: You can click Word () to launch Word.
Right-click Word ().
The context menu opens.
To pin Word to the taskbar, click or highlight More, and then click Pin to taskbar.
Click Pin to Start.
Windows pins Word to the Start menu.
Launch Word from the Start Menu
Click Start ().
The Start menu opens.
Click Word ().
Word opens.
Note: You can get Word either by buying an Office 2019 perpetual license or by paying for a Microsoft 365 subscription. Microsoft is gradually moving to the subscription model, and this is generally a better choice because the software receives ongoing updates as long as you subscribe, whereas the perpetual license receives only bug fixes and some updates.
Launch Word from the Taskbar
Click Word () on the taskbar.
Word opens.
Meet the Home Screen and Close Word
When Word opens, it displays the Home screen.
If you have signed in to Microsoft 365, your ID appears here.
The New area presents templates you can click to start a new document.
You can click Search and type a search term to search for a document or template.
The Recent list shows recent documents. You can click a document to open it.
You can click New to create other types of new documents.
You can click Open to open other existing documents.
Click Close ().
TIP
What do the Pinned tab and the Shared with Me tab contain?
The Pinned tab contains a list of documents you have “pinned” to keep them available. This gives you an easy way to open documents you use often.
The Shared with Me tab contains a list of documents that others have shared with you via Microsoft’s OneDrive online service or through other means.
Understanding Office and the Cloud
Word and the other Microsoft Office apps, such as the Excel spreadsheet app and the PowerPoint presentation app, offer full integration with Microsoft’s OneDrive online service, SharePoint servers, and Teams collaboration app. This integration enables you to work no matter where you are and which type of device you have available. For example, you can sign in to OneDrive on your laptop or iPad and get to work in Word; or you can sign in to Teams and open a Word document for editing directly in the app.
Sign In to the Cloud
Signing in to Office.com or your Microsoft 365 subscription connects your Office programs to the world beyond your computer. Office Online offers free access to the online, limited-edition versions of Word and other Office programs that you can use on any computer. Purchasing a Microsoft 365 subscription gives you access to full versions of the Office desktop programs and the online versions of the products. Signing in gives you access to online pictures and clip art stored at Office.com and enables Word to synchronize files between your computer, OneDrive, and SharePoint.
OneDrive Storage Space
Subscriptions to Microsoft 365 include space on Microsoft’s OneDrive cloud storage service. The amount varies depending on the plan; for example, the Microsoft 365 Personal plan gives one person 1 terabyte—1 TB, 1000 GB—of storage space, and the Microsoft 365 Family plan gives up to six family members 1 TB each. Word and the other apps save all documents by default to OneDrive so that you can access your documents from anywhere.
Using Office Online Apps
You can open and edit Word, Excel, OneNote, and PowerPoint documents from OneDrive using Office online apps, which are scaled-down editions of Office programs that you can use to easily review documents and make minor changes.
Take Your Personal Settings with You Everywhere
Word keeps track of personal settings like your recently used files and favorite templates and makes them available from any computer. When you open a document, Word gives you an easy way to return to the last location you were editing. This makes it easy for you to get back to work when you move from one computer or device to another.
Your Documents Are Always Up to Date
Word saves your documents by default in the OneDrive folder on your computer, from which you can access them quickly. Windows then synchronizes this folder with OneDrive in the background.
Share Your Documents from Anywhere
You can share your documents both from within Word and from OneDrive. If the document is stored on OneDrive, you can send the recipient a link so that they can work with the original document. If the document is stored on your PC, you can send the document itself; you can also send the document from OneDrive to give the recipient a separate copy to work with.
Take Advantage of the Office Store
The Office Store contains add-in applications that work with Word and the other Office apps. For example, the dictionary you use to look up words in Word does not automatically install when you install the program. But when you need an add-on for Word, you can download it from the Office Store.
Explore the Word Window
Like most of the other Office apps, Word’s interface uses the Ribbon, a control strip across the top of the window, and a Quick Access Toolbar that appears either in the window’s title bar or below the Ribbon. The Ribbon contains most commands available in Word, and the Quick Access Toolbar contains frequently used commands.
Quick Access Toolbar
A Contains buttons that perform common actions.
Ribbon
Contains buttons organized in tabs, groups, and commands.
Dialog Box Launcher
Appears in the lower-right corner of many groups on the Ribbon. Clicking this button () opens a dialog box or task pane that provides more options.
Document Area
The area where you type and edit content. The insertion point, a blinking vertical bar, shows where text will appear when you type.
Status Bar
Displays document information and the location of the insertion point.
View Shortcuts
Contains buttons to switch among Word’s different views of a document.
Zoom Controls
Changes the magnification of a document.
Microsoft 365 Indicator
If your name appears, you are signed in to your Microsoft 365 subscription. You can click to display a menu that enables you to manage your Microsoft account settings. If you are not signed in, this area shows a Sign In link.
App Window Controls
Title Bar
These buttons enable you to control the appearance of the app window. You can minimize the Ribbon, and you can minimize, maximize, restore, or close the app window.
Shows the document and app titles.
Sign In to Your Account
You can use Office.com or your Microsoft 365 subscription to work from anywhere. Once you sign in, you can use the free Office online apps, such as the Word app. Word remembers some of your personal settings such as your Recent Documents list so that you always have access to them. Desktop product users typically sign in using a Microsoft 365 subscription.
When you work offline, Word creates, saves, and opens your files from the local OneDrive folder. When you reconnect, Word uploads your changes to the cloud automatically.
Sign In to Your Account
Open Word.
The Word Home screen appears.
Click the Sign in link.
Note: If you are viewing a document, you can click the Sign in link in the upper-right corner of the screen.
The Sign In window appears.
Type the Microsoft account email address associated with your Microsoft 365 subscription.
Click Next.
Note: If the Enter Password window appears, type your password, and click Sign In.
Your name in this area indicates that you have signed in to Microsoft 365.
If you need to sign out, click your name, and then click Sign out in the pop-up panel that opens.
Work with Backstage View
You can click File at the left end of the Ribbon to display Backstage view. Backstage is the place to go when you need to manage documents or change program behavior. In Backstage view, you find a list of actions that you can use to open, save, print, remove sensitive information, and distribute documents as well as set Word program behavior options. You can also use Backstage to manage the places on your PC’s hard drive, on your network, or in your OneDrive space that you use to store documents.
Work with Backstage View
Click File.
Backstage view appears.
The left pane acts as a menu for navigation and commands for manipulating Word and the active document.
This pane lets you quickly create new documents and open recent documents, frequently used documents you have “pinned,” and documents shared with you.
The Search box enables you to search by keywords for documents.
Click New.
The New pane appears.
You can double-click a template in the New area to quickly create a document based on that template.
You can click Search for online templates and type search terms to search for online templates.
You can click a Suggested Search to display templates in that category, such as Resumes and Cover Letters.
Click Info.
The Info pane appears.
You can view information about the document and its properties, such as its size and last modified date.
You can take actions, such as inspecting the document or managing it.
Click Back ().
Word closes Backstage view and redisplays the open document.
TIP
What does the Options link in Backstage do?
Clicking Options in the left pane in Backstage opens the Word Options dialog box. This dialog box contains scores of options for configuring Word to look and behave the way you prefer. You will explore the Word Options dialog box at various points throughout this book.
Change the Color Scheme and Background
The Office apps include several themes that you can apply from the Account screen in Backstage view or from the Word Options dialog box. The Colorful theme gives each app a different main color—navy blue for Word, forest green for Excel, and so on. The Dark Gray theme, the Black theme, and the White theme apply the name’s shade to each app.
You can also apply an Office background, such as Clouds or Tree Rings, to an app. The background graphics appear on the right side of the title bar.
Change the Color Scheme and Background
Note: The color scheme and background apply to all the Office apps, so if you change the color scheme and background in Word, the changes appear in Excel, PowerPoint, and the other apps as well.
Click File.
Backstage view opens.
Click Account.
The Account pane appears.
Click Office Theme ().
The Office Theme drop-down list opens.
Click the Office theme you want.
Word takes on the colors of the theme you chose.
Note: Some theme changes are more subtle than others.
Click Office Background ().
Move the pointer () over a choice in the menu to highlight that choice.
A background pattern appears at the top of the window. The pattern remains as you work on documents.
Click the pattern you want to use, or click No Background.
Click Back () to return to your document.
The Office theme and background you selected appear.
The background appears in the title bar.
TIP
What is the point of the Office backgrounds?
The backgrounds add a small amount of visual interest to the app’s interface. Some people like the backgrounds; others consider them pointless.
Locate Commands on the Ribbon
Word’s Ribbon contains a huge number of commands, and it can be difficult to remember where to find a command you do not use frequently. To help you locate Ribbon commands, Word provides the Search feature.
You can still use the Ribbon directly, as described in the next section, “Give Commands Using the Keyboard and Mouse.” The Search feature is most useful when you are not sure where on the Ribbon to find the command you need.
Locate Commands on the Ribbon
Open a document.
Note: See Chapter 2 for details on opening documents.
Click Search ().
The Search pop-up panel opens.
The Recently Used Actions list shows some recent actions you have taken.
The Suggested Actions list suggests options that may be useful.
Type a brief description or a keyword describing what you want to do.
The Actions list shows matches for what you typed.
Click a command to perform its action.
If the command includes an arrow (), you can either click the command itself to perform its default action, or click to display a list of all its actions, and then click the action you want to perform.
Note: If you click a command that has no default action, Word displays the list of all the command’s actions. You can then click the action you want to perform.
The program performs the action you clicked. In this example, Word places a border around the first paragraph.
TIPS
Will I need to type a description of the action I want to take if it is the same action I have previously taken?
No. The Search box remembers your previous searches and displays them on the menu that appears when you perform step 2.
Can I delete my previous searches?
No. The Search feature retains your searches in the Recently Used section of the menu that appears when you click in the search box.
Give Commands Using the Keyboard and Mouse
You can keep your hands on your keyboard and select commands from the Ribbon or the Quick Access Toolbar, or you can use the mouse.
The Ribbon contains buttons organized in tabs, groups, and commands. Tabs appear across the top of the Ribbon and contain groups of related commands. Groups organize related commands; the group name appears below the group. Commands appear within each group. By default, the Quick Access Toolbar appears above the Ribbon and contains the AutoSave switch and the Save, Undo, and Redo commands. To customize the Ribbon or the Quick Access Toolbar, see Chapter 11.
Give Commands Using the Keyboard and Mouse
Give Commands with the Keyboard
If appropriate for the command you intend to use, place the insertion point in the right word or paragraph.
Press on the keyboard.
Shortcut letters appear on the Ribbon.
Shortcut numbers appear on the Quick Access Toolbar.
Type a letter to select a tab on the Ribbon.
This example uses , which activates the Layout tab.
The appropriate tab appears. In this example, the Layout tab appears.
Letters for each command on that tab appear.
Type the letter or letters to select the command you want to run.
For example, type SA to select the Space After box in the Paragraph group.
If appropriate, Word displays options for the command you selected.
Type a letter or use the arrow keys on the keyboard to select an option.
Word performs the command you selected, applying the option you chose.
Give Commands with the Mouse
Click in or select the text or paragraph you want to modify.
Click the tab containing the command you want to use.
Move the pointer over the command you want to use.
Word displays a ScreenTip describing the function of the button at which the pointer () is pointing.
Click the command. For example, click Bold ().
Word performs the command you selected. In this example, Word applies boldface to the selected text.
Note: If you selected text, click anywhere outside the text to continue working.
TIPS
Can I toggle between the document and the Ribbon using the keyboard?
Yes. Each time you press , Word changes the focus of the program, switching among the document, the status bar, and the Ribbon, in that order. When the focus is on the status bar or the Ribbon, you can press to move the focus to the next control, or press + to move the focus to the previous control.
What do the small down arrows below or beside buttons mean?
The small arrow () on a button means several choices are available. Click the button directly to apply a default choice. Click to view additional options. As you move the pointer () over the two parts of the button, Word highlights one or the other to alert you that you have more choices.
Using Word on Tablets and Phones
You can use Word and the main Office apps on many tablets and phones as well as on PCs. Windows 10 tablets can run the full versions of the apps, and you can switch to Touch mode to make the interface easier to use with your fingers.
Microsoft also provides versions of Office for the iPad as well as the iPhone and iPod touch, and for Android phones and tablets. These versions of the apps look substantially different but provide most key features, including OneDrive connectivity, enabling you to continue your work no matter where you are.
Using Word on Tablets and Phones
Start a Program
Tap Start ().
The Windows 10 Start menu for Tablet Mode appears.
Note: If Word () appears at the top of the Start menu, tap it.
Tap All apps.
The All Apps screen appears.
Tap Word ().
Word opens.
Tap the document you want to open.
The document opens.
Using Touch/Mouse Mode
Tap Customize Quick Access Toolbar ().
Tap Touch/Mouse Mode.
Word adds the Touch/Mouse Mode button to the Quick Access Toolbar.
Note: By default, each Office program displays the screen in Mouse mode.
Tap Touch/Mouse Mode ().
The Touch/Mouse pop-up panel appears.
Tap Touch.
Word enlarges the Ribbon, adding space between the controls and collapsing some groups into buttons, as needed to fit the screen.
Tap to position the insertion point.
The on-screen keyboard appears.
You can then type on the on-screen keyboard.
TIP
Where can I get Word for iOS, iPadOS, and Android devices?
You can get Word for iOS or iPadOS from the App Store. On your iPhone, iPod touch, or iPad, tap App Store on the Home screen, and then search for Microsoft Word. Similarly, you can get Word for Android on the Play Store. On your Android device, tap Play Store on the Home screen or the Apps screen, and then search for Microsoft Word.
You can use the basic features of these apps for free. But to use the apps’ full capabilities, you must pay for a subscription.
Using Word in OneDrive and Microsoft Teams
From OneDrive, you can use the Word online app to open and edit Word documents with the same basic editing tools you use in Microsoft Word. Similarly, after signing in to Microsoft Teams, you can open a Word document for editing directly in Teams.
Both OneDrive and Teams provide a streamlined version of Word with fewer tools and commands than the full desktop version.
Using Word in OneDrive and Microsoft Teams
Using Word Online from OneDrive
Sign in to OneDrive at onedrive.live.com.
Open the folder containing the document you want to open.
Click the document you want to open.
The document appears in the Word online app in another tab in the browser.
The insertion point appears, and you can edit as normal.
The Ribbon contains fewer tabs than in the desktop version.
You can click Open in Desktop App to open the document in Word, assuming Word is installed on the computer.
Note: The Word Online app automatically saves changes, so you do not need to save them explicitly.
When you finish working in the document, click Close ().
The document closes.
Using Word in Microsoft Teams
Open Teams as usual. For example, click Start (), and then click Microsoft Teams ().
Microsoft Teams opens.
Click Teams () in the navigation bar.
The Teams list appears.
Click the appropriate team.
Click Files.
The Files pane appears.
Click the file you want to open.
The file opens, and you can work with it.
For example, you can select a paragraph, and then apply a style to it.
Note: The Office Online apps inside Microsoft Teams automatically save changes, so you do not need to save them explicitly.
You can click Open in Desktop App to open the document in Word, assuming Word is installed on the computer.
When you finish working with the file, click Close.
The document closes.
TIPS
What does the Conversation button in Microsoft Teams do?
Click Conversation to open the Conversation pane so that you can hold a conversation with fellow team members. For example, you can discuss the changes needed to a document as you work on it.
Work with the Mini Toolbar and Context Menus
Most of the formatting commands appear on the Home tab in Word, but you have alternatives to format text. Without switching to the Home tab, you can format text using the Mini Toolbar, which contains a combination of commands available primarily in the Font and Paragraph groups on the Home tab.
You also can use the context menu to format text without switching to the Home tab or the Review tab. The context menu contains the Mini Toolbar and a combination of commands available primarily in the Font group and the Paragraph group on the Home tab and on the Review tab.
Work with the Mini Toolbar and Context Menus
Work with the Mini Toolbar
Select text.
The Mini Toolbar appears.
Note: If you slowly move the pointer () away from the selected text, the Mini Toolbar becomes transparent and then disappears.
Click any command or button to perform the actions associated with the command or button.
Word performs the action on the selected text.
The Mini Toolbar remains visible so that you can use it again if you want.
Work with Context Menus
Select text.
The Mini Toolbar appears.
Right-click the selected text.
The context menu opens.
Note: You can right-click anywhere in the document area, not just on selected text, to display the Mini Toolbar and the context menu.
Click a command or button to perform the associated action.
TIP
How do I turn off the Mini Toolbar?
Click File and then click Options to open the Word Options dialog box. Click General in the left pane to display the General category. Go to the User Interface Options section, and then click Show Mini Toolbar on selection ( changes to ). Click OK. The Word Options dialog box closes.
Enter Text in a Document
Word makes text entry as easy as possible. By default, Word uses Insert mode, in which any text to the right of the insertion point moves along to accommodate the new text. When the text reaches the end of the line, Word automatically wraps it to a new line, so you need to press only when you want to start a new paragraph.
When you want to use white space to align or position text, press rather than . See Chapter 6, “Formatting Paragraphs,” for details on settings tabs.
Enter Text in a Document
Type Text
Type the text that you want to appear in your document.
The text appears to the left of the insertion point as you type.
As the insertion point reaches the end of the line, Word automatically starts a new one.
Press only to start a new paragraph.
Separate Information Using Tabs
Type a word or phrase.
Press .
To align text properly, you can press to include white space between words.
Some white space appears between the last letter you typed and the insertion point.
Type another word or phrase.
Enter Text Automatically
Begin typing a common word, phrase, or date.
The AutoComplete feature suggests common words and phrases based on what you type.
You can press to let Word finish typing the word, phrase, or month for you.
You can keep typing to ignore Word’s suggestion.
TIP
Why should I use rather than to include white space between words?
Typically, you include white space between words or phrases to align text in a columnar fashion. Most fonts are proportional, and each character takes up a different amount of space on a line, so using spaces does not usually align words exactly. Tabs, however, are set at specific locations on a line, so when you press , the text will be aligned precisely with the next tab stop. For details on tab settings, see Chapter 6.
Move the Insertion Point Around a Document


