20,99 €
Mehr erfahren.
- Herausgeber: Crowood
- Kategorie: Fachliteratur
- Sprache: Englisch
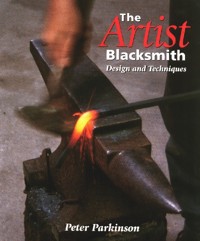
The Artist Blacksmith is the essential handbook for anyone interested in bringing a creative, contemporary approach to this ancient craft, and for those already hooked who want to improve and expand their skills.
Das E-Book können Sie in Legimi-Apps oder einer beliebigen App lesen, die das folgende Format unterstützen:
Seitenzahl: 273
Veröffentlichungsjahr: 2014
Ähnliche


TheArtist Blacksmith
Design and Techniques
Peter Parkinson
First published in 2001 by The Crowood Press Ltd Ramsbury, Marlborough Wiltshire SN8 2HR
www.crowood.com
This impression 2014
This e-book first published in 2014
© Peter Parkinson 2001
All rights reserved. No part of this publication may be reproduced or transmitted in any form or by any means, electronic or mechanical, including photocopy, recording, or any information storage and retrieval system, without permission in writing from the publishers.
British Library Cataloguing-in-Publication Data
A catalogue record for this book is available from the British Library.
ISBN 978 1 84797 783 0
Dedication
I would like to thank all those blacksmiths who have generously lent me illustrations and countless more whose advice and enthusiasm, whether they know it or not, has contributed to this book.
Photographic Acknowledgements
All photographs by the author with the exception of those credited otherwise, and the following: Peter Hill 76 (bottom); Andrew Lee 83; Ian Macaulay 84, 85 (top), 101 (top); Paul Taylor 89 (top).
Line drawings by the author.
PREVIOUS PAGE: containers and forged mild steel twigs by the author. Containers made from mild steel angle section, cut and hot folded to trap the base in slots, with cut and punched decoration.
Please Note
I have tried where possible throughout this book to use gender neutral words, in the knowledge that blacksmithing is by no means a male preserve. I have nevertheless used 'he' and 'his', because to add 'she' and 'hers' every time would become unbearably tedious. If this still rankles, I can only apologize and emphasize that 'he' is simply a pronoun, and not intended as an opinion.
CONTENTS
Introduction
Chapter 1 Workshop and Equipment
Chapter 2 Materials
Chapter 3 Health and Safety
Chapter 4 Working at the Anvil
Chapter 5 Drawing Down
Chapter 6 Bending
Chapter 7 Upsetting and Spreading
Chapter 8 Hot Cutting
Chapter 9 Punching
Chapter 10 Twisting
Chapter 11 Joining Processes
Chapter 12 Working with a Striker
Chapter 13 Design
Chapter 14 Jigs and Tools
Chapter 15 More Tools
Chapter 16 Assembly and Finishing
Further Reading
Glossary
Index
INTRODUCTION
Blacksmithing has come a long way in the last twenty years. In 1979 I was invited as a guest to the Crafts Council Forging Iron Conference and Workshop at Hereford, organized with the intention of revitalizing an apparently dying craft. The main participants were fourteen blacksmiths from all over Britain, many of whom had never met before and had been under the impression that they were the last real blacksmith in the country.
Since that time the craft has expanded dramatically, developed artistically, embraced new technologies and found new applications. Blacksmithing has been taught in a number of Art Colleges since 1982. The British Artist Blacksmiths Association – BABA – founded in 1978, now has some 600 members, amateur and professional, and a thriving annual programme of events. Perhaps surprisingly there is also a significant international dimension to the craft, providing a very active and fertile network between smiths in America, Europe, Russia, Japan and Australia.
Typical BABA blacksmithing event.
Despite its increasing sophistication, blacksmithing has not forgotten its roots. The heart of modern blacksmithing is still the fire, the anvil and the hammer. You heat the metal and shape it with a hammer. The core activity of the smith today would be easily recognized and understood by a smith transported, for example, from medieval times.
On my shelf is a book published to accompany the 1980 British Museum exhibition, ‘The Vikings’, that includes a photograph of a group of tools left in the grave of a tenth-century Norwegian weapon-smith. The tongs, hammers and chisels are virtually identical to tools I use in my workshop today, a whole millennium later.
At that time iron was an expensive metal, difficult to produce in any quantity and valued for its use in tools and weaponry, implements and even jewellery. The smith made his own tools and would save and rework metal, welding small pieces together to make a larger bar if necessary.
This kind of economy of working has persisted. The metal is no longer valuable, but smiths still habitually save odd pieces in the scrap pile, to provide the material for a particular job or special tool. There is a powerful appeal in having an excuse to forage in scrapyards for handy bits, and if you can’t exactly forge a sword into a ploughshare, you might at least make a candleholder out of an old piece of pipe.
The intrinsic self-sufficiency of smithing is of great benefit to the amateur and professional alike. You can begin with very little equipment and make what you need as time goes by.
Sculptural piece by Alan Evans, gas cut from steel tube, heated and shaped.
Blacksmithing offers a way of working metal that gives rise to forms and qualities that are far more personal than the products of our machine-made environment. There is a freedom and spontaneity in shaping hot metal with a hammer. Every blow leaves its mark and contributes to the result. Each smith will hit the metal in his own way and leave a characteristic ‘fingerprint’ of hammer marks. You don’t have to search for this, it will come to you.
So what kind of objects do blacksmiths make today? The answer is an almost embarrassingly long list, from small items such as hooks, paperknives and candleholders through light fittings, curtain rails and furniture, to pieces of architectural metalwork such as screens, railings and gates and large pieces of public art. The point is, the choice is yours. The craft encompasses all these things but the processes used to make them are essentially the same.
This book looks at processes as the basic building blocks through which you can realize and develop your own projects and ideas. The challenge, the fun – and indeed the magic – lies in playing with fire and transforming a rather unprepossessing material into something with a quality and life of its own.
Finally, the techniques and processes that I describe are those that from my experience have proved to be the most effective. They are not necessarily the way these things should be done. When I started smithing I learnt a great deal by spending a day a week in a well-established forge that employed a number of blacksmiths. I had a forge to myself, would spend half a day struggling to do something until someone took pity and showed me how to do it. Problem solved. Until later another smith would wander over and say ‘If I were you I wouldn’t do it like that – what I would do is this....’. It was the best lesson of all. In the end there is no definitive way, only the way that works for you.
Tool rack for hammers, fullers, hot chisels and punches.
1 WORKSHOP AND EQUIPMENT
THE WORKSPACE
Setting up your own workshop is a crucial step and there are a number of important points to be taken into account when considering the use of a particular building or space. The essential requirements are size, accessibility and an electric power supply.
To begin blacksmithing the nature of the space is more important than the size. My first workshop was only 2.4m (8ft) long by 2m (6ft 3in) wide, but it did have the virtue of a concrete floor and a high ceiling. If there is room for a forge and anvil, and enough space to move comfortably around the anvil, you have a potential forging workshop; minimal but viable. This said, a bigger space is clearly desirable, allowing more equipment to be fitted and space to lay out and construct larger projects. But if a small space is all you have, do not be discouraged.
A concrete floor is very desirable but not as essential as a ceiling high enough to allow you to swing a hammer at full stretch – 2.4m (8ft) is a minimum. Do not forget that light fittings are usually lower than the ceiling itself. It is remarkably easy to remove lights with a careless swing of a hammer, even when you thought you knew where they were. Ceiling lights should be placed high up and out of reach. A large workspace is no good if the roof is too low.
Access is a major consideration. Moving equipment, metal, fuel and so on into the building requires a reasonably easy access. Steps, for example, are a real problem. A level access and a wide door – preferably double doors – are a great advantage. It is so easy to put together a large piece of work, and forget that it has to be taken out of the workshop when it is finished.
Fire risk must also be evaluated. The most suitable type of building is of conventional brick, concrete or stone construction with slate or tile roofing, or utilitarian steel framing and metal cladding. Whilst this does not preclude the use of a wooden shed, it does mean that more care must be exercised than in, say, a brick building. This may mean lining a special part of the workshop with non-inflammable sheeting for welding or grinding. A wooden shed also needs a hard, preferably concrete, floor.
The author’s first workshop. Just enough room for a coke forge, anvil and vices fitted to a bench.
It must be acknowledged that noise is a potential problem. In my experience, not quite so much the noise of hammering at an anvil, but the whining noise of ancillary equipment such as a fan or angle grinder. Clearly if your intended forging shop is adjacent to the house next door, you may have a problem. Distance can make a difference and a screen of shrubs and trees may help. Working only at particular times of the day – never after 6pm, for example – might also help endear you to your neighbours.
ELECTRIC POWER AND LIGHTING
Electric power is essential. Even if you wish to blow your forge with traditional bellows, you will still need to have electric light to see what you are doing. If your workshop is situated where you live, a catenary wire run from the house carrying the power cable is not difficult to arrange. The power should come through its own fuse in your domestic consumer unit. Fit a fuse rather than a miniature circuit breaker, if you are going to use an arc welder. This will tend to trip the circuit breaker, while a wire fuse is more tolerant.
It is better to fit more power sockets than you think you need, and preferably use double ones to reduce the hazard of long trailing leads to a hand electric drill or angle grinder. With so much metal in the workshop, good earthing is essential. RCD (Residual Current Device) sockets are also a worthwhile safety device, giving you protection should you cut a trailing cable with a power tool or a piece of hot metal.
A fence design laid out on the concrete workshop floor.
Traditionally a blacksmith’s workshop was an ill-lit place, with few windows, since the smith needed to ‘see the colour of the metal’. That is, to judge its temperature. It is very important to be able to see how hot the metal is, but this does not mean that the workshop has to be gloomy. A normally lit interior space allows you to judge the colour of the metal perfectly well, and crucially enables you to see what you are doing. A light-coloured floor and walls provide a good background against which you can judge a bar for straightness. If the floor and walls are a dark colour, it may be necessary to use a piece of white painted board propped up, to act as a background.
Direct sunlight can be a problem. For this reason, windows may be better fitted with obscured glass and ideally should be in a north-facing wall. Sunlight coming directly through a window and shining on the metal, can make judging the heat very difficult. If there is really no alternative – or if you want to work out of doors for instance – the hot end of the metal can be offered into a steel drum, or under the shade of the forge hood, where its colour can be seen.
For preference, windows should be set fairly high. If they are at bench height or lower, they can be easily broken by the careless handling of a length of metal or a dropped tool. A window above a bench is a good arrangement from the point of view of illumination, but beware of grinding sparks impacting the glass. The metal particles stick and gradually turn the window brown with rust.
A good flat, solid floor is important, not least because blacksmithing equipment is heavy and subject to impact. A smooth concrete floor is fireproof, enables equipment to be moved easily and allows chalk lines to be set out as a guide for a particular piece of work. If the floor is truly level as well as flat, a spirit level can be used to check pieces of work and a plumb line hung from the roof will be at right angles to the floor surface. This can be very useful for ensuring that an upright feature – the stem of a floor standing lamp, for instance – is set truly vertical in relation to its base.
The workshop should be well ventilated, but not draughty. There is a risk of fumes from the forge fire and from arc welding operations. A coal or coke fire is dusty, and grinding produces dust. For these reasons, many smiths prefer to work with the door open to provide a flow of fresh air. But a direct draught near the fire should be avoided since it can blow fumes from the burning fuel into the workshop before they can escape up the flue.
BASIC EQUIPMENT AND LAYOUT
Essential equipment is the forge, anvil, a heavy vice and a bench. A great deal can be achieved with just these and a few hand tools. It is an advantage to add a hand electric angle grinder, an electric arc welder, and a number of other tools that will be reviewed in Chapter 15. But whatever else you may have, or aspire to, the forge and anvil are the heart of the workshop.
The forge is simply a heat source and may be coal, coke, gas or oil-fired. There are many different types and sizes, each with its own advantages and disadvantages (see below). Like motor cars, they all ultimately get you there, but with varying degrees of efficiency, comfort, speed and cost.
Since it needs a flue, a coal or coke forge tends to fix the layout of the workshop. Its position needs careful thought. A gas-fired forge running on propane, or an oil-fired forge burning paraffin needs no flue in a well-ventilated workshop, since the fuel burns cleanly without noxious fumes. It should be remembered, however, that any kind of hydrocarbon fuel produces carbon dioxide, and with a restricted air supply can also produce carbon monoxide. So good ventilation is important. These forges provide a heated chamber – similar to a potters kiln – accessed though doors at front and back. Since they are relatively light in construction, and do not need a fixed flue, they can be placed on a base fitted with castors, and moved as necessary. This permits a more flexible layout to the workshop, enabling the forge to be sited to suit the particular job.
Solid fuel forges often have a water trough attached to the front of the hearth. It is essential to have some form of tank or trough in which to cool or quench the metal. An old oil drum may serve, although there is some advantage in having a long tank, since a hot bar may be laid across it and areas quenched at either side of a heat, without flooding too much water on the floor.
WHICH FORGE?
COAL OR COKE FORGES
Advantages
◆ Give a short heat on a bar.
◆ Good for providing a local heat in the middle of a bar, to make a tight bend for example.
◆ Very suitable for fire-welding operations.
◆ Flexible access to the heat source – a large or awkward piece may be reheated.
◆ Since a fan controls the fire, it may be shut down between heats, conserving fuel.
◆ If the fan is silenced, it can be very quiet to use.
Disadvantages
◆ More difficult to install. Must have a flule to vent fumes.
◆ Dirty. Even with a good flue it produces dust in the work-shop.
◆ Difficult to achieve a heat much longer than, perhaps, 6in (15cm).
◆ Metal left unattended in the fire will almost certainly burn.
◆ Physically a larger unit than a gas or oil forge.
WHICH FORGE?
COAL OR OIL FORGES
Advantages
◆ Easy to install – no flue.
◆ Can be made mobile by placing on a trolly fitted with castors.
◆ Give a long heat on a bar – as long as the forge chamber itself – good for long tapers or long bends.
◆ Several bars may be heated at once and worked in rotation. Ideal for repetition forging.
◆ Metal left in the fire will not burn, though the surface may oxidize considerably.
◆ Physically a smaller unit than a solid-fuel forge.
Disadvantages
◆ Not very suitable for taking short heats on a bar.
◆ Local heat in the middle of a bar is determined by the length of the chamber.
◆ Limited access. Once a bar is bent, it may not be possible to get it back into the forge.
◆ Demands intensive use. Once lit, expensive fuel burns continuously.
◆ It may be difficult to achieve fire welding temperatures.
◆ Even with a silenced fan, the roar of the flame can be noisy.
WORKSHOP LAYOUT
Positioning the forge fire is probably the most crucial decision to make in planning the layout of the workshop. If you are only expecting to work short pieces of metal, the location of the forge may not seem to be critical. But consider the need to heat one end of a long length of metal, to make (for example) a 2m curtain rail or a long crowbar. Will the other end hit the wall? Or the need may arise to heat the middle of a long length, to bend it. The space at either side of the forge will determine the maximum length that can be handled. Anticipating the worst case enables the forge to be placed in a position that permits maximum use.
It is well worth drawing a plan of the workshop, and taking time to determine the optimum position for the forge. Cutting a hole though the roof to put in a flue is something you really only want to do once. The rest of the workshop can then be laid out around the forge. Take advantage of the access door. It may be possible, for example, to feed long lengths of metal through the door into a vice or mechanical saw, to cut them off.
The anvil should normally be close to the forge. There is a great advantage in being able to take a piece of metal from the fire to the anvil, in one movement, before it cools down. This is particularly critical with thin stock. A vice – preferably a leg vice – should also be positioned where hot metal from the fire can be quickly clamped and worked with the minimum of running around. Safety, comfort and efficiency are worth striving for and after a little time in the workshop you may be able to refine the layout to your advantage.
London pattern anvil on an oak-log base.
ANVILS
When choosing an anvil, it is worth remembering that you can make small pieces of work on a large anvil, but you can’t easily make large pieces of work on a small anvil. Anvils are rated by weight, which is the important factor in absorbing the shock of hammering. Since volume determines weight, a 200lb (90kg) anvil may only be a few inches longer than a 100lb (45kg) anvil, So, if you have a choice (and the space), choose the larger one. This principle applies to a lot of tools including a vice, leg vice, bench drill, fly press, lathe and so on. An anvil weighing less than 1cwt (50kg) is likely to be too small for much serious work.
There are two basic types of anvil in common use, the London pattern and the double bick anvil, widely used in Europe, a version of which is called the Portsmouth pattern in Britain. New anvils are available and used ones may be bought from engineering machinery dealers, farm auctions or even scrapyards. Some may actually be scrap, but few anvils are totally beyond salvaging.
Anvils today are made of a steel casting with the face hardened, but traditionally were made with a wrought iron or soft steel body and a separate hardened steel face, fire-welded on. Many anvils had the steel plate welded to leave part of the body exposed as a step or table of soft iron, that provides a surface used for cutting, since it will not blunt a chisel. Exceptionally the plate may be in the process of separating from the body of the anvil. A ‘cracked’ or ‘dull’ note when tapping along the anvil with a hammer may indicate this problem.
Much is made in the literature of choosing an anvil with ‘a good clear ring’, which is intended to diagnose this kind of fault, in the way that a railway man walks the length of a train, tapping the wheels with a long hammer to check for cracks. In use, however, the last thing you need is an anvil ringing like a bell every time you hit it. A ‘good clear ring’ can be deafening. Setting the anvil on timber and bedding the feet of the anvil on a few strips of modelling clay (plasticine), will deaden and control the ring (see below).
WHICH ANVIL?
WHICH ANVIL?
WORKBENCH
The bench provides a focus for the cold work needed to deal with the pieces you have forged. It is a place where you can fix a vice, check, clean up, file, fit, assemble, and simply put down components while you consider the next step. It may be large or small, depending on the space available and kind of work you want to do, and made of timber or metal. A metal bench (or at least a metal top to a bench) may be useful if it is to double as a bench for gas or arc welding. Either way, make it rigid and err on the side of heaviness. A shelf under the bench top is doubly useful since it provides storage and adds weight to the structure.
An engineer’s vice or a leg vice (or both) should be fixed to the bench in a position where they offer the best access. It is useful to have an engineer’s vice with a swivel base fitted at one corner of the bench, enabling it to be swung round to provide access both from the side and the end of the bench. Flexibility is useful in this instance and as a general principle. You never know the shape, size and length of metal you are going to need to work next, and it is an irritating problem if part of it fouls the wall or the leg of a bench.
Part of the bench top can provide a good clear layout area. You may also want to have a surface plate on the bench to provide a flat reference surface for checking or assembling components. This does not need to be of the precision ground quality used in an engineering workshop, but simply a piece of flat steel plate, carefully checked for straightness with a steel rule, or a salvaged cast-iron machine table from a scrapyard. It can be an advantage to set this up using a spirit level so that it is truly level.
Double bick anvil on an angle-iron base.
VICES
There are two types of vice commonly used in a blacksmith’s shop, a leg vice and a bench or engineer’s vice. They operate on different principles. The engineer’s vice has jaws that remain parallel at any opening, while the jaws of the leg vice pivot on an arc. It is useful to have both, but if space or cost is a limitation, the first choice should be a leg vice. This can be fitted to a bench, can be obtained already fitted to a free-standing mounting, or you can make a mounting from heavy tube or ‘I’ beam to be bolted to the floor. However it is installed, the virtue of the leg is to transmit the impact directly down to the floor. Fitting a vice to a stand that can be placed or bolted in the middle of the floor can be an advantage, since it offers access all round. Again, weight is an important factor. When the vice is used to grip hot metal – to be hammered into a bend for example – it may be subject to as much impact as an anvil.
Leg vice on a mounting bolted to the floor.
As with anvils, new leg vices are available, but serviceable old ones are to be had from similar sources. It is fairly easy to check that the clamping screw is not damaged, the jaws meet properly and the bottom pivot is not out of line or loose. The jaws of a leg vice are integral with the body and are sometimes not hardened, but may be patterned to give a grip surface. This grip should be ground off to leave smooth jaws, or they will make marks on a hot workpiece.
The bench vice usually does have hardened jaw faces with a grip patterned surface. These are separate pieces retained with screws, and are better removed and replaced with smooth mild steel jaws, to avoid marking workpieces. It is useful to have a vice fitted with a swivel base.
STANDS
If you work alone, you are very likely to find occasions when it would be helpful to have another hand. Simply hot cutting the end off a long or heavy bar can become a real problem, without someone to hold it for you. An adjustable stand with a tripod base offers a way of supporting the other end of the bar and solving the problem. This is sometimes referred to as a ‘blacksmith’s helper’. It is useful to have several of these. Different supporting pieces can be made to fit to the basic stand, some with plain ends, some with a flat ‘u’ shape to prevent the bar falling off sideways, and some with a roller to allow a bar to be slid backwards and forwards when, for example, splitting it down its length.
Quite different kinds of stand – trestles – may be needed if you are intending to make any kind of gate, grille or screen. These usually have simple ‘A’ frame ends and an angle iron or flat bar horizontal. They are used in pairs (or more) and are carefully levelled to provide a reliable horizontal surface on which the structure may be assembled.
Blacksmith’s helpers. Adjustable stands with different heads.
Trestles in use to assemble a grille.
SWAGE BLOCK
This is not the most essential item when you are starting a workshop, but is nevertheless a very useful and versatile piece of equipment. A swage block is usually square in shape, made of cast iron, has a number of square, round and rectangular holes passing through it, and grooves of different profiles cast into its edges. Some have a cavity for shaping the bowl of a ladle. The block can be used on the floor, but is better set on a stand which enables it to be laid flat or stood on edge.
With the block laid flat, the holes serve variously as heading tools, to anchor the end of a bar for bending, provide sockets for tools like swages or fullers and offer support for a hot bar when drifting through large holes. On edge, the block can serve as a collection of bottom swages of larger sizes than anvil swages, it can locate a bar horizontally, and bars can be hammered straight or bent into curves across the larger hollow profiles. Again, the heavier the block the better.
Swage block on a welded angle-iron stand.
HAND TOOLS
Working hot metal can ultimately demand a large number of tools, not least because while the metal is workable, you cannot touch it. But you can begin smithing with a relatively small number, and as your skills develop, make many of the more specialized tools yourself.
Blacksmithing tools are produced commercially, or you can save money by seeking second-hand tools at machinery dealers, scrapyards, farm sales, car boot sales and junk shops. Work with just a few tools initially. With a little experience you will be in a far better position to select the tools that suit both you and the kind of work you want to do.
The shiny painted and varnished hammer handle, for instance, is the last thing you really need to hold for three hours in a sweaty hand. Plain, unvarnished hickory or ash handles are preferable, even if you have to spend time scrubbing off the varnish with steel wool. Similarly avoid plastic or rubber-sheathed handles on any tools used near hot metal. Even the plastic case of a tape measure is at risk.
Hammers
You probably only need one or two hammers to begin with, but you may need to try several in order to locate the right ones. I do much of my work with three different hammers and most of it with just one. A weight between 1¾lbs and 3½lbs (roughly 0.75kg to 1.6kg) will be suitable for most forging processes, but occasionally a smaller or larger hand hammer may be needed. A 7lb or 10lb (3kg or 4.5kg) sledge hammer is also useful, even if you work alone (Hammers may be marked in pounds, ounces, kilograms or grammes). Many smiths use a conventional engineer’s pattern, ball-pein hammer, but my preference is for a square-faced, cross-pein hammer, for reasons explained in Chapter 5. This is the common pattern available in Germany and France.
My favourite forging hammers, two square-faced cross-pein hammers and a ball pein.
Two rawhide mallets and one with a heavy rubber head.
Mallets
A heavy mallet is useful to straighten or bend metal without damaging its surface. A hot bar can be worked on a timber block. Timber, rubber and rawhide-headed mallets are available, although timber is usually too light. The type that has a steel head fitted with replaceable rawhide faces is ideal, and available in several weights. It is also obtainable with one rawhide face and one copper, that can be useful in its own right, and adds weight.
Tongs
The jaws of blacksmith’s tongs are shaped to fit a particular section of bar – round, square, flat – and may also only accept one particular size. Most tongs are designed to hold a workpiece securely while it is hammered, but some are intended for picking up metal from the fire, bending small details or for opening and setting collars. Choose tongs that suit the work you want to do. Many tongs seem to be made far too long and heavy. Small light tongs are preferable unless you are undertaking very large and heavy work. The jaws can be adjusted, so two or three pairs may serve initially for a wide variety of work. It can be useful to make a few oval rings from steel rod to slip over the handles of the tongs to lock a workpiece in the jaws.
ANVIL TOOLS
The hardie hole in the anvil accepts a variety of tools. The most essential and often used is the hardie itself, used for cutting off metal. Hardies can be short and squat for cutting cold metal or more slender in shape for hot cutting. It can be useful to have two hot hardies, one forged and sharpened symmetrically, the other forged with a vertical face and ground on one side only, like a wood chisel.
A hardie in use for hot cutting.
Tongs for holding particular bar sections.
When buying anvil tools make sure that the shank size fits your anvil. Even if nominally correct, the shanks may need to be ground slightly to provide a snug fit.
Bottom fullers.
Fullers and swages
Fullers are of a convex shape, swages are concave. Both are often used in pairs as ‘top and bottom tools’. Bottom tools have a square steel shank that fits the hardie hole. Top tools have an iron or steel rod handle wrapped round the body, or a wooden handle fitted into an eye like a hammer. In my view, the wooden shafted tools are easier to use. They are often lighter, usually better balanced and more comfortable to hold.
Bottom swages.
Top fullers, two with timber handles and one with a rodded handle.
Top swages, two with timber handles and one with a rodded handle.
Chisels
Chisels for hot cutting, similarly fitted with rod or timber handles, are known as ‘hot sets’. ‘Set tools’ are, in general, those fitted with a separate handle, rather than held directly in the hand. They are held in position on the work and hit with a hammer – often a sledgehammer. There are set punches and set hammers, a useful version of which is known as a ‘flatter’, used for smoothing and flattening surfaces. In each case, the handle keeps the smith’s hand away from the heat of the metal and the risk of a misplaced hammer blow. Many of these tools can be used by a smith working alone, but in reality they belong to a category of tools intended to be used when working with a striker – the helper with the sledgehammer. The smith holds the workpiece and places the set tool, while the striker provides the blow.


