22,49 €
Mehr erfahren.
- Herausgeber: The Crowood Press
- Kategorie: Lebensstil
- Sprache: Englisch
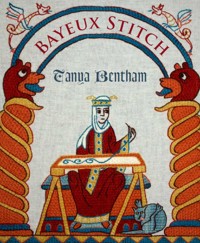
The term 'Bayeux stitch' often describes the laid and couched work that was used across Europe in the middle ages. This practical book of techniques and projects demonstrates the simple style of the Bayeux tapestry, before showing variations based on both surviving examples and adaptations of medieval manuscripts. It explains the narrow range of stitches used in laid and couched work and introduces the limited colour palette in medieval embroidery and the rhythmic use of colour. There are twelve projects with step-by-step sequences that illustrate how to stitch subjects ranging from knights to trees, and from dragons to bishops. By introducing subtle variations of techniques and materials, Tanya Bentham illustrates the endless potential of this beautiful embroidery, and brings it alive for today's embroiderers.
Das E-Book können Sie in Legimi-Apps oder einer beliebigen App lesen, die das folgende Format unterstützen:
Seitenzahl: 229
Veröffentlichungsjahr: 2022
Ähnliche


BAYEUX STITCH
Luttrell music.
BAYEUX STITCH
Tanya Bentham
First published in 2022 byThe Crowood Press LtdRamsbury, MarlboroughWiltshire SN8 2HR
This e-book first published in 2022
This impression 2023
© Tanya Bentham 2022
All rights reserved. This e-book is copyright material and must not be copied, reproduced, transferred, distributed, leased, licensed or publicly performed or used in any way except as specifically permitted in writing by the publishers, as allowed under the terms and conditions under which it was purchased or as strictly permitted by applicable copyright law. Any unauthorised distribution or use of this text may be a direct infringement of the author’s and publisher’s rights, and those responsible may be liable in law accordingly.
British Library Cataloguing-in-Publication DataA catalogue record for this book is available from the British Library.
ISBN 978 1 78500 988 4
Cover design: Peggy IssenmanPhotographs: Dr G. Davies
Please note that the measurements given are from top to bottom and from side to side of the actual design. This is not the canvas size, which should be a good few inches bigger all around
CONTENTS
Introduction
Chapter 1 Getting Started
Chapter 2 Laid and Couched, Stem and Split Stitch
Chapter 3 The Bayeux Knight
Chapter 4 Westminster Abbey
Chapter 5 Marginals
Chapter 6 The Ship’s Cat and Sea Dogs
Chapter 7 Cat Borders
Chapter 8 Medieval Trees
Chapter 9 Bad Rabbits
Chapter 10 Swirly Dragon
Chapter 11 Fighting Couple
Chapter 12 The Reykjahlid Antependium
Chapter 13 Hólar Bishop
Chapter 14 Pyx
Suppliers
Index
INTRODUCTION
Bayeux stitch is often used to describe the laid and couched work used throughout the medieval ages. However, this style of embroidery was not unique to the Bayeux Tapestry – it was used all over Europe for centuries. There are Scandinavian and English examples of laid and couched work from before the conquest in 1066. For instance, there are huge altar frontals like the one from Reyjahlið in Iceland, there are examples in silk from the later period of opus anglicanum, and there are Tudor examples like the book cover once belonging to Henry VIII in the royal collection, until eventually the stitch becomes part of the larger repertoire of Stuart crewelwork.
I will start by showing you the simple style of the Bayeux Tapestry before moving on to show variations based upon both surviving examples and adaptations of medieval manuscripts, showing subtle variations of technique and materials. Medieval embroidery relies on a surprisingly narrow range of stitches, but from them it creates subtle and varied results that are endlessly adaptable.
Luttrell dragons.
Bad rabbits – rabbits behaving badly were a frequent motif in medieval manuscripts. They are discussed in more detail in Chapter 9.
CHAPTER 1
GETTING STARTED
You really don’t need a lot of equipment for this type of embroidery. One advantage the modern stitcher has over those who worked on the Bayeux Tapestry is our access to magnification and electric light, but even these are optional – I like a nice bright work lamp, but I find magnifiers an irritation. My best advice is to use a magnifier if it helps you, but by no means should they been seen as obligatory.
Beatus of Liebana, The Commentary on the Apocalypse, The Ark of Noah.
FRAMES AND TENSION
You will get the best results with this technique as long as you have good tension on the canvas. It should be drum-tight and evenly maintained, and you will need something to hold your canvas in place.
Hoops
The most obvious choice for many modern embroiderers is a hoop; in fact, I’ve spoken to many who think it’s the only choice. However, I do not recommend using a hoop for laid and couched work for many reasons.
The first is tension: hoops don’t hold enough tension. You can’t hold even tension over a square woven cloth on a round hoop – it’s almost impossible to get the canvas properly square. If the canvas isn’t square, it can lead to distortion, especially on larger pieces.
The second is size. Hoops tend to be on the small size with the expectation that you will move the work around on the hoop, and this doesn’t work for laid and couched work. The standard-sized 15cm (6in) or 20cm (8in) hoop will often be much smaller than the span of a stretch of laidwork, as for instance on the Hólar Bishop project, and although there are techniques you can use for joining areas of laid and couched work, it’s not advisable to move the work around on the hoop before the laidwork is fully stabilized.
The third is crushing and distortion. As you move work around on a hoop, the hoop itself can do damage to your work.
Finally, hoops aren’t medieval. If you want the real medieval embroidery experience, use a frame because that’s what medieval embroiderers used. Hoops really don’t work well with medieval embroidery because they aren’t designed to.
Frames
There are several types of frame to choose from.
Slate frames
These are the most medieval choice. Easy to use and adaptable, you simply lace the canvas squarely onto the frame and add extra tension using the pegs to hold the whole thing together. Smaller slate frames can be held in the hand or leant against something, but they’re traditionally used in conjunction with a set of trestle legs. I have a slate frame set up with trestles when I work at demonstrations of medieval embroidery so that I can show the medieval way of working, but in truth I never use my slate frame at home.
Slate frames – the most medieval choice.
The big disadvantage of a slate frame with trestles in a domestic context is the amount of space it takes up. You really need a dedicated studio space for it, which isn’t always available in a modern home. Trestles aren’t something you can clear away easily because getting them positioned correctly can take longer than lacing up the frame. The other big problem I have with my slate frame is that I’m forever losing the pegs that hold it together – if you look closely at the photo you might notice mine is held together with chopped-up pencils!
The slate frames themselves are reasonably priced at between £30 and £60, but a set of trestles can run to a couple of hundred pounds.
Floor standing frames
My preference is for a floor standing frame with screws at the sides. These are Elbesee type B screw-sided frames, of which I think I have seven, possibly eight, in various sizes. The smaller frame at the front is an older model that I was given, which has screws at both sides; the larger frame at the back is a newer model with only one set of screws.
Two floor standing frames with screws at the sides.
Floor standing frames are very quick and easy to set up. You just sew your canvas to the tapes along the bars at the top and bottom, screw out to get tension, and then lace the sides, which is important for even tension.
I don’t like being hunched over my embroidery as this gives me backache. I like to sit upright on the sofa, and these frames are comfortable for me because I can sit without hunching, put my feet on the lower bar and lean the frame back towards me – rather than me leaning over the frame. Finding a comfortable working position is important; embroidery is meant to be fun, and sore necks and backs are not.
These frames are ideal if you need something portable and don’t have a dedicated workspace because they fold quickly and easily out of the way. You can take them apart quite simply for transport or storage, but even assembled they don’t take up a lot of space. At Christmas I stacked my eight assembled frames against the wall and their combined depth was only about 30cm (12in).
The Elbesee frames I use cost between £60 and £80, depending on width, and I can personally attest their durability – I bought one from Bainbridge’s in Newcastle when I was nineteen and I’m still using it every day.
Square frames
A cheap and practical option if you have a pet woodworker is just to use a square frame. My partner makes these by the dozen for me when I’m teaching. You can even adapt a sturdy picture frame for this use by taking out the glass and pins, so it’s a cheap option for the beginner.
A square frame – four lengths of cheap pine and eight woodscrews.
I actually prefer these to slate frames because they don’t have bits sticking out at the corners. You can see I’ve been using this one as a demo canvas for my online classes.
TOOLS
All you really need is a decent pair of scissors, something to mark your design onto the canvas, and very occasionally you may need a sewing stiletto for poking things and making holes.
You don’t need many tools – scissors, needles and a fabric marker are needed for all the projects. Some also require beeswax and a sewing stiletto.
CANVAS
Throughout the book I offer the choice of using a wool or linen evenweave canvas, save for the final project which requires a very fine canvas. Cotton wasn’t an option in the medieval era, and silk was generally too expensive for this type of embroidery.
An embroidery of Noah’s Ark from Beatus of Liebana’s Commentary on the Apocalypse, embroidered on wool.
Wool might seem like an odd choice and, like most people, I assumed for many years that all medieval embroidery was done on linen, because after all that’s what the Bayeux Tapestry was done on. Then I started work on a full-scale replica of the Reykjahlid Antependium. I dyed all the wools specially and spent two days drawing the pattern onto my linen canvas. When I was about halfway through, I read what little information I had back through and realized the Antepedium was stitched on wool. When I started looking I found others too. I was so intrigued by this that the next project I did – an embroidery of Beatus of Liebana's, TheCommentary on the Apocalypse, The Arkof Noah. (chosen because the animals are very silly) – was done on wool, in this case an undyed Manx tweed.
It was an absolute revelation. As someone who has problems with textures, I often find certain threads or canvases so unpleasant to work with that I avoid them – especially cotton. But wool on wool is an absolute joy. I often find that sewing wool onto linen leads to lots of thread tangles and wearing of the thread, but wool on wool is just more harmonious. So, most of the time I use a fine even-weave wool canvas, because I prefer it. I recommend you try it at least once.
MARKING OUT PATTERNS
I prefer to draw my patterns directly onto the canvas. The medieval way to do this is to use the prick and pounce technique, but this is only really a practical option if you want to repeat the same pattern several times, because the initial pricking is a lot of work. I have long suspected that large embroidery workshops kept a selection of stock designs and borders in ready pricked-out sheets and combined them with drawing for the more bespoke images.
An LED lightpad is a cheap purchase to help with transferring a design, but some people prefer to use the method of taping everything to a window. With the wool canvas I use, it’s enough to place the canvas over the top of a black-andwhite drawing, as the wool is translucent enough to see through. However, linens can vary quite considerably, hence the need for a lightpad to boost the image.
You will get a much better transfer of your design if you tension the fabric properly beforehand, as this will prevent the canvas from sliding around and distorting the pattern. Because the wool canvas transfers very easily, I tension it to my frame, then lay the frame on a pile of books to sandwich my drawing between the books and canvas for a clear image.
Laid and couched work works best in a larger format, so most of the designs in this book will need to be scaled up from the designs given. A home scanner and printer is handy for this.
I prefer to use a permanent ink to transfer my designs and then completely cover the marks. All the designs in this book should be read as covering the lines, rather than working to the inside of them.
Always test whatever pen you use for water fastness before sewing, because the last thing you want is to have the lines bleed if you decide to wash the finished article. Bear in mind that if you decide to use a fade out pen you may end up having to reapply your design, as most of them fade within a day or two, and many of the designs will take at least week to complete. If you do use a wash-out marker, check that it will actually wash out, especially on wool canvas, as the ink may behave differently on a different fibre – most fabric pens are designed for cotton.
Whatever you prefer to use, avoid marking with ordinary pencil, as it can leave your canvas very grubby and doesn’t wash out easily – on a design with a lot of white canvas it can be a disaster.
MEDIEVAL COLOUR
Just as medieval embroidery tends to work with a limited number of different stitches – usually no more than two or three in any given piece – it also tends to work with a limited palette of colours. This should not be seen as a disability, rather as a virtue. The palette is really one of the only areas of minimalism in medieval art. Largely this is a reflection of the range of dyestuffs available. Domestically grown weld for yellow, woad for blue and madder for reds, oranges and browns can be combined to create a surprising range of tones, with successive exhaust baths giving paler and paler shades. These could be augmented, if money allows, with kermes, a relative of the cochineal beetle(which can be used as a cheaper substitute); cutch for brown; walnut husks for blackish browns; and brazilwood for reds.
Some of my own dyed threads. All are blue-faced Leicester wool, pre-mordanted with alum. Most dyes give paler colours from successive exhaust baths, but the blue dyes, woad and indigo build up layers of colours from successive dipping.
Madder, first strong bath on the left down to exhaust on the right.
Woads and indigos, with the one on the right being several dips and the left only one dip.
Compound blacks and browns, cutch, oak and undyed white.
Cochineal shades, from first dark through bright red modified with tin, purples modified with iron down to exhaust pink.
Further variation in tone can be obtained with the judicious use of mordants, which as well as being the chemical ‘glue’ that binds the colour to the fibre can also change the shade completely. For instance, the mordant alum tends not to alter colour much, so cochineal with alum will give a rich red, whereas cochineal with a touch of tin will yield a bright scarlet, and the same dye with iron will give shades of purple.
It is tempting to look at hedgerow gleanings like rosehips for additional colour, and indeed traditional dye plants like weld can sometimes be found growing wild. But, in reality, many such plants will only give a temporary stain on the fibre, being neither light nor wash fast. There is good reason why weld, woad and madder reign supreme in the dye house with their long-lasting, reliable colours. Beautiful though the initial results from a pan of blackberries may be, their rapid fade to grey would make them a poor investment for a medieval person for whom clothing was a major outlay of time and money at all levels of society. Far better to just eat the blackberries.
We tend to take colour for granted in the modern world, where cheap aniline dyes are freely available in bright and breezy disposable textiles. In many ways this has led to the loss of an ancient language surrounding clothing, where a glance at the colour of someone’s clothes gave a rough idea of their status, before closer examination of fibre and weave could tell a more nuanced tale. In spinning, weaving, dyeing, sewing and embroidery we begin to glimpse the complexities of this ancient language again. You can spend weeks, months, even years on a single piece of embroidery until the hours of skill and labour become incalculable – imagine then that before you even thread the first needle you first have to wash, spin and dye the thread, both for the sewing and to weave the background canvas on which you will sew.
Weld (Reseda luteola) is the most common source of yellow, often found growing as a weed (indeed to my delight I found a huge patch of it growing by the side of the A66 on my way to visit my parents last summer). However, there are many other sources for good yellows, including marigold, safflower, persian berries, birch bark and even common brown onion skins (although if you go far enough back in history there’s no guarantee they had the same onions we use today, since garden vegetables have been bred and changed as much as livestock breeds). Turmeric and saffron can also give yellow, but although initially vibrant, neither is fast to light. Extracting colour from most yellow yielding plants is generally no more complicated than making good chicken stock; you simply simmer your chosen dyestuff with some mordanted wool for an hour or two.
Madder root (Rubia tinctorum) is treated in a similar fashion, although there’s a large amount of research concerning modifying the vat, water hardness and so on. There are references to the cultivation of madder in England as far back as the Anglo-Saxon period, but just because something can be grown in an English garden doesn’t make it cheap. Pre-conquest England suffered terrible famines and crop failures, and under such circumstances taking land and labour away from food production became a risky business – one which only the wealthy may have been prepared to take. Madder would have been worth the risk, since where weld tends to yield one dyebath, madder can be used again and again to yield a huge range of shades from chest-nut browns to dark reds, oranges and rosy pinks, right through to a delicate fleshy apricot shade from the last gasp of the dye vat. If you do decide to experiment with your own dyes it’s worth trying to source madder of different origins. I find that English madders give me deep russets, French madders yield pinks and Turkish madders (the product of hotter, dryer soils) yield brighter and far more vibrant reds.
Woad was the premier blue dye of medieval Europe, but woad and indigo both contain the same basic blue pigment, and it’s probable that the indigo dyed silks imported from China were being used alongside domestically woad-dyed wools. Colour is extracted from both by fermentation, using either human urine or a modern chemical alternative (which smells no better). The colour is layered up by repeatedly dipping in the dye vat followed by oxidization, so that pale sky blues are cheaper than deep indigos. Green is made by layering blue over threads already dyed yellow, and I use blues to add a final layer of intensity for my deepest browns.
Together with occasional touches of cochineal, walnut, etc., these dyes give a narrower palette of colours than those available in the average range of commercially produced threads, but the restrictive range of colour can be quite creatively liberating. In my opinion, some embroiderers waste far too much time and emotional effort fretting over whether a newly bought skein of thread can be matched to an old one, but this is not an option when working with natural dyes because you just have to use what you’ve got, even if it doesn’t quite match. There are numerous examples of surviving embroideries where the stitcher ran out of a colour and just continued with what she had, even though it was quite different.
There is also a rhythm to the use of colour in medieval art, which can be seen right through from early sources like the Book of Kells and the Lindisfarne Gospels, right through to later sources like the Luttrell Psalter. Colours within a single border may alternate between blue and orange, and although this may seem quite chaotic to the first glance of the modern eye, when you start to sew and work with the colour changes, you begin to see the harmony and order in the scheme.
Naturally dyed colours do harmonize better than chemically dyed ones. It’s almost impossible to place two naturally dyed skeins side by side and have them clash and jar the way chemically dyed ones so often do.
Colour is many things in medieval art and textiles. Sometimes it is pure exuberant decoration, sometimes it’s a display of wealth, with dyes sourced from the remotest corners of the earth, and sometimes it reveals the soul of the person or thing being stitched.
The full range of Appletons wool colours.
I have spent many hours poring over the Appletons shade card to match my natural dyes as closely as possible – although ironically the modern shades have no close match for my good strong madder or favourite pea green – but the colour numbers given are quite flexible. Naturally dyed threads have much more life in them because they contain subtle colour variations throughout, whereas chemically dyed threads are just one flat colour. At times I will recommend using two different coloured threads together to replicate a variegated natural one. Because Appletons threads are grouped in families of colour, it won’t affect your results too much if you use 184 instead of 185, so don’t feel that you must follow my colour guidelines too exactly.
CHAPTER 2
LAID AND COUCHED, STEM AND SPLIT STITCH
Laid and couched work is often known by the name of the work most people associate with it: Bayeux stitch, or sometimes by the Icelandic term ‘refilsaumur’. I prefer the term ‘laid and couched work’ because although the Bayeux Tapestry is the most famous historical example of this stitch, it is by no means the only example, and many of the other surviving examples are perhaps better executed from a technical point of view, although they don't always display the same joyous sense of life.
This stitch was used for a whole series of altar frontals through the Middle Ages, most specifically in Iceland and the Germanic countries, including the altar frontal from the Reykjahlið Church in Iceland, of which I have produced a full-scale replica. It continued in use throughout Europe until it eventually blended into the huge range of stitches used in Elizabethan crewelwork.
A full-scale replica of the altar frontal from the Reykjahlið Church in Iceland, which uses laid and couched work.
Laid and couched work is always used in conjunction with an outline stitch, usually either stem or split stitch, although a couched outline stitch is also sometimes seen. As we will see, there are subtle differences in the effect given by these three different outlines, which can be used to add texture. However, on the whole, stem and split stitches can pretty much be used interchangeably, according to preference.
Earlier pieces tend to use stem stitch, as this was the stitch preferred in the pre-conquest era. I personally prefer split stitch most of the time, as I find stem a bit trickier to work under tension, but use stem as well when I want a slightly more raised outline.
Some people prefer to work the outline stitch first, as is done in earlier historical examples, then fill in with the laid and couched work, but I prefer to work the outline last, as is more common in later examples. It’s quite tricky to get good coverage if you work the outline first, as you have to tuck the edge under the outline and you can often end up with some very fiddly spaces to fill. Working the outline last is not only quicker as you fill just one large area rather than many little ones, but it also allows you to cover up a lot of mistakes, which is especially important for the beginner.
Although the Bayeux Tapestry is worked on linen, many later examples, such as the Reykjahlid Antependium, are worked on wool. If you choose to use a wool canvas, try to find a fabric where the individual threads are of comparable size to crewel embroidery threads, as this will give you the best results. I prefer wool canvas because I find wool against wool gives a more pleasant sewing experience; linen can often feel as though it’s fighting against the woollen thread.
There is no right or wrong place to start laid and couched work. There’s also no direction, as you would have with cross stitch or needlepoint. The right direction to lay the stitches down is the direction that will cover the shape most quickly, so with a long thin shape you would lay along the longest stretch. Some shapes, like this sample circle, don’t have a longest side, so you may find it easiest to begin in the middle and work out to either side, or, as I have done here, you can just begin along the ‘shortest’ side. So bring the needle out at the edge of the design, wherever feels about right. Use two strands of crewel wool at this stage.
Take your double strand of thread over the shape to the other side and go down. Try to cover your outline so it becomes invisible in the finished piece. I always use a permanent fabric marker, so my habit is always to work slightly to the outside of the drawing, which I also find gives it a more accurate shape. I have chosen to go from side to side with this circle, but it would be equally valid to go from top to bottom, or even to start in the middle and work out, as mentioned above.
Now, instead of going back to the beginning to come up, as you would with satin stitch, come up again on the same side, about one background thread of the canvas away from where you just went down. Don’t worry if you occasionally pop the thread straight back out again – that just shows you’re packing them close enough together. And don’t fret too much if you forget and go across the back (now and then is okay, just try not to do it all the time as it will affect your end result).


