26,99 €
Mehr erfahren.
- Herausgeber: The Crowood Press
- Kategorie: Lebensstil
- Sprache: Englisch
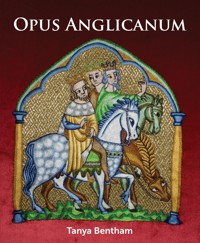
Opus Anglicanum, 'English work', was one of the high arts of the Middle Ages, treasured and traded by princes and bishops across Europe. This practical guide explains how just two seemingly simple stitches – split stitch and underside couching – can give extraordinarily complex and sophisticated results that exploit the qualities of silk and gold thread. It introduces new techniques through fourteen projects that progress in difficulty. The book advises on shading, adding detail and authentic use of colour; gives in-depth instruction on stitching faces, hair and hands, as well as wings, animals and landscaping and includes detailed reproductions of original pieces, as well as some with a contemporary twist. The book concentrates on the heyday of Opus Anglicanum, from the twelfth century to the fourteenth, when mastery of this art was at its height.
Das E-Book können Sie in Legimi-Apps oder einer beliebigen App lesen, die das folgende Format unterstützen:
Seitenzahl: 372
Veröffentlichungsjahr: 2021
Ähnliche


OPUS ANGLICANUM
OPUS ANGLICANUM
A practical guide
Tanya Bentham
First published in 2021 by The Crowood Press Ltd Ramsbury, Marlborough Wiltshire SN8 2HR
This e-book first published in 2021
© Tanya Bentham 2021
All rights reserved. This e-book is copyright material and must not be copied, reproduced, transferred, distributed, leased, licensed or publicly performed or used in any way except as specifically permitted in writing by the publishers, as allowed under the terms and conditions under which it was purchased or as strictly permitted by applicable copyright law. Any unauthorised distribution or use of this text may be a direct infringement of the author’s and publisher’s rights, and those responsible may be liable in law accordingly.
British Library Cataloguing-in-Publication Data A catalogue record for this book is available from the British Library.
ISBN 978 1 78500 897 9
Cover design: Peggy & Co DesignPhotography: Dr G Davies
Acknowledgements I would like to thank Brenda Scarman, Mary Frost, Anna Novitsky, Amanda Ashton, Liz Elliot, Kathleen Griffiths, Dr Timothy Dawson, Hazel Johnson and Bess Chilver for their input to this book.
CONTENTS
Introduction
CHAPTER 1 Materials, Tools and Frames
CHAPTER 2 Opus Stitching
CHAPTER 3 Techniques for Faces, Hair and Hands: Big Ed and Little Ed
CHAPTER 4 Simple Shading and Surface Couching: The Riggisberg Lady
CHAPTER 5 Three-Colour Shading: St Stephen
CHAPTER 6 Underside Couching
CHAPTER 7 St Michael and the Dragon, from the Syon Cope
CHAPTER 8 The Cherub: A Sampler of Wings
CHAPTER 9 The Reaper
CHAPTER 10 The Small Knight
CHAPTER 11 The Three Kings
CHAPTER 12 Rapunzel
CHAPTER 13 Rumpelstiltskin
CHAPTER 14 Selfie Girl
CHAPTER 15 Slips
CHAPTER 16 Assembling a Purse
Further Reading
Suppliers
Templates
Index
INTRODUCTION
Essentially, opus anglicanum uses just two stitches – split stitch and underside couching – so it must be pretty straightforward, right?
Not really.
Opus anglicanum is as much an artistic style as it is a form of needlework. It is a style that affects everything, from the choice of the original inspiration that forms the basis of your design, to the selection of materials, right down to the placement of each individual stitch.
It is slow, too, so, if you need a quick fix, go to do some cross stitch; if you want to get your teeth into something, try opus.
Even in its secular forms, all medieval art addresses the divine, and opus anglicanum is no exception. It plays with light in much the same way as the great Gothic cathedrals do, by manipulating the light to create something that is more than the mere sum of its parts. The reflection of light on the filament silk and gold threads that are used for working opus anglicanum is as important as the stitches themselves, and I hope to show you how to play with light, as well as how to perform two very simple stitches.
It is not my intention to provide a history of the technique, but inevitably history will be mentioned, because it affects the design choices made throughout this book. The book will deal only with the early period of opus before the Black Death changed the technique into a more debased style and faster form of needlework.
This is a guide for getting on with things, and, if you start at the very beginning, you can use it as a complete course for a beginner, or you can dip in and out of it if you already feel more confident as an embroiderer. Every project is chosen to showcase at least one new variation of the basic technique, with each project increasing in difficulty throughout the book.
CHAPTER 1
MATERIALS, TOOLSAND FRAMES
FABRIC
The fabric that I have used throughout this book for the examples and projects is a fine ramie canvas. Ramie is a plant fibre similar to linen, and the two corresponding fabrics would often be lumped together historically. I use ramie because it is finer than any linen that I have been able to find in repeatable quality. It is about 80 count, and I use two layers, which I usually machine-stitch together around the edges of the pieces before attaching the seamed, double-layer fabric on to the frame.
When working opus, you make a lot of holes in the canvas, so, the finer its count, the less these holes show. The results of opus are best if you never split the individual threads of the canvas, so, the finer the canvas is, the less chance there is of it being damaged.
Where a coloured canvas is used, I have used a twill silk similar to that seen for historical examples, backed with two layers of my usual ramie.
THREADS
For opus anglicanum, it is essential to use silk threads – and in particular filament-silk threads – for working split stitch, which forms the majority of the stitching of an embroidered piece. There are exceptions to this, for example, when working couching with metal or metal-effect threads, and linen thread is also needed for couching. Cotton threads should not be used, as explained further in Chapter 2.
This is a close-up of a single layer of the ramie fabric used for the examples and projects throughout this book. The translucency of this fabric is apparent.
We will explore the characteristics and uses of various silk thread types and other thread types in Chapter 2 and subsequent chapters.
TOOLS
I don’t use many fancy tools and materials: the following items are about all that I need, in addition to the silk thread for stitching and the fabric upon which to stitch.
These are the main tools that I need for working opus (from left to right): good linen thread; beeswax, for conditioning the linen thread; a stiletto, for making holes in things, especially the canvas, and for poking; small scissors (I don’t buy expensive ones, just lots of pairs of brightly coloured, cheap ones); and a permanent fabric-marking pen.
Some people like to use a magnifier when working opus, but, to be honest, I find that a good light source is of more use. Get something bright that can be directed to where you need to see.
Transferring designs
The ramie that I use is quite translucent: if you photocopy your design and hold it against the back of the fabric (prop this fabric–photocopy sandwich up against the pages of a thick book or two, so that the fabric is pressed against the design), you can trace the design lines easily. You can get really good A4 LED light boxes quite cheaply, which are great for tracing, and some people insist on taping the design and overlying fabric to a window for tracing. I always prefer to have the fabric laced on to the frame before transferring the design; this way, the canvas can’t move around under the pen, and you get a more accurate drawing.
The prick-and-pounce technique is really only practical if you want to work a particular design more than once, or if you have repeated elements, otherwise it is an awful lot of work for something that you want to mark only once. I have always suspected that professional medieval workshops kept a selection of stock designs, and probably complicated shapes like the lobed quatrefoils used in the Syon Cope, marked out on vellum for prick and pounce but that more-bespoke designs were done as a one-off and always drawn freehand.
Marking designs
When it comes to marking designs on canvas, I like to use something that won’t wash out or fade. Most opus projects will take much longer to work than a fade-out pencil will last for, and wash-out markers are a bit pointless, because, once you have put the gold thread into your project, it is not the best idea to wash it. I prefer the permanent pens intended for fabric that you can buy in haberdashery shops, although some people swear by the kind that you buy in art shops: whichever you use, do a quick wash test first, just in case of surprises.
Graphite pencil is a bad idea as a marking medium and tool, because it tends to rub and can leave your threads looking grubby, especially if you are working with pale colours.
FRAMES
Embroidery hoop
I don’t recommend using a hoop for opus. Not only were there no hoops in the medieval period but also they really don’t keep enough tension for the technique, plus it is very difficult to get canvas squared within a round thing.
Slate frame
This is the most authentic medieval type of frame to work on, and they are still widely available today, often combined with a set of trestles on which to rest them. You can get really good tension on these frames. I tend to use my slate frame mostly when doing medieval demonstrations, because the big disadvantage of a slate frame and trestles is the amount of space that they take up: it is really best if you get the trestles positioned the way you like them and leave them undisturbed, which isn’t always practical in a modern home.
Here you can see a typical slate frame, bearing a laced piece of fabric with a transferred design.
The other disadvantage that I find to this type of frame is that I constantly lose the pegs that hold these frames together, and so I end up holding mine together with snapped-off bits of dowels and pencils or giving homemade biscuits to the nearest woodworker in exchange for freshly carved pegs.
Floor frame
I prefer this type of frame when working at home. It holds great tension and folds flat against the wall in an instant, so it is much easier to clear away than a slate frame and its trestles. This type of frame is also ideal if, like me, you prefer to work with your frame at a 45-degree angle: this allows me to sit on the comfy sofa and lean my frame back into my lap. I admit to having six of these: some of them are over thirty years old and still work fine, so I can vouch for the fact that they are worth the £50 or £60 investment.
This is a typical floor frame, set up ready for working some more embroidery.
You set up this type of frame in pretty much the same way as you do a slate frame, sewing the fabric to the top and then firmly lacing along each side, but it is important to buy the type that has a big screw at the side, as for the featured frame: it allows you to increase the tension easily.
Here you can see the tightening mechanism of a typical floor frame (such as the one pictured earlier). This mechanism effectively holds the set tension of the fabric.
You sometimes find floor-standing frames with a rotating bar that is tightened by a metal wing nut, which doesn’t hold tension at all.
Small frame
A cheap option for beginners is to get your nearest friendly woodworker to make a simple square or rectangle slightly larger than your canvas – you can even use a chunky wooden picture frame with the glass and pins taken out as an improvised frame. This is the type of frame that I use when teaching classes, and they work quite well as long as you tighten the lacing properly.
This is how a small frame looks with a properly laced-on canvas, ready for work.
If I have to work on a small frame without trestles, I find that it is still far less irritating to use than is a traditional slate frame, because a small frame doesn’t have bits sticking out.
LACING
Anchor the canvas by passing the lacing thread around one corner of the frame, then spiral lace along one side. Now, pull each loop of the lacing thread as tight as you can. Lace the opposite side of the canvas to the frame and tighten as before, then work back and forth between the two sides to achieve even tension.
Lacing thread
Whichever type of frame you use, a good, strong thread for lacing the sides of the canvas is essential. The medieval option would be a thick linen thread, but I mostly use a cotton thread, DMC Perle 5 (also commonly labelled Coton Perle or Pearl Cotton); they sell this thread for crochet under the name DMC Petra 5, which works out very cheaply compared to the little skeins sold for embroidery.
The disadvantage of a linen lacing is that it will stretch with high humidity, so you have to constantly relace your frame. In contrast, cotton thread isn’t as affected by atmospheric humidity.
CHAPTER 2
OPUS STITCHING
Although opus anglicanum sometimes includes small areas of other stitches for effect and texture – laid-and-couched work, trellis couching and even tiny areas of satin stitch turn up from time to time – there are two stitches that define this style of embroidery: split stitch and underside couching. However, simply mastering these two stitches is not enough to make something opus.
Split stitch is used like a paintbrush, with every stitch being carefully placed and its direction being carefully chosen to express shape, light and character. Unlike later techniques such as crewel work, where the stitcher must show mastery of dozens of different stitches, opus is about knowing every subtle nuance of only the two simple techniques of split stitching and underside couching. Split stitch is covered in depth in this chapter; for an introduction to and instructions for, underside couching, seeChapter 6.
THREAD CHOICEAND CHARACTERISTICS
As introduced in the previous chapter, the stitching thread used for split stitching absolutely must be silk – and not just any old silk but filament silk: it reflects the light and plays with it to create three dimensions out of two.
Filament is silk reeled directly from a cocoon, as one long, continuous fibre only. This fibre is barely visible to the naked eye, so often several are layered into one thread for stitching with. Generally speaking, throughout this book, four strands are used for the stitching of drapery and other background details such as floors, but only two are used for the faces, and this echoes the practice used for original pieces.
Layered filaments can then be twisted to make the plied threads that most of us are used to, such as the Como silk that I use from time to time. Such twisted filaments are distinguished by their high lustre; they can be used as they are, or sometimes, as with Como, I pick them apart to use as filament threads.
Most of the silk currently available, however, is spun silk, which has a rougher, duller appearance. A true filament silk comes from the traditional Chinese method of production wherein the silkworm is never allowed to hatch and eat its way out of the cocoon; because the hatching process would break the filament, instead, the worm is boiled inside the cocoon and one continuous filament is able to be reeled off. Spun silk is made either from broken filaments or from cocoons where the silkworm has been allowed to hatch and eat its way out of the cocoon, thus breaking the filament apart in the process. If you pull apart the individual plies of a spun-silk thread and try to sew with them, they will break because they are much weaker, being made of many short broken pieces of silk filament.
Filament silk is flighty stuff. I often tell students that this is the naughty child of embroidery threads. If it can find a way to misbehave, it will: it will snag on the slightest thing and tangle if you so much as look at it funnily. There are fierce debates about whether or not to use thread conditioners with filament, the main argument against being that they dull the shine. I don’t use conditioner on my thread, but I think it is a good tool for a beginner to use. Think of a thread conditioner as the training wheels that stabilize a small child’s bike – they are something really useful for your first baby steps, but you want to get rid of them as soon as possible, because you will look rather silly if you keep using them into your teens.
The best way to make sure that filament silk behaves is a bit of self care. File your nails. Use a hand scrub once a week to slough off rough skin. Moisturize. Then moisturize again. I am very keen on a solid hand-cream bar that I keep in my sewing box that is made from beeswax and cocoa butter, because it goes on quite dry and doesn’t make the threads sticky if you use it on your hands and then embroider straight away.
Seven different types of silk, from left to right: Como silk thread, woad-dyed silk thread, spun-silk thread, DeVere Yarns 36 thread, DeVere Yarns 60 thread, tram silk thread and DeVere Yarns 6 thread.
Como silk
This is a filament silk that has been twisted and is sold as ten- and twenty-five-gram cones for weaving and as spools. I use this for many different things, and it can be pulled apart into four or sixteen strands and then used for embroidery. It can be used whole for underside couching or making decorative braids for edging and finishing.
This is Como silk deconstructed into four constituent strands. Each of these can be split into a further four smaller strands.
Woad-dyed silk from The Mulberry Dyer
This thread is now sadly discontinued. It is not quite as shiny as some of the other filament silks, but it has more body and sits on the canvas more like the original silks do.
Spun silk
This is made from broken silk-filament fibres and so is less shiny. I keep two weights of this in stock: 60/2nm, which is roughly of the same thickness as sewing cotton, and 30/2nm, which is thicker – the spun-silk thread in the earlier photo is of the 30/2nm weight, which I bought undyed and dyed myself by using woad.
This spun-silk thread is used for stem stitch and the upper layer of trellis couching, where it provides textural contrast to the shine of filament silk (see the ‘Trellis couching’ box in Chapter 12), and for assembling finished projects (seeChapter 16). However, it is not used for working split stitch in opus anglicanum.
DeVere Yarns 36 thread
This is another twisted-filament thread. I don’t use this much: it is of a similar weight to 60/2nm thread but a lot more expensive – you would use them both in much the same way for working opus anglicanum.
DeVere Yarns 60 thread
This is a very loosely twisted filament, basically ten threads of their 6-count thread. This is interchangeable with the DeVere Yarns 6 thread, if you want to be lazy (which I very often do); you can pull a strand of this 60-count thread apart and have five two-thread strands ready to sew with without having to mess around.
Tram silk
This is also sold for weaving as ten-gram cones or spools of 500 metres in length. It comes in a far more limited range of colours, but it is cheap and sews up quite nicely. It is slightly thicker than DeVere Yarns 6 thread, which makes the tram silk thread easier for beginners and for experimenting with. The limited range of colours isn’t really a problem; in fact, it encourages a more medieval way of working, as medieval embroiderers didn’t have hundreds of colours to choose from. When working on your own medieval designs, it is actually very freeing to limit your colour palette, as it saves time agonizing over which of thirty shades of blue to use.
DeVere Yarns 6 thread
This is a very fine, flat filament. Normally, you would use at least two strands of this held together. One strand of sewing thread should be of roughly the same thickness as one thread pulled from the background canvas, so two strands is the minimum that I would use with the fine ramie that I prefer as canvas. One strand is almost too fine to see and doesn’t give significantly better results. In practice, two strands held together are used for flesh and at least four for drapery, in line with original practice, where the flesh is always treated with more detail than the clothing.
A reminder about thread type
You will achieve the full effect of opus anglicanum only if you use filament silk; even spun silk won’t bring out the full beauty of the technique, and, if you use cotton thread, it won’t be opus at all.
WORKING AN OPUS ANGLICANUM PIECE
General points before you start
You need to stitch with filament silks in order to achieve the full effect of opus anglicanum; any other thread type won’t match the characteristics of true opus.
Pack your stitches closely together, then pack them even closer. If you look at an area that you are trying to fill with split stitch and think ‘Yes, I just need one more row to fill that’, you almost certainly need two, or possibly three.
Always split something. I will remind you of this so often that you will feel like you are a teenager again and your mum is nagging you to pick up your socks/close the door/do your homework. This repetition is because this point is so important.
Never be ashamed when you realize that you left a tiny gap in your stitching; go back and fix it by adding a few extra stitches as needed. But, when you do go back, always fill the gap by bringing the needle up through and down into – or splitting out of and into, respectively – the existing stitching and following the direction of the original stitches.
Be aware that going back and adding just one stitch can change the whole expression of a face: it is definitely worth doing this sometimes, to achieve the desired effect.
The initial drawing that you transfer on to your canvas is only a guideline. If you later think that the hand should be positioned at a different angle, change it. If you draw the line a bit wobbly, smooth over it when you stitch, and, if you want to sew an angel in a cowboy hat, well, yee-haw!
The colours used in original pieces and other examples of opus are again for reference only and don’t have to be replicated. Angels can have pink hair if you want them to. I recently taught an online class where each student worked the same angel, but each angel had individual hair and varied wings, and it was wonderful to see all of the variations.
Use an exfoliating hand scrub before working with filament silk. This thread will snag on the tiniest roughness on your skin that you didn’t even realize was there before, and, although moisturizing will soften the rough skin, it won’t remove it.
Get rid of any rough edges on your nails before starting to stitch.
Moisturize often!
Take regular breaks. Opus requires mental alertness and concentration: you have to think about where you are putting each stitch and how it will affect the outcome. I never sit and sew for more than an hour without getting up and moving around a little bit. This break-taking is especially important when it comes to working underside couching, which can be very hard on the hands.
At the top is a row of split stitch worked with filament silk, in the middle with DMC stranded cotton and, at the bottom, with spun silk.
These two threads are pretty much the same of shade of blue; however, not only is the texture of the cotton (bottom) rough but also, as you can see, all the light is visible in the silk (top) – the cotton is dull, dead stuff by comparison.
Notice how much light is bouncing off the top row of stitches in comparison to that of the bottom two rows in the accompanying photo. With opus anglicanum, it is the light that is important: essentially, we are going to play with the light and manipulate the way that it bounces off of the filament silk. Opus anglicanum plays with light. Silk filament brings the light to your stitching in a way that no other thread can match.
If you have a range of ten shades of blue, from the palest to the darkest, such as those shown here, choose ones that will contrast.
Here, I have picked out the second, third, and fourth shades from the original range. They tone beautifully, but they clearly don’t contrast.
Here, I have picked out the second, sixth and tenth shades. There is a stark contrast between the light and the dark shades, with a medium shade in the middle.
The contrast is even more obvious when you see a block of silk filament worked right up against one of cotton, as demonstrated in the next photo.
Colour
I have used DeVere Yarns and tram silk threads throughout this book, but you can easily swap these to use Pipers Silks or Au Ver à Soie or any other brand, just as long as the thread is of a reeled, flat, filament silk. It just has to be shiny!
Don’t be afraid to swap the colours used for the examples and change them at will, and don’t worry about matching the shades that I have chosen exactly – choose something that looks about right, and shade numbers be damned.
One thing that I will emphasize is not to use too many colours. It is all too easy to fall for temptation and buy all of the colours available and then try to use them all at once, like an over-excited child in a sweet shop, but medieval embroidery tends to have a limited palette. Choose three or four shades of each colour and use them throughout the same piece. Buy all the colours if you must (and, let’s face it, we all want all the colours, because they are shiny and pretty and the possession of a complete set of something makes our little monkey brains happy), but please use them on different projects.
When depicting drapery or other shapes in opus, don’t fall into the modern trap of being tasteful. Opus needs contrast.
To illustrate the point about the importance of contrast, if you use the three shades shown above for your three layers of colour within a piece of drapery, you might as well do the whole thing as one flat blob of colour, because there isn’t enough contrast between the lightest and the darkest shades in order to distinguish between the stitches of the different shades.
There is no real subtlety in the next selection shown above right, but this is the combination to choose for opus, because it will show off all of the work that you put into shaping the drapery.
THE BASIC STITCH: SPLIT STITCH
The basic split stitch is very simple to work.
I will repeat to the point of nagging that you must always split something. The first split made is the splitting of the previous stitch.
It is important to note that the third stitch should come up right next to the end of the first stitch and halfway along the second stitch, so that the whole row of stitches maintains the same width and body. To continue the row of stitching, every new stitch made splits the previous stitch made halfway along its length.
The end result can easily be mistaken for a row of delicate chain stitch. (If you ever do public demos, you will get sick of people explaining to you that you are doing chain stitch.)
I am not one to obsess over the appearance of the back of a piece of embroidery. Original pieces are often messy, and they do have knots, at the back. As the appearance of the front of your work improves, the truth is that the back will get neater as well, but if all you ever worry about is the back then you are focusing on the wrong part of the embroidery.
Bring the threaded needle out from the back of the canvas to the front of the work, and make a straight stitch about 4mm (just over 1⁄8in) long by taking the needle back down into the canvas, to the back of the work. With the needle, come up again halfway along the first stitch, splitting this stitch in two (as shown), hence the name, split stitch.
The next stitch made should be of the same length as the first, but half of it should overlap the first stitch, so that each stitch advances by only half a stitch.
The aim is to have a smooth, even strand of stitches in a row.
On the back of the work, this is what a properly worked single row of split stitch should look like.
If you compare this stretched-out example with the previous front-of-work one, you can see how lumpy the row has become – thick where the stitch threads overlap and thin and straggly where they don’t.
Here you can compare the top row of stretched-out split stitch with the neat row of properly done stitches at the bottom.
Basically, if the back of your split-stitch rows starts to look like this, you are doing the split stitching wrong.
Shown at the top is a row of split stitches that are worked very small, with each stitch covering only one or two threads of the background canvas, and shown at the bottom is a row worked with each stitch covering between eight and ten threads of canvas (exactly how many depends on how fine your canvas is; for the examples in this book, I am using a fabric of roughly 80 count throughout).
Opus anglicanum is a slow technique, and there is a very real temptation to try to speed up the process by stretching the stitches to make them go further. By this, I mean going only a canvas-thread distance or two back into the previous stitch, instead of halfway back along that stitch.
The resulting straggly effect is bad enough on a straight row, but, if you start trying to work around a curve, it becomes spiky very quickly.
Size matters! A common problem that I see is people making their stitches too small, as on the top row of the accompanying photo – the size of the stitches of the bottom row is about the optimum stitch length.
You need a stitch as tiny as those shown on the top row only when you are working faces or going around a tight curve (as the stitch needs to compensate for the angle of the curve); most of the time, you need to work your split stitches to the size shown for the bottom row. If you work all of your stitches too small, two things will happen:
You will never finish your embroidery.
The look of the stitching will change. Notice how much darker the top row looks. Both rows have been worked with the exact same strand of silk, but the shorter stitches of the top row change how the light bounces off of the silk. You need some length to the stitch to optimize the play of light, just not too much length: it is a delicate balance.
On the left is a circle of tiny stitches; on the right is a circle of the same size but worked with fewer, normal-length stitches. For the right-hand circle, you can see how the normal-size stitches – which are too big for this purpose – make the circle spiky and irregular – the stitching line is no longer smooth, and the circle looks more like a polygon.
If you look at the side of this block of stitching, you will see that the rows are never more than two threads of the background canvas apart – I usually aim for one, but this canvas is very fine.
When you do need to go small with your stitches is when you are working circles and tight bends.
Rarely in opus anglicanum will you use a single row of split stitch standing alone. Normally the rows of stitching are packed very closely and tightly together, to the extent that sometimes you may wonder if you have added anything at all.
The silk does spread out a little along its width, but you shouldn’t rely on that to fill the space, especially if the finished piece will move in any way, as gaps can open up between the rows of stitching when the fabric bends.
You must pack your stitches tightly. Don’t worry if you sew over the previous row a little bit when working the current row.
The back of an embroidery
Knowing what a stitch ought to look like at the back of the work is an important aspect of understanding how the stitch is constructed, and split stitch is no exception. I struggled with split stitch for years, until it occurred to me that split stitch is actually the very same backstitch that I was taught for stitching straight seams when I was a child – but upside down!
If you turn the fabric over to look at a row of split stitch, the rear should pretty much look like common or garden backstitch. It doesn’t have to be the world’s neatest backstitch: it can be a bit wobbly, but, if you aim to have most of the stitches joining up with one another, the front will by default look pretty good too.
Snags
As I said earlier, filament silk sometimes feels like it is actively trying to find a way to misbehave, and snags are common, even when you have remembered to moisturize beforehand. If you notice a snag straight away, you can fix it there and then by pulling the excess thread through from the back.
This is how a snag might look on the front of the work; you should always keep an eye open for snags cropping up while you stitch.
When you are working the row alongside that containing the snag, make sure that you pull the snag loop to one side and sew it down as part of working the adjacent stitching of the current row.
Once you have worked the next few rows, you won’t even be able to see where the snag was.
On the left is a curve worked so that each row is quite separate and distinct from the previous row; as you can see, the rows start to lean away from one another, and gaps are appearing. This will get even worse if the embroidery will be on an item that will move when in use.
On the right is a series of curved rows worked really closely together. Each of these two samples is of just three rows of stitching, but you can see at once how much thinner the arch is when the stitches are properly packed, as on the right.
In this example, I have worked an exaggerated, expanded version with three thread colours to show you how the packing of stitches works on a curve. Notice how each row ‘bites’ into the previous one, effectively knitting them together.
However, quite often you won’t notice a snag until you are stitching the next row or you are several stitches along – this is fine thread being used and, if the light is at the wrong angle, it can become invisible.
You do not have to pick out the entire row to fix one snag within it.
If you unpick every time that you miss a snag, you will never finish your embroidery. Luckily, this is where those tightly packed rows work to your advantage. This is also one of those instances that demonstrate that expertise is not about never making a mistake but is about knowing how to fix those mistakes when you inevitably make them.
Curves
As mentioned previously, your stitches should get smaller when working curves and tight circles, but they should also get closer together. Pay attention to how you pack the stitches around a curve, otherwise things can look messy very quickly. Remember that this is not a technique in which you can cheat and speed things up by working fewer stitches.
Really, the technique of working a curve properly comes back to me nagging you to always split something – here, you need to split into the adjacent row to achieve proper coverage of stitches over the canvas.
Points
Whereas you can work around a soft curve, there are many folds in drapery that need a sharper look. The principle is the same as for biting into a curve, but you do it at only one specific place, to form the point.
To achieve a good point, work your row of split stitch just a millimetre or two past where you want the point to be, then bring the needle up and out through the fabric and split the previous stitch as usual, but, instead of taking the new stitch forwards in line with the rest of the row, go in the opposite direction to change the stitching angle as necessary.
As you continue to fill up the point with stitching, make sure that you split the tip of each subsequent row into the one before, to maintain the sharpness of the point. By overlapping the rows of stitching slightly, you will keep the point clean and sharp. I have worked this example with two colours of thread so that you can see this effect clearly.
Here, I have worked an expanded version on the left, with larger gaps between the rows of stitching as usual, so that you can see the rows splitting into one another, and a two-coloured version on the right, so that you can see how the tightly packed stitches begin to flare out.
Layering
Often, you will want to widen an area of solid colour without turning around a point. You can achieve this by layering.
When working such layering with one colour, all you need to do to work the next row is to carry the thread across the back of the work to split out of the row that you have just worked.
As shown in this image, you can fill by working your rows one beside the other until the narrow areas are filled (the cream stitches) and then continue to fill by working the stitches in a continuous spiral pattern (the blue stitches). This is a perfectly acceptable way to fill, but it can create two visually distinct areas in the silk, because the stitches of the two areas lie in different directions and therefore interact with the light differently.
When working this type of layering, don’t worry about the long threads travelling across the back of the work; your subsequent rows will stitch them down – you can’t even see them here.
Instead of working the next row of stitching along the full length of the previous one, work it only part way and then split the end of the final stitch into the previous row.
Work the next row along the full length of the area being stitched, then make another partial row and then again work the next row along the full length. This will gently flare the area of stitching.
This is a really useful and important technique that I will come back to time and time again, but it is just another variation on the principle of always splitting something.
The layering technique offers an additional way of filling large areas, as shown in the accompanying photo.
Alternatively, you can fill an area by using layering with interlocking rows of stitches, as shown here, with two colours. You can even work a gentle outward curve with this technique.
Unpicking
I rarely unpick split stitch, and, on the whole, I advise against it. Because you split each stitch, you are essentially destroying the thread as you go along, and, if you have packed the stitches properly, it can be almost impossible to see where one row of stitching ends and another begins. Trying to unpick a row that is snug against another can easily and quickly result in wholesale destruction.
As long as your stitches are properly packed, you can cover even stitches worked in a strong colour contrast, and the threads are so fine that there’s no discernible textural change where the new thread is worked over the old. This is one of the few instances where silk filament can be helpful and forgiving.
As you can see from these side-by-side samples, each technique gives you a different texture, because of the way that the light plays on the stitching. On the left is a spiral filling; on the right is a layered filling. Both are useful in different ways.
I normally choose to work over small errors instead of picking them out, as shown here. It is quicker to achieve the desired result and far less soul-destroying.
You can see here that I have worked over part of the grey point shape shown in the previous image with a much paler thread, masking it completely.
More than once I have seen students try to unpick a patch of split stitch at home and end up with a hole in the canvas. It is all too easily done: either you pull too hard or try to cut out a stitch and slip, in each case resulting in that unwanted hole. However, all is not lost – small holes within an area of split stitch can be patched.
Take a single layer of the same cloth that you are using for your canvas, lay it over the hole, and the use a silk thread to darn it thoroughly into place. Essentially, you just have to go back and forth with running stitch in both directions to make a rough grid, as shown. It doesn’t have to be pretty!
Once you sew over it, the added cloth and the hole beneath it will disappear.
Once you sew over it, it will disappear.
CHAPTER 3
TECHNIQUESFOR FACES, HAIRAND HANDS: BIG EDAND LITTLE ED
Faces are the most difficult and technical part of any composition in opus anglicanum, and they are crucial because so much of the mood of the composition depends upon each face being just right.
A lot of the expression of the face comes from subtle changes of direction in the stitches used to form them, and from the play of light upon these stitches, and all of this relies heavily on the use of filament silk. Using the same techniques with cotton, even though the thread is almost as fine, will always look clunky and amateurish by comparison, because cotton is dead and dull next to the light that plays upon silk.


