Erhalten Sie Zugang zu diesem und mehr als 300000 Büchern ab EUR 5,99 monatlich.
- Herausgeber: Fernhurst Books Limited
- Kategorie: Fachliteratur
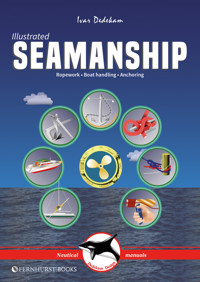
- Serie: Illustrated Nautical Manuals
- Sprache: Englisch
For any sailor, in a yacht or motorboat, the passage from one place to another is relatively easy, particularly with modern navigation equipment. What can be more of a challenge (and a potential source of anxiety for skipper and crew) is the start and end of a passage – how to leave and arrive safely, particularly if it's a cramped marina or crowded anchorage. In Illustrated Seamanship, Ivar Dedekam takes you through the techniques required to achieve a safe departure and arrival. Starting with the fundamentals of ropework he then moves on to manoeuvring, berthing, making fast and then leaving. All types of berthing are covered from coming alongside, stern to, bow to, between finger pontoons and using piles and buoys. There is advice about dealing with different wind and current directions as well as using springs. Ivar then turns to anchoring and offers guidance on setting and weighing anchor in many different circumstances: under sail and under power, using one or two anchors and coping with changes in wind and tide while anchored. You probably won't experience all the scenarios that Ivar so carefully describes, but you will certainly come across quite a few. Knowing what to do when a new situation comes up could be invaluable, increasing your confidence and leading to greater enjoyment and use of your boat. With over 500 diagrams, this slim volume is a perfect reminder of frequently used techniques and could be your get-out-of-jail card when a new circumstance arises. This new edition has an improved layout and the eBook's functionality has been improved significantly.
Sie lesen das E-Book in den Legimi-Apps auf:
Seitenzahl: 127
Veröffentlichungsjahr: 2025
Das E-Book (TTS) können Sie hören im Abo „Legimi Premium” in Legimi-Apps auf:
Ähnliche


CONTENTS
ROPEWORK
The basics
Clove hitch
Bowline
Sheet bend
Reef knot
Stopper knots
Rolling hitch
Coiling ropes
Cleats
Whipping
Splicing
Lashing
Winch handling
Making fast on a bollard
Swigging (sweating)
Various useful knots
BOAT HANDLING
The basics
The propeller
The rudder
Wind impact on the hull
The boat”s turning circle
Getting to know your boat
Turning in confined spaces
Coming alongside
Making fast the mooring lines
Leaving the berth
Using springs
More about mooring
Winding ship
Other types of mooring
Tides & currents
Bow thruster
Day shapes for various vessels
ANCHORING
The basics
Anchor rode
Ground tackle
Foredeck arrangement
Anchoring techniques
Snubbers
Anchor chums
Weighing anchor
Using two bow anchors
Using a dinghy
Using a bow or stern anchor
Anchoring examples
Miscellany
Summary
The Fernhurst Books’ Knowledge Centre has lots of other information (including videos, book extracts & other resources) on sails & rigging – scan the QR code or visit www.fernhurstbooks.com & click on ‘Knowledge Centre’ to find out more
INTRODUCTION
Today yachts are often equipped with radar, GPS, chart plotters, electrical windlasses, autopilot, bow thrusters, etc.
In addition, today’s equipment has become more reliable, making it possible to make long offshore passages without a basic knowledge of navigation and seamanship.
However, as the coastguards in many countries can confirm, more and more yachts require assistance, even when they should be able to reach harbour on their own.
It is often only necessary to have a basic knowledge in order to voyage safely at sea. In this book you will be shown the minimum techniques you should be familiar with, regarding rope handling, manoeuvring and anchoring, in order to make long passages with a reasonable degree of safety.
Although yacht gear is becoming more and more reliable, you can be almost sure that, sooner or later, it will fail or you will be out of electrical power to use it.
Learning the traditional techniques may not only be necessary but is also both interesting and fun.
Instead of waking up the entire harbour at an early hour with the noise of your bow thruster, you may, alternatively, use a spring line to get safely moored to or leave the pontoon.
Try practising the techniques and methods described in the book. Start in calm conditions until you get the hang of it. You will then experience the joy of being able to handle your boat in this way, even if the boat is packed to the brim with modern equipment.
Good luck!
Ivar Dedekam
ROPEWORK
This chapter outlines the minimum level of knowledge of knots and hitches, whipping, splicing, etc. that you should have in order to make long passages. Remember that it is better to know a few knots well than to half-know many.
Take your time to learn these knots so that you are able to tie them quickly. Ideally you should be able to tie the knots with one hand and blindfolded! A good basic knowledge of ropework, knots and hitches may save both life and gear in dangerous situations.
Ropes are made of short fibres that are spun into yarns, which are then made into flat or twisted strands. Finally, the strands are spun or braided to make the finished rope. The two main types of rope are:
☐Laid rope: Three-strand rope (two- and four-strand ropes also exist) is made of strands twisted together in the opposite direction to that of the yarns, normally to the right (Z-laid), but sometimes to the left (S-laid).
☐Braided rope: Is made in different ways. The yarns are normally braided to form a sheath covering an inner core of yarns, which may again be braided or lightly twisted together.
THE BASICS
Material
Natural fibres like hemp, manila and sisal were used for all rope until the 20th century. These fibres were derived from various plants and usually made into laid rope. Today, most rope is made from synthetic fibres.
The fibre type determines, to a large degree, the rope’s properties:
☐Multifilament: Thin threads giving a supple / soft rope
☐Film: A flat, wide fibre used in cheap rope
☐Monofilament: A thick fibre giving a stiffer rope
The material used can be divided into four groups:
☐Polyester (Terylene) makes high quality rope made of multifilament fibres. The rope is supple (and remains supple), well protected against sunlight and sinks. A high breaking strength makes it suitable for anchor and mooring lines. Pre-stretched polyester rope, which gives minimum stretch, is used for sheets and halyards
☐Polyamide (Nylon) rope made of multifilament fibres is a high-stretch rope much used in fishing and shipping. They have, like polyester ropes, high abrasion resistance and don’t float. In addition, they are very elastic, making them suitable for towing, mooring and climbing ropes. They are available in laid, braided and multibraided forms
☐Polyethylene rope made of monofilament fibres is smooth, with a relatively hard surface. This rope is used for heavy fishing gear due to its very high abrasion resistance
☐Polypropylene fibres make low-cost, all-purpose ropes. They are light and float, making them suitable as rescue or short mooring lines. However, the ropes have a low resistance to abrasion and sunlight. Polypropylene ropes come in a number of forms. Rope made from film fibres is inexpensive but should not be used on yachts, at least not where quality is necessary.
NB!Polyester, polyamide, polyethylene and polypropylene are the correct names of the materials, while names like Nylon, Terylene, Dacron, etc. are theproduct namesvarious companies use on products derived from these materials.
Aramid fibre (Kevlar) combines a very high breaking strength with a very low elasticity. A number of other fibres with names like Vectran, Spectra and Dyneema are light and often have higher breaking strengths than steel! These ropes are expensive and are still used mostly on racing yachts.
CLOVE HITCH
The clove hitch is rather easy to make (1-4). You can add as many half hitches as you like, but always do the turns in the same direction. The hitch can be made mirrored and you may also make the turns in either direction relative to whatever you are making the knot on. You know that the knot is made properly when the working end and the standing part (the static part of the line) run in parallel in opposite directions under the locking turn. This knot is very basic and you should be able to tie it in both directions, starting the turn over or under the object on which you are making the knot.
The clove hitch (5) is used a lot for mooring lines and fenders.
A round turn with two half hitches (6) should be used more often. Unlike the bowline (Fig.5), this knot may be untied under load. You make the clove hitch itself on the standing part of the line. You can make one or more complete turns around the pile in order to increase friction and to distribute the load better.
When you approach a pier, the fenders may be made fast with a clove hitch (7) and even made with a slip knot (Fig.27). If the fenders are to be fixed for longer periods, it may be wiser to use a round turn with two half hitches (8). You can then be sure that the knot won’t untie itself, thus avoiding losing a fender. The clove hitch alone may become untied if it is not tightened well from time to time.
BOWLINE
The bowline is used when you want a fixed eye on, for example, a mooring line, or for tying sheets to a sail. The bowline is a very reliable knot that can be used for many purposes. You should learn to tie this knot blindfolded!
Many find the knot hard to learn. Imagine, for example, the small loop as a pond from which a sea snake (the working end) ascends and twirls itself around a tree (the standing part) and then slides back into the water following its body. (Make the first loop in exactly the same manner all the time. This makes the knot easier to learn.)
The bowline can also be used to join two lines that are to be heavily loaded, where you want to be sure that you will be able to undo the knot afterwards. This is often a better solution than using a double sheet bend (Fig.8) or a reef knot (Fig.9). The latter should never be used for such purposes!
You can secure the bowline as shown (4) or make a stopper knot (Fig.10) if you want to be absolutely sure that it won’t come undone (normally it does not). You may also make the knot with a slip knot as shown in order to be able to undo it quickly. Always check that the working end protrudes an inch or two from the small loop to avoid the knot untying itself.
SHEET BEND
The sheet bend (1-2) is normally used to attach ensigns to flag lines or join two ropes with equal diameters (if not use the double sheet bend). To make a sheet bend, fold the end of the first line (blue) back on itself to form a loop if it doesn’t have a fixed eye. Pass the working end of the other line (shown in red) through and around this loop (1), and then tuck it under itself but over the blue loop (2).
You make a double sheet bend (3) by leading the red working part once more around the loop and then taking it under itself but over the blue loop. Pull the knot tight. It is wise to use the double sheet bend most of the time, as it will almost never come loose.
The sheet bend can’t be untied under load and it can be rather difficult to untie when relieved of the load.
You may join two lines by a sheet bend (4) but, if they will be heavily loaded, it is recommended that you use two bowlines tied ‘inside each other’ (Fig.6), as the bowline is far easier to untie when relieved of the load. If it isn’t necessary to untie the ropes (permanent join), a double sheet bend (5) can be a good solution.
REEF KNOT
The reef knot (or square knot) should only be used as a binding knot, for example to tie up sails on a boom. The well-known shoelace knot (4) is actually a reef knot with two slip knots as shown.
The reef knot can’t be untied under load but is easy to untie when relieved of the load.
It should never be used to join two lines that will be subject to any load, as it can easily come undone.
However, the knot can be used to join two lines of equal diameter that will be subject to very small loads.
STOPPER KNOTS
Stopper knots are used, for example, to prevent a sheet from slipping out of the sheet block on deck. The figure of eight knot (1) is the most commonly used stopper knot. The double (or multiple) overhand knot (2) is also much used, but this knot might be more difficult to undo than the figure of eight knot. It is always important to make sure that a knot can be undone easily when required, while at the same time ensuring that it can’t untie accidentally.
ROLLING HITCH
The rolling hitch (1-3) is used to tie a line to a pole, wire or another line when you need a knot that won’t slide when strain is applied sideways. Start by making two to five complete turns (1) with the working end in the direction of the load, depending on how much friction you think you need. It may be necessary to remake the knot with more initial turns if it slides under load. The rolling hitch is a very important knot to know; it can save you in many difficult or even dangerous situations.
When, for example, a sheet under load is stuck on a winch, you may release the sheet (1) by using a second line attached with a rolling hitch and leading to a second winch (2). Take in on the second winch until the sheet goes slack and may be released from the first winch.
The rolling hitch is also very useful when you want to fix something to a wire or a smooth tube, e.g. fasten an ensign to a backstay. Note that the hitch locks itself in the direction of the strain but may be moved quite easily in the opposite direction. This can be used for a lot of purposes, e.g. to make movable steps by attaching loops to a shroud with rolling hitches. You push the loop upwards and when your weight is on the loop, it locks to the wire, preventing the loop from sliding downwards.
COILING ROPES
Right-laid rope needs to be coiled clockwise and given a right-hand twist in each turn in order to avoid kinks when the line runs out.
Halyards and sheets are now almost solely made of braided rope, which is normally coiled clockwise, although it really shouldn’t be coiled at all! Braided rope that is coiled always risks having kinks when the line is running out. More often than not, braided rope is coiled in the same way as laid rope.
Many experts recommend coiling braided rope in figures of eight. Another, simpler, method is to lay loops from side to side as shown, avoiding kinks.
When coiling right-laid (Z-laid) rope, you make the turns with one hand (normally the right hand) and lead them over to the other hand as they are made. This will, after some time, become an almost automatic movement.
When you have finished coiling, you can secure the coil with thin laces, or you can terminate the coil with one of the techniques shown in Fig.15 and 16.
Left-laid rope, which is quite uncommon, should always be coiled anticlockwise.
Terminating the coil
When you have coiled a line, grab the working end on its way upwards (1) and turn it around the coil and over and around itself, creating a lock.
You have to squeeze the loop (use your fingers) against the coil at A until the coil is locked with the next turn, which is to be made downwards.
Make more turns downwards around the coil (2) and tuck the working end through the opening at the top of the coil (3).
Pull everything tight as you push the loops around the coil upwards.
Adjust the length of the working end according to whether the coil is to be suspended from a cleat or pushpit (4) or just stowed away.
A more common termination is shown in Fig.16. Take the working end on its way downwards (1) and lead it around the coil and over itself, making the lock. Squeeze the loop against the coil at A until it has been locked with the next turn. Make more turns upwards and make a loop on the working end, putting it through the opening at the top of the coil (2).
Then wrap the loop over the top of the coil (3). Push the loops around the coil upwards and pull everything tight. You may also lead the working end through the loop as shown with the arrow (4). The methods described here are the most common. The method shown on Fig.15 is more stable over a period of time, especially in harsh weather.
CLEATS
Making fast on a cleat
Keep the line, for example, a halyard, tight and make a complete turn


