18,49 €
Mehr erfahren.
- Herausgeber: Crowood
- Kategorie: Geisteswissenschaft
- Sprache: Englisch
Insect photography is a challenging and stimulating art. Well-shot images give stunning results, which can aid study and enhance enjoyment of the natural world. This practical book explains how to reliably take those photographs. Through introducing insects and their behaviour, it advises on when and how to see nature at work and, by instructing on techniques, it shows how to capture the moment to dramatic effect. This new book advises on buying and using equipment for both compact camera and SLR users; it describes how to find and understand insects, and encourages responsible photography and good fieldcraft and instructs on composition, exposure, lighting and advanced techniques. Ways of sharing images, cataloguing and caring for them, and backing them up are given too. This book is aimed at amateur and professional naturalists and photographers, as well as artists.
Das E-Book können Sie in Legimi-Apps oder einer beliebigen App lesen, die das folgende Format unterstützen:
Seitenzahl: 237
Veröffentlichungsjahr: 2012
Ähnliche


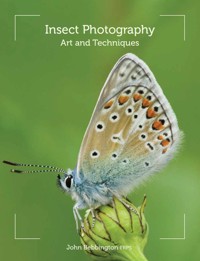
Insect Photography
Art and Techniques
John Bebbington FRPS
Copyright
First published in 2012 by The Crowood Press Ltd, Ramsbury, Marlborough, Wiltshire, SN8 2HR
www.crowood.com
This e-book edition first published in 2013
© John Bebbington 2012
All rights reserved. This e-book is copyright material and must not be copied, reproduced, transferred, distributed, leased, licensed or publicly performed or used in any way except as specifically permitted in writing by the publishers, as allowed under the terms and conditions under which it was purchased or as strictly permitted by applicable copyright law. Any unauthorised distribution or use of this text may be a direct infringement of the author’s and publisher’s rights, and those responsible may be liable in law accordingly.
ISBN 978 1 84797 501 0
Dedication
This e-book is dedicated to my late parents, who allowed me to go my own way as a youngster, and to my wife Anne and daughters Emma and Katie who for many years have tolerated and encouraged me in my passion for insects and insect photography.
Acknowledgements
I owe my interest in insect photography to the late Andy Callow FRPS who first inspired me through his images in the mid-1960s, and I am indebted to Michael Proctor FRPS for his support through the early stages of my development and subsequent achievement of Associateship and Fellowship of the Royal Photographic Society. I am also grateful to my many colleagues in the RPS Nature Group for their helpful suggestions and comments regarding equipment and specialist techniques. Any errors or omissions in the text are mine.
CONTENTS
Title Page
Copyright
Introduction
1 Photographing Insects With a Compact
2 SLR Cameras and Accessories
3 Knowing Your Subject
4 Fieldcraft
5 Perception, Composition and Depth of Field
6 Exposure and Lighting
7 Capturing the Moment
8 Advanced Techniques
9 Processing Your Images
10 Cataloguing and Sharing
11 Expanding Your Horizons
Useful Information
Index
Fig. 0.1 Queen Garden Bumblebee Bombus hortorum nectaring on Bluebell, Cumbria, UK. Pentax K-x, Sigma 70–300mm zoom lens, ‘macro’ setting @300mm, 1/125sec ƒ16, ISO 1600.
Introduction
Insect photography is a challenging, exciting and rewarding branch of the photographic art. Success does not however depend on your owning the latest high specification equipment, as I hope to show in this book.
Capturing the beauty of a butterfly’s wings reflecting sunlight or the eloquence of a perched damselfly, observing and recording the infinite variety of insect behaviour and often bizarre life cycles, seeing and recording things which are not obvious to the casual observer but can be shown in all their detail in a print or a projected image – all these require good fieldcraft, technical skill and above all an understanding of the subject and empathy with it, and a desire to communicate and demonstrate these to others.
Natural history and a desire to share its wonders with others have always been the driving forces behind my photography. These have been enhanced by membership of the Nature Group of the Royal Photographic Society and four excellent natural history photographic folios, creating the need to produce images which are good enough to merit selection for exhibitions and which can stand up to peer and professional criticism. Good photographic images, well presented, can entrance an audience and reinforce whatever message you are trying to convey, whether it is personal enjoyment, the sheer beauty of an insect, the fascination of what many people would consider as grotesque, preparation for or follow-up to a fieldwork session, the need for conservation of a species or habitat, or a talk on pollination or insect camouflage strategies.
Whether you are a newcomer to insect photography or someone wanting to improve your insect photography, this book aims to give you an understanding of why you are photographing your subjects and the background knowledge and confidence to produce good images of insects and other invertebrates. A variety of cameras is considered, including digital compact (‘point and shoot’) and ‘bridge’ (higher specification models without interchangeable lenses) cameras as well as film or digital single lens reflex (interchangeable lens) cameras.
Through the chapters in the book you will learn about your camera and additional equipment (commercially available and home-made), finding and understanding insects, fieldcraft and responsible photography, the necessary photographic skills and more advanced techniques, and processing and storing digital images, as well as the rewarding experience of sharing your images and furthering your expertise.
YOUR REASONS FOR PHOTOGRAPHING INSECTS…
It is important to think carefully about your reasons for taking your images, as they may determine the complexity and cost of the equipment which you use or purchase, your approach to photographing your subjects, and the way in which you process, store and share the images you take. You may go out with a predetermined ‘wish list’, but if you have confidence in your abilities and your equipment, this lets you take advantage of unexpected opportunities, such as the mating Daddy-Long-Legs Spiders (Fig. 0.2), which were found in the outhouse when collecting walking boots before walking the dog; or the Scorpion Fly (Fig. 0.3), which was found while stalking butterflies nectaring on thistle flowerheads; and the Mayfly with its cast skin, again found while dog walking (Fig. 0.4).
Personal Enjoyment
Photography should be enjoyable, and you may not wish to carry heavy specialist equipment or to go any further than achieving reasonable, identifiable records of the insects you see, and sharing them with friends and family. Such images can be successfully taken using a compact camera, that is, a camera without interchangeable lenses. Good examples, taken by non-specialists, are the Dandelion (Fig. 0.5), where the photographer was fascinated by the large number of tiny moths on the flowerhead and was interested to know their identity, and the Convolvulus Hawkmoth (Fig. 0.6), which was placed on a hand to give an indication of scale.
Fig. 0.2 Daddy-Long-Legs Spiders Pholcus phalangoides mating, Somerset, UK. Pentax K-x on tripod, Sigma 180mm APO macro lens, 3sec ƒ16, ISO 200.
Fig.0.3 Female Scorpion Fly Panorpa communis scavenging on dead wasp Dolichovespula saxonica, Somerset, UK. Pentax K10D on tripod, Sigma 180mm APO macro lens, 1/15sec ƒ22, ISO 100.
Fig. 0.4 Adult (‘spinner’) of Mayfly Ephemera sp. with recently shed subadult (‘dun’) exuvium, Somerset, UK. Pentax K10D on tripod, Tamron 90mm SP macro lens, 1/400sec ƒ8, ISO 400. A high shutter speed was needed to overcome subject movement in a strong wind.
Talks, Presentations and Teaching
Talks and presentations are a useful way of sharing your enthusiasm and knowledge with others. A combination of knowledge of your subject (and the ability to communicate at the right level) with attractive images can have a real effect on an audience.
Unfortunately there are too many presentations where projected images or prints are carelessly recorded, prepared or presented – for example, colour transparencies with fingerprints or covered in dust, or digital images with dust-spots on the camera sensor. Your images should show what they are meant to show, clearly and attractively, without extraneous clutter, and they should be relevant to the title of the presentation. Try to include interesting behaviour – such the female Common Blue butterfly (Fig. 0.7) basking in a typical position, on one of its larval foodplants.
Appropriate images can provide invaluable teaching support for students. Images of habitats and species can give a good grounding before a fieldwork visit and, used in follow-up, can widen understanding of seasonal variation and behaviour which may not have been observed during the visit.
Fig. 0.5 Cocksfoot Moth Gliphypterix simpliciella on Dandelion flowerhead, Derbyshire, UK. Compact camera – Canon Ixus 750, 1/00sec ƒ4.9, lens in close-up (‘macro’ mode) at 23.1mm focal length. The camera was held parallel to the surface of the flowerhead, and the image is of high enough quality to enable identification of the moths, which are about 5mm long.
Fig. 0.6 Convolvulus Hawkmoth Agrius convolvuli. Image taken as proof of having caught this migrant species in my moth trap, Somerset, UK. Canon Ixus 500 digital compact, 1/200 ƒ2.8, ‘macro’ setting with zoom lens at 7.4mm focal length, ISO 400.
Fig. 0.7 Female Common Blue butterfly Polyommatus icarus on Bird’s Foot Trefoil flowerhead, Somerset, UK. Image taken to show adult on larval foodplant. Pentax K-x, Sigma 180mm APO macro lens, 1/200sec ƒ16, ISO 800.
Fig. 0.8 Snipe Flies Rhagio scolopacea paired, Dorset, UK. Pentax K10D, Sigma 180mm APO macro lens. 1/6sec ƒ22, ISO 100.
Exhibitions and Competitions
You may already be an accomplished amateur or professional photographer in your chosen field(s) and you may wish to explore a different discipline, perhaps with the aim of submitting images for exhibitions and competitions. To have a chance of success in competitions or to gain acceptances in exhibitions you will need images of outstanding quality and impact or interest – the capabilities of digital single-lens reflex cameras have ‘raised the bar’. The image of Snipe flies paired (Fig. 0.8) was the result of over thirty minutes careful approach and preparation. It won a silver medal in one exhibition, judged by photographers who were themselves naturalists, but in another it gained low marks and was rejected by a panel of selectors who were not naturalists.
If you are showing prints, mount them attractively. Don’t be afraid to choose an unusual mount colour, but make sure that this doesn’t clash with or compromise the photograph, and remember that your choice may not be attractive to the exhibition selectors.
Photographic Qualifications
You may want to gain photographic qualifications, either to provide a stimulus for improving your standards or to enhance your credibility in the eyes of others. Make sure that you understand the requirements – do the judges or selection panel view your submission as a random selection among many others, all of which are being given a mark out of say twenty-five, with an average of twenty needed to gain the qualification, or are they seen as a panel, as in the case of Associateship and Fellowship of the Royal Photographic Society, where the standard needs to be uniformly high? In the first case, you may be successful if you submit images which have consistently succeeded in club competitions and national and international exhibitions. They do not need to be related to each other, because they are not viewed as a coherent set. In the second case your images are viewed as a panel, and they must ‘hang together’. Choosing your favourite images (or those which your family and fellow club members like) is unlikely to bring success. A carefully thought-out panel showing that you are a competent (or in the case of the RPS Fellowship, outstanding) insect photographer, with a theme flowing through it, will be more likely to succeed.
The images of moths at rest (Fig. 0.9–0.14) were entered for a camera club ‘panel’ competition, which was designed to give members a taste of what is required by the Royal Photographic Society. They were projected as a text-only title image, followed by the individual images, then the layout image. This panel was placed first in an entry of twenty-four sets.
Fig. 0.9 Pale Brindled Beauty moth Phigalia pilosaria on bark, Somerset, UK. Pentax K10D on tripod, Tamron SP AF 90mm macro lens. 0.4sec ƒ22, ISO 200.
Fig. 0.10 Striped Twin-spot Carpet moth Nebula salicata on bark, Kintyre, UK. Pentax K10D on tripod, Tamron SP AF 90mm macro lens. 2sec ƒ22, ISO 100.
Fig. 0.11 Peppered Moth Biston betularia (normal form) on lichen, Somerset, UK. Pentax K10D, Sigma 180mm APO macro lens on tripod. 1.3sec ƒ22, ISO 100.
Fig. 0.12 Waved Umber moth Menophra abruptaria on bark, Somerset, UK. Pentax K10D, Sigma 180mm APO macro lens on tripod. 1/4sec ƒ22, ISO 100.
Fig. 0.13 Oak Beauty moth Biston strataria on lichen-covered wall, Avon, UK. Pentax K10D, Sigma 180mm APO macro lens on tripod. 0.3sec ƒ22, ISO 100.
Fig. 0.14 Geometrid moth panel.
Photographic Illustration for Publication
High quality images will always help to sell a publication. A combination of high technical standards and ‘an eye for a picture’ are both important, but most of all it is critical to work closely with authors and publishers, so that images fit their needs. If you are framing an image which might naturally be recorded in landscape format you may need to rethink it to fit on a book cover or a magazine spread, if necessary allowing space for text.
You should also file images in a format and at a resolution which suits customers’ requirements. Here it is important to preserve and back up your original images, ideally as RAW files which can be revisited and developed differently if necessary, and save copies or modified versions under separate filenames and in different locations (Figs 0.15 and 0.16).
Fig. 0.15 Seven-spot Ladybirds Coccinella 7-punctata hibernating, Somerset, UK. Pentax K10D on tripod, Sigma 180mm APO macro lens, 1.6sec ƒ32, ISO 100. Portrait format.
Fig. 0.16 Seven-spot Ladybirds Coccinella 7-punctata hibernating, Somerset, UK. Pentax K10D on tripod, Sigma 180mm APO macro lens, 1.6sec ƒ32, ISO 100. Portrait format.
Photographic Support for Painting and Drawing
You may be an artist who would like to take up insect illustration and use photographs on which to base your paintings or drawings; or perhaps an illustrator who already draws or paints insects and would like to take photographs that illustrate fine detail or aspects of behaviour, to improve the accuracy of your images. Images of insects behaving naturally are useful, like the queen Tricolored Bumblebee (Fig. 0.17) and the Peacock butterfly (Fig. 0.18). It is also worth looking out for and collecting fresh road kill insects to build up a record of detailed photographs – you never know when you may need them.
Fig. 0.17 Queen Tricoloured Bumblebee Bombus ternatus nectaring on Everlasting flowerhead, Lake Superior, Minnesota, USA. Pentax K10D handheld, Sigma 180mm APO macro lens, 1/200sec ƒ16, ISO 400.
Fig. 0.18 Peacock butterfly Inachisio nectaring on Michaelmas Daisy flowerhead, Somerset, UK. Pentax K10D handheld, Sigma 180mm APO macro lens on tripod, 1/50sec ƒ16, ISO 100.
Fig. 0.19 Detail of wing of road-kill Peacock butterfly Inachis io, Somerset, UK. Pentax K5, Tamron 90mm SP macro with +4 dioptre accessory close-up lens. 4sec ƒ22, ISO200.
Photographs as Creative Art
Insects and other invertebrates show an amazing range of form, colour and behaviour and can provide endless inspiration for photographers and artists alike. Here, you can employ shallow depth of field, unusual postures and lighting to good effect, but confidence in basic technique and equipment and a thorough understanding of photographic principles provide a sound basis for creativity.
Digital image processing and manipulation extend the opportunities, allowing you to create wonderful abstract patterns. The image of enlarged scales from an Emperor Moth wing (Fig. 0.20) was processed in Photoshop Elements – first posterized and then filtered to show edges (the wing was one of a large number below a perch where a Stonechat was stripping wings from its prey before feeding its young). The Hoverfly (Fig. 0.22) was photographed with the camera on a tripod, but using a wide aperture to limit depth of field, and the woodlouse (Fig. 0.23) was photographed with specialist equipment, using flash as the light source.
Fig. 0.20 Forewing ‘eyespot’ of a female Emperor Moth Saturnia pavonia, Surrey, UK. Original image – Pentax K10D, 50mm Takumar lens reversed onto Sigma 180mm APO macro lens (×3.6 magnification). 4.5sec ƒ32, ISO 100.
Fig. 0.21 Manipulated version of the Emperor Moth eyespot. Image posterized and edges enhanced in Photoshop Elements.
Fig. 0.22 Hoverfly Helophilus sp. on Calendula flowerhead, Somerset, UK. Pentax K10D, Sigma 180mm APO macro lens with Sigma accessory close-up lens. 1/50sec ƒ11, ISO 200. The fly was photographed at a wide aperture to isolate its head from the background.
Fig. 0.23 Common Shiny Woodlouse Oniscusasellus, head detail. Pentax ME Super, 50mm lens reversed onto 100mm macro lens with ×3 converter, twin flash manually controlled. Fuji Provia 100F film. 1/125sec nominally ƒ96. The image was taken for a talk entitled ‘Beautiful and beastly – a closer look at Nature’.
WHAT ARE YOU TRYING TO SHOW?
Identification of Insects
In images taken for identification purposes the amount of information varies according to the species you are photographing. For example, butterflies in temperate regions can usually be differentiated by their wing markings, and dragonflies by their body and wing markings – as long as these are clearly shown then identification is possible (Figs 0.24–0.29).
Some species however need more detail – in Britain the Small and Essex Skippers are separated by the colour of the underside of the tips of the antennae (Figs 0.30 and 0.31) and the Hoverfly family is characterized by a ‘ring vein’ around the outer edge of the wing (Fig 0.32). In such cases your images need to be of high quality, and to show the important features of the organism.
You may need to include a scale to indicate size, as is the case with some of the smaller ‘micro’ moths. Here, you may not have the opportunity to place a ruler alongside the insect without disturbing it; you can simply take the photograph of your insect and then of your ruler without altering the image magnification. The two images can be combined digitally, or the scale cut from a print and pasted onto the print of the insect – take care not to alter the magnification of either image before combining them (Fig. 0.33). The more detailed the information needed, the more you need to know about both the subject and photographic technique.
Fig. 0.24 Underside of male Spotted Fritillary Melitaea didyma, Causses de Gramat, France. Pentax ME Super on tripod, Pentax 100mm macro lens, Kodachrome 25.
Fig. 0.25 Upperside of male Spotted Fritillary Melitaea didyma, Causses de Gramat, France. Pentax ME Super on tripod, Pentax 100mm macro lens, Kodachrome 25.
Fig. 0.26 Underside of male Glanville Fritillary Melitaea cinxia, Oberwallis, Switzerland. Pentax ME Super on tripod, Pentax 100mm macro lens, Kodachrome 25.
Fig. 0.27 Upperside of male Glanville Fritillary Melitaea cinxia, Oberwallis, Switzerland. Pentax ME Super on tripod, Pentax 100mm macro lens, Kodachrome 25.
Fig. 0.28 Immature Male Four-spotted Chaser dragonfly Libellula quadrimaculata, Dorset, UK. Pentax K-x on tripod, Sigma 180mm APO macro lens. 1/800sec ƒ11, ISO 1600.
Fig. 0.29 Immature Male Scarce Chaser dragonfly Libellula fulva, Somerset, UK. Pentax K-x on tripod, Sigma 180mm APO macro lens. 1/100sec ƒ16, ISO 1600.
Fig. 0.30 Small Skipper butterfly Thymelicus sylvestris showing orange tip of underside of antenna, Somerset, UK. Pentax K10D on tripod, Sigma 180mm APO macro lens, ISO 100, 1/20sec ƒ22.
Fig. 0.31 Essex Skipper butterfly Thymelicus lineola showing black tip of underside of antenna, Mürren, Bernese Oberland, Switzerland. Pentax K-5 handheld, Tamron 90mm SP macro lens, ISO 1600. 1/250sec ƒ10.
Fig. 0.32 Hoverfly Volucella pellucens showing abdominal markings and ring-vein on wings, both of which are key identification features, Surrey, UK. Pentax ME Super, 100mm Pentax macro lens, twin flashguns, 1/125sec ƒ22. Kodachrome 25 film.
Fig. 0.33 ‘Micro’ moth Aethes tesserana, Somerset, UK. Pentax K-5 on tripod with Tamron 90mm SP macro lens with +4 dioptre accessory close-up lens, 1sec ƒ22, ISO 800. The millimetre scale was photographed immediately afterwards and the two images combined digitally.
Fig. 0.34 Grayling butterfly Hipparchia semele, resting position, Stiperstones, Shropshire, UK. Pentax K10D on tripod, Sigma 180mm APO macro lens, 0.4sec ƒ32, ISO 100.
Recording Natural Behaviour and Life-Cycles
It is useful first of all to understand your subject, to recognize indicators of and be prepared for what may be about to happen, and to have sufficient confidence in equipment and technique to be able to concentrate on what is happening and communicate it through your images, rather than worrying about technicalities. Practise on everyday subjects, gaining confidence in yourself and your equipment; this is far less costly (except in time) when using digital imaging than when using film.
The critical ‘decisive moment’ may only last for a fraction of a second, as with the Grayling Butterfly ‘flashing’ its forewing eyespot (Fig. 0.35) or the Large Skipper butterfly nectaring on Fragrant Orchid and showing the orchid pollinia on its proboscis (Fig. 0.36). The Daddy-Long-Legs spiders (Fig. 0.2), however, remained in this position for several minutes, although they were swaying slightly for most of that time, and of more than twenty images recorded only two were critically sharp.
Fig. 0.35 Grayling butterfly Hipparchia semele, response to disturbance, Stiperstones, Shropshire, UK. Pentax K10D on tripod, Sigma 180mm APO macro lens, 0.4sec ƒ32, ISO 100.
Fig. 0.36 Large Skipper butterfly Ochlodes venata nectaring on Fragrant Orchid, with pollinia on proboscis, Box Hill, Surrey, UK. Pentax ME Super, 100mm Pentax macro lens, twin flashguns, 1/125sec ƒ22. Kodachrome 25 film.
Fig. 0.37 Female Common Blue butterfly, Gwynedd, UK. Pentax K-5, Sigma 180mm APO macro lens handheld, 1/200sec ƒ16, ISO 1600.
The ‘Beautiful’ and the ‘Beastly’
Some insects, such as butterflies, are beautiful to our eyes, as their multicoloured wings gleam in sunlight; others, such as spiders, can appear quite grotesque when seen close up. If you can achieve simplicity in photographing a beautiful insect, so that it stands out from its background, or record fine detail so that every bristle on a fly’s face shows, your images will have great impact.
You may start out photographing insects purely for enjoyment and not wish to go further, but as your technique improves and your confidence and knowledge grows, you may want to learn more about insects and other invertebrates, improve your fieldcraft and equipment, set yourself ever more difficult challenges, share your images with others, develop projects or gain qualifications. This book is intended to help you on your journey – and may it be an enjoyable one.
Fig. 0.38 Wolf Spider with moth, Somerset, UK. Pentax K10D, Sigma 180mm APO macro lens on tripod. 8sec ƒ22, ISO 100.
‘FAMILIARITY BREEDS CONTENT’*
What is really important, after the welfare of the subject, is the quality of the image which is obtained. Technical difficulties should not obstruct the photographic process or hinder your vision and imagination.
Become familiar with your localities, and your equipment and its capabilities, learning from your mistakes. Record in detail what you do and where you do it (this is essential with a film camera but less so with a digital camera, as all the details of exposure and lenses, and location if you have a GPS unit, should be held in the image file).
Become competent at the basics before trying to move on to more advanced techniques. Once you are technically confident, and familiar with your subjects and working sites, it is far easier to capture attractive and informative images.
Build on success, avoid past mistakes and concentrate on what you see through the viewfinder to realize your vision.
*This is the title of a superb presentation by a great landscape photographer, Chris Palmer.
Fig. 1.1 Female Oak Eggar moth Lasiocampa quercus, Somerset, UK. Canon Ixus 500, autofocus, pattern metering, auto white balance, auto exposure 1/25sec ƒ2.8. No ISO data.
Chapter 1
Photographing Insects With a Compact
Whether you use a compact or a single-lens reflex camera, or perhaps you are considering purchasing a new camera, you will get the best results from understanding what is required from your camera and equipment. (‘Compact’ here refers to models with non-interchangeable lenses, usually called ‘compact’ or ‘bridge’ cameras. Those with interchangeable lenses, however compact, are referred to in Chapter 2.)
It is often said that it’s not possible to take good insect photographs with a compact camera, but this is not necessarily true. The capabilities of a compact may be relatively limited, and you will not have the flexibility offered by a single-lens reflex camera with interchangeable lenses, but on the other hand a thorough understanding of your camera and the accessories (commercially-produced and homemade) which you can use with it, along with careful choice of subject and a disciplined approach, will enable you to produce images which will be very acceptable. There are two main advantages over the SLR: your camera will be much lighter and you will not be troubled by dust getting onto the sensor, as the camera is a sealed unit; you will probably be able to attach your camera to a microscope; and with current high megapixel counts you will be able to crop an image, especially one taken at lower sensitivity (ISO rating), and still retain sufficient quality for projection or identification purposes.
Fig. 1.2 ‘Greenbottle’ fly basking. Nikon Coolpix P5100, +4 dioptre accessory close-up lens on tube mount, 1/80sec ƒ7.3, ISO 100. Full-frame original file.
Fig. 1.3 ‘Greenbottle’ fly basking. Nikon Coolpix P5100, +4 dioptre accessory close-up lens on tube mount, 1/80sec ƒ7.3, ISO 100. Image cropped to central portion.
THE BASIC CONTROLS
When you buy a camera, it is usually preset to full auto mode. You may have been tempted to leave it set up in this way, because this is the easiest way to produce images and requires little thought. However, if you want to progress beyond this stage and to produce images which reflect your vision, you need to understand the basic controls and learn how to exploit them. This understanding will give you confidence in your equipment and enhance your creativity. The camera handbook or operating manual may be a printed version or it may be on CD/DVD. It may appear daunting at first, but it is important to read some critical sections. The version on disc should be an indexed PDF file, and you can search for a specific topic rather than thumbing through the book.
Ideally your compact camera should allow you to have some control over focusing, metering modes, aperture, shutter speed, shutter release mode, sensitivity and exposure. A zoom lens with a ‘macro’ mode (a flower symbol on one of the controls) will enable you to focus close-up, although it will not give you true macro images. If the lens has a wide zoom range including telephoto you can use accessory lenses to obtain closer focus. The camera should offer some sort of image stabilization (VR, SR, IS), which is especially important when the lens is on telephoto setting. Video capability and a hinged live view screen are useful.
Focus
Focusing mode in the more basic models will probably be ‘autofocus’, perhaps with a choice of where in the frame the camera chooses, but more advanced models such as the Canon G12 have a manual focus mode. This will allow you to choose precisely where you want the plane of focus to be. If the camera is set on autofocus, and the subject is small and some distance away from the background, it may focus on the wrong area and your subject may be partly or wholly outside the area of focus. However, if the subject is static, you can try several different shots, taking care to ensure that the subject is in focus (Figs 1.4 and 1.5).
Fig. 1.4 Brindled Beauty moth larva Apocheima hispidaria – camera autofocus has locked on hedge in background.
Fig. 1.5 Brindled Beauty moth larva Apocheima hispidaria, Somerset, UK. Care taken to position spot autofocus point on subject. Nikon Coolpix P5100, 1/1000sec ƒ2.7, ISO 400.
If your subject is small, you can place a large leaf close behind it so that the camera focuses correctly. You can even hold a finger next to the subject to ensure that the camera focuses correctly – the result may not be very artistic but you will at least have a sharp image for identification purposes.
Metering mode usually offers a choice of spot, centre-weighted or average (matrix); in some models there is a choice of where in the frame the spot meter reads so that if, for example, the main subject is off-centre it is still correctly metered.
Exposure
Aperture (ƒ no.) can be set in AV (aperture priority) mode. As you change the ƒ number, the camera will adjust the shutter speed to give a correct exposure. Using aperture priority allows you to control depth of field (seeChapter 5


