20,99 €
Mehr erfahren.
- Herausgeber: The Crowood Press
- Kategorie: Geisteswissenschaft
- Sprache: Englisch
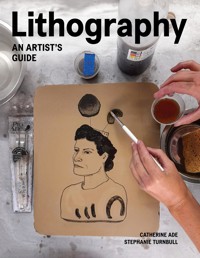
Learn the versatile art of lithography and explore its expressive potential This practical book explains how to create and print your own lithographs. With clear step-by-step sequences, it explains the full process that depends fundamentally on water not mixing with grease. It includes new methods and ideas in an up-to-date practical guide that covers everything from studio set-up through to mixing inks for edition printing, and then explains alternative techniques such as Lo-shu washes, negative drawing, transfers and Manière Noire. This book is an invaluable reference as you explore the beautiful and expressive potential of one of the oldest printmaking techniques. The processes – stone lithography, ball-grained plates (aluminium and zincography) and photoplates Inks and paper – edition printing, multiple transfer techniques and alternative drawing materials Recipes – quick reference guide and reminder for mixing etches, processing chemicals, mixing tusche and making drawing materials
Das E-Book können Sie in Legimi-Apps oder einer beliebigen App lesen, die das folgende Format unterstützen:
Seitenzahl: 275
Veröffentlichungsjahr: 2023
Ähnliche


CONTENTS
INTRODUCTION
1 STUDIO SETUP
2 STONE LITHOGRAPHY
3 BALL-GRAINED PLATES
4 POSITIVE PHOTOPLATES
5 INKS AND PAPER
6 TRANSFER METHODS
7 ALTERNATIVE DRAWING TECHNIQUES
8 RECIPES AND ALTERNATIVES
GLOSSARY
FURTHER READING
SUPPLIERS
INDEX
INTRODUCTION
Lithography is a planographic process, which means that a print is taken from a completely flat surface, unlike relief and intaglio printing which are raised or incised. In its simplest form lithography works due to the fact that water and grease do not mix. The artist draws on a stone or plate (the matrix) with a greasy drawing material and prints with greasy ink. Providing the matrix is kept damp throughout printing the water will be repelled by the greasy drawing material and hold on to the negative space. The greasy ink will only be attracted to the greasy drawing material and will not adhere to the parts of the matrix that contain water.
A BRIEF HISTORY
Lithography was invented in 1798 by Alois Senefelder in Bavaria, Germany. Senefelder was looking for a way to publish his music scores which, prior to the invention of lithography, would have been engraved into copper plates. Senefelder had purchased a block of Bavarian limestone to test for an engraving, which at that time would have been cheaper than buying copper plates.
Apparently Senefelder discovered lithography when he wrote down his mother’s laundry list on a block of limestone. He just so happened to be using an ink made up of pigment, soap and wax. He then tested this drawing material to see if it would work as an acid resist and later discovered that if the stone was kept damp, then the image could be inked up and the non-image areas would reject the ink. He referred to this as chemical printing and lithography, stone writing being just one aspect of this process. Now the term is used in reference to all aspects of chemical printing, both stone and plate. Lithography was used commercially to print labels, posters, packaging, newspapers, etc. Plate lithography was developed as early as 1840, as a cheaper and lighter alternative to stone. This was especially advantageous in commercial printing, as work could be produced at a faster pace. The lithographic print community has always benefited from developments in the commercial sector and when advances were made in photomechanical printing, fine art lithographers adapted this to suit their own needs.
Even though the principle of lithography is simple, it is in fact a rather complex process and a lithographic printer can train for years to master all of its complexities. For this very reason lithography has a strong tradition of collaboration, where the printer will deal with all of the technical aspects of the process and the artist will only worry about their concept and the artistic side of creation.
Previously, collaborations were between artists and commercial printers or at least with printers who started out in the commercial industry, with collaborations in the UK being recorded as early as 1803. When commercial printing developed further and became irrelevant to fine art printing, print studios were set up purely for collaborative purposes. The UK’s most renowned lithographic studio was The Curwen Studio, established in 1958 and managed by master printer Stanley Jones MBE. Prior to leading the new Curwen Studio, Jones had trained in lithography at the École des Beaux-Arts before working at Atelier Patris in Paris, at the time the centre of the art and print publishing world. Curwen, originally known as the Curwen Press, had been established in 1863 by Reverend John Curwen for the printing of music scores; the studio started collaborating with artists when Harold Curwen took over in 1908.
Stanley Jones worked at The Curwen Studio until 2014 and during that time he collaborated with artists such as Barbara Hepworth, Henry Moore, Graham Sutherland, David Gentleman, Paula Rego and Eric Ravilious, to name a few. He also established the Curwen Print Study Centre in 2000, which is an educational hub offering adult learning classes and an educational programme for schools. The Curwen Studio still operates and collaborates with artists today, under the umbrella of Worton Hall Studios in London.
Over the years a number of print studios opened up and collaborated with artists; however, in the early years, printers were often very secretive about the technical aspects of lithography, especially the etching process. As commercial lithography training changed radically, moving away from using stones and plates, this left a void in traditional skill sets being passed down from master to apprentice. In 1960 in the USA, artist June Wayne established the Tamarind Institute with the help of the Ford Foundation. Its aim was to train and establish a pool of master printers who would then set up their own studios throughout the USA, continue to collaborate with artists, and establish a print market, promoting both lithography and collaboration. Over the years the Tamarind Institute and its printers have contributed to research regarding presses, papers and techniques such as transfers and negative mark-making. It is now regarded as a world-renowned institution and as a result, the USA has some of the best collaborative print studios and educational programmes, attracting printers from around the world who are keen to enrich their country’s lithographic and collaborative tradition.
THE POTENTIAL OF LITHOGRAPHY AND OUR EXPERIENCE AS COLLABORATIVE PRINTERS
Lithography is the most versatile of all printmaking processes as it can also mimic all the other printmaking processes. Lithography still seems to be perceived as a process for black-and-white, beautifully rendered drawings and hopefully this book will show its full potential.
Chris Orr, The Bits John Constable Left Out, from The Miserable Lives of Fabulous Artists. An eight-colour lithograph, 103 x 73cm. Edition of 50. Collaborating printer: Stephanie Turnbull at the Curwen Studio. Each colour separation was drawn on a separate piece of true grain and exposed to photoplates. This lithograph was the first image to be printed where the printing bed of the offset press was maxed out in both directions.
As collaborative printers, we have worked with a variety of artists and had the opportunity to work on some interesting projects. Without these collaborative experiences, the range of work we are able to do would be smaller. Our experiences in collaboration serve to enrich and broaden our own technical skills and thinking, as well as enabling us to use the lithographic process in our own art practices and future collaborative projects.
Artists have always worked across different media and the notion of artists making collaborative prints became common practice in Paris during the early twentieth century. The gallerist and print publisher Ambroise Vollard was a fervent supporter of the Parisian studios and commissioned countless artists to work in collaboration with the printers.
One notable artist–printer relationship was that of Pablo Picasso with Fernand Mourlot at Mourlot Studio, making around 400 lithographs there. Picasso would re-work a stone or plate several times. The lithographs telling the story of David and Bathsheba are testament to the skills of the printers there. The single stone used for David and Bathsheba was edited some thirteen times, the first state drawn with crayon and ink on a light background and transformed to state thirteen with light scratches on a dark background. At each state an edition was pulled, and each state considered an element of the final work. These prints along with the stone, inked in its final state, are housed in the collection at the Musée National Picasso-Paris.
Clare Woods, Shirley, 2013, 166 x 227cm, two-colour aluminium plate lithograph 1/1. Collaborating printer: Stephanie Turnbull. The image is made up of four ball-grained aluminium plates with two plates printed side by side to create one layer. As there were no presses big enough, a pedestrian walk-behind roller was used instead.
Some of the most technically ambitious collaborations were carried out by master printer Kenneth Tyler between 1965 and 2001 when he retired. Inspired by Picasso who notoriously never followed the rules, Tyler adopted the same principle in his own workshops: no rules and no restrictions. By creating a collaborative space without limitations for the artist, it allowed Tyler and his printers to produce some of the largest, most technically complex prints in history. They broke the technical boundaries of traditional print, leading the way as pioneers and innovators, designing new presses, papers and techniques that we still use today.
Michael Armitage, Ewaso Niro, 2016–17. Lithograph on white Somerset 410gsm tub-sized satin paper hand finished with ink, watercolour, colour pencil and conte. 28 3/4 x 34 13/16 in (73 x 88.5 cm); 31 15/16 x 38 1/16 x 1 3/4 in. (81.2 x 96.6 x 4.5 cm) (framed). © Michael Armitage. Photo © White Cube (George Darrell). Collaborating printer: Catherine Ade. The image is made from two zinc plates. The background plate was printed twice, one colour was printed, the plate edited and then a new colour over-printed to create a new blended colour on the paper. The artist added hand colouring with ink, watercolour, coloured pencil and conté crayon.
Within our own collaborations, scale is often the thing artists want to push the most, by maxing out the press beds – for example, our collaborations with Chris Orr and Michael Armitage at the Curwen Studio, or Stephanie’s collaborations with Clare Woods, printing two large ball-grained plates side by side with a ground roller on the floor of Clare’s studio.
Some collaborations have made us think outside the box when it comes to implementing different drawing materials or techniques or the use of colour through layering. Other prints, though simple in appearance, may have involved a lot of planning in order to run split rolls or blends on a multi-colour run print.
Ultimately the collaborative process involves creative input from both artist and printer to bring the work into being. The artist, whilst not involved in the technical aspects of the construction or printing of the work, is the sole creator of the initial idea. Along the way there may be things the artist sees in their test image or first proof printing session that influences the way the work is made, which may allow the artist to explore an idea in a way that was previously unknown. This is what the process of collaborative working is for: to enrich and serve the communication of an idea.
WHAT TO EXPECT FROM THIS BOOK
This book is an introduction to the art of lithography, aimed at students, beginners, and as a useful point of reference for the more experienced lithographer. The aim has been to break the process of lithography down so it becomes easier to digest and understand. We have tried where possible to provide information that we felt has been missing, especially information relating to zincography. Etch tables have been repeated throughout the book so the reader doesn’t need to continuously flick back and forth when working on a particular process. As teachers of lithography, we know students benefit from repetition; we hope this repetition through the book will help ingrain that knowledge in the reader.
The first part of the book will address studio requirements and cover the main three processes: stone lithography, ball-grained plates (aluminium and zincography), and photoplates. The later chapters will cover inks and how to mix them for edition printing, multiple transfer techniques, and alternative drawing materials to showcase lithography’s versatility. These alternative processes are also ones that we have used in collaborations with artists, or within our own practice. Chapter 8 acts as a quick reference guide and reminder for mixing etches, processing chemicals, mixing tusche and making drawing materials. We hope every reader will benefit from this, regardless of their experience.
At the end of the book there is a glossary of printmaking terms and a comprehensive list of suppliers, as well as a further reading list with useful websites that will further inspire. It is our hope that this book will get covered in ink and become a part of your press kit as you begin to explore the art of lithography.
CHAPTER 1
STUDIO SETUP
This chapter covers the studio setup, plus all the materials and equipment needed to get started with lithography. The majority of artists and printers will be accessing equipment via an open access workshop, print studio or university print room but all of these things should still be considered. This chapter will also talk about safe working practices: COSHH (the Control of Substances Hazardous to Health Regulations), PPE (Personal Protective Equipment) and MSDS (Material Safety Data Sheet), alternative chemicals and the cleaning and maintenance of equipment.
The Lemonade Press, Bristol.
STUDIO REQUIREMENTS
Lithography is known for needing a lot of equipment and materials, especially if stones, ball-grained plates and photoplates are to be used. Stone lithography tends to be the most problematic as a selection of stones is needed, a direct press, stone storage and a designated graining sink. Ball-grained plates and photoplates are easier to introduce to pre-existing studios as they can both be printed on an intaglio press.
Graining sink set up with easy access to a levigator, files, grit, callipers, sponges, and a straight edge. The inside of the sink must be built up so it is level with the top of the sink. This is so stones don’t have to be picked up and lowered into the sink for graining. The Lemonade Press has a large movable tray that sits on top of the sink when preparing and processing plates.
When setting up a lithographic studio, in terms of finding a suitable space, the following requirements must be considered:
• Water is needed for graining, processing photoplates, printing and mixing solutions.
• Floors need to be strong enough to support the weight of presses, stones, storage and other studio equipment.
• Space is needed for storage and moving around. Lift trucks for moving stones have to be able to fit around and navigate through the space.
• Designated work areas.
• Electricity, good lighting.
• Effective ventilation.
If the space is big enough, having separate rooms for graining and photoplate processes is ideal; for smaller spaces, however, a layout with designated zones is just as effective. These are some of the areas to consider:
• Graining area: sink, possibly a large tray if this also needs to double up for plate processing, stone storage, shelves for grit and other graining supplies, a space for drying stones and plates, hanging space for a fan and straight edge, and space for levigators to be stored.
• Processing space: acid and solvent cabinets, ideally near a water supply, a counter top to mix etches and store the beakers and dispenser bottles.
• Drawing area for artists.
• Paper storage and storage of prints (at the opposite end of the room to the water).
• Darkroom for photolithography: exposure unit, developing sink (water). If it is a self-contained exposure unit you don’t necessarily need a dark room.
• Chemical storage, shelf for bowl and developer pad.
Horizontal stone storage that prevents stones getting stuck to the surface if traces of gum remain underneath and allows for more visibility and room for moving stones on and off the shelves. If a hydraulic stacker truck is available then this type of storage enables the forks to slide underneath the stone to be lifted so no manual handling is required.
• Storage for inks, rollers, stones, plates and papers. It is good to have workbenches with lots of shelves to hold and store these and other items you need to hand when printing. Inks can be kept on shelves and organised by colour to make it easier to find the inks needed for printing. Rollers can be stored on specially designed roller racks on the wall, freeing up shelf space for other items. Stones can be stored either horizontally or vertically depending on the size. Investing in a lift table will make it both easier and safer to move stones around the studio. Roller racks are a great way to store stones as you can move large stones easily by simply pushing them back and forth. Other studios insert small ball bearings into their wooden storage shelves. This is a cheaper alternative to the roller racks and again allows you to move the stones on and off the shelf with very little effort.
• Press area: press, worktops, ink slab for both colour and roll up black (the ink slab for colour work needs to be able to roll out the largest roller in the studio), leather roller, composition roller and spaces for these on the worktop when printing. Paper table or shelf for editioning paper, printed paper, bon à tirer (BAT) and newsprint. Solvent rag bin under press, press kit, bowls and sponges for dirty and clean water. A shelf for gum, asphaltum, turpentine, roller wash, vegetable oil and their tins for semi-clean rags. Hand fan, cheesecloths, rags, drying rack, tympan and scraper bar storage.
If stones are to be stored on a flat surface or on struts where no stacker truck is available, then inserting ball bearings into the wood enables you to move larger stones or plate backers with ease.
MATERIALS AND EQUIPMENT
Presses
Lithographic presses are referred to as direct presses or offset (flatbed) presses. There are many different brands available, the most prestigious being the Takach press. The majority of presses here in the UK will be cast iron, side-lever hand presses, which means the pressure will be applied by lowering a handle on the side of the press. There are also top lever presses with the bar handle situated on the top of the press. Some of these presses are motorised; others are hand cranked. Direct presses take an impression directly from the surface, which is the case for most print processes.
J. Ratcliffe and Sons offset press. Offset presses consist of two beds – the paper bed and the printing bed – and a large cylinder with a blanket wrapped around it. These presses are predominantly used for plates; however, some presses such as the one shown can lower the press bed enough to accommodate stones.
Direct top lever press, the JL-70 model from Polymetaal. Top lever presses apply pressure by lowering the scraper bar onto the matrix.
Direct side lever press manufactured by D. & J. Greig in Edinburgh. Side lever presses work by the pressure bar (side lever) operating a cam and lifting the press bed up in contact with the scraper bar. These press frames are cast iron so even the small presses are heavy in comparison to the more modern presses.
Offset presses or flatbed proofing presses take the impression off the plate and onto the blanket before reprinting it onto the paper. When using an offset press the plate and paper sit side by side on separate beds which means the artist can create the imagery as it should be seen and not in reverse. Again, there are various types, with some being hand operated and others completely motorised. While mostly used for printing plates, some offsets have the ability of lowering the plate bed, which means they can accommodate stones and even relief print blocks.
Scraper bars
These are used in the direct press and apply pressure during printing. Traditionally these were made from wood (maple) with a leather strap. More modern scraper bars are made from polyethylene with straps of the same material. These scraper bars can be used with or without the straps, but the straps protect the bevel of the scraper bar and make it easier to print edge to edge. Any imperfections in the bar will show up in the print usually as a white or hazy mechanical line. Straps can be easily replaced and if a bar gets damaged it needs to be sanded down without altering the bevel. Leather straps are more expensive and harder to maintain than the polyethylene straps. However, if using leather, a 2.5cm-wide cowhide strip is used and this must be treated with neatsfoot oil before attaching. Soak it for 24 hours before attaching. If you are cleaning the scraper bars with solvents then the leather will dry out over time, so a thin coating of neatsfoot oil should be applied now and again to keep the leather in a good condition.
Scraper bars of varying sizes from Takach Press, USA. To make it easier to select the correct scraper bar for the job, mark up each scraper bar with its length (as shown above).
Ideally the scraper bar should fit inside the matrix as the pressure from the edge of a plate or stone can indent the scraper bar which would then cause imperfections in larger prints. It would therefore be wise to equip the studio with a variety of scraper bar lengths to fit the range of stones available.
Scraper bars should be stored near the press and upright, meaning bevel edge up. This will prevent the bevel and strap from getting damaged. Scraper bar sizes can be added to the edge to make them easier to find and select.
Tympan
This is a thin sheet that protects the print paper from the scraper bar. Grease is applied to the top surface and enables the matrix to travel through the press with ease. Some presses have a fixed tympan that should be hooked up to a weighted pulley system. These are often made from a metal sheet which can be extremely heavy so for safety reasons they need to be set up properly. Most printers have moved away from these, preferring to use a thin sheet of polycarbonate or glass epoxy (8–10mm thick) that can be removed from the press. There are several advantages to having a lightweight, clear and movable tympan:
Tympan material: Amari Plastics’ Makrolon clear, 2050 x 1250 x 1mm. These large sheets can be cut down into a range of sizes to accommodate a variety of stone sizes.
• The studio can stock a variety of sizes to fit a range of stone sizes. The tympan needs to be bigger than the matrix/paper being printed.
• They are lightweight, so easier to handle.
• If the material is clear, it is easier to set up your start and stop marks for printing. This is particularly useful when printing edge to edge on a stone.
• They are cheaper and easier to replace if they get damaged. A larger damaged tympan can always be used to make smaller ones.
Just like a scraper bar, imperfections and damage to the tympan will translate to the print. After use, tympans should be cleaned with a small amount of mineral spirits or alcohol. Alternatively, clean with a small amount of vegetable oil followed by a biodegradable citrus cleaner.
Plate backer
If printing a plate on a direct press it will need to be elevated so it is a similar height to that of a stone in order for the scraper bar to engage and apply the right amount of pressure. It needs to be strong enough to withstand the pressure and not buckle and warp over time. Suitable materials include:
• Lithographic stone
• Marble
• Slate
• Metal (1-inch-thick aluminium)
Ideally you want these to fit the printing bed as you can then accommodate a variety of plate sizes up to the maximum print size. This backer can be moved onto the press when printing a plate and be stored elsewhere in the studio when the backer is not required. On a shelf under a strong table or bench or on stone storage is an ideal place.
Slate plate backer from Berwyn Slate Quarry measuring 102 x 72 x 4cm.
Leather roller
Traditional leather rollers are used for the roll up ink, the non-drying black. After printing leather rollers don’t need to be cleaned like a composition roller; instead, they get scraped out weekly, depending on their use. After printing, cover the roller with a sheet of acetate as this will prevent dust from getting onto the roller. All rollers must always be kept on a stand or chocks, and never left to rest on a surface as this can damage the roller.
A leather roller rolled up in a shop mix. These rollers consist of a wooden core followed by a layer of felt then a leather layer with the nap on the outside.
The nap of the leather roller inks up an image better than a composition roller, capturing the most delicate details and creating a sharper image. They do take a lot more care than a composition roller but if looked after correctly, they last a lifetime. While leather rollers are available to buy, most printers manage to find them second-hand, which means they have already been conditioned and broken in.
Composition roller
When investing in a studio roller(s) pick a roller that will fit the size of your plates/stones and consider the largest area you can print. The roller’s roll-out area needs to be slightly bigger than your printing area. To work this out, measure the distance of one full rotation of the roller and measure the length of the roller excluding the handles.
A selection of composition rollers and brayers. All of these rollers are from Takach Press and have a shore of 35. The largest roller has a 21.5cm diameter and a face length of 52.5cm. The smaller roller is 12cm in diameter and has a face length of 32.5cm. The brayers’ widths are 0.6cm, 1.2cm, 2cm and 2.5cm.
Composition rollers can either be soft or hard and this determines the roller’s durometer or shore (hardness). A shore of 20 is soft, 35 is medium and 60 is hard. 35 is the standard for lithography. If investing in larger rollers it is important to consider where they were manufactured. Some rollers are very heavy, so this is something to consider especially if printing an edition. Takach Press in the USA makes the best lightweight rollers. They also manufacture their rollers with plastic handles, not metal. Metal handles will oxidise during use and tarnish your hands, making it harder to keep clean during editioning.
Acids
• Acetic acid
• Citric acid powder
• Nitric acid (in a safe break bottle)
• Phosphoric acid (80 per cent)
• Tannic acid
Chemicals and solvents
• Ammonium dichromate (egg albumen)
• Acetone
• Alcohol: butyl, denatured and isopropyl
• Asphaltum
• Deletion fluid for photoplates
• Mineral spirits (low odour thinners)
• Roller and blanket wash
• Plate developer
• Shellac: dewed and button
• Silicone (Dow Corning 732 waterless lithography)
• Turpentine
Drawing materials
• Charbonnel Coverflex Tusche
• Charbonnel High Grade Tusche
• Charbonnel Stick Tusche
• Charbonnel Liquid Litho Ink
• Korn’s Litho Pencils #1, #2, #3, #4, #5
• Korn’s Litho Crayons #1, #2, #3, #4, #5
• Korn’s Stick Tusche
• Korn’s Rubbing Crayon
• Trilobite Tusche
Gum, grease, oils
• Gum arabic 14 Baume
• Gum arabic powder
• Grease (tympan)
• Petroleum jelly or Vaseline
Inks and varnish
• Charbonnel’s Noir à Monter
• Graphic Chemical Crayon Black
• Graphic Chemical Shop Mix
• A range of colour hand printing inks
• Litho varnish #0, #3, #5, #8
Powders and grits
• Carborundum grit (coarse 80, medium 100–180, fine 220)
• French chalk or talc
• Magnesium carbonate
• Red oxide powder
• Toner powder
Printing matrix
• Lithographic stones of various sizes (Carrara marble or Pedrara onyx, these need hotter etches than the Bavarian limestone that is traditionally used for lithography)
• Ball-grained aluminium or zinc
• Positive photoplates
A hydraulic lift table is the easiest and safest way to move lithographic stones around the studio. If choosing to invest in one of these make sure its maximum height will reach the top of the press, stone storage and graining sink.
STUDIO EQUIPMENT
Abrasive containers
Acid dropper bottles
Acid and solvent cabinets
Air brush kit
Beakers of varying sizes for measuring etches and chemical solutions
Bins/solvent bins
Bowls
Brayers varying widths
Callipers
Cans to store semi-clean rags
Caulking gun (waterless lithography)
Composition rollers
Cutting mat
Drying rack
Exposure unit (photoplates)
Eye protection
Eye wash station
Files for edges of plates and stones
Fire extinguisher
First aid kit
Funnels
Gloves
Graining sink
Hair dryer
Heat gun or hot plate
Ink knives
Ink scraper
Ink slabs
Leather roller
Levigator
Lift table
Light box
Pipettes
Respirator
Scraper bars
Spatula
Straight edge
Tear bar
Tympan
STUDIO CONSUMABLES
Acetate (Diacel/acetate 75 microns)
Cheesecloth/muslin
Cotton buds
Gum tape
Hand cleaner
Masking tape
Newsprint
Opaque paper (to protect rollers)
Pencils
Pens: markers, biros, red opaque
pens
pH papers
Rags
Red conté crayon
Rhoplex N-580/
PVA (adhesive for
Chine-collé)
Sandpaper
Sponges
Tissue
Watercolour pencils
Webril wipes
Press kit
The press kit is an essential for any lithographer and contains all the small tools you need when working at the press. Ideally this press kit should live on or near the press so anyone using it has immediate access to the essentials:
• Pencil, Sharpie, ballpoint pen
• Red conté crayon, crayon holder
• Needle or pick (a tattoo needle is great for removing hairs/fibres from inking slabs and rollers)
• Scalpel and blades 10 and 10A
• Stanley knife
• Ink scraper and blades
• Ink knife (mini plastic ink knives are good for drawdowns)
• Bone folder
• Scissors
• Eraser, kneaded eraser
• pH papers
• Small touch-up brushes, brushes for spot etching
• Mini ruler (recommended: Shinwa hook rule) and square
• Cotton buds
• Registration pins
• Magnifying loupe
• Pencil sharpener
• Emery board
• Small piece of iron oxide for transferring registration marks to the matrix
• Invisible tape
Press kits are extremely useful and should be located on or next to every press in the studio. This ensures that the user has all of the essential tools to hand when working at the press, such as: fine touch-up brushes, rulers, pens and pencils, magnifying loupe, ink knives, needle picks, etc.
CONTROL OF SUBSTANCES HAZARDOUS TO HEALTH (COSHH)
When setting up your own studio or working in an open access print studio, it is important to consider the chemicals you are being exposed to. Where possible chemical use should be kept to a minimum, and simple steps can be carried out to limit exposure. Chemicals can enter the body in a number of ways: through ingestion, eye and skin contact, and inhalation.
Ingestion is when a chemical enters the body through swallowing. It is important to keep food out of the studio and use sealed drinks containers. Washing your hands before eating prevents toxins from being ingested.
PPE: a chemical respirator with ABEK1 P3 filters, apron, neoprene Ansell Scorpio gloves that protect against liquids and chemicals, ear defenders, and safety goggles.
Eye and skin contact can be avoided through the correct PPE. Goggles can protect eyes from any accidental chemical splashes and gloves will prevent these substances from entering the bloodstream. Solvents are used to break down grease particles, which also means they are capable of breaking down the skin’s natural oils and fats. Prolonged exposure to solvents can cause dermatitis and the bleaching of the skin’s natural pigments. Arms and legs can be protected simply by wearing long sleeves and trousers.
Inhalation is the hardest one to avoid as all chemicals are released into the atmosphere during their use, and don’t disappear just because you stop using them. The best way to combat this is by having efficient extraction and ventilation installed in the print studio. However, this is an expensive endeavour and a lot of print studios in the UK cannot afford this. It is therefore crucial for the printmakers using these spaces to equip themselves with the correct PPE and minimise exposure by implementing the following measures:
• Keep all solvent rags currently in use in a sealed metal tin. This reduces the toxic waste by reusing slightly soiled rags and prevents prolonged exposure to evaporating solvents by keeping them contained. Not only does this benefit the user of these chemicals but everyone using the space.
Press chemistry storage. This is a designated spot near the press to house all the everyday solvents/chemicals. Gum arabic, asphaltum, turpentine, blanket and roller wash, vegetable oil and a surface cleaner. Underneath all the corresponding rag tins are stored for ease of access, to minimise contamination and reduce chemical exposure.
The solvent cabinet is clearly labelled and includes a hazardous materials identification guide. This corresponds to the labels attached to all the chemicals used within the studio.
• Invest in the correct solvent bins and cabinets. These not only contain the fumes but if a solvent-soaked rag were to combust these specialised containers would control and contain the fire for longer. Acids and solvents should never be stored in the same cabinet. In terms of safety and awareness for studio users, COSHH forms on products provided by the suppliers should be accessible to all users. This is a lot of information for people to take in so to make it more accessible and easier to digest, hazardous material identification signs can be placed around the studio, especially on solvent cabinets to alert users to the potential risks.
Solvent label for shellac providing a quick reference to the chemical’s potential hazards and the correct PPE to be worn.
•


