18,49 €
Mehr erfahren.
- Herausgeber: Crowood
- Kategorie: Geisteswissenschaft
- Sprache: Englisch
This book explains how to take great shots of animals moving in water, land and air, as well as perhaps less obvious plant movement. The main topics covered include the functions of your camera, and the fundamentals of good photography; setting up and taking photos in the field, as well as using a flight tunnel, aquariam and microscope; details of the set-up, lighting, background, lens aperture, shutter speed and ISO setting are also covered. Finally, information is given on the natural history and biology of the organisms to give a greater appreciation of the photographs. This is essential reading for everyone who wants to capture exquisite shots of nature in action, and is filled with practical advice for the field and technical photographic instruction. Superbly illustrated with 186 colour photographs.
Das E-Book können Sie in Legimi-Apps oder einer beliebigen App lesen, die das folgende Format unterstützen:
Seitenzahl: 275
Veröffentlichungsjahr: 2013
Ähnliche


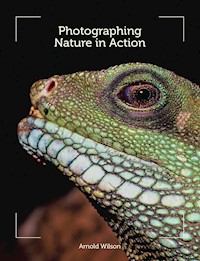
Photographing Nature in Action
Arnold Wilson
CROWOOD
First published in 2013 byThe Crowood Press LtdRamsbury, MarlboroughWiltshire SN8 2HR
www.crowood.com
© Arnold Wilson 2013
All rights reserved. No part of this publication may be reproduced or transmitted in any form or by any means, electronic or mechanical, including photocopy, recording, or any information storage and retrieval system, without permission in writing from the publishers.
British Library Cataloguing-in-Publication Data A catalogue record for this book is available from the British Library.
ISBN 978-1-84797-643-7
ACKNOWLEDGEMENTS
The production of a book is a combined effort involving many professional people, not just the Crowood team, but their various suppliers, each playing a vital role. – thank you all very much.
Nearer to home, I am greatly indebted to my good friend Dr Mike Kelly who sorted out several computer problems and helped with the cropping and sequencing of the images. Thank you, Mike.
My sincere thanks also to Julie Richardson who produced the excellent digital illustrations in the section on Colour in Chapter 3.
Finally, a very special thank you to my wife Margaret who encouraged and supported me throughout the project, converting my untidy much altered script into a beautifully presented manuscript, correcting a few errors en route. I would not have attempted to write the book without your support and encouragement. Thank you very much, Margaret.
Frontispiece: Puffin on Farne Island, Northumberland. Exposure 1/125 sec f8. ISO 100
CONTENTS
Introduction
1 Types of Camera
2 Equipment and Methods
3 Composition
4 Restless in Water
5 Animals Restless on Land
6 Plants Borne on the Wind
7 Flight in Birds
8 Insect Flight
Further Information
Index
Smooth newt. Exposure flash f11 50mm macro lens. ISO 100
Introduction
In this book for photographers of the natural world, I have concentrated on producing stimulating images of plants and animals in action. With a background in biology I have long been interested in photographing the natural world, including those microscopic plants and animals invisible to the unaided human eye.
At first sight restlessness and movement in the plant kingdom appear to be rather rare or almost non-existent. However, closer examination reveals that somewhere in their life cycle all plants have a motile phase, if they are to thrive and colonize new ground. Movement takes place when the male pollen is shed and transferred to the female ovary, or more obviously when fruits and seeds are dispersed away from the parent plant. Plant growth can also be considered a form of movement, as seen in a tree root system where the slow but powerful movement is sufficient to collapse a well-established stone wall.
Animals are restless in their search for food or a mate, reproducing and feeding their young, and where possible, colonizing new territories. We will analyse and explore the photography of animal movement in water, land and in the air.
We begin by looking across the range of cameras – compact, bridge and compact system cameras and the single lens reflex (SLR) camera. Some of the images in the book were captured on film but the majority were taken with modern digital cameras, including a compact Canon PowerShot G series bridge camera and a Sony alpha digital SLR camera.
In the micro-world many organisms living in both fresh water and marine environments exhibit interesting methods of movement, which are readily observed in close-up and particularly under the microscope. As many of the animals and plants photographed in later chapters are quite small (e.g. tiny barnacles, butterflies, moths, spiders and red campion capsules) we will concentrate on equipment which is particularly useful in close-up work.
The mere mention of close-up and macro photography is sufficient to frighten off many photographers, thinking that their digital compact camera is a non-starter for serious close-up work, while SLR owners assume close-up work requires lots of extra, expensive equipment and techniques which are too complicated for the average photographer to cope with. They would be wrong on both counts!
Over the years I have developed techniques to enable me to photograph particular moments, such as sycamore fruits spinning to the ground, while at a much higher magnification and using electronic flash I have captured tiny barnacles feeding. On a larger scale, but presenting other difficulties, to capture butterflies, moths, damsel flies and bumble bees in flight I have designed and built a flight tunnel which I use with very high-speed flash.
The photographs are accompanied by information about the natural history and biology of the organisms; this should add immeasurably to a greater appreciation of the photographs, and help you to work out how you wish to take your own photographs.
For each photograph details of the set-up, lighting, background, lens aperture, shutter speed and ISO setting have been provided, often with descriptions of conditions on the day, to give you a full appreciation of how they were taken.
This book was written for lovers of the natural world who are keen to capture the wonders they notice, both for their own pleasure and for that of others.
Fig. 1.0 Eagle owl. Flash 500mm lens f8 ISO 100
Chapter 1
TYPES OF CAMERA
Fig. 1.1 The Pentax Optio M40 – a typical point-and-shoot compact camera.
The literally hundreds of different makes and models of cameras available can fortunately be subdivided into four basic groups: point-and-shoot compacts, bridge cameras, compact systems cameras (CSCs) and single lens reflex cameras (SLRs). Each group is analyzed below, giving their basic characteristics, their advantages and disadvantages and how well suited they are to the types of photographs considered in this book.
DIGITAL POINT-AND-SHOOT COMPACTS
Although these cameras are often thought of as the simplest of the four groups, they do include highly complex electronics and could almost be thought of as miniature computers. The level of sophistication can be confusing for the first time buyer. The example discussed here is the Pentax Optio M40, a typical point-and-shoot digital compact camera, which produces very acceptable holiday and family photographs.
Camera Front
The lens
The lens is obviously the key component in any camera, collecting light from the scene being photographed and focusing it on the image sensor at the back of the camera. Lenses are complex, computer-designed, multi-element units made of glass or plastic, with most elements being symmetrical and spheric (part of a sphere).
The focal length of the lens is the distance between the lens and the image sensor when the lens is focused on distant objects (theoretically at infinity) and is marked on the rim of the lens.
Most digital compacts have a zoom lens, enabling you to produce a larger image from the same distance. The range of zoom focal lengths is also marked around the rim of the lens, with the Pentax Optio having a zoom range from 6.3mm to 18.9 resulting in a 3× magnification. (The 35mm equivalent is 36mm to 108mm).
As there is no control of the lens aperture (f numbers) on a point-and-shoot compact, this topic will be covered in the section on bridge cameras.
Autofocus (AF) assist
In dim light this feature produces a red beam of light that helps the camera to focus on the subject, but it is not available on all compact cameras.
Fig. 1.2 The shot of the squirrel was taken from the back door using the Pentax Optio M40 point-and-shoot digital compact camera. The Programme setting was used and the lens was fully extended. Programme 3× zoom. ISO 100
Fig. 1.3 A potted orchid sitting on the kitchen window sill and backlit by the late afternoon sun. Handheld and set to Programme. ISO 100
Flash window
The built-in flash unit has a fairly weak output (GN around 11 at ISO 100) being controlled by a button at the back of the camera. The flash guide number (GN) is an indication of the strength of the flash, where, for example, GN 11 indicates that if the lens aperture is set at f2 the flash will produce a well-exposed image at distances up to 11÷2=5.5m (18ft).
Optical viewfinder
An optical viewfinder is found on one or two digital compact cameras (notably Canon) and is useful for viewing the image in bright sunlight when the LCD screen image is difficult to see.
Fig. 1. 4 Close-up of an orchid flower with the lens on the macro setting. Tripod-mounted camera for stability. Programme macro setting. ISO 100
Self-timer lamp
When the self-timer is in operation, the picture is taken either ten seconds or two seconds after the shutter release button has been pressed. The self-timer lamp will blink red during the countdown, and on the Pentax M40 it is located next to the flash window.
Microphone
The microphone is positioned behind a tiny hole towards the bottom left of the lens.
Zoom control lever
The shutter release button is often surrounded by a spring lever, which operates the zoom lens, although on some cameras the zoom control is a separate rocker switch located in a convenient position elsewhere on the body. In the Pentax M40 it is on the back of the camera next to the LED screen. The digital zoom (4×), giving even greater magnification, is accessed from the same lever, but as it only selects the centre of an increasingly large image the quality is bound to suffer, so it is preferable not to use this unless no other option is available.
Camera Top Plate
Power switch
This switch turns the camera on and off.
Fig. 1.5 The business end of the camera showing some of the main settings.
Shutter-release button
This operates the shutter, allowing a measured amount of light to fall on the image sensor. Shutters are electronically controlled, with speeds ranging typically from 10sec to 1/1500sec (4sec to 1/2000sec in the Pentax M40). The advantage of this type of shutter (a between-the-lens leaf-blade shutter) is that flash can be used at all speeds. Half-pressing the button activates the autofocus mechanism and the light meter, in anticipation of making an exposure. This greatly shortens the shutter delay time, making it easier to obtain sharp, in-focus photographs of sporting activities and other fast-moving events.
Camera Back
Liquid crystal display (LCD) screen
The largest component on the camera back is the LCD screen. It consists of between 65,000 and more than 230,000 pixels (150,000 in the Pentax M40), and being live, it shows the image you are about to photograph. In playback mode the captured image is zoom button also displayed on the screen together with the shooting details. Screen sizes range play back image button from a modest 5cm (2in) to the larger 7.6cm 2/10 second delay (3in). As with television screens the screen size macro button is measured diagonally across the screen.
Fig. 1.6 The shot of the pigeons was taken from the back door using the little Pentax point-and-shoot compact. Selecting the Sports setting produced a shorter shutter speed, sufficient to almost freeze the wing movements. Sports setting. ISO 400
Four-switch button
The most obvious feature on the back (apart from the LCD screen) is a fairly large button containing four switches. One side-switch often controls the flash unit (On, Off, Auto) while another sets the close-up option. A third often selects a single-shot exposure, multiple shots in rapid succession, and a time-delay setting. In playback mode these switches have different functions.
Function button (Func Set)
The function button is in the centre of the large button and usually provides information on a wide range of settings including ISO, white balance, drive, flash compensation, metering, compression and image size. Each is on a default setting, but can be altered as required, and other options – scenes (SCN) are arranged round the top of a rotatable knob on most digital compacts. On the Pentax M40 the button marked Mode brings up fifteen small drawings (such as scenes), any of which can be selected using the two side buttons.
Auto and Programme settings
The first two settings, Auto and Programme, are extremely useful to anyone new to compact cameras, with the Auto setting selecting everything for you. This includes the lens aperture, shutter speed, focus, ISO setting and white balance. Most people use this setting regularly and are quite happy with the results.
The Programme setting is mainly automatic but also includes landscape and close-up settings, auto or manual focus and full control of the ISO level. These are the settings on the Pentax M40 compact, but they do vary a little from camera to camera.
Also included are Portrait, Sport, Pets, Kids and Face Recognition options, automatically selecting for each setting the appropriate lens aperture, shutter speed, ISO setting and overall colour where appropriate (such as adjusting for natural skin tone on the portrait setting). Pressing the OK button on the Pentax will confirm the settings selected, rather like the central Func Set on many other cameras.
Menu button (recording mode)
On the Pentax M40 the Menu button allows you to select many of the recording parameters including number of recorded pixels, quality (three levels), focus area (three settings) and sensitivity (auto or any ISO setting), white balance (auto and five settings) and image quality level (three settings).
Recording a video clip
The recording menu suggests that 640 pixels, at 30 frames per second (fps) produces the best quality images. Automatic white balance (AWB) is standard and the flash is switched off. Using the Pentax M40 and pressing the Mode button brings up the fifteen picture options. Click onto the image of a professional-looking movie camera and save it by pressing the OK button. Set the zoom lens appropriate to the composition of the image (only the digital zoom can be used during filming) and press the shutter release button. Press it again to stop the filming.
Playback mode
On the Pentax M40 switching from record to playback by pressing the triangular-marked button brings up the images on the LCD screen, while activating the zoom lever or rocker switch enlarges them, allowing closer inspection for overall quality. Pressing the central button shows the shooting parameters on the screen, including the ISO setting, exposure and film size, plus a histogram indicating whether the image has been correctly exposed.
To view and playback videos, locate the beginning by using the two side buttons (marked Flash and Close-up on the Pentax M40) and press the top button (showing the shutter time delay icon). Stop the moving image by pressing the bottom button (marked Mode).
To erase an image it is always necessary to press two buttons, with the dustbin button providing a choice of Erase or Cancel, while pressing the function or OK button completes the procedure.
CAMERA BASE
Located in the camera base of the Pentax M40 compact camera is a lithium-ion (Li-ion) battery which, as cameras are becoming smaller and require more power, have replaced the original rechargeable AA nickel metal hydride (Ni MH) batteries which took up too much space. Battery capacity is sufficient to power around 200 images, depending on how often the flash and the LCD screen are used.
Fig. 1.7 The camera base with the battery compartment open, showing the Li-ion battery and the SD card.
Secure Digital (SD) memory card
This small but vitally important card, located next to the battery, holds all the images you have taken with your camera. It replaces the storage element of film and can be used an almost infinite number of times. SD cards are available in different capacities ranging from 2GB (gigabytes) to 32GB. The memory card receives its electronic images from the image sensor via the drive engine (buffer). The image sensor is located at the inside back of the camera, where the film is located in a film camera. The number of mega-pixels in the camera’s specification indicates how many million pixels (light receptor units) are located on the image sensor.
Fig. 1.8 The camera base showing three sockets and the closed memory card and battery compartment.
Three sockets
Along the base of the Pentax M40 are three important sockets.
The first is a tiny PC/AV socket which, via the appropriate cable, connects the camera to a computer (default setting), or by selecting Pickbridge it will link to a compatible printer. The same socket is also used to connect the camera to a television using the AV cable supplied.
The second is a tripod socket with a universal thread, allowing any tripod head or ball and socket to be screwed into it.
Finally, at the end of the camera base is a neatly protected DC socket, which via a mains transformer will provide the camera with a low voltage (around 4 volts) direct current. This unit is not supplied with the camera.
Making a Start
Perhaps surprisingly the information provided above has covered only a tiny fraction of the information provided in the 187-page Pentax Optio M40 Operating manual. To get started, often the best way is to let the camera look after everything. Simply switch on the camera, line up the image on the LCD screen and press the shutter button. You can then move on to the Programme setting which is still quite straightforward but gives more choice in the settings, such as the ISO level, flash control and possibly a choice of scenes depending on the model of camera.
THE BRIDGE CAMERA
The typical point-and-shoot digital compact camera accounts for about 70 per cent of the digital camera market. However, there is a more technically and optically advanced group of cameras which help to fill the gap between the compact and the compact systems cameras and the much larger digital single-lens reflex cameras. These are known as the bridge cameras, such as the Nikon P100, Canon S1000, Panasonic FZ and the Canon G12. As bridge cameras are generally larger than compacts they have a greater surface area with space for more and larger dials and knobs. This allows useful information to be accessed both quickly and easily.
The Canon PowerShot G10 (now replaced by G15) will be covered here, based on my own experience over some time, including topics such as lens apertures (f numbers), memory cards and image sensors, which apply to all cameras.
Camera Top
The top of the camera shows obvious differences from the digital compact discussed earlier.
Fig. 1.9 The Canon camera top and front showing the main controls and settings.
Auto settings
Near to the centre is a large dial containing several letters including AUTO, P, Tv, Av and M. These letters are used on all Canon cameras, while the rest of the world seems to follow the more universal lettering system of AUTO PASM. As mentioned earlier, the AUTO setting is used by many people who want a simple point-and-shoot system, allowing the camera to look after almost everything. More useful is the programme (P) mode, where the ISO setting, flash output and exposure adjustment are controlled by the photographer, while the camera takes care of the focusing and exposure.
Aperture and Shutter Priority
Important additions are the priority settings. For aperture priority (A), you select the aperture (and therefore the depth of field), leaving the camera’s exposure meter to determine the shutter speed. This is very useful in landscape photography and close-up work, where control of the depth of field is important, and in macro work where the lens can be stopped down to f22.
Fig. 1.10 This shot was taken on the wide-angle default setting in the macro mode. The lens was approximately one centimetre above the peacock eye feather producing an image measuring 4×3cm 1/8 sec f8 macro setting. ISO 80
In shutter priority (S) you select the shutter speed, leaving the camera’s metering system to come up with the correct aperture and exposure. Shutter priority is useful when photographing moving subjects such as people, cars, birds or animals.
In the manual mode (M) you select the aperture and the shutter speed independently of each other; this is mainly used by very experienced photographers.
Selecting the special scenes (SCN) setting on the dials reveals a list of twenty different scenarios, with the camera’s electronics computing the most appropriate settings, as described earlier in this chapter.
Hot shoe significance
The flash hot shoe, quite rare in digital compact cameras, allows a much more powerful flash unit to be attached and controlled by the camera in addition to the built-in flash.
ISO settings
Finally, at the right side is the ISO dial, permitting a quick and easy change of ISO setting without having to scroll through the screen menu. I find this an extremely useful feature when, for example, the exposure for a particular shot is too long for a handheld camera, but by flicking the dial to a higher ISO number, the shutter speed can be halved or even quartered, reducing the exposure from, say, an unusable 1/15 sec to a more useful 1/30 or 1/60 sec.
The Lens
Non-interchangeable lenses
Bridge cameras are more expensive than their digital compact counterparts (but cheaper than SLRs) although the zoom lens is not interchangeable. Zoom lenses range from a modest 3× right up to a jaw-dropping 36× in the Nikon P500. In the end it comes down to personal preference: for some photographers these cameras are too bulky for day-to-day use, particularly when on holiday, while for others they are ideal.
Fig. 1.11 The back of the camera is dominated by a large LCD screen with a range of control knobs and buttons at the far end. Above the screen is the eye-piece for the optical viewfinder. The functions of the buttons to the right are fairly obvious and almost universal, with the exception of the grooved wheel surrounding the 4-switch buttons, which sets the lens aperture.
The larger LCD screen on bridge cameras makes it easier to see and to compose the image, although most have a very efficient eye-level viewfinder, making some of these cameras resemble small SLRs. A few professional photographers use a bridge camera such as the Canon G12 as a back-up for their digital SLRs.
Lens aperture and f numbers
Around the rim of the lens in addition to the zoom range is a second group of figures (ignore the number 1 which is not relevant to the present discussion) representing the ‘speed’ of the lens (the maximum amount of light the lens will transmit at the extremes of the zoom range). Referred to as the f number of the lens aperture, a small number (for example f2.8) will allow a lot of light through, whereas a large number (such as f22) transmits only a tiny amount of light. For example, lens settings of f1.4 and f2.8 are referred to as ‘fast’ lenses transmitting a lot of light, while f16 and f22 are ‘slow’ lenses transmitting very little light.
The lens aperture is controlled by the iris diaphragm which is similar in function to the iris of the human eye. It controls the size of the aperture (pupil) according to the strength of the light entering the eye.
Fig. 1.12 As the lens aperture decreases the f number increases, with each increase in f number halving the amount of light passing through the lens. The f number and shutter speed below produces exactly the same exposure, right across the diagram, so that 1/500sec at f2.8 is the same exposure as 1/8sec at f22.
THE F NUMBER
The f number of the lens is calculated by dividing the diameter of the lens aperture into the focal length of the lens. For example, a standard 50mm focal length lens with a lens diameter of 28mm will have an f number of 50÷28 =1.8.
Depth of field
Stopping down the lens (making the lens aperture smaller) increases the depth of field – that is, how much of the photograph is acceptably sharp in front of and behind the point of focus; this is approximately one third of the distance in front of the point of focus and two thirds beyond the point of focus. Depth of field is particularly important in landscape photography where most photographers prefer everything from nearby to infinity to be in sharp focus, and in close-up work where the depth of field is extremely small, often measured in millimetres. The downside is that longer exposures are required, hence the popularity of tripods in landscape and close-up photography.
Fig. 1.13 When working close, the depth of field is very shallow. In this image of the lily flower the macro lens was wide open (f2.8) resulting in a shallow depth of field, but highlighting the stamen heads and the stigma at the expense of the petals. 1/250sec f2.8. ISO 100
Fig. 1.14 With the lens stopped down to f22 everything including complete stamens, the pistil and the petals of the lily are in sharp focus. 1/4sec f22. ISO 100
Memory Cards
An item which is common to all digital cameras, from the humblest point-and-shoot compact to the mighty digital SLR camera, is the memory card for storage of images. After the photograph has been taken the electronic information from the image sensor is transferred via the camera’s buffer into the memory card. There are several sizes and shapes of memory cards available including compact flash (CF), secure digital (SD), IBM Microdrive and the memory stick (MS) card. Higher speed cards work more swiftly, allowing a greater number of pictures to be taken quickly, with less time lag between pressing the shutter button and the information being processed to the memory card (write and re-write speeds).
The SD card is now the most common type of memory card used in cameras today. The exceptions are some of the top of the range SLRs such as Canon and Nikon which use the compact flash (CF) card and the Sony alpha SLRs which stick to the MS card, although there is the option to use CF cards. However, many of the DSLR cameras, particularly the entrance level and mid-priced cameras are now using the ubiquitous SD card.
SDHC cards, although physically the same size as SD cards, are designed differently internally and can only be used with SDHC compatible cameras. There are four main types from Class 2 (C2), C4, C6 and C10, with the latter being the fastest and most expensive.
The development of Transferjet gives a glimpse of the future. Basically it is a wireless technology, developed by Sony, that allows you to transfer images from Transferjet enabled cameras to Transferjet enabled PC, TVs and even other cameras. It does not mean the end of the memory card because a Transferjet Memory Stick is required as an integral part of the process – however, it could mean the end of cables and card readers.
Image Sensor
The lens, diaphragm and shutter have all developed fairly slowly over many years, whereas the image sensor and its associated electronic circuitry has witnessed explosive research and development since the first digital SLR camera, containing a mere 1.3 megapixels, became commercially available in 1991, at the eye-watering price of £15,000.
The majority of DSLR cameras use a CCD (charge-coupled device) or a CMOS (complementary metal oxide semiconductor) image sensor. A typical compact digital camera might well have a 1/2.5in sensor (these imperial units date back to an early system used in the vidicon tubes of TV cameras). Suffice to say, a 1/2.5in sensor measures 5.8 × 4.3mm – smaller than a child’s little fingernail. Yet this tiny rectangular sensor can incorporate up to a staggering 15+ million minute pixels (PICture ELements) arranged in a regular mosaic, each one responding to light and generating a tiny electrical charge. Many top of the range DSLRs feature sensors carrying 25+ million pixels, while 645 SLRs boast up to a whopping 40 million pixels.
Much of the quality of the DSLR camera can be attributed to the area of the image sensor, which comes in sizes ranging from 17.3 × 13mm (Micro Four-Thirds system: Olympus and Panasonic), to 22.2 × 14.8mm (APS-C, Canon) to 28.7 × 19mm (APS-H, Canon), to full frame 36 × 24mm (Nikon, Canon).
Fig. 1.15 The image sensor in digital cameras varies in size from the tiny 1/2.5in (5.8×4.3mm) sensor in most digital compacts to the 35mm full frame (36×24mm) sensor in the top quality professional SLR cameras.
Image Sensor Design
Looking in more detail at the image sensor, each pixel is covered with a red, green or blue filter (the same three colours which make up the colour TV picture), with twice as many greens to correspond to the human eye’s greater sensitivity to green light. The electronic information produced by the sensor is handled by the camera’s buffer before being passed on to the memory card.
Fig. 1.16 The most common type of colour filter arrangement in an image sensor is the Bayer pattern mosaic, where there are twice as many green pixels as there are red and blue.
Image Sensor Sensitivity (ISO settings)
The sensitivity of the image sensor (and film) to light is referred to as its ‘speed’ or ISO (International Standards Organization) rating. At a low setting (ISO 80) the sensor has reduced sensitivity to light but produces very clear, detailed images, whereas high ISO settings tend to have the opposite effect. Doubling the ISO number doubles the sensor’s sensitivity to light – equivalent to one stop on the camera lens or doubling the shutter speed.
A high ISO setting often introduces some noise (non-signal impulses), resulting in general blotchiness and lack of detail. This also shows up as tiny multicoloured speckles, particularly in areas of dark tone. Over the years the ISO speed has increased quite dramatically, with 6,400 and above being quite common. However there is a significant difference in noise levels between that produced by the tiny image sensors on many compact cameras (where any speed above ISO 400–800 is not usually recommended) and the large APS-C and whole frame sensors where useable settings up to ISO 3,200–6,400 are not uncommon. At the extreme ISO 102,400 setting photographs can be taken in almost pitch darkness.
JPEG AND RAW CHARACTERISTICS
To keep the image data (that is, the film size) reasonably small, allowing more images to be stored on the memory card, the information can be compressed by the camera’s processor, resulting in a JPEG (Joint Photographic Expert’s Group) file. The camera’s processor removes areas of similar colour and detail in the image, thereby reducing the file size to a JPEG. JPEGs come in varying degrees of compression, with the least compressed producing the highest quality images. When you select the JPEG setting, the camera will automatically start making a series of adjustments including sharpness, contrast and colour saturation so that the images are ready to be printed with a minimum or no editing.
RAW files, as the name suggests, are completely unmanipulated, having none of the adjustments that are applied to JPEG files. All professionals shoot RAW because RAW files contain a vast amount of information (up to 8× more than some JPEG files), allowing the photographer to manage many characteristics including exposure control, colour balance, saturation contrast, highlight and shadow detail and full control of the white balance (Kelvin temperature). Therefore, the final results can be very impressive indeed.
If you are undecided between shooting JPEGs or RAW many cameras allow you to shoot both simultaneously.
COMPACT SYSTEM CAMERAS (CSCS)
These cameras were developed to appeal to photographers who wanted to upgrade from a compact camera but were not too happy with the bulk and weight of a typical SLR camera. They share much of the potential of an SLR but have smaller lighter bodies and smaller interchangeable lenses.
They differ from typical SLRs, having no reflex mirror or pentaprism, and not having a reflex mirror allows the bodies to be narrow from back to front. As the lenses do not have to cover a full frame image sensor, more compact lenses have been developed – the micro four-thirds lens fitting of Panasonic and Olympus being fairly typical, and other manufacturers such as Nikon, Sony, Ricoh, Samsung and Pentax have all developed compact interchangeable-lenses cameras, each with its own lens fitting.
Fig. 1.17 The most obvious feature of the Panasonic Lumix and most CSC cameras is the compactness of the body and lens, and the flat top normally occupied by the pentaprism in SLR cameras. It is also quite light but does have a decent handgrip making it very convenient to use.
Characteristics
Autofocus
Without using a mirror, autofocus is achieved using a contrast-detect system which, as the name suggests, works well when the image being photographed is quite contrasty. However, the system is quite different and probably not as effective as the advanced phase auto-focus system on DSLRs.
Viewfinder
Having dispensed with the reflex mirror and bulky pentaprism, compact system cameras have either a separate optical viewfinder or an electronic viewfinder (EVF). Many photographers still prefer the traditional mirror/pentaprism system, although I am happy with the EVF on my Panasonic G1 camera.
Fig. 1.18 The camera top has the usual array of self-explanatory knobs and buttons with the eye-piece of the electronic viewfinder (EVF) a prominent feature. When the eye is brought up to the viewfinder it transfers the LCD screen image to the viewfinder. The hinged LCD screen is useful when taking high angle and ground level photographs.
Frames-per-second (fps) shooting rate
Because these cameras lack a moving mirror system, they are better able to photograph fast-moving subjects by shooting up to 10 fps which gives a much better chance of capturing that often elusive image of the fast moving deer or moment of touch-down of a water bird.
Lens crop factor
As compact system cameras have interchangeable lenses we meet for the first time the term ‘crop factor’.


