Erhalten Sie Zugang zu diesem und mehr als 300000 Büchern ab EUR 5,99 monatlich.
- Herausgeber: Spellmount
- Kategorie: Geisteswissenschaft
- Sprache: Englisch
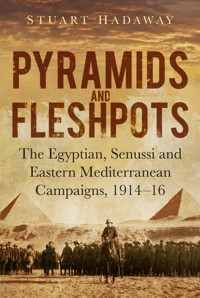
Pyramids and Fleshpots tells the true story of the experiences and achievements of British military personnel serving in Egypt in the First World War fighting a determined enemy to protect the Suez Canal – the lifeline of the Empire. The popular impression that the campaigns were merely a sideshow, with troops enjoying a holiday among the pyramids and the 'fleshpots' of Cairo, is far removed from the truth. Troops faced appalling heat, abrasive sand, poor rations and water shortages. In the desolation of the Western Desert they fought the Senussi, an Islamic sect supported by the Ottomans, in a reversal of Lawrence's later work with the Arabs, while in the Sinai Desert they countered German-backed moves to dominate this strategically important area. Meanwhile, the Royal Navy fought to keep the supply lines to Gallipoli open, and keep men and materiel flowing to France from India, Australia and New Zealand. These arduous and hard-fought land, sea and air campaigns in Egypt, Libya and the Eastern Mediterranean are comprehensively covered by Stuart Hadaway in this groundbreaking analysis of an often overlooked theatre of war so vital to Britain's empire.
Sie lesen das E-Book in den Legimi-Apps auf:
Seitenzahl: 518
Veröffentlichungsjahr: 2014
Das E-Book (TTS) können Sie hören im Abo „Legimi Premium” in Legimi-Apps auf:
Ähnliche


To the memory of David Moscato
1951–2013
Who taught me all I know about horses, and much else besides.
ACKNOWLEDGEMENTS
I would like to thank many people for their help while researching and writing this book. On the home front, I’d particularly like to acknowledge my debt to Nina for her constant support, understanding, advice and patience, and to my parents for their support. A special thank you goes to Marnie for her help on SW duties.
More professionally, as always David Buttery has been a great help, and I’d especially like to thank him for his work on the production of the excellent maps. My interest in this campaign was first sparked many years ago while working for the Museum of the Worcestershire Soldier (to which I recommend all readers as being well worth a visit), and I’d like to thank Colonel Stamford Cartwright MBE for his (and his regiment’s) many kindnesses and support then and since. My bibliography would have been considerably thinner without the help of Chris Kellas, Caroline Chapman, David Kivlehan, and the staff of the Prince Consort’s Library at Aldershot, and I owe them all my thanks. And, as ever, the staff at the Imperial War Museum have been very helpful.
For the production of this work, I’d like to thank (apart from Dave, again, for the maps, despite being busy with his own book) all of the staff at The History Press, particularly Jo de Vries, Sophie Bradshaw, Rebecca Newton and Paul Baillie Lane. I’d also like to thank the Trustees of the QOWH for their permission in the reproduction of some of the illustrations, and Lee Barton for his technical assistance with scanning.
CONTENTS
Title
Dedication
Acknowledgements
Foreword
Note on Names, Quotes, Terminology and Foot/End Notes
Map 1: The Eastern Mediterranean Theatre
Map 2: Assault on the Suez Canal, February 1915
Map 3: The Sinai Desert
Map 4: The Western Desert
Map 5: The Battle ofRomani, August 1916
Map 6: The Action ofRafah, January 1917
Prologue: Last Stand at Katia
1 Egypt in 1914
2 Opening Shots
3 Pyramids and Fleshpots
4 The Battle of the Suez Canal, February 1915
5 Egypt Base, 1915
6 Sideshows
7 The Canal Defence Zone, 1916
8 The Senussi War
9 Retaking the Western Desert
10 The War at Sea
11 The Egyptian Expeditionary Force
12 The Battle of Romani
13 Advance to Palestine
Epilogue: Egypt 1917–18
Appendix A: British Mediterranean Fleet, 1914
Appendix B: Note on the Organisation ofBritish and Imperial Forces
Appendix C: Canal Defences Order ofBattle, February 1915
Appendix D: British Flying Services Order ofBattle, December 1915
Appendix E: Cattle Rustlers ofthe Aegean
Appendix F: Egyptian Expeditionary Force Order ofBattle, April 1916
Appendix G: Imperial Strategic Reserve, 1916
Appendix H: Battle ofRomani Orders ofBattle, August 1916
Appendix I: Prisoners ofWar in Turkey
Glossary
Bibliography
Plates
Copyright
FOREWORD
I was delighted to be asked to write a brief foreword to this book, Pyramids and Fleshpots, as much of the content mirrors the experiences of officers and soldiers from my former regiment, The Queen’s Own Warwickshire and Worcestershire Yeomanry which, prior to amalgamation in 1956, served in the First World War, in the Middle East as separate county yeomanry regiments, The Warwickshire Yeomanry and The Queen’s Own Worcestershire Hussars. Their movements, over the four years of warfare and policing duties, can be traced in many of the chapters throughout this book.
Over the next four or five years, as we approach the one hundredth anniversary of The Great War, the British public will learn a great deal about the First World War through exposure to images and stories in the media. These images are most likely to feature the Western Front in France and Belgium as it dominated much of the news at the time.
However, on other fronts, namely Gallipoli and the Middle East, the British and Dominion Troops were fighting a very formidable enemy in the shape of the soldiers of the Ottoman Empire.
Into these theatres of war stepped cavalry and infantry regiments from Britain and overseas, many of these units formed from Territorial or Reserve soldiers who had no experience of fighting in battle except for those, relatively few in number, who volunteered to serve with the Imperial Yeomanry during the Boer War.
These untried and untested soldiers would play a crucial role at Gallipoli, being forced to trade their sabres and horses for bayonets and infantry backpacks and experiencing the horrors of trench warfare in the blazing heat of the peninsula. When the campaign in Gallipoli was brought to an end the much depleted regiments were withdrawn to Egypt to regroup, re-equip and take their places in the order of battle in the Sinai and Palestinian campaigns as part of the Egyptian Expeditionary Force (EEF). They would learn the tactics of desert warfare, some would learn to ride camels rather than the familiar mounts they had ridden at home and many would experience for the first time the intoxicating atmosphere of the Middle East, many taking a step outside their country, or indeed their county for the first time.
This book paints a fascinating and detailed picture of the preparations for the protection of the Suez Canal and how critical it was to the Allied war effort to maintain the flow of traffic through the Canal to ensure the passage of goods to and from the Empire.
This book would be a first-class read for those who make a study of the war in the Middle East; however, it also provides a fascinating glimpse, for the casual, interested reader, at the life of the soldier from Britain and the Empire, as well as Ottoman Turkey, who served in this theatre for four long, hot, dusty years, where the reliance was on your comrades and your horse.
Colonel (Ret’d) Stamford J. Cartwright MBE TD
Chairman Worcestershire Yeomanry Museum Trust
January 2014
NOTE ON NAMES, QUOTES, TERMINOLOGY AND FOOT/ END NOTES
This book principally concerns two empires, each of which contained numerous nationalities and ethnic groups. As a rule, I have kept to the terms ‘Ottoman’ and ‘British’ to refer to the political entities of the opposing forces. The forces of the British Empire and its Allies in Egypt are generally referred to as ‘the British’, although they also included (among others) Australians, New Zealanders and Indians. Where particular nationalities were the majority of the forces involved, due credit has been given. The Ottoman Army mainly consisted of Turkish troops from Anatolia, although it also included Arab and Bedouin forces. Again, the term ‘Ottoman’ has been used as a cover-all, with particular sub-contingents credited where appropriate.
I have taken a few liberties with the official British Army nomenclature of First World War combats. The official system says that any engagement that involved less than a full division of British troops (roughly 18,000 men) was an ‘Affair’. If it involved one or more complete divisions, it was an ‘Action’, and one or more complete army corps (each about 38,000–40,000 men) upgraded the fight to being a full ‘Battle’. This system was drawn up by the Army Council in 1920 to standardise the terminology in the official histories and for battle honours, and was very much based on the standards of the Western Front. It was recognised that it was less than fair on some of the peripheral campaigns, where fewer troops were involved, and indeed by these standards the only true ‘Battle’ in the Egyptian theatre between 1914 and 1916 was Romani. However, considering that the defence of the Suez Canal in February 1915 involved, directly or as reserves, the whole of the British forces in Egypt, and took place over a front of 100 miles, I have unofficially promoted this to the status of ‘Battle’, too.
A certain amount of liberty has also been taken with Arab or Ottoman names, be they places or people. For places, I have largely stuck to the names used at the time (i.e. Constantinople instead of Istanbul and Cairo for al-Qa¯hirah) or the most common spelling. Arabic names get recorded in an entertainingly varied number of ways in Western sources, but I have taken the most common and, except in direct quotes, stuck with that. For the names of persons, given the difficulties of Anglicising Arab or Ottoman words, I have used my own judgement on which is the most acceptable translation.
It should also be noted that some of the words used in quotes are very much ‘of their time’ when it comes to opinions regarding the locals in Egypt. These have been left in as reflecting the honest views of those present, even if they are utterly unacceptable today.
I have used both footnotes and endnotes. As a rule, footnotes (at the bottom of the page) give additional information that is directly relevant to the matter at hand, but would clog up the text too much, i.e. the units that constituted various columns or forces. Generally I only do this for temporary formations put together for a particular action or campaign, and for the composition of permanent formations I recommend that you consult the Orders of Battles in the Appendices.
Endnotes are mostly references, citing where certain information came from or recommending where you can find out more. However, some do also give further information that is (to my mind) interesting, but not really vital to the overall story.
Map 1: The Eastern Mediterranean Theatre
Map 2: Assault on the Suez Canal, February 1915
Map 3: The Sinai Desert
Map 4: The Western Desert
Map 5: The Battle of Romani, August 1916
Map 6: The Action of Rafah, January 1917
PROLOGUE
LAST STAND AT KATIA
For Arthur Dabbs, a 28-year-old bank clerk from Birmingham, it was all over. His war, and probably everything else, was going to end at a desolate oasis in the Sinai Desert, 30 miles east of the Suez Canal, on this Easter Sunday, 23 April 1916. Outnumbered and surrounded, his troop of the Queen’s Own Worcestershire Hussars (Yeomanry) had ridden all night, and then fought most of the day under the blazing sun, burrowing into the hot sand for cover. Now, at 3 p.m., with ammunition and water all but gone and no hope of help, the end had come:
Suddenly I saw the right flank beginning to fall back and saw that the Turks were in amongst them. Then the Turks opposite us leapt up shouting ‘Allah, Allah’ and charged us. I stood up and fixed my bayonet and waited for the end, hoping it would come quickly. I felt miserable to think I had to die, especially in a hole in the desert like this and I wondered how my people would get to know of it and who would be alive to write and tell them. I wondered which of the advancing Turks would kill me and if I should be able to kill one or two before I was done in. We had almost stopped firing, and the Turks too and it was strangely quiet except for their shouting.
Then the colonel said ‘It’s no good, boys, throw down your rifles.’ Very gladly I obeyed though feeling very cheap and very much conquered as I held up my hands. I was astonished to see that the Turks who came up were holding out their hands and saying ‘Ingleesi good’.1
Corporal Dabbs would be one of the ‘lucky’ ones, experiencing two and a half years as a prisoner of war in Turkey, kept on short rations and worked hard to build roads and railways. Many of his comrades would be left behind in the desert at Katia, and more still would die as a result of the harsh conditions of their captivity (see Appendix I).
Their sacrifice stalled an attempt by German-led Ottoman Turkish forces to establish positions where their artillery could dominate the Suez Canal. This sliver of water, connecting the Mediterranean to the Gulf of Suez and the Indian Ocean beyond, was Britain’s lifeline to its Dominions and Colonies in India, the Far East and the Pacific. Millions of tons of vital war supplies and raw materials flowed through it to feed Britain, the Empire’s industrial powerhouse, and tens of thousands of men to feed the insatiable demands of the Western Front. At the same time, the trade goods that helped fund the war effort flowed out to the Empire and neutral countries.
While these supplies could be sent around the southern tip of Africa, such a route would add days and weeks to the journey. Throughout the war, Britain suffered an acute shortage of shipping and walked a fine tightrope of having just enough ships carrying just enough supplies, arriving just in time. To divert Far Eastern traffic around the Cape would be a serious disruption.
The Suez Canal had been of increasing importance since it was first cut in the 1860s. After initial British disinterest, a growing realisation of its significance had led to the purchase of a controlling interest in the Canal in 1878, and an occupation of Egypt in 1882, even though the country remained nominally part of the Ottoman Empire. Allies for most of the nineteenth century, the early twentieth century saw friction between the two empires grow, coming, with the rest of the Europe, to a crisis point in the summer of 1914. The Ottomans held off against the demands of their German allies for as long as possible, but finally, in November 1914, war was declared. To preserve the safety of the Suez Canal, Britain immediately declared a protectorate over Egypt and would spend the next five years in fear of nationalist and Islamic unrest and revolt within the country. Externally, the great fear was of an Ottoman strike against the Canal.
The first such strike came in February 1915 and the resulting battle was fought and won on the banks of the Canal itself. Any attempts to prevent future attacks by dominating the Sinai Desert were forestalled by the Entente campaign in the Dardanelles, which sucked in all of the available troops and resources of both sides. However, when this misadventure finally ended in the first days of 1916, protection of the Canal again became the centre of attention. Control of the Sinai Peninsula now became the priority.
To move even a few divisions into the desert would require significant logistical effort. Water, in particular, would be a problem, and while railways and water pipelines were constructed from Kantara (El Qantarah) stretching out into the desert, water holes and oases along the way would also need to be exploited. In April 1916 parties of Royal Engineers, with strong cavalry escorts, began to locate and develop such sites.
Of particular importance were the wells around Katia (Qatia). Numerous wells covered a large area, and several of the main tracks across the desert met there. Throughout April, this area was swept by the Yeomanry units of the 5th Mounted Brigade, under Brigadier Edgar Wiggin. Consisting of the Queen’s Own Worcestershire Hussars (QOWH), Royal Gloucestershire Hussars (RGH), and the Warwickshire Yeomanry (each of around 500 men), the brigade had served on foot at Gallipoli, and since January had been recovering in Egypt and readjusting to mounted operations. Through April they swept the Katia area, tangling on several occasions with long-range patrols of Ottomans and their Bedouin allies.2
By mid-April, the brigade had settled into a north–south line to cover the work of the Royal Engineers. Furthest north, the RGH was concentrated at Romani, where the railway, already well underway, was expected to run, with a single squadron of around 150 men detached to Katia to the south, in the centre of the line. Furthest south were the Warwickshires, with ‘C’ Squadron of QOWH, grouped around Hamisah. In front of the line, at Oghratina, 7 miles east of Katia, were the two remaining squadrons of the QOWH.3
On 19 April 1916 Brigadier Wiggin, then at Hamisah, received intelligence from patrols of the Royal Flying Corps (RFC) that a force of 200–300 Ottomans had been spotted at Mageibra, about 10 miles south of his position.4 After conferring with his own commanding officer, he decided to make a reconnaissance in force, with the hope of catching and engaging the enemy.5 On 22 April he led his entire force (two squadrons of Warwickshires and one of QOWH) in a night march to come upon the reported camp at dawn. His decision to take his whole force was later criticised by many of his men, although there is perhaps more than a touch of hindsight in these opinions. In the event, while only halfway there, Wiggin’s scouts reported back to say that the camp at Mageibra was deserted. Wiggin decided to push on, but when he reached the camp at dawn on Sunday 23 April the campsite was indeed empty except for half a dozen Ottoman orderlies. These were captured, but more interesting was the clear evidence that a body of several hundred enemy troops had been there only the night before.
In fact, this Ottoman force was only one of several busy in the area that morning, albeit probably the smallest. Earlier that month a force of some 3,700 infantry, 1,000 irregular (Arab) camel troops, six artillery pieces and four machine guns had set out from Palestine under the command of the German Colonel Kress von Kressenstein. Their mission was to roll back the British forces in the Sinai, pinning them back behind the Canal to enable larger Ottoman forces (then being prepared) to follow up and establish strong points from where artillery could dominate the Canal, effectively cutting it. A secondary objective was to create such a threat that the movement to France of troops being withdrawn from Gallipoli would be stopped.
They crossed the Sinai Desert by a route judged by the British as impassable, and had arrived within a few miles of the British outposts without detection, despite warnings by the RFC that forces were gathering.6 In the south, a small force had camped at Mageibra, but moved on the evening before Wiggin’s arrival. This contingent would get the closest to the Canal, attacking a redoubt held by a single company of the 5th Royal Scots at Dueidar just after dawn. Despite artillery support, their repeated attacks failed, and the Ottomans were forced to withdraw in the early afternoon when reinforcements from the Australian Light Horse arrived.
The other, much larger, Ottoman forces met with greater success. In the early hours of 23 April 1916 they converged upon Oghratina, where ‘A’ and ‘D’ Squadrons of the QOWH, under Major Williams-Thomas, were protecting their party of Royal Engineers (RE). A thick fog, caused by moisture rolling in from the sea during the night and evaporating as the dawn broke, had covered the area around the oasis. Although three patrols were sent out to maintain a watch in the dawn, visibility remained minimal. Two patrols returned and reported no contact, but the third did not come back. No alarm was raised, even when one of the outposts reported hearing activity around some of the outlying wells to the west, towards the Canal. A small patrol under Captain E.S. Ward of ‘D’ Squadron was sent out to investigate, expecting to find the lost patrol. Instead they observed through a gap in the fog a small Ottoman patrol watering their animals. Returning to the main force, Ward collected the rest of his troop (about thirty men) and headed back to ambush them. Creeping up under cover, they managed to surprise the Ottomans, who fled with heavy casualties.7 The Yeomen eagerly took up the chase, but this had only been a scouting party. Within moments, they ran into the advancing main body of Kress von Kressenstein’s force, and, under heavy fire, it became the Yeomen’s turn to retreat.
As Ward returned to the main position, Williams-Thomas faced a tough decision. Through the fog he could see sizable Ottoman forces closing in from the north and west. His orders had been clear: if faced by a major attack, he was to mount up and fall back. Unfortunately, this order did not take into account the REs in his care. Although the mounted Yeomen could retreat rapidly, the Engineers were on foot and would not be able to outrun the Ottomans.8 Williams-Thomas decided that he could not abandon the men he was charged with protecting, and, after sending back mounted messengers as well as telephoning Katia, formed his men into a defensive circle on a slight hill, ready to receive the enemy.
The first hurried Ottoman attack, at around 4 a.m., was successfully repulsed. The soft sand of the hill impeded the sudden rush, slowing the attackers and leaving them open to the Yeomen’s fire. Next, the Ottomans took a more methodical approach. They moved around to totally encircle the British position, cutting the telephone lines to Katia at around 4.30 a.m. An hour later they attacked from the north, south and west. This time machine guns gave covering fire and the infantry advanced in short rushes.
Overwhelming Ottoman numbers began to tell. Despite holding hard, at times fighting hand-to-hand, the Yeomen were pushed back all along their line, moving back up the slopes of the hill to where the REs had set up a second line of defensive positions. Again heavy fighting (with consequent heavy casualties) engulfed the Yeomen, and again the line was pushed back, this time to the very crest of the hill. The fog was now lifting, allowing the Ottomans to bring their artillery to bear, while machine guns were repositioned to enfilade the British positions. At the north-west (highest) end of the line, Lieutenant Sir John Jaffrey’s troop caught the worst of the fire. Only a handful of men were left able to fight; many of those who had not been killed or wounded now found their weapons clogging up after continuous use in the soft, fine sand.9
At around 7.45 a.m. the final rush came. Despite a gallant and desperate fight against overwhelming odds, the two squadrons were overrun. The Ottomans ‘seemed to pour in among us’ recalled Sergeant Horace Mantle, ‘a lot of us were knocked out while still in position’.10 Of Jaffrey’s troop, only two men were left alive.11
No one had time to escape; most of the survivors had been wounded and all were captured. They would face a long, harrowing march into captivity, and spend the rest of the war in appalling conditions. Many would die as prisoners.
The worst of the wounded, about half a dozen men, were simply left behind. The Ottomans dressed their wounds and abandoned them in the shelter of a few palm trees. One of the men, Saddler-Sergeant Joseph Pratt, was wounded in the hip and shoulder:
There was an Engineer with me. A plucky little chap. I don’t remember his name, but he was [a] Scot. He was badly wounded in the face. An old Arab woman … found us and brought us water from the well. One day she didn’t come, but the Scotsman managed to drag himself to the well … A party of Bedouins, who are regular desert pirates and cut-throats, came across us, and wanted to put an end to our misery. They were only stopped by their leader. On the Thursday [fifth day] I saw a horseman on the sky-line. I lifted my helmet, waved it, and shouted as well as I could in my weak state. Sound carries in the desert. He heard me, and I heard him shout something about coming down. He was one of a troop of Australian Light Horse who happened on us accidentally. We were taken to hospital at Kantara and then to Cairo. My companion, I am sorry to say, died.12
Pratt was shipped back to England, but died of his wounds in December in a Manchester hospital.
Messengers from Oghratina had reached Brigadier Wiggin and his three Squadrons just before 7 a.m. His horses were tired and thirsty after their night march and unfit for any fast movement across the desert. Nevertheless, he turned his force back north.
With Oghratina overrun, the bulk of the Ottoman force moved on and at 9 a.m. began to attack ‘A’ Squadron RGH at Katia. German aircraft had plotted the positions of the defences and the horse lines, and as the Ottoman infantry deployed, their artillery began to fire against those lines to prevent a breakout. The garrison had already moved many of their horses in preparation to relieve Oghratina, but enough were left in the lines and were subsequently killed to present the commander, Captain Lloyd Baker, the same dilemma as had faced Major Williams-Thomas.13 The mounted men could escape, but there was now a body of dismounted men who would not stand a chance. His decision, like Williams-Thomas, was to stand by his men, and a defensive perimeter was formed.
Closing in from the south, Brigadier Wiggin could not only hear the artillery, but see the shells bursting over Katia. After much pleading by his officers, he agreed to let Colonel the Hon. Charles Coventry, commander of the QOWH, take his ‘C’ Squadron and attempt to break through to Oghratina. As they got closer, though, Coventry reassessed the situation and decided that as the guns there had fallen silent, Oghratina was probably beyond help. Instead, he turned towards Katia and pushed his tired force onwards. Corporal Arthur Dabbs remembered that ride:
The horses had done 36 miles during the night and were terribly thirsty – and so were we, having only the tepid water in our bottles to drink, and thinking longingly of the tea which we now should have no time to make.14
Off to the north at Romani, Lieutenant Colonel Ralph Yorke of the RGH had come to the same conclusion, and led his two remaining squadrons to Katia’s aid. By coincidence, both forces reached the area at about 10 a.m., albeit from opposite directions. As they pushed through the Ottoman flanking units, Yorke and Coventry independently came to the conclusion that Katia could not be held. As Corporal Dabbs recalled, new orders were given to ride in ‘as fast as possible and hold the line while our men in camp saddled up and got away, afterwards following them as fast as we could’.15
However, Katia was now surrounded by heavy fighting so even this plan was impractical. The relief forces arrived at the gallop but could only get to within 400yd (360m) of the perimeter before getting pinned down. Dismounting, it took several hours of careful advancing before they could link up with the garrison.
Inside the perimeter, the remaining Yeomen were being assaulted on three sides, and those inside and out were thirsty, tired and taking heavy casualties. Colonel Coventry got an order back to Major William ‘Bill’ Wiggin (officer commanding ‘C’ Squadron and brother of the Brigadier) to bring the remaining horses forward to enable as many men as possible to mount up and escape. Although he received this order at about 1.30 p.m., Major Wiggin had suffered a bad shoulder wound and, on moving to the rear, fell unconscious from loss of blood. He lay for an hour before coming to and carrying on.16 It was 3 p.m. before the horses were brought to the front.
Meanwhile Colonel Coventry had ordered a general retreat. Many men, mainly those furthest from Katia, fell back in a running fight and met Brigadier Wiggin as he came the other way. The Ottomans, seeing the British line break, surged forward to finish them.
Those who stayed, like Colonel Coventry and Corporal Dabbs, were captured, while those who tried to escape faced a desperate dash for freedom. Corporal Bob Eaton of the RGH had two horses shot from under him before catching another and making it to safety; he was one of only nine of the 106 men of his squadron to escape.17 That evening the QOWH mustered just fifty-four NCOs and men.18 During the roll call the single surviving officer, Major Wiggin, fell from his horse as he again passed out from loss of blood. While the RGH and Warwickshires fared slightly better, the brigade had, for the time being, been effectively wiped out.
However, Kress von Kressenstein too had received a setback and his force was in no condition to carry on towards the Canal. With the alarm raised, and his prisoners and wounded to care for, he pulled back into the desert. By the time his reinforcements arrived in July – a fighting strength of some 12,000 Gallipoli veterans – the British had also had time to prepare. They had established strong lines around Romani, supported by redoubts. A stubborn defence, coupled with effective use of cavalry (particularly the Australian Light Horse), saw the Ottomans turned back at the Battle of Romani in early August.
The action at Katia vividly highlights how the war in Egypt differed from the more widely known campaigns in France. Many of the traditional images of the First World War simply do not apply or are even drastically reversed. In complete contrast of the mud and trenches of France, this was an open war of movement fought across burning deserts, where manoeuvring was possible and front lines were frequently abstract markings on a map. Small units could wander far and wide, completely cut off from logistical or military support; if one got into trouble, help had to come from considerably further away than the reserve trenches.
Logistics were also a far more fundamental problem. In France, keeping the flow of food, munitions and water moving to front-line troops required a massive and complicated machine based on railway networks, shipping convoys and fleets of lorries. In Egypt, and later Palestine, the process was far more precarious. Keeping a force marching across barren desert suitably supplied left very little room for delay or error, and water supplies in particular would on several occasions form the margin between defeat and victory. Equally, rest was rare. Whereas units in France rotated through the front, support and rear areas every few days, men in Egypt, and later Palestine, could and often did remain at the front for weeks or months on end. Even when withdrawn for a ‘rest’, the principal blights on their lives – the heat, clogging sand, sores, and, always, the perpetual swarms of flies – were inescapable.
Troops in Egypt would often complain in their letters and journals, and later in memoirs, of the complete lack of appreciation they felt they received from the rest of the army in France or the civilians at home. The popular perception was that anyone who had not served in the Middle East believed that theirs was an easy war, spent enjoying, in the popular biblical misquote, the ‘pyramids and fleshpots’ of Egypt instead of fighting. This complaint even entered the annals of regimental histories, in this case that of the 5th Battalion, Highland Light Infantry:
The Egyptian Expeditionary Force was associated in the minds of the average citizen with the idea of Pyramids and flesh pots. For the first, symbolic pictures were largely to blame. There never was a design representing ‘Britain’s far flung battle line’ which did not show a comfortable man in a sun helmet with a Pyramid in the background. Pyramids are so easy to draw. The artists are beaten by the flesh pot – because they had no very clear conception of what a flesh pot looks like. But the old Biblical phrase rose irresistibly to the mind mingled perhaps with recollections of some globe-trotter’s stories of the delights of shepherds. Both ideas are quite false. Our flesh pot was the Dixie [mess tin] – and there was a great deal less to put into it than there was on other, more canteen-blessed fronts – while many a man who joined us early in 1916 left for France in 1918 without ever having set eyes on a Pyramid.19
Yet the task they performed was critical. The Suez Canal was ‘the most vital and most vulnerable link in the maritime communications between Europe and the East’.20 In 1915 and 1916 alone, over 5,000 British ships totalling over 21m tons passed through the Canal, in addition to over 1,700 Entente or neutral ships totalling over 5m tons.21 Even at the height of the submarine threat, the Suez and Mediterranean route was still preferred as being the quickest and most efficient way to deliver the men and material needed within the fastest possible time.
Notes
1. QOWH(Y)M, Arthur Dabbs.
2. ‘C’, pp.49–50.
3. ‘C’, pp.50–1.
4. Jones, Vol. 5, p.182.
5. ‘C’, p.51; MacMunn and Falls, Vol. 1, p.162.
6. Jones, Vol. 5, pp.180–1.
7. MacMunn and Falls, Vol. 1, p.163.
8. ‘C’, p.55; MacMunn and Falls, Vol. 1, p.168.
9. ‘C’, p.54.
10. QOWH(Y)M, Horace Mantle.
11. ‘C’, 53.
12. Berrow’s Worcester Journal, 4 November, 1916.
13. MacMunn and Falls, Vol. 1, p.164.
14. QOWH(Y)M, Arthur Dabbs.
15. QOWH(Y)M, Arthur Dabbs.
16. MacMunn and Falls, Vol. 1, p.166.
17. Clifford, p.9.
18. ‘C’, p.57.
19. Fifth Battalion Highland Light Infantry, pp.77–8.
20. Fayle, Vol. 1, p.32.
21. Schinfield, The Suez Canal in World Affairs, p.168.
1
EGYPT IN 1914
In August 1914 Egypt was in a very difficult position. Diplomatically and legally speaking, the country was in a grey area, being at the same time part of the British and Ottoman Empires. Britain’s interest in Egypt stretched back for over a century, straddling as it did one of the main (and the quickest) routes between Britain and the jewel of its Empire, India. Military expeditions had been sent to Egypt in the 1790s and 1800s, taking part in the disorder and confused fighting that followed the French invasion of 1798. After the French had been evicted, the country descended into a protracted civil war. Although Egypt had been part of the Ottoman Empire for centuries, the traditional ruling class had been destroyed by the French and control of the country was being fiercely contested. Over the following decade Britain intervened on the losing side, fought a brief and unsuccessful war with the Ottomans, had a small field army all but wiped out and eventually decided that its Egyptian policy was better conducted from a distance.
For most of the nineteenth century, the Walis (governors) of Egypt gradually moved away from Ottoman rule, even fighting their own wars with Constantinople, while expanding their influence into Libya and the Sudan. Progressive rulers (later designated Khedives – Viceroys) modernised the country, improving the bureaucracy, infrastructure, agriculture, industry and education systems, while also forging links with the European Great Powers. Unfortunately, the quality of the rulers was not consistent and in 1858 the then Khedive struck a very bad bargain with the French engineer Ferdinand de Lesseps and his Universal Suez Ship Canal Company (USSCC). The plan to build a canal from Port Said in the Mediterranean to Suez on the Red Sea should have brought the country great wealth but the terms of the deal led to rising international debt as unscrupulous European investors squeezed the country dry. Internal unrest followed and in 1875 the Khedive was forced to sell Egypt’s shares in the Suez Canal. Britain, which had been initially sceptical about the Canal and had declined to invest, now leapt at the chance to buy them, effectively gaining a controlling interest. The money raised paid Egypt’s debts for only one year and in 1876 the country was bankrupt. The Great Powers stepped in and took control of Egypt’s finances and government.
The loss of independence was not popular in Egypt and a series of revolts followed, culminating in 1882. In that year an Anglo-French task force was sent to re-establish control, but at the last minute the French withdrew. The Royal Navy forged ahead alone to bombard Alexandria and land a British army. After fierce fighting, Britain emerged as de facto ruler of Egypt. A British Agency was established to control the country’s finances and over time it inevitably spread into all government and public offices, the legal system, and the army. However, Egypt would officially remain, in the words of the British Foreign Office, ‘a semi-independent tributary state to the Ottoman Empire’22 and pay a yearly tribute to Constantinople, rather than being legally annexed into the British Empire.
The Ottomans, meanwhile, were in no real position to counter the British takeover. Egypt was a largely unprofitable backwater for the Empire, and given all the other problems besieging the ‘sick man of Europe’, it was far down the list of Ottoman priorities. Throughout the nineteenth century the Ottoman Empire was wracked by internal and external strife. Wars with Russia in the 1850s and 1870s were damaging, but it was internal uprisings that were almost crippling. Many of the subject peoples of the Empire were increasingly dissatisfied and rebellions were frequent. Most serious were the uprisings in the Balkans, particularly as when the Ottoman territories in Europe were torn away, so too was a significant part of the empire’s population base and a very large part of its industrial capability.
Politically, the major change came in 1908 and 1909, when power was seized by the so-called ‘Young Turks’, who were determined to abandon the traditionally inclusive stance of the Ottoman Empire in favour of a pro-Turkish policy. Essentially, the ‘Young Turks’ meant the new ruling triumvirate, known as ‘The Three Pashas’: Mehmed Talaat as Minister of the Interior, Ismail Enver as Minister of War, and Ahmed Djemal as Minister of the Navy.23 To them, ‘Ottoman’ meant everyone, whereas ‘Turkish’ meant a focus on the Muslim majorities of the Anatolian heartlands. The idea of Constantinople as the traditional protector of international Islam, with the Sultan of the Ottoman Empire as the Caliph, their spiritual leader, was reasserted, to the consternation of Britain and other European Powers. The concern that the Caliph had the loyalty of, and could call on military support from, the large Muslim populations in India and Africa would become a recurring nightmare for the Great Powers, who feared massed uprisings should they ever go to war with the Ottomans.
On two occasions direct conflict between the British in Egypt and the Ottoman Empire became a close possibility. The first was in 1904–6, when the Ottomans began to encroach on the traditional borders of Egypt on the eastern side of the Sinai Peninsula. Known as the Taba Crisis after one of the disputed settlements, it saw British troops pouring into Egypt, and the Royal Navy preparing to support a counter-invasion on the Syrian coast or to force the Dardanelles and bombard Constantinople. The Taba Crisis was eventually settled peacefully, although it made Britain take a long hard look at the defence of Egypt, and make plans that would prove useful a few years later.
The second crisis came in 1911, when Italy invaded the neighbouring Ottoman states of Tripolitania, Cyrenaica and Fezzan, collectively known as Libya. Legally, the Ottomans could have demanded free passage for their forces to pass through Egypt to counter the invasion, and that Egyptian forces themselves take part. Unable to be seen to be taking sides against Italy, Britain declared Egypt to be neutral, and closed its borders to anything but humanitarian aid. In actuality, the long Egyptian–Libyan border proved fairly porous and Ottoman military aid (including Enver Pasha himself to take command) slipped through either unseen or ignored. Indeed, Britain even took the opportunity to push the poorly-defined border slightly farther to the west. The already struggling Ottomans were unable to contest the British position, not least because, in the spring of 1912, the Italians opened further fronts in the war in the Dodecanese and eastern Mediterranean. In the autumn, matters became worse still when an alliance of Balkan states decided to take advantage of the situation to start another war with the Ottomans. Faced with protecting either their few remaining lucrative European lands or the vast deserts of Libya, the Ottomans made a quick peace with Italy in order to focus on the campaign closer at home. In Libya a strong resistance movement of Bedouin tribes, led by the Senussi religious sect, maintained a guerrilla war against the invaders.
Inside Egypt, British rule was tolerated by the majority. Reforms in education, agricultural methods (including land reclamation in the fertile Nile Delta), and investment in infrastructure did much to improve the lives of average Egyptians. Economic reforms certainly meant that they were better off under British rule, as the foreign debts and other government spending was bought under strict control; in the first twenty-five years of British rule, taxes fell by 25 per cent.24
Small groups continued to oppose British rule and campaigned for greater political independence and control over their own government. These nationalist groups were a thorn in Britain’s side, and several of the British consuls general experimented with various forms of democracy at different levels. In truth the level of political freedom was no less and perhaps somewhat higher than the Egyptians had enjoyed under the direct rule of the Khedives. However, the new, more efficient governmental systems were not Egyptian, and resentment at having to adapt to foreign ways enforced by foreign officials, both of which often ignored local traditions, culture and even languages, rankled with many.
The legal system was a particular cause of resentment, in no small part because the British enjoyed what were known as the Capitulations. These had first been agreed with the Ottoman Empire and (among other things) gave British (and certain other European) subjects accused of crimes in Egypt the right to be tried by their own national, rather than local, courts. An extension to this system was made in 1895, when anyone suspected of committing crimes against the occupying British forces would face trial by a special tribunal, outside the usual legal system.25 This led to several travesties of justice, such as the infamous Denshawai Affair of 1906, and a general feeling that the British were above and outside Egyptian law.
In 1912 a new British Consul General was appointed: the perhaps unlikely figure of Field Marshal The Right Honourable The Viscount Kitchener. A blunt military man, Kitchener knew the country from his time there during the 1880s and 1890s. Although his direct methods annoyed many political figures, in 1913 he introduced a new legislative assembly with elected members and real powers. He also showed genuine concern for the people, introducing reforms in agriculture and the cotton trade, and in the areas of banking and loans, as well as a series of urban improvement and land reclamation projects.26 By 1914 the country was prospering and, for the most, part, settled.
As war erupted across Europe in July and August 1914 the Ottoman Empire appeared to be keeping neutral. Britain, however, was not, and the big question was how Egypt should react. Secret discussions within the British government in 1913 had addressed this issue.27 Although a de facto British colony, Egypt was, in Kitchener’s words, ‘still technically and legally outside the British Empire’. The ramifications were almost endless. With the Khedive still responsible for law and order, Britain would be unable to round up enemy aliens, including spies and saboteurs. Nor would she be able to stop Egypt from trading with countries at war with Britain, some of whom may be bound by trade agreements signed with the Ottomans, or stop them using the Canal. Perhaps most importantly, defence of the Canal would become almost impossible. The sure way to cut through this Gordian Knot of legal issues would be either to declare Egypt a protectorate, and thus a formal part of the British Empire, or to declare martial law, which was, legally, a step down from a full protectorate but would still send the very clear message to the world that Britain was in control of the country. From either of these actions there would be internal repercussions. The nationalist and anti-British portions of the country would likely receive a swell of support, possibly even sparking the much-feared Islamic uprising, and Britain would suddenly face internal as well as external threats. The issues were complicated and the weighing of them would have to be finely balanced. In the end, it was decided that the decision would have to be left to the man on the spot (with Foreign Office advice) as and when the time came.
When the time did come, however, it was the height of summer and many of the most senior officials were at home on leave. Lord Kitchener had left for England on 18 June 1914 and although he hurried to return to Egypt when war broke out, he was detained and appointed Secretary of War instead.28 The Khedive, Abbas Hilmi, was also out of the country. He had been on a visit to the Sultan when, on 24 June, he had been the subject of an assassination attempt by an Egyptian student. Badly wounded, he was still recovering in Constantinople despite being desperate to leave, as he believed that the Young Turks were behind the attempt.29 Meanwhile, the Legislative Assembly of Egypt was adjourned.30
With Kitchener definitely not coming back, Milne Cheetham, who had been left as the chargé d’affaires at the British Agency in Kitchener’s absence, was made temporary Consul until he could be replaced by Sir Henry McMahon, who would arrive in early January 1915. On the Egyptian side, Hussein Rushdi Pasha, the President of the Council of Ministers, took charge and acted with a mixture of good sense, calm and more than a dash of resignation, to pull his country through this complicated international situation.31 Between them, they steered the country through the rocky opening months of the war. The international status of Egypt was settled on 5 August, the day after Britain declared war on Germany. Rushdi issued a ‘document which committed Egypt virtually to a declaration of war against the [British] King’s enemies’.32 In it, several wartime measures were detailed, such as forbidding Egyptian citizens from trading with Britain’s enemies or giving them loans, which would realistically have only limited impact on the country while at the same time making it publically clear that they were supporting Britain.
The reaction across Egypt was surprisingly muted. Financial uncertainty struck the country, causing a drop in the market, but this was only to be expected when war is declared.33 At other levels in the towns and cities, life appeared to go on very much as usual, with only the higher echelons of the British Agency showing signs of frantic, even chaotic, activity, as they worked to deal with the (real or perceived) political and military repercussions of war.34 One serious area of worry that did reverberate down to the lower levels of society, especially in rural areas, was that of food supply. In 1913, around one-third (260,000 tons) of Egypt’s wheat had to be imported, principally from Russia.35 With the potentially hostile Ottomans controlling the Russian trade routes in and out of the Black Sea through the Dardanelles, this supply was effectively cut off. A few other foodstuffs were also imported and their supply also jeopardised. It was now just after the harvest, and so Egypt would not face any food shortages in the short term, but a knee-jerk reaction by the government saw regional food commissions spring up across the country, buying up all surplus stocks and banning all exports. There was little central co-ordination, and so the prices paid differed between regions, causing some discontent, and the system did little to calm the population.36 Meanwhile, the amount of agricultural land was increased by instructing growers to decrease the amount of cotton cultivated. As foodstuffs were less profitable than cotton, this was not popular with farmers.37
Even with such a muted reaction, the British in Egypt remained on edge. Should the Ottomans declare support for Germany, it would raise the spectre of a potential Muslim uprising in Egypt, preventing the use of the Suez Canal, as well as possibly more serious problems in India. There was little anyone in Britain or Egypt could do but wait to see which way the Ottomans would jump.
Notes
22. TNA CAB38/24/23.
23. McMeekin, chapter 3, passim.
24. Richmond, p.156.
25. Alexander, p.60.
26. Elgood, pp.34–5 and Richmond, pp.167–9.
27. TNA CAB38/24/23.
28. Storrs, p.123.
29. McGuirk, p.51.
30. Elgood, p.42.
31. Elgood, p.42.
32. Elgood, p.47.
33. Elgood, pp.46–7.
34. See, for example, Storrs, chapter 7, passim.
35. Elgood, p.51.
36. Elgood, pp.48–50.
37. Elgood, pp.52–5.
2
OPENING SHOTS
The big question in August 1914 was which side the Ottomans would choose, if either. There was a general assumption, based on recent close relations, that the Ottomans would side with Germany and the Central Powers. This assumption perhaps explains the incident that sparked a chain of events that would, publically at least, justify their eventually joining Germany in November. There were two Ottoman dreadnought-type battleships currently sitting in British dockyards. The largest was the Sultan Osman I, which had been originally ordered for the Brazilian Navy until monetary problems had led to her sale to the Ottomans in 1913. With seven turrets mounting a total of fourteen 12in guns, she was the most heavily armed ship of her type ever built. The second was the Reshadieh, which was also formidably armed, mounting ten 13.5in guns, and had been paid for by a public-subscription scheme (although a considerable sum was still outstanding38). These powerful, modern ships were high-profile symbols of the status of the Ottoman Empire, and outcry followed when, on 31 July, First Lord of the Admiralty Winston Churchill ordered them to be seized for use by the Royal Navy. The Ottoman personnel who had already arrived to take delivery were bustled away and the next morning British sailors arrived to take possession. Although perfectly legal under the contracts signed with the Ottomans, the conversion of Sultan Osman I into HMS Agincourt, and Reshadieh into HMS Erin, stung Ottoman pride badly and the Germans took full advantage of the opportunity to show the British up.
The German presence in the Mediterranean in 1914 consisted of two warships: the battlecruiser SMS Goeben, and the light cruiser SMS Breslau, under the command of Rear Admiral Wilhelm Souchon. Both were fast (although Goeben suffered from persistent boiler problems39) and heavily armed. If war broke out, they could be a considerable threat. Although it was unlikely they would remain for long in the Mediterranean, where they could be cornered by superior forces, the French were deeply concerned about them. In the event of war, the primary initial function of the French Navy would be to carry XIX Corps, the Army of Africa, from Algeria back to mainland France. Two heavily armed, fast warships could wreak havoc among the lumbering troopships and seriously upset French plans. For the British, the fear was that the Goeben and Breslau would break out of the Mediterranean, raiding merchant shipping in the North and South Atlantics. The attention of both countries would be directed at the western end of the Mediterranean, ready to react to the first sign of German ships.
The Germans, however, knew this too, and knew that any attempt to break through the western Mediterranean would probably end in disaster. Instead, they decided to present the two modern warships to the Ottomans as a sign of friendship: a grand gesture that would not only win political favour with the Ottomans but also avoid the negative publicity of losing their ships to British and French guns. On the back of this, and the resulting Entente annoyance at having former-German warships blocking communications with the Russians through the Dardanelles, the Ottomans would be drawn into the war on Germany’s side.
That, at least, is the popular version of events, but the actual facts are far more complicated. For one thing, the Ottomans and the Germans had already signed a secret treaty. In July 1914 the Ottomans had canvassed not only Germany but Britain and France for an alliance, and had been rejected by them all.40 However, a sudden enthusiasm by the Kaiser led to Germany returning to the Ottomans with their own proposals only days after rejecting them. In particular, the Germans were keen to have the Ottomans as an ally on the southern flank of Russia. After several days of frantic negotiations (during which time the Sultan Osman I and Reshadieh were seized), a secret treaty was signed on 2 August 1914. It committed the Ottomans to attack Russia, which they were still loathe to do, and in the rush to sign they managed to word the treaty so that this obligation only came into effect if Russia declared war on Germany. In fact, the previous day, it had been Germany who had declared war on Russia.41
While the Ottomans continued to dither and attempt to avoid entering actual hostilities with anyone, the Germans scrambled for ways around the treaty. They desperately wanted the Ottomans to divert at least some of Russia’s strength onto her southern, Caucasian border, and they also wanted Ottoman spiritual help. Extensive plans had been made, under the guidance of the eccentric orientalist Max von Oppenheim,42 to use the Sultan’s position as Caliph to declare a jihad, a holy war that would spark Islamic uprisings across the British, Russian and French empires. After all, the British Empire alone contained more Muslims than the Ottoman Empire did.43 Extensive German preparations were made, spreading propaganda44 and sending envoys into Russia and the northern borderlands of British India, hoping to raise rebellion in the name of Islam.45
The concept of a jihad was at the time, as now, greatly misunderstood by many people. Europeans in particular viewed it with fear. For the Germans it was a magic bullet that could knock their enemies out of the war at one stroke, and for Britain it was a nightmare scenario. Religion, and the Sultan’s status as Caliph, had haunted British plans in Egypt for decades, perhaps because, even sixty years on, the scars of the (at least partly) religiously motivated uprising in India in 1857 were still vivid and raw. The Ottoman view was somewhat different and distinctly more muted.46Jihad (literally, ‘striving’) was not clearly defined in the Koran and could mean anything from holy war to the search for inner peace, with hundreds of interpretations in between. The Ottomans had called for a jihad in some of their previous conflicts but equally had not in many more, and it appears to have been seen within the Sublime Porte as little more than rhetoric. While a jihad was eventually called in November 1914 it was as much as anything a sop to placate their new German allies.47
But first, the Ottomans had to be enticed into actually declaring their allegiances. The delivery of the Goeben and the Breslau into the Dardanelles was going to be the spark that ignited what the Germans hoped would be a powder barrel of religious discontent. To do this, they had to run the gauntlet of the Royal Navy.
The Royal Navy (RN), though, was weak in the Mediterranean. For a hundred years the ability of Britain to dominate this sea had been a clear and present reminder to the rest of Europe of her reach and military might. The RN had been used to interfere in countless wars, diplomatic disputes and political decisions in the region, but as the twentieth century dawned, RN ships had increasingly been needed elsewhere. As the arms race with Germany escalated, Britain could no longer guarantee domination of the North Sea without stripping other areas of their assets, and an agreement with France had made this possible. After the ancient enemies had signed the Entente Cordiale in 1904, further agreements for mutual protection had followed. In 1912 this had included an arrangement whereby each took responsibility for a different sea. The RN had bases in Scotland and the middle of the English Channel, far enough from Germany to be safe from surprise attack and yet perfectly poised to bottle up any German attempt to break out, and so they took responsibility for the North Sea. The French Navy, fearful that a surprise attack on the Channel ports could destroy its fleet piecemeal, and preoccupied with moving troops home from Africa in case of emergency, took the Mediterranean.48
Gradually the RN stripped back its Mediterranean assets, although a sizable force was still needed. After all, the sea was still teeming with British traders and merchantmen, and the threat from Italy and Austro-Hungary also loomed large. These two nominal allies were both modernising their fleets, albeit in an arms race with each other, and it was feared that a combined Italian-Austrian fleet would be able to overwhelm the French.49 In late July the RN Mediterranean Fleet, under the command of Admiral Sir Berkeley Milne RN, consisted of three battlecruisers, four cruisers and four light cruisers, plus a number of destroyers (see Appendix A). For all that one midshipman, on being posted to HMS Defence in early 1914, would state ‘I knew little or nothing about foreign policy, beyond the fact that the Mediterranean belonged to us’,50 this was a weak force. It would stand little chance against Italian or Austro-Hungarian dreadnoughts, and individually even the battlecruisers were likely to be outclassed by the Goeben.
The British fleet began to gather at its main base at Malta on 27 July.51 For the cruiser HMS Defence and the destroyer HMS Grampus, this meant leaving the small multinational flotilla off Albania, where they had been ensuring the independence of that new country.52 Here, HMS Defence’s crew had mounted landing parties next to sailors from SMS Breslau, and subsequently enjoying dinner in the mess of the German light cruiser. At Malta, rapid resupply was undertaken, particularly of coal. Fifty years before, warships had been dependant on the wind for their speed and direction of travel, but could stay at sea for months at a time. The modern, steam-driven fleet could move with virtual impunity but required frequent recoaling, either at a port or by rendezvousing with coaling ships, although oil was beginning to see increased use as ship fuel as well.53 This limitation on freedom of movement would be a major factor in the debacle that would follow.
Once in harbour, preparations for fitting the RN ships for war began. Although, for now, they would remain at a lower, peacetime crew strength, the ships themselves had to be prepared for combat:
We were told to prepare for war. This included throwing over the side all unnecessary furniture, chairs, tables, etc., and anything flammable. This also included the removal of layers of enamel on the quarter deck bulkhead and after turrets. This had to be done by chipping and was undertaken by the PMO, the Purser and the Chaplain. After trial and error, they found the best way to do it was to hammer it off with the end of a golf club.54
On 30 July 1914, Milne received orders to assist the French in guarding the ships which should even now be transporting thousands of troops from Algeria, although his orders stated that his forces were not to engage any enemy ships unless they were already exchanging fire with the French.55 By 31 July Milne’s entire force was ready and HMS Chatham had been despatched to watch for the Breslau and Goeben


