11,49 €
Mehr erfahren.
- Herausgeber: Crowood
- Kategorie: Geisteswissenschaft
- Sprache: Englisch
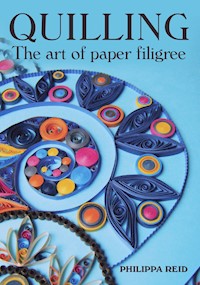
Quilling is a centuries-old art, which requires just three elements - your fingers, paper strips and glue. This practical guide demonstrates the techniques with step-by-step instructions and photos, and explains the best way to develop your skills and thereby push the creative boundaries of this art. Written by a passionate paper artist, it is a comprehensive guide that will inspire both novice and experienced quillers, as well as mixed media artists wishing to explore the potential of paper filigree work. Projects covered within this book include making vortex coils, pixie-hood loops, huskings, multi-strip open coils, fringed flowers, ring coil tracery patterns, folded ring coils and rolling a perfect spiral-centred coil without the need for a quilling tool. There is also advice on forming letters and abstract shapes with quilling and building 3D models from solid coils. It is beautifully illustrated with 173 colour images. Philippa Reid is a fully Accredited Fellow of the Quilling Guild and edits both the Guild's magazine and blog.
Das E-Book können Sie in Legimi-Apps oder einer beliebigen App lesen, die das folgende Format unterstützen:
Seitenzahl: 150
Veröffentlichungsjahr: 2019
Ähnliche


QUILLING
The art of paper filigree
QUILLING
The art of paper filigree
PHILIPPA REID
First published in 2019 byThe Crowood Press LtdRamsbury, MarlboroughWiltshire SN8 2HR
This e-book first published in 2019
www.crowood.com
© Philippa Reid 2019
All rights reserved. This e-book is copyright material and must not be copied, reproduced, transferred, distributed, leased, licensed or publicly performed or used in any way except as specifically permitted in writing by the publishers, as allowed under the terms and conditions under which it was purchased or as strictly permitted by applicable copyright law. Any unauthorised distribution or use of this text may be a direct infringement of the author’s and publisher’s rights, and those responsible may be liable in law accordingly.
British Library Cataloguing-in-Publication DataA catalogue record for this book is available from the British Library.ISBN 978 1 78500 614 2
Photographs by Philippa and Tony Reid except where specified otherwise
AcknowledgementsMy grateful thanks go to all those who have supported and encouraged me during the writing of this book: in particular my husband, Tony Reid, for his patience whenever I was busy writing and for helping me with the photography; Nicky Ward for her unfailing belief in me and sharp eyes reading the manuscript; Fran Pitt for sharing useful tips drawn from her own publishing experience; and all my colleagues in the Quilling Guild – especially Jane Jenkins, Licia Politis, Janetta van Roekel, Genevieve Godden, Anne Straker and Brenda Rhodes who allowed me to include some of their own quilled creations and technique ideas. I am also very grateful to the Directors of Creative Innovation Centre (CICCIC) Taunton for allowing me studio space in which to create the quilled design for the front cover during a two-week artist residency. This book is dedicated to you all.
CONTENTS
1 STARTING OUT
2 WORKING WITH PAPER STRIPS
3 MAKING SPIRAL COILS
4 LOOPING TECHNIQUES
5 TIGHT COILS AND 3D MODELLING
6 AFFIXING YOUR QUILLING TO A BACKGROUND
7 SPECIAL EFFECTS
8 CREATING WITH PAPER STRIPS
9 BORDERS
10 INFILLING
FURTHER READING AND SUPPLIES
INDEX
A selection of quilled items made by the author, showing a range of applications.
CHAPTER ONE
STARTING OUT
In the sixteenth century, nuns in France and Italy began trimming strips of paper from the gilded edges of Bible pages and rolling them into filigree shapes to adorn their sacred reliquaries. The results so closely resembled real gold that the process must surely have seemed like alchemy.
Later, in eighteenth-century England, as ‘accomplished ladies of leisure’ employed paper filigree techniques to decorate tea caddies, picture frames and fire screens, their pastime became a versatile creative outlet through which innate artistic talents could be channelled.
The term ‘quilling’ is popularly supposed to have originated from the practice of rolling paper strips around the quills of birds’ feathers in times gone by, but the truth of this is unlikely ever to be proved. What is certain, however, is that the apparent ‘magic’ by which rolled paper can readily be transformed into beautiful filigree shapes will continue to inspire creativity for centuries to come.
Quilling, as defined by the Quilling Guild, is the art of rolling narrow strips of paper and then shaping them to make exquisite designs. These can range from simple gift tags and cards to pictures, jewellery, three-dimensional models or decorations for frames and boxes.
The strips used are typically either 5mm (just under ¼in) or 3mm (⅛in) wide (sometimes even narrower), and are set on edge so that the design produced has both depth and texture. In fact, quilling has been described as a method for creating pictures that even blind people are able to ‘see’ through touch!
The intricacy of a quilled design can be both impressive and daunting in equal measure. However, when broken down into its constituent parts (that is, the basic shapes which are all described in detail in this book), a quilling usually reveals itself as much less complex than appearances may suggest.
There is a fluidity to quilling whereby the gentle curves of different shapes fit naturally together. As soon as you begin creating them, you will find that the simple act of arranging and re-arranging your shapes in an exploratory manner produces myriad ideas for attractive patterns. Indeed, this practice is to be positively encouraged, as it helps the beginner to develop a natural feel for the ways different shapes can be assembled.
Multiple shapes can also be assembled together in a composite manner to create more complex elements – a practice which contributes greatly to the overall visual impact of quilling. This should always be borne in mind, even when you are just starting out to learn techniques, as it really does help to fuel the creative process.
The nine commonly-used quilled shapes shown here can be assembled to create a design such as this butterfly.
Like pieces in a jigsaw puzzle, quilled shapes readily fit together to form designs. Here, curved, leaflike shapes nestle against circles, while coiled filigree shapes touch and intertwine.
At its most fundamental level, there are just three basic elements required to begin quilling: your fingers, paper strips and glue. Various additional tools and accessories may undoubtedly be found useful, as will be seen later in the course of this introductory chapter. To begin with, however, consideration must be given to the two most essential material elements: paper and glue.
Quilled shapes can be combined into composite elements like the petals of this flower.
Paper
Quilling is done with paper which has been cut into narrow strips. The strips may be cut by hand, bought commercially or even produced with a shredder, but the most basic requirement is that the type of paper used should be of sufficient weight/robustness to hold its shape when coiled. In practical terms, this ideally means that strips should have been cut from stock with a minimal weight of 100gsm (US equivalents: 28lb bond stock; 70lb book stock). Strips of a lighter weight can be used, but they are less likely to deliver satisfactory results, especially in the hands of beginners. Heavier strips can also be utilized, provided they can be manipulated in the fingers to produce smooth shapes. In practice, this takes the range of material suitable for quilling from good quality higher weight paper into the realm of light card.
If cutting your own strips, it is important to remember that the main visual impact of quilling comes from viewing shapes from above after they have been set on edge. The colour and textural integrity of the strips’ cut edges is therefore of vital importance. Commercially produced quilling strips are manufactured to satisfy this requirement: a standard strip that is blue on each side, for example, will also have blue edges. By contrast, a sheet of paper selected individually for hand-cutting may be coloured or patterned on one side only, resulting in strips that are bilateral in appearance and which are also likely to have white edges when viewed from above.
Strips that have been cut with a shredder may sometimes have finely serrated edges instead of straight ones, depending on the type of machine that has been used. Serrations may add interest to the appearance of quilled shapes, but straight edges generally produce a more acceptable ‘clean-cut’ impression.
Commercially produced quilling strips come in a vast array of different colour shades and variations, particularly when sourced from specialist suppliers. Standard, single colour strips can be purchased in a variety of different widths. The length of the strips can vary, too, depending on the brand. They are generally supplied in sinusoidal packs of 100 or more strips, bound at each end by easily detachable webbing.
The choice of commercial strips is not limited to plain, solid colours. ‘Graduated’ colour strips can be purchased which are dark at one end, fading to a lighter shade at the other. A variation of this is the ‘dark centre’ option, graduating from white at each end to a coloured section in the centre. Working with such strips produces some interesting visual effects. Then there are strips with metallic or pearl coated finishes, and others which have been ‘edged’ with special metallic or holographic applications, producing an opulent and often spectacular appearance in quilled designs – echoing, perhaps, the nuns’ gilded papers of old.
Quillers naturally want their work to remain in good condition for as long as possible, and so it is always worth utilizing strips which have been cut from acid-free paper of ‘archival’ quality.
Quilling strips can sometimes be found in good craft shops, but the best option is to search for details of specialist suppliers – these can readily be found online.
Glue
Poly vinyl acetate (PVA) glue is most commonly used for quilling. Such glue is white in appearance when wet, but has the advantage of drying clear.
As with the paper strips selected for quilling, quality is of paramount importance. A good PVA glue should be quite thick in consistency, unlike the rather thin, ‘watery’ versions which are typically used in schools.
PVA is water-soluble, and the wet product can therefore be wiped away with a damp cloth should any inadvertent spillages or mis-placement occur. It starts to become ‘tacky’ on exposure to air, but allows for glued surfaces to be repositioned (if necessary) for several minutes following application, making it quite amenable for quillers to use without undue time pressure.
In quilling, glue is applied in very small amounts, ideally just sufficient to secure quilled shapes in place without leaving visible ‘blobs’ which, although transparent when dry, do nevertheless remain shiny. A method of application must therefore be adopted which not only dispenses the glue in the requisite small quantities, but also which does so in a convenient and controllable way.
This can be achieved very simply by pouring a small quantity of PVA into a container such as an upturned plastic bottle top, and then dipping the pointed end of a cocktail stick in it as a means of picking up tiny spots of the glue. As an alternative, some quillers prefer just to pour a little glue out onto a tile. The disadvantage, of course, is that the glue starts drying as soon as it is exposed to air, so the supply has to be constantly refreshed while quilling. Needless to say, the source container in which the main stock of PVA is stored should be always be kept closed when not in use.
A finely-tipped glue dispenser (left) delivers PVA in tiny quantities when needed. An alternative is to dip a cocktail stick into a small pool of freshly-poured glue.
The alternative is to invest in a glue dispenser with a very fine metal applicator tip which can be purchased from specialist quilling suppliers. In this type of applicator, the glue is contained in a plastic bottle which is turned upside down and then gently squeezed whenever a spot of PVA is needed. A pin is inserted into the metal tip when the dispenser is not in use, preventing air from getting in and causing the glue to set. Dispensers like this are best kept inverted in a jar or similar container at all times, so that the glue never gets the chance to drain back away from the nozzle. When the pin is not in place (whilst the dispenser is in use), it is always a good idea to have a damp sponge or rag at the bottom of the container to keep the tip moist and prevent the glue from clogging or drying out.
Other items that can be useful
Once the basics in terms of paper strips and glue have been obtained, it is also worth considering the acquisition of various other items which may assist the quilling process.
Quilling tools
There are two different types of ‘quilling tool’ on the market which many quillers like to utilize. The first of these is generally referred to as a ‘slotted tool’ and is characterized by a tip which is split into two prongs, rather like a miniature tuning fork. This type of tool is useful for creating twists and turns in a quilling strip, which must first be inserted between the prongs. Many quillers also favour using a tool of this kind to secure the end of a strip when creating spiral coils; you can read more about the relative pros and cons of this approach in Chapter 3.
Slotted tools (left and centre) are sometimes used to grip and twist quilling strips, creating a kink in the paper. A needle tool (right) can be used as an alternative to produce coils with a neat round centre.
The second type of ‘quilling tool’ is a straight, unslotted, finely pointed needle which has been inserted into a wooden or plastic handle. A needle tool of this type can be useful for creating coils and also for poking tiny pieces of paper into position when quilling. Needle tools can additionally be used in place of a wooden cocktail stick for applying tiny spots of glue. There is no pressing need to invest in one, however, since hat pins or corsage pins can serve just as well.
Tweezers
A good pair of tweezers can be invaluable for picking up delicate quilled shapes and placing them into position when assembling a design. Tweezers with pointed tips are probably the most useful, although a set of different types can be a worthwhile investment.
Tweezers with pointed tips (left) are useful for picking up quilled shapes. Flat tipped tweezers (right) provide a broader grip which can assist when gluing down the ends of spiral coils. The tweezers in the centre are self-locking, which means that they maintain their grip after you have put them down, leaving your hands free.
Cutting tools
Sharp, short-bladed scissors are invaluable for cutting quilling strips neatly and also, when creating quilled flowers, for ‘fringing’ wider strips at regular intervals. (Fringing techniques will be discussed in Chapter 7.) A self-healing cutting mat, scalpel knife and metal ruler are also essential if you are considering cutting your own quilling strips from larger sheets of paper.
Dowels
A set of round wooden dowels of different diameters will be handy if you want to create open rings of paper in uniform sizes (seeChapter 5). It is also worth gathering together a collection of various smooth-sided cylindrical household objects such as plastic bottles, small glass jars and applicator tubes for making rings.
Work-board
When creating and assembling quilled shapes, there are often times when it is useful to be able to pin different elements together whilst the glue which has been applied to them dries. Pinning of shapes is also sometimes utilized in looping techniques (seeChapter 4). Plastic-backed cork quilling boards are commercially available which typically have a range of various circle- and shape-sizer holes in the plastic on one side, whilst enabling round-headed pins to be inserted into the cork on the other. Such boards can be used for pinning, as long as the cork is covered with a layer of transparent cling-film to prevent glue soaking in and causing quilled pieces to become accidentally stuck to the surface. The layer of cork on these boards is generally quite thin, however, and does not allow for pins to be inserted very deeply. Instead, a more practical work-board can quite easily be created using a stack of three or four same-size pieces of foam-filled artists’ mount board wrapped tightly together with cling-film. Such an arrangement enables pins to be pushed in to the full depth of the stack, ensuring that work is held securely in position at all times.
To give paper strips a crimped appearance, they can be fed through a device called a ‘ribbler’ (left) or between the cogs of a crimping tool (right).
Because your work-board will be covered with transparent cling-film, there is the opportunity to place patterns or graph paper on top of the board beneath the film to guide the assembly of your quilled pieces. Square graph paper is very useful for lining shapes up accurately, whilst a round polar graph is invaluable for ensuring the symmetry of circular designs. Additionally, you can laminate graph paper sheets of this type and use them as convenient wipe-clean work surfaces on which to assemble quilled pieces in cases where pinning of work is not required.
Miscellaneous items
While quilling, you will find it very useful to have a pack of wet wipes to hand for dampening the ends of strips, cleaning up unwanted glue and wiping sticky fingers. A supply of cocktail sticks and a few cotton buds can also be handy. You will certainly need a ruler for occasions when you need to measure lengths of strips. Additionally, a wide bulldog-clip will be of assistance if ever you decide to do any fringing (Chapter 7).
Every quiller has their own unique collection of tools/accessories selected individually for the kind of work they like to produce. The ones you choose will be a mirror of your own creativity!
A selection of quilling strips.
CHAPTER TWO
WORKING WITH PAPER STRIPS
The many different varieties in which commercially produced quilling strips are available give a clue to the amazing versatility of paper filigree as a visual art.
Many beginners like to start their quilling adventure by using 5mm (¼in) wide strips, which are narrow enough to create shapes that are reasonably delicate in appearance, yet wide enough not to be too fiddly when mastering techniques.
Wider 10mm (just under ½in) strips are also available which give a very strong visual impression of depth when used for shapes which are set on edge.
The most commonly used strip width is 3mm (⅛in), whilst some very dextrous quillers may also opt for 2mm or even 1.5mm (1/16


