20,99 €
Mehr erfahren.
- Herausgeber: The Crowood Press
- Kategorie: Lebensstil
- Sprache: Englisch
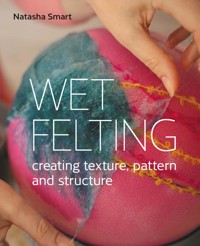
Wet felting is an incredible textile art form that offers enormous opportunity for genuine creativity and innovation. This beautiful book is a complete guide to the process, from the basic techniques through to using embellishment materials to decorate your felt and resists to structure it. There are step-by-step instructions to nine projects, plus ideas for variations and an introduction to an innovative felting ball to create fully 3D-felted forms. Packed with practical advice throughout, this is truly a book to inspire your creativity and to guide you in the potential of this wonderful art form.
Das E-Book können Sie in Legimi-Apps oder einer beliebigen App lesen, die das folgende Format unterstützen:
Seitenzahl: 284
Veröffentlichungsjahr: 2022
Ähnliche


WETFELTING
creating texture, patternand structure
Natasha Smart
WETFELTING
creating texture, patternand structure
First published in 2022 by
The Crowood Press Ltd
Ramsbury, Marlborough
Wiltshire SN8 2HR
www.crowood.com
This e-book first published in 2022
© Natasha Smart 2022
All rights reserved. This e-book is copyright material and must not be copied, reproduced, transferred, distributed, leased, licensed or publicly performed or used in any way except as specifically permitted in writing by the publishers, as allowed under the terms and conditions under which it was purchased or as strictly permitted by applicable copyright law. Any unauthorised distribution or use of this text may be a direct infringement of the author’s and publisher’s rights, and those responsible may be liable in law accordingly.
British Library Cataloguing-in-Publication Data
A catalogue record for this book is available from the British Library.
ISBN 978 0 7198 4040 1
Cover design: Sergey Tsvetkov
CONTENTS
Introduction
Acknowledgements
1Materials and Equipment
2Getting Started
32D/Flat Wet Felting
43D Wet Felting (with Flat Resists)
53D Wet Felting (with 3D-Shaped Resists)
6Developing Your Work
7FAQs/Troubleshooting
8Template and Tables
Glossary
Useful Resources
Main Project Guide
Index
INTRODUCTION
Welcome and thank you so much for picking up this book and joining me in my feltmaking world! My aim is to introduce you to the magic of wet felting with wool fibre and the amazing variety of things you can achieve with it: from a decorative piece of flat fabric to seamless, shaped, three-dimensional forms which hold their structure (like a bag or bowl), all with incredible texture and pattern.
This book is all about encouraging you to experiment and play with wool fibres by following the techniques shown to create successful felt in all its structural forms (by which I mean two-dimensional flat felting, three-dimensional flat felting and fully three-dimensional shaped forms). By including lots of examples and step-by-step demonstrations, I’m aiming to give you the confidence to both practise the techniques and then adapt them, enabling you to follow your inspiration in making your own wet felted creations. I’ve also included a variety of embellishment fibres, which you might have heard of but never tried and weren’t sure how to use, or perhaps have never even heard or thought of, but which you can use to create wonderfully textured and patterned surface designs.
There’s a progression in the order of the three project chapters, as well as the nine main projects, starting with smaller and simpler project makes and building up to bigger and more complicated versions using the same or similar techniques. I recommend reading the whole book, or at least the whole chapter, before starting on one of the projects so you get an understanding of the progression element and don’t miss tips in the earlier projects when completing the next one. I’ve also included at least one variation at the end of each main project, which might show you a slightly different version of the main project to try or it might highlight a new technique to inspire you in a different direction. You’ll also see similar techniques or embellishments appearing and being reused throughout the main projects and their variations, to illustrate that you can mix and match the projects and their decoration to achieve different effects.
One of the key things I’ve learned during my time as a felter over the last fifteen years is that there isn’t just one way to create a particular piece of felt, there are many ways! Every felter has their own set of tried and trusted techniques and preferred way of working. There are a few hard and fast rules in wet felting, such as you need to apply water and friction to wool fibre to make the felting process work at all (with soap in particular being invaluable to making the process work better). Also, there are two distinct stages of the wet felting process: the felting stage, where the fibres start to bond together to create a very loose fabric (called prefelt, sometimes spelt pre-felt); and the fulling stage, where the fibres bond completely and contract to create a firm fabric. Neither of those stages can be rushed; they happen when the fibre is ready! But there are lots of ways of achieving those processes, along with many other variables to consider, like the different shrinkage rates of different wool fibres, which might also affect your choice of technique. So it’s important to have a good armoury of techniques you can deploy in different felting scenarios, which is what I’m hoping you’ll find in this book. This will then help you to go on to develop your own projects, so that you can tackle anything, or, if things don’t seem to be working, you have a variety of techniques to deploy to help get things back on track.
So, my recommended approach to this book, if you’re already an experienced felter, is that the projects and materials will inspire you or perhaps get your brain ticking in another direction about an idea you’d like to test out. The way I do things might encourage you to try a completely different technique or embellishment material. But don’t feel that you need to slavishly follow my method of working. If you prefer working on a sheet of plastic to bubble wrap, then use plastic; if you like to use an electric sander rather than a rubbing tool, use a sander. Just adapt my methods of achieving the project to suit yourself.
On the other hand, if you’re new to felting, and not sure where to start, then the main projects will give you a tried and tested recipe that has worked for me (as well as students on my courses). Just follow the step-by-step instructions shown, as these should ensure pretty successful results and help you grow your confidence as to what’s possible. I’d also encourage you to take courses, watch videos and read other books to broaden your all-round experience of felting techniques. I hope there’s something for everyone here.
Wet felting is a fantastic art form, offering lots of opportunities for genuine creativity and innovation. I’m conscious that what I’m sharing in this book is just a fraction of what felting can do, but I hope you find it useful and inspiring, nonetheless. Above all, please enjoy your own felting journey (I’m still on mine), keep experimenting and have fun!
METRIC OR IMPERIAL?
I’ve included measurements in both metric and imperial throughout the book. Please note, however, that the projects were all created using metric forms, so I’ve rounded the imperial versions up or down (depending on what was being measured and how precise it needs to be). For greater accuracy in using the imperial forms, you might like to double check any measurements using the conversion table at the back of the book (these have also been rounded up or down but are much more accurate).
ACKNOWLEDGEMENTS
This book is dedicated to my fabulous creative friends and supportive family, who have all encouraged my feltmaking endeavours over the years, especially my parents, who have provided unwavering and much-appreciated encouragement for whatever I’ve been doing. And very special love and thanks to my husband Steve, who continues to be my biggest supporter, has always been an essential sounding-board with sensible advice and who has been stalwart in the face of living on the front line with me for the past year whilst I’ve been writing this book – I’ve really appreciated your help so much and I couldn’t have done any of this without you. (My adored cats have been no assistance whatsoever, but I feel they deserve a mention too.)
Big thanks to talented photographer Ellie Burgin, who has provided the majority of the photographs in this book (except the main project step photos, taken by the author).
Ellie Burgin Photography, Instagram @ellieburgin2.0
I must also give a big credit to US feltmaker Ruth Walker, who taught me the original ‘felting on a ball’ technique (developed first as a ‘hat on a ball’ by feltmaker Beth Beede in 1975) and who so generously shared her knowledge some years ago on an International Feltmakers Association workshop I attended. Thanks also to all the feltmakers whose courses I’ve attended (including Leiko Uchiyama), online tutorials I’ve watched or books I’ve read, which have all contributed to my own journey as a feltmaker.
Ruth Walker, Feltmaker, Facebook @RuthWalkerFeltmaker Leiko Uchiyama, www.leikofelt.com
CHAPTER 1
MATERIALS AND EQUIPMENT
Wool fibre is obviously the core component required for felting, so let’s look at that first. Many animal fibres will felt (that’s a whole new area of feltmaking to explore!), but for the purpose of this book I’ve restricted our scope to sheep’s wool fibre, and specifically those that are most commonly available and can be found in the widest range of colours (both natural/undyed and dyed).
WOOL FIBRE
Merino Wool Fibre/Wool Tops (Roving)
Even if you’re new to feltmaking you’ve probably heard of Merino wool fibre, which is probably the most popular fibre for wet felters and is where most beginners start. From the Merino sheep breed, it’s a fine and soft fibre which felts easily, comes in a huge range of colours and can easily be found worldwide. It is usually manufactured in the form of tops (or roving). This is where, at the end stage of the processing of the wool, it is combed into long straight ropes of fibre, with all the individual fibres stretched to smooth them out and laid in the same direction. This makes it very easy to work with. Merino is a fine fibre which particularly lends itself to felting anything which will lie next to your skin, needs to be thin or needs to drape well, so is often used for clothing or scarves.
Merino wool tops in plain and variegated colours.
Merino wool fibre is almost synonymous with wool tops, although you can find other wool fibre in tops or roving form (and increasingly so, as wool fibre prepared for felting and spinning becomes more readily available from suppliers). I’ve mostly found other breeds of wool fibre in tops form from smaller-scale independent hand-dyers, or in a more limited colour range from bigger suppliers, so Merino is definitely your best option if you’re looking for a fibre in tops form that gives reliable results and has a vast choice of colours. You can also find Merino in carded batt form (see below), but less commonly and not in the extensive range of colours found in tops.
Carded Wool Batt Fibre (Carded Fleece)
The other main format you’ll find wool fibre in is batt form (or carded fleece), which is a stage before tops in the wool processing, when the fibres have been carded into sheets and are lying in all directions rather than being combed into one direction like tops. Batts can be peeled and torn apart to use and can be quicker to work with than tops because the fibres are already intermingled so you don’t have to be as precise with the layout. Batts are commonly used for wool breeds other than Merino, so as a general guide they are likely to consist of a coarser fibre and be used for a more hardwearing end result like a bag or slippers.
Sheets of wool batt fibres: Finnwool (blues) and Maori (pink).
How to Compare Wool Fibre
Other terminology is also used, such as descriptive terms (like fine or coarse, although there is no industry standard for this), staple length (the length of a wool lock), lustre (sheen) or crimp (natural waviness) to give you an idea of what the fibre is like. There is also a more traditional way of measuring and referring to the thickness of each fibre called the Bradford count, which is based on the number of 560-yard hanks that can theoretically be spun from one pound of wool roving. The higher the number, the more hanks can be spun per pound and therefore the thinner the fibres. You’ll see this reference still used, in particular when buying Merino wool tops, where you’ll commonly see 64s (23 mic, fine) and 66s (22 mic, fine), but they do go up to the 100s (18.5 mic and lower, super fine and ultra fine).
As a very brief guide, here are some commonly available wool fibre breeds, including those used in this book, and their approximate measurements/qualities (but note that these can vary even within the same breed). These all offer good dyed colour ranges, but you will find lots more details online and from supplier websites:
Breed (Supplier)
Microns
Terminology
Merino
14.5–19
Ultra fine/Super or Extra fine
Merino
20–25
Fine
MC-1 (Living Felt)
25
Medium–Fine
Maori (DHG)
27
Medium–Fine
Finnwool (Piiku)
26
Medium-Fine
Bergschaf
30–36
Medium-Coarse
Norwegian
33–36
Medium–Coarse
Working with Wool Fibre
It’s worth making the point here that you can felt any project with any wool fibre, they will all work! However, part of the art of feltmaking is using the right fibre for the right job. So, you are less likely to want to make a scarf to go around your neck with a very coarse fibre, which isn’t going to drape as well or feel as soft against your skin. And you probably won’t use a very fine fibre to make a pair of slippers, which really need to be made of something a bit coarser and more hard-wearing. Those are obvious examples. But for everything in between (for example, the Fringed Clutch Purse Project in Chapter 4), it really doesn’t make much difference what you use. Often your choice will be dictated by what you’ve got available to you and what colours you want to use. It’s worth experimenting with different fibres to see which you like best and then building up your colour stash. For instance, I’ve got a vast range of Merino tops (fine and extra fine) and Finnwool batts, which is why you’ll mostly be seeing those appear in the projects. But if you’ve mainly got a collection of a different batt fibre you prefer to use, feel free to use that instead (it shouldn’t make much difference in terms of finished sizes, though you’ll want to test this for any of the projects with very specific end sizes).
SURFACE DESIGN EMBELLISHMENTS
Now that we’ve considered our options for wool fibre to create our felt, we might want to think about decorating the felt. We might do this by creating patterns simply using different colours of the wool fibre (there are also lovely, variegated mixes available from suppliers). But there is a whole world of different materials out there that can be combined with the wool fibre during the wet felting process to create incredible patterns and textures. These materials do not just sit on the surface of the felt (although we’ll also consider the additional surface design techniques we can apply to finished felt in Chapter 6), they combine with it and sink in to become an integral part of the final felt. Let’s look at some of the embellishment materials on offer, starting with other wool products.
Prefelt
Prefelt (or pre-felt) is a sheet of wool felt which has been only partly felted. The fibres have started to bond together, but the fulling/shrinking stage has not yet happened, so it is still quite soft and delicate. You can buy ready-made prefelt (which has been needle-punched together and is relatively firm) or make your own (by following the felting process and stopping midway through once the fibres have started to bond – seeChapter 2 for the exact process). You can also create prefelt with any surface embellishment layer on top, for example a nuno or viscose prefelt.
A sheet of commercial needle-punched Finnwool prefelt.
So why would you want to do this? The main advantage of creating designs and patterns with prefelt is in order to create a more definite shape or design on your felt. If you lay out your wool fibre background and then add wisps of different wool viscose or fibre colours on top in a design and then apply the whole felting process, you’ll find that the design will shift, blur and become smudgier, and the colours will lose their purity as they bond with the background fibre colours. So one way of creating more definite shapes with defined edges and purer colours in your surface design is to use prefelt, which you can make in advance, dry and then use to cut out shapes. You would add your prefelt pieces as a surface design to a new fibre background and then follow the felting process to integrate them. Because the prefelt has already been through the felting process a bit, and as you’ve cut the fibres, they all mingle less with their neighbours (but still enough to felt with the background). This gives you more control and precision when creating a design, and results in more definition and truer colours in the finished design on the felt. See the Journal Cover Projects in Chapter 4 for examples using viscose prefelt.
Another way of working with prefelt is to use it as a base/background layer (instead of laying out fibre) and then create your design layer on top. This can save you time (by not having to lay out the fibres), especially with a large layout, and can be useful if you struggle with your hands as it makes the whole layout process a bit easier. It can also be helpful if you want to create a very even end result (especially if you use commercial prefelt).
You can also create added texture with prefelt, for example if you cut out shapes from very thick pieces (or layer up two or three shapes) and then cover them with further wool fibre or other embellishments (see the Hoop Art Variation Project for an example of this in Chapter 3). Although prefelt should ideally have not yet gone through the fulling/shrinking stage, if you overfelt it you can help it felt to a new fibre background by roughing up the reverse to help the fibres bond with the fibres beneath it. There is also no fixed rule for making prefelt, just rubbing it might give you the loose prefelt you want, or you might rub it and go through a whole rolling process too, which would give you a firmer prefelt. The more felted the prefelt, the more defined the shapes you can create with it when combined with new fibre (but beware that it might be slightly more difficult to felt to the new fibre).
Curly Wool Locks
Many sheep breeds produce long curly locks (popular ones include Wensleydale, Teeswater and Masham), which are often hand-dyed and are perfect to use as embellishments in wet felting. They aren’t heavily processed, so they retain their curly, ringlet-like shape, even after felting, and are an excellent way of creating texture and interest. And because they are a wool product, they felt in easily with other wool fibre. You can either lay the locks directly onto your wool fibre layout and felt them in, or a popular method is to use them as a fringe or edging by just laying the thicker ‘root’ end of the lock into the edge of the fibre layout and leaving the tip end of the lock unfelted and free to hang off the edge.
Examples of hand-dyed long curly wool locks.
You can find other similar locks like mohair (from the hair of angora goats) which also work well in felting.
Wool Yarns
I’m a big fan of using wool yarns in wet felting to build up patterns, and you can add a lot of textural interest by also using a variety of yarn types in addition to a standard smooth knitting yarn: mohair (which is hairy), mohair bouclé (which has loops), slub or thick and thin yarns (which have thinner and thicker parts), and art yarns (which are often hand-spun and might have multiple strands and added slubs and fibres). As a general rule, the more hairy, multi-stranded or loose a yarn is, the easier it felts (the same goes for non-wool yarns). However, you’ll see I’ve also used a standard smooth wool yarn for the crochet design in the Yarn Basket Project in Chapter 5. As long as the yarns have high natural wool content you can just lay them on top of your wool fibre background and they’ll felt in quite happily (but watch out for wool yarns labelled as superwash as these have been chemically treated to avoid shrinkage).
A selection of thin, thick, slubby and bouclé mohair yarns.
Pencil Roving
Pencil roving is a single, pencil-thickness length of wool fibre that has not yet been spun to create yarn, so is classed as a pre-yarn. It’s still very delicate (although thicknesses vary), but can be used in felting to create lines and patterns just by laying it on top of a fibre background. You can also (but very carefully because it can break apart so easily) knit/crochet/weave a complete textile piece from it before felting.
A range of dyed Finnwool pencil rovings (unspun pre-yarn).
Wool Nepps
Wool nepps are tiny balls of felted fibres which are by-products of commercial wool processing and can be found in a range of dyed colours. They are great for adding texture and pattern to wet felting projects, particularly if you’re aiming for realistic landscape designs because adding their little dots of colours can give an impression of natural elements like flowers in fields. They can be difficult to felt in because they are already felted, but the trick is to add some wisps of wool fibre on top to anchor them in and be very gentle with them in the early stages of the felting process.
Close-up of dyed wool nepps.
Art Batts
Art batts are beautiful sheets of different colours of wool fibres which have been carded together, often with additional embellishment fibres mixed in, and then rolled into a bundle. You can make them yourself or you’ll often find them at textile craft shows being sold by small-scale producers. They’re mini works of art in themselves, which are used by spinners and felters to create their own work. As they’re handmade, usually with a drum carder, the batts won’t be as uniform as commercial wool batts, but you can still peel them apart in the same way and just add them on top of your main fibre background as a surface design (and a little goes a long way).
Art batt with Teeswater curly wool locks, wool nepps and seacell and silk fibres.
Protein Fibres
Protein fibres are those that originate from animals, such as wool and mohair. Silk fibres are also a popular animal fibre to use in wet felting. They’re easy to combine with wool fibre (just lay them on top and the wool fibres will happily grab hold of and bond to them) and they provide beautiful sheen and organic patterns (and, again, a little goes a long way). There is a large variety of silk fibres available in slightly different forms, such as dyed Mulberry silk tops or roving (long fibres combed into lengths), silk hankies (squares of silk made from spread-out cocoons), silk throwsters waste (recycled silk waste threads), sari silk tops (recycled sari silk waste threads), silk laps (which come in sheets like batts), and silk noil (silk waste made from short fibres, so more slubby with less sheen).
Examples of hand-dyed silk fibres: Mulberry silk tops (light sea green), silk throwsters waste (bright green and blue) and a silk hankie (green and yellow).
Colourful sari silk tops.
There are also newer protein fibres such as milk protein fibre, which is generally found undyed, but will add a similar organic sheen to the felted surface.
Plant Fibres
There is a vast (and ever-increasing) array of plant fibres on the market, from the most popular ones like viscose (made from cellulose/wood pulp), bamboo and ramie (nettle), which are available in an extensive range of colours, to more obscure ones like seacell (seaweed), mint and pineapple, which are mainly found just in white or natural. They all function in a similar way to silk fibres: you just add wisps of them on top of your wool fibre, which happily bonds with them, and they provide a lovely sheen and organic pattern to the finished felt. They also mainly come in combed tops or roving form and are very silky and shiny. It is often difficult to tell the difference between them because they are so similar in appearance and function.
Plant fibre tops: viscose (cobalt blue), bamboo (pink), linen/flax (light turquoise) and mint (white).
A plant fibre which looks quite different to most of the above is flax or linen fibre, which has a more hairy and less smooth appearance with less of a sheen, so gives quite a different finished result.
Synthetic Fibres
There are lots of glittery and shiny synthetic fibres that you can add to your felting, such as Angelina, Stellina (polyester and nylon) and Trilobal (nylon). You can lay them on top of your wool fibre with wisps of fibre on top to sandwich them in, or a more effective way to help them felt in is to card them in with your fibre so that they are more integrated with it already. You’ll often find sparkly fibres included in this way in art batts, and you can also buy manufactured blends like Merino tops with glittery fibres already mixed in.
Synthetic fibres: trilobal (white, rainbow and teal green), and Angelina (peacock and pink).
Synthetic Yarns
Although wool yarns are ideal for embellishing felt as they bond with the wool fibre so easily, there are obviously lots of other yarns out there with interesting colours and textures that aren’t made of wool, but which give unique effects. These include novelty yarns, yarns made of acrylic, polyester and nylon, metallic yarns (like eyelash tinsel) and even superwash yarns. The golden rule here is that if you know you are dealing with a synthetic yarn or are in any doubt about the wool content, then you need to add some wisps of fibre on top to sandwich the yarns between the top wisps and the full fibre background layer below, to lock them in place. You don’t need much fibre on top, so you don’t need to completely cover the yarns, just a very fine layer of wisps is enough to bond with the main layer of fibre.
Eyelash tinsel yarns (pink and silver) and Merino tops blend with gold Stellina.
Metallic sari ribbon yarn with visible weave holes.
It’s a good idea to test out whether your non-wool yarns will felt, not least as some of them might felt in quite easily. As with wool yarns, the more hairy, multi-stranded or loose a yarn is, the greater chance it has of felting, so some synthetic yarns might surprise you. Also look out for synthetic yarns with visible holes or weaves, such as metallic ladder yarns and sari ribbon yarns, which felt in easily as the fibres can migrate through the holes.
Fabric/Nuno Felting
Nuno felting (nuno is the Japanese word for cloth), invented by felter Polly Stirling, involves felting wool fibre into cloth to create a new combined and completely integrated fabric, also known as laminated felt. For the process to work effectively, the cloth should ideally have an open weave structure, which enables the wool fibres to migrate through the holes and bond fully with it. Once bonded, and the felt starts to shrink, the process makes the cloth ruche and crinkle into beautiful organic and textural patterns, which differ depending on the material used (from tiny all-over ruching to larger rectangle-like shapes).
Silk fabrics: sari silk (green and pink patterned), silk chiffon (pink) and Margilan silk (blue).
Fine silk fabric is very popular for nuno felting, notably silk chiffon and very fine Margilan silk from Uzbekistan, which is often combined with a very thin layer of extra fine Merino tops to create garments. The combination of felt and fabric enables you to create very thin but strong felt with good drape. Other fabrics that work well are very open weave fabrics like cotton cheesecloth and scrim. Patterned fabric, like sari silk and silk scarves, can create interesting effects when ruched up into nuno felt. Any other fabric which has holes in it, like lace, should also felt in.
Nuno felt doesn’t have to be a complete layer of fabric and wool. A technique that works well for items like scarves, which can be more decorative and delicate than a garment, is to use a whole layer of fabric, but just partly covered with a pattern of wool fibre. This creates some flat areas that are just fabric, some partly ruched areas of fabric where it lies near to the wool fibre, and some completely ruched parts where the fabric joins the fibre. You might also want to leave deliberate holes in the fibre layout, which get filled up by the scrunched-up fabric, creating another different effect. Alternatively, you can create nuno elements within your felt, by having a complete layer of fibre and adding just pieces or a patchwork of fabric pieces to create nuno effects (see the Silk Stripe Cushion Cover Project in Chapter 4 for an example). However you approach it, using cloth in your felting is an excellent technique to give your felt more structure (so that you can make very fine felt with inherent strength) and/or to add organic pattern and texture.
As a general rule, it’s harder (but not impossible) to combine man-made fabrics (like polyester) with fibre to create nuno felt. However, what’s more important than what a fabric is made of is the openness of the weave, so a synthetic fabric with an open weave will probably work better than a thicker silk with a tight weave. If a fabric’s weave is very tight and the fabric is thick, it may not work at all, regardless of what it’s made of. It’s therefore really important to sample all your fabrics (with the wool fibre you want to use) for feltability before you commit to a project, and that includes silk which can be very variable. You’ll also want to test how the fabric ruches, and by how much, as this will affect the shrinkage of the felt. That’s why you should really make a sample first before making something important, or where the exact shrinkage or an exact look is critical.
The process of nuno felting is the same as that for standard wet felting, although if you’re just using one fine layer of wool fibre then you can lay out the fibres in any direction, as the fabric helps to give the finished felt more strength and structure. Once you start the wetting and agitation process, it helps to start very gently and slowly with nuno felting, as you want to ensure that the fibres have time to bond fully with the fabric (and not just with each other, which can happen if the bonding happens too quickly). So, to slow things down some felters use very cool water. I find it also pays to be quite hands-off at the start, as it’s very easy to disrupt the fabric and the delicate bonds that the fibres are developing with it, so generally I do less rubbing and more rolling and avoid moving on to higher agitation methods until I’m sure the fibres have fully bonded to the fabric.
Working with Embellishments
As with the wool fibre I’ve used in the projects in this book, my choice of embellishment materials has mainly been dictated by my own stash and preferences, but you can swap these for materials you already have or would prefer to use. I’ve tried to use similar materials in different projects to illustrate how they can be used to different effect, for example the Fringed Clutch Purse and Fringed Cushion Cover Projects in Chapter 4, so the surface design techniques shown are all interchangeable. You can also layer up multiple techniques for greater effect and interest, for example the Nuno Silk Scarf Project in Chapter 3 includes not just nuno felting but also a viscose fibre top layer.
Here are some general tips on combining wool fibre with embellishment materials:
• Wool fibre will bond to other wool fibres, and protein fibres (like silk) and plant fibres (like viscose), quite easily, so you can pretty much just lay those on top of your wool base and they’ll felt together.
• Wool fibre will also bond well to open weave and fine fabrics like cotton cheesecloth and silk chiffon because the wool fibres can migrate through the holes in the fabric and bond to the fabric that way.
• Once you start introducing man-made embellishment elements (like acrylic yarns or nylon fibres) or non-open weave or synthetic fabric (like polyester), you’re going to have a much more difficult time getting them to bond (if at all). This is because the yarns don’t have feltable properties and the fabric can’t easily let the wool fibres through it to bond. So your main options to secure yarns are to lay more wisps of wool on top to sandwich them between layers of wool and lock them within the felt, or choose synthetic yarns which are very hairy, slubby or open-stranded, as this gives the wool fibres something to grab hold of. If you really want to persist with using a particular fabric, then an option to try is to be very painstaking at the start of the felting process, going very slowly and using cool water until the fibres start to migrate through.
• It’s always a good idea to do test samples with your embellishment materials, both to check that they will felt in and to see what sort of effect they create.
•


