Erhalten Sie Zugang zu diesem und mehr als 300000 Büchern ab EUR 5,99 monatlich.
- Herausgeber: The History Press
- Kategorie: Geisteswissenschaft
- Sprache: Englisch
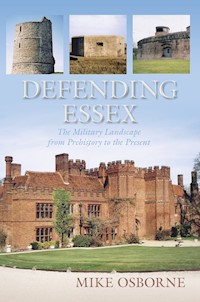
For 2,000 years Essex, the county with the longest coast-line in England and dominating the eastern approaches to London, has been in the front-line against foreign invasion, from the Romans to the Spanish Armada to the two World Wars. It has also been involved in civil disorder, from the Anarchy and the Peasants' Revolt to the English Civil War. Many reminders of these scenes of conflict may be seen in the landscape - Iron Age forts, a Roman walled town, medieval castles, strong-houses and homestead moats, coastal fortifications from Napoleonic times and earlier, and Victorian barracks and the drill halls of the Volunteers. From the twentieth century there are still more sites: military airfields from the First World War and Battle of Britain fighter airfields, radar sites and later bomber bases from the Second. Anti-invasion defenses line the coast, linear defenses criss-cross the landscape, and AA sites are everywhere to be found. Taking the story all the way up to the nuclear threat of the Cold War, this guide will interest residents and visitors alike.
Sie lesen das E-Book in den Legimi-Apps auf:
Seitenzahl: 377
Veröffentlichungsjahr: 2013
Das E-Book (TTS) können Sie hören im Abo „Legimi Premium” in Legimi-Apps auf:
Ähnliche


Contents
Title Page
Acknowledgements
Abbreviations
Introduction
One Prehistoric to Saxon Essex
Two The Early Medieval Period
Three The Later Medieval and Tudor Period, 1300–1600
Four Stuart and Georgian Essex
Five The Victorian Age, 1815–1914
Six Essex in the First World War
Seven The Inter-War Years
Eight Essex in the Second World War
Nine The Cold War and Beyond
Appendices
Bibliography
Copyright
Acknowledgements
Mike Bardell of RFCA, Chelmsford; Alec Beanse and Wayne Cocroft of English Heritage; Simon Brand DSM, DCM, late of 2 Para; Fred Nash; Ivor Crowson; Major Tony Kriehn and WO1 Bruce Dickson, respectively 2i/c and RSM of 101 (EOD) Engineer Regiment at Carver Barracks; Colin Alexander; Paul Francis; Mrs Bygraves; owners and tenants at Bowaters Farm and Stow Maries airfield for allowing access.
All illustrations are by the author unless otherwise credited.
Abbreviations
AA
anti-aircraft
AAA
anti-aircraft artillery (US Army)
AAOR
anti-aircraft operations room (ROTOR system)
ACF
Army Cadet Force
ADGB
Air Defence of Great Britain (1924 scheme)
ARP
Air Raid Precautions
A/S
anti-submarine
AT
anti-tank
ATS
Auxiliary Territorial Service (forerunner of WRAC)
BD
Bomb Disposal (Unit)
BEF
British Expeditionary Force
BHQ
Battle Headquarters
BL
breech-loading (gun)
CASL
Coast Artillery Searchlight (Second World War)
CBA
Council for British Archaeology
CD
Civil Defence
CH
Chain Home (radar)
CHEL
Chain Home Extra Low
CHL/CD
Chain Home Low/Coast Defence
CRE
Commanding Royal Engineer
DEL
Defence Electric Light (Coast Defence Searchlight to First World War)
DEMS
Defensive Equipping of Merchant Ships (Second World War)
DFW3
Directorate of Fortifications and Works, Department 3
(E)(R)FTS
(Elementary) (Reserve) Flying Training School
EH
English Heritage
EOD
explosive ordnance disposal
EXDO
Extended Defence Officer (minefield control)
FIDO
Fog Information and Dispersal Organisation (on airfields)
FUSAG
First US Army Group (spurious formation in D-Day deception)
GCI
Ground-Controlled Interception (radar/fighter system)
GDA
Gun-Defended Area (Second World War AA defences)
GHQ
General Headquarters (as in GHQ Line)
GL
gun-laying (as in radar for AA artillery)
HAA
heavy anti-aircraft
HT
Horse Transport
IAZ
Inner Artillery Zone (London Second World War AA defences)
IFF
Identification Friend or Foe
KRRC
Kings Royal Rifle Corps
LAA
light anti-aircraft
LADA
London Air Defence Area
LCM/LCT(1–8)
Landing Craft Mechanised/Tank (eight sizes)
LDV
Local Defence Volunteers, later Home Guard (HG)
lmg
light machine gun
LST
Landing Ship Tank
MFV
Motor Fishing Vessel (for RN service)
MGB/L/TB
Motor Gun-Boat/Launch/Torpedo-Boat (RN)
(M)M/S
(Motor) Minesweeper
MOD
Ministry of Defence
MU
Maintenance Unit (RAF)
NOIC
Naval Officer in Charge
NZEF
New Zealand Expeditionary Force
pdr
pounder (as in weight of projectile)
PF
position-finding (cell) for ranging Coast Artillery
PSP
pierced steel planking (for runways and hard standings)
QF
quick-firing (gun)
RAAF
Royal Auxiliary Air Force (until 1957)
RAC
Royal Armoured Corps
RAF
Royal Air Force (from 1 April 1918)
RAFVR
Royal Air Force Volunteer Reserve
(R)AOC
(Royal from 1918) Army Ordnance Corps
(R)ASC
(Royal from 1918) Army Service Corps
RCHM(E)
Royal Commission on the Historical Monuments of (England)
RCM
radio counter measures (Meacon, Bromide, beam-bending etc.)
REME
Royal Electrical and Mechanical Engineers (from 1942)
RFC
Royal Flying Corps (up to 31 March 1918)
RFCA
Reserve Forces and Cadets’ Association
RGA
Royal Garrison Artillery
RHA
Royal Horse Artillery
RML
rifled muzzle-loader (Victorian cannon)
RN
Royal Navy
RNAS
Royal Naval Air Service (up to 1918, Fleet Air Arm from 1938)
RN(V)R
Royal Naval (Volunteer) Reserve
(R)OC
(Royal from 1941) Observer Corps
SAS
Special Air Service
S/L
searchlight
SOE
Special Operations Executive
TA
Territorial Army (from 1920 to 1939 and 1947 to present)
TAC
Territorial Army Centre (drill hall post-1947)
TAF
Tactical Air Force (to support ground operations)
tb
temporary brick (single brick with buttresses in RAF buildings)
TF
Territorial Force (from 1908 to 1918)
UKWMO
United Kingdom Warning and Monitoring Organisation
UP
unrotated projectile (as in Z battery, AA rockets)
USAAF
United States Army Air Force (Second World War)
USAF(E)
United States Air Force (Europe) (post-Second World War)
VAD
Voluntary Aid Detachment (First World War)
VTC
Volunteer Training Corps (First World War Home Guard)
WAAF
Women’s Auxiliary Air Force
WRAC
Womens’ Royal Army Corps
WRNS
Women’s Royal Naval Service (Wrens)
Introduction
Essex can thank the wide stretch of the North Sea as a natural defence against invasion – for otherwise, its 300 miles (480km) of coastline, the longest of any English county, much of it flat and inviting, would have seen countless invaders. Granted, the Vikings landed at Maldon and Mersea Island, and the Dutch raided Harwich, but Claudius the God, William the Conqueror and the future Louis VIII of France chose the Channel route, subsequently working their way north. Napoleon and Hitler planned Channel crossings, but missed the boat. The sea was not, however, sufficient protection in itself, and fixed defences were required to secure the landing places, especially in the Thames Estuary, representing the gateway to London. Medieval castles, Tudor forts, Napoleonic Martello Towers, Victorian casemates, and twentieth-century batteries and pillboxes all stand testimony to this vulnerability. Much of the Essex landscape is flat and, unsurprisingly, some 800-odd medieval moated sites, many of them with at least a nod to defence, have been identified, the highest total for any historic English county. In his survey of more recent times Fred Nash, working for an enlightened Essex County Council, has recorded 2,700 sites of Second World War defences. This has taken him nearly twenty years to date, and he recently estimated around a further 800 sites remain to be identified and recorded. A number of important survivals such as the defences of Chappel Viaduct have been scheduled as ancient monuments.
No county can be a discrete entity and both fixed geography and managed boundary changes demonstrate this. The wider defences of Essex straddle the Thames in the south and Harwich Haven in the north, so there are references in the text to sites in, respectively, Kent and Suffolk. Greater London’s 1968 reorganisation turned a large slice of Essex into six new London boroughs, and whilst many of the monuments in those boroughs were covered in the London volume of this series there will remain a degree of overlap.
Despite much of Essex lying in the path of the developers, much of its defence heritage remains. Moreover, as plots are cleared for redevelopment, land use changes or road-layouts are altered, archaeologists and individuals alike continue to make discoveries such as that of the Napoleonic Bathside coastal battery in Harwich.
Any readers who might be lucky enough to uncover items of interest are asked to observe three principles: to respect private property and privacy; to take appropriate care in potentially hazardous locations; and to report discoveries to local authority Historic Environment Officers or museum staff. The landscape changes overnight and I suspect that few of those watching or participating in the Olympic mountain-biking at Hadleigh Country Park will know that they are in the middle of a Second World War anti-aircraft site.
It has been a pleasure to reacquaint myself with places well-known to me and to discover others less so. In the 1990s I walked the Outer London Line and the southern sections of the Essex GHQ Line with Colin Alexander. Soon after that, my wife and I walked the rest of the GHQ Line and the Eastern Command Line, as well as much of the coast, but in the last twelve months we have revisited many of those sites as well as taking the opportunity to visit some that are new to us. The county has a rich defensive heritage from many periods and it is the intention of this book to chart its development and to place it in its social and historical context.
Mike Osborne,
July 2012
Prehistoric to Saxon Essex
Prehistoric Fortifications
There are upwards of twenty or so prehistoric sites in Essex which could be described as defensible. Amongst the earliest is the Neolithic causewayed enclosure at Orsett, whose purpose is still not fully understood. Two millennia on and Bronze Age sites at Springfield Lyons, Great Totham and Mucking, none of them much larger than half an acre (0.2ha), comprise small groups of structures, often round-houses, surrounded by banks, palisades and external ditches. These defences were probably intended as much to protect the inhabitants and their stock from wild animals, as to defend against hostile neighbours or to control private space.
By the time of the Iron Age the size of social groups had increased and so settlements became bigger, often with more significant defensive features. Regardless of the terrain, such settlements are usually known as hill forts, and there are a number in Essex. Danbury Camp occupies a hill-top site, but many must have relied solely on the strength of their defences. One such was Wallbury, a pear-shaped fort sited on a spur over the Stort valley, and covering 30 acres (12ha). It has ditches 50–70ft (15–22m) wide, and a double rampart 7ft (2m) high. The rampart, constructed as a hollow timber framework, revetted with timber or rubble and filled with the spoil from the ditch, would have been topped by a timber palisade with a fighting-platform. The entrance would have been a dog-legged passage through the rampart, with a timber tower above it. Often this entrance was placed in a re-entrant so that the approaches could be flanked by fire from the defenders’ slings and arrows. Most camps were less impressive than Wallbury, many – such as Ambresbury Banks, Ring Hill Camp at Littlebury, and Prittlewell Camp in Southend – being univallate with a single bank and ditch. Examples of the more substantial bivallate camp can be found at Chipping Hill, Witham, and Pitchbury Ramparts. These camps ranged in size from the 7 acres (3ha) of South Weald Camp to the larger Wallbury. Ditches could be up to 180ft (55m) wide, as at Pitchbury, and the 10ft (3m) depth of the ditch at Ambresbury Banks, combined with its banks, 7ft (2m) in height, would have created a formidable obstacle to the attacker, crossing under a hail of missiles. The situation of camps such as Wallbury and Loughton Camp on spurs would also have added to their defensive properties by limiting the number of possible approaches. At Ardleigh is the unusual occurrence of a single isolated round-house, surrounded by a deep rectangular ditch, ringed with a timber palisade.
Much larger than the usually compact hill forts were the much rarer Celtic oppida, of which there were only a handful in the whole of Britain. One such oppidum, or tribal centre, was that of the Trinovantes at Camulodunum, or modern-day Colchester, named for Camulos, the Celtic god of war, and dating from the early first century BC. It was characterised by its sprawling site, its extensive, but disjointed, systems of surrounding dykes, and the presence of many of the activities associated with towns. These included artisans’ workshops, a mint and evidence of trade, particularly in food and pottery. The dykes at Camulodunum added up to a total of 18 miles (29km) of discontinuous lengths, and may not have been defensive in conventional terms, but intended to define space, to control movement and, it has been suggested, to limit the manoeuvrability of chariots, the Celts’ most favoured tactical strike force. The earliest dyke was Heath Farm Dyke, dating from c. 100 BC, and the latest, Gryme’s Dyke, from after the town’s destruction by Boudicca in AD 60. Most of the ditches face west and are V-shaped, up to 13ft (4m) deep, with a bank behind. Heath Farm Dyke is on a slightly smaller scale, measuring 10ft (3m) from the bottom of the ditch to the crest of the bank. The earlier dykes may have faced west against the encroachments of the expansionist Catuvellauni. The oppidum appears to have occupied a significant area of up to 20 square miles (5,000ha) between the Colne and the Roman river, with its epicentre at Gosbecks, south-west of the modern town centre.
Roman Invasions
Following an armed reconnaissance the previous year, Caesar landed in Kent with five legions and 2,000 cavalry, in 54 BC. The forces of Cassivellaunus initially managed to avoid serious contact, drawing the Romans ever deeper into inhospitable country. However, the Romans were aided by the Trinovantes, and allied tribes, who bore deeply-felt resentments against Cassivellaunus. His forces, possibly based on the substantial hill fort of Wallbury with outposts at Uphall, Ambresbury Banks and Loughton, were defeated by the Romans. Although Caesar had gained the upper hand he was forced to hurry back to Gaul, where a rebellion was breaking out, leaving orders for Cassivellaunus to stop bothering the Trinovantes. In the following years, the Catuvellauni and the Trinovantes combined into a successful trading partnership, and under the powerful leadership of Cunobelinos, Shakespeare’s Cymbeline, they thrived by balancing the influences of the three major power-blocks: Rome, the Gallo-Belgic immigrants of the first century BC, and native British tribes like the Iceni. In AD 43 the Romans returned, led by Plautius under the orders of the Emperor Claudius. Landing unopposed at Richborough (Kent), the Roman army marched inland, defeating the tribes under Caratacus on the Medway, in a particularly hard-fought battle lasting two days. Survivors of the British army retreated across the marshes, possibly crossing the Thames at Mucking or East Tilbury. The Roman army, now accompanied by Claudius in person, crossed the Thames at London and advanced towards Camulodunum. Some skirmishes were fought on the way, providing the emperor with military success for home consumption, and complementing the glory of the British leaders’ swift submission.
Roman Consolidation
Following this military success, the Romans embarked on a campaign to conquer the whole country. The earliest Roman roads began at London and fanned out across the country with forts being built at regular intervals, usually a day’s march apart, to secure the route, to provide accommodation for officials in transit, and as permanent garrisons in newly occupied areas. These garrisons would have ranged from cohorts of legionaries down to detachments of auxiliaries, depending on local circumstances. Stane Street, the road from London to Camulodunum, had at least three forts along its length. One would have been on an as-yet undiscovered site near Billericay, with others at Kelvedon and Chelmsford, the route terminating at a fort at Stanway, very close to the tribal oppidum itself. Chelmsford was named Caesaromagus, which may imply some significance for Claudius himself; perhaps it was the site of one of his famous victories. These interval forts were roughly square with sides of around 400ft (120m), defended by a bank and the characteristic V-shaped military ditch. Huts housed the garrison with grander structures serving as the commandant’s house and unit HQ. The fort at Stanway has only three sides, with the Heath Farm Dyke forming the fourth. In Chelmsford the fort was next to a bridge over the river Can where a ditch, turf rampart and timber buildings have been excavated. At Kelvedon, Roman Canonium, the fort straddled the main road to Romanised Camulodunum. Other camps have been identified at Orsett and Hadleigh, possibly serving as signal stations on Thames crossings. By using the known Roman road network it is possible to infer the existence of further forts at the river crossings of Great Dunmow and Braintree on the route west from Camulodunum, and at Wixoe on the road which ran to Cambridge and on through Godmanchester into the Midlands.
Each of the four legions involved in the conquest of Britain was provided with a substantial depot, whose location shifted as the occupation proceeded. The XXth Legion’s base at Camulodunum was established 2 miles away from the original fort, next to the river Colne, surrounded by a turf rampart built on a raft of planks, and a ditch 16ft 6in (5m) wide, the circuit extending to just under 2,000 yards. Barracks were built of clay blocks on oak ground-plates themselves resting on mortared plinths, preserved by Boudicca’s conflagration. The discovery of Claudian coins at Fingringhoe Wick has led to suggestions that supplies for the legion were brought in by ship. Moreover, a Roman camp has been identified at Wick Farm. Within a few years the legionary base, whose street plan can still be traced in the town’s modern layout, had outlived its usefulness and was replaced by a colonia for retired legionaries, occupying the site of the fortress, its eastern annexe, and as much land again to its east. The defences were levelled right down to the log foundations, and the buildings themselves adapted for civil use. A few years later, when the Boudiccan revolt broke out, the town was graced by the unfinished, but already imposing, temple of Claudius, but was otherwise virtually unprotected.
Boudicca’s Revolt
The revolt in AD 60 was caused by a combination of, on the one hand, Roman arrogance, complacency and insensitivity, and, on the other, British naivety and pride. On the death of her client-king husband, Boudicca, neglecting to read the small print, expected to succeed him. The Romans, regarding the Iceni lands as theirs to bestow on whomsoever they pleased, took them back under imperial management – ignoring, as Boudicca herself must have known they would, her late husband’s wish that his daughters would inherit alongside the emperor. The widowed queen and her daughters were brutally and publicly punished for their presumption. At the same time that this was happening, a Roman army was crushing the Druids on Anglesey, the defeats of the last fifteen years were still smarting, taxes were being levied, foreign merchants were creaming off the tribes’ wealth, and this latest humiliation must have come as the final straw for the Iceni, who determined to destroy the Romans before they were completely crushed or enslaved. As news of the uprising spread, the Roman Governor gathered together a scratch force of legionaries and cavalry, marching down from Longthorpe, the legionary depot on the Nene, west of Peterborough. This expedition, premature but at the same time lacking in urgency, was ambushed by Boudicca’s army and effectively destroyed, leaving no significant Roman force within several weeks’ march, and a clear run for Boudicca to march her army south. Her intention was to eradicate all traces of Roman power by utterly destroying Colchester, St Albans and London – the buildings and everyone in them, collaborators all. Barely reinforced by a few troops from London, the Colchester veterans, their families and the rest of the town’s inhabitants were slaughtered by the Iceni, and the settlement razed to the ground, a last stand in the hated Temple of Claudius marking the death throes of Roman Camulodunum. Boudicca moved on, meting out the same treatment to St Albans and London, before being defeated by the Roman army returning from its campaign in Wales, and committing suicide. Around the time of Boudicca’s revolt the Roman settlement at Ardleigh, a few miles north-east of Colchester, received defences in the shape of a deep V-shaped ditch and a timber palisade with gates. Although there is no evidence of these defences suffering assault, they appear not to have lasted very long.
The Defence of Britannia
The aftermath of the Boudiccan Revolt saw the rebuilding of Camulodunum as a centre of Roman government, accompanied by a strengthening of the Roman military presence. Camulodunum was given a circuit of town walls, of 3,000 yards, slightly increasing the area of the first colonia to some 108 acres (43ha). These walls, constructed between AD 65 and AD 80, were 9ft (2.8m) thick and up to 20ft (6m) high, standing on foundations going down a further 4ft (1.3m). It was built of septaria, the nodules found in the local clay, Roman tile and mortar, laid in bands and courses. There were six gates, a tower at each corner, and rectangular interval towers built up against the interior face of the walls. Around AD 50, the veterans of the colonia had built a triumphal arch on their western boundary, on the site of the West Gate of the legionary fortress. This line still marked the western limit of the walled area and so the arch was incorporated into the defences as the Balkerne Gate.
The arch became two carriage arches and a quadrant-shaped tower, containing a pedestrian arch, was built each side. The whole structure extends to 107ft (33m), projecting 30ft (9m) into the field. The only other surviving gate, Duncan’s Gate, consisted of a single archway 11ft (3.4m) in width. These imposing fortifications were not only some of the earliest, but also the strongest in Roman Britain, and still represent some of the best-preserved. Another immediate response to the Boudiccan Revolt was the expansion of the network of forts protecting the road system. There may have been a fort at Great Chesterford, guarding the Cam crossing on the road north from St Albans prior to the revolt, but it was most probably strengthened after AD 60 as a base for punitive operations into East Anglia, the Iceni heartlands. With the Cam forming its western defences, it had a double ditch 15ft (4.5m) wide, and a bank with a timber palisade, all enclosing an area of 24 acres (10ha), and appears to date from Nero’s time.
During the third century the activities of sea-borne barbarian raiders prompted an overhaul of the Roman defences. At Colchester it would appear that the gates were blocked, limiting access through the walls; the Balkerne Gate reduced to just one of its pedestrian archways. A more pro-active response was the creation of the Saxon Shore, a coastal defence system based on a string of forts supporting a fleet, the Classis Britannica. Forts and signal towers were built around the eastern and southern coasts of Britain and also on the Continent.
1 Colchester: the Roman Balkerne Gate, showing one of the entrances.
There were two forts in Essex, at Walton-on-the-Naze, its site now under the North Sea, and at Bradwell-juxta-Mare, or Othona. These forts were built of stone with surrounding ditches. Othona, much of whose fabric was either stolen to build the Saxon chapel of St Peter-on-the-Wall, possibly incorporating the Roman West Gate, or eroded by the sea, appears to have been roughly square in shape. The west wall, uncovered by excavation, was 525ft (89m) in length and about 13ft (4m) in thickness. It had an external ditch 25ft (8m) wide and 8ft (2.5m) deep. There was a C-shaped bastion at the north-west corner, and more along the wall itself. This would suggest a strong similarity, in both size and form, to Burgh Castle (Suffolk), the next fort in the chain. At some time the original fort at Chelmsford was replaced by a stronger structure, but still consisting of earthwork defences and was only small in area. In the fourth century, Great Chesterford was given an oval-shaped circuit of stone walls with a ditch, enclosing an area of 36 acres (15ha). By the time the Romans finally withdrew their forces in AD 410, many of these defences would already have been crumbling.
2 Colchester: the Roman wall and the projecting face of one of the quadrant-shaped gate-towers.
Figure 1 Colchester: the Balkerne Gate, reconstructed plan and front elevation, showing the central triumphal arch flanked by later quadrant-shaped towers containing footways.
Saxon and Danish Fortifications
After the collapse of the Roman administration the Romano-British inhabitants of Essex strove to continue their previous way of life, initially in the face of voracious raiders from northern Europe, and ultimately of land-hungry settlers. As in other Roman towns it is likely that occupation continued in Colchester but only a small number of Anglo-Saxon dwellings have been discovered inside the walls, and there is no evidence that the town was a burh, although examples of Roman towns being adopted as burhs are known elsewhere in England. It has been suggested that the Roman temple site had some significance as a some-time royal dwelling, known as King Coel’s Palace, and there is masonry in the blocked-up Balkerne Gate which could as easily be Saxon, as late Roman or post-Conquest. The remains of an apsidal chapel, probably late Saxon, have been excavated near the entrance to the castle keep.
Burhs were communal fortifications erected by Anglo-Saxon kings to defend against Danish or Viking attacks, and usually comprised earthwork and timber defences, not dissimilar to those employed by their British predecessors, and in fact hill forts were sometimes adapted as burhs. There was a close relationship between the size of burhs and the number of armed peasants available to man them. In Wessex, this relationship has been quantified to show that every four hides of land would generate enough troops to man 5 yards of defensive perimeter. There are two known burhs in Essex, both built by Edward the Elder, at Maldon and at Witham, in around 916. At Maldon, there is archaeological evidence for the site, marked by banks on the western edge of the town centre (TL846071), probably the angle of a rectangular enclosure of 22 acres (9ha), overlooking the river and the hythe. At Witham there is no such certainty. It has long been assumed that the concentric banks and ditches of the Iron Age Chipping hill fort were re-used as the burh, but nothing has ever been proved and there are apparently two other possible sites at Wulvesford (TL821142) near the river and, some way away to the north-east, at Burgate Field, Rivenhall End (TL838164). Chipping Hill is an oval measuring 1,200ft by 1,000ft (360 × 300m) with a ditch up to 30ft (9m) wide. Interestingly, eighteenth-century descriptions of both these burh sites mention inner enclosures, linked to the outer ones by cross-walls. One other possible site from this era is Danbury where the church stands in the middle of what is generally accepted to have been a hill fort. The place-name, however, casts some doubt, so this may be a re-used Iron Age site, or a new ninth-century site – or neither.
Saxon and Danish Conflict
Wherever these burhs might have been located, it could be argued that they came a bit late to be a solution to Danish aggression, for the county had been a battleground for many years. While the various Saxon kingdoms had feuded amongst themselves for centuries, they found themselves faced with an external threat. The Viking incursions began in 793 with a raid on Lindisfarne (Northumbria), but within forty years, these raids became attempts at permanent settlement, initially signalled by their fleets over-wintering, often around the Thames Estuary. These expeditions soon escalated into a full-fledged invasion of East Anglia in 865, followed by another, five years later, in which Mercia was conquered, and King Edmund killed. By 878 Alfred ruled Wessex and Mercia, whilst the Danes held eastern England, the Danelaw, but were not averse to marauding over their neighbours’ lands.
In 885 Alfred’s ships won a sea-battle off Shotley, and in 893 his troops defeated a Danish army led by Hasten who had laagered at Benfleet on the Thames. Catching the Danes unawares, the army of Wessex, reinforced by locals, completely destroyed the Danish fleet. The Danes withdrew to Shoeburyness, building a new camp there and re-grouping. There was also a Danish base on Mersea Island, providing a jumping-off point for raids round the coast as far as Chester and the Wirral. These camps were usually simple half-moon-shaped enclosures of bank and ditch with the riverbank as the straight side, allowing the long-ships to be drawn up into a protected space for the winter. If, as happened at Benfleet, the camp could be stormed, then the long-ships would be fired, and raiding curbed, providing a breathing-space until a new fleet was constructed.
Operations of the Saxon army in 917 illustrate an unusually successful campaign. Following a victory at Tempsford, on the Ouse in Bedfordshire, which was stormed with the death or capture of the Danish leadership, Edward’s army marched on Colchester, besieging it and then storming in and expelling the Danes, some of whom only escaped by going over the walls. The Danes were quickly back on the offensive, laying siege to Maldon, but a relief force joined up with the defenders, bringing the Danes to battle and defeating them. Periods of relative peace alternated with periods of outright war, but by 980 the Danes had regained the upper hand with their tactics of renewed raiding of the coastal communities. By 991 the Saxons under Aethelred decided to make a stand against a raiding force with over ninety ships which, so the story goes, landed on Northey Island, separated by a causeway from the mainland. Unwisely, the Saxon leadership agreed a truce, allowing the Danes to avoid what would have been the extremely dangerous manoeuvre of crossing the narrow causeway under fire. The Danes made their crossing unmolested and the subsequent Battle of Maldon resulted in a disastrous defeat for the Saxons. So began the payment of Danegeld in enormous quantities to buy them off, a catastrophic policy which merely encouraged the Danes to come back for more. Essex was totally ravaged in 1009 by Swein and Cnut, and the whole of East Anglia by 1011. In 1014 Swein died, as did Aethelred two years later, and, although his successor Edmund enjoyed early success, he was brought to battle by Cnut at Assingdun, generally thought to be Ashingdon near Canewdon, and defeated, thus bringing to an end the resistance to Danish domination, and leaving a Danish king on the throne of England.
The Early Medieval Period
The Norman Conquest brought William I to the throne of England but some of his compatriots had already been in the country for a while previously, enjoying the patronage of Edward the Confessor. Some of them are reputed to have built examples of the new private fortress which came to be known as the castle, one example in Essex being Clavering, first mentioned in 1052 as ‘Robert’s Castle’.
Norman Earthwork Castles
Apart from immigrant castle-builders such as Robert, at Clavering, native examples are not totally unknown. In some parts of the country Saxon church-towers, built of stone, have been suspected of having secular functions, both ceremonial and practical. But Essex is not a stone county – retaining, incidentally, the country’s only surviving timber church, at Greensted by Ongar, constructed of split logs which have been dated to 1063 at the earliest and 1100 at the latest. Notable exceptions apart, the Norman castles of Essex were going to be constructed of earth and timber.
The Conquest, one way or another, heralded a period of prolific castle-building, and most of these new castles took one of two forms: the motte, and the ringwork. The motte was a mound of earth either raised from ground-level by digging a deep circular ditch and piling the spoil into the middle, or else the adaptation of an existing natural hillock which might be scarped to accentuate the steep sides so necessary defensively. The ringwork was larger in area, possibly a low moated platform, usually circular or ovoid, with a bank and timber palisade round the lip, and a ditch round the outside. Both forms could have one or more outer courts, or baileys, themselves defended by banks, ditches and palisades. Depending on the size of the motte-top, there might be merely a palisade around the edge or, more generally, a centrally placed timber tower. At Rayleigh there are three rows of post-holes around the edge of the motte suggesting a substantial palisade with a fighting-platform. Access to both forms would represent weak points receiving stronger defences – gate-towers and drawbridges, for instance. At Pleshey the bridge had a retractable section, and the outer gate at Rayleigh is suspected of having a barbican. If a motte appeared unstable, then it might be terraced, or layered with clay or gravel, or the central tower might be mounted on stilts standing on the natural surface with the mound heaped up around them or, as at Rayleigh, the motte might be strengthened with stone revetments. At Mount Bures the motte was encased in clay to stabilise the sandy soil of which it was composed. As to the question of why one should be chosen over the other, both models enjoyed advantages and disadvantages. The motte was probably stronger and more imposing, dominating the area around, but lacked comfortable accommodation in what, in all but the largest, was a restricted space. The less dominant ringwork could hold more structures in the inner-most enclosure but also needed a bigger garrison to defend its longer perimeter. Given that the incidence of castles undergoing assault was fairly rare, then it is likely that the occupants’ other needs – domestic, judicial or administrative – would win out against the purely military demands. King lists twenty-five early medieval castles in Essex, recording sixteen as mottes, and six as ringworks, which compares with a national ratio of 22:6. Very often, we must assume, the military characteristics of the castle projected an image more symbolic than practical. That is not to say that castles were not seen as ‘burdening the poor people of the country with forced labour’ and worse, as the Anglo-Saxon Chronicle told it, but castles were seldom called upon to fulfil what could be assumed as their prime function, that of protecting their occupants from attack.
Clavering, the county’s precocious castle, seems to have been quite low profile and particularly reliant on water defences, its moat being 75ft (23m) wide and 18ft (5.5m) deep, and connected to the river Stort. Mottes in the county range from the highest, Canfield, Ongar, Pleshey, Purleigh and Rayleigh, all around 50ft (15m) high and between 230ft and 300ft (70–90m) in diameter, to the much lower Bocking and Great Easton. Some, like Felsted – thought to be more likely a mill-mound – or Lavender Mount in Ilford, Plumberow Mount, probably a barrow, or Navestock, are unlikely even to have been mottes. Rayleigh, Pleshey and Ongar represent the classic motte-and-bailey layout, with the kidney-shaped bailey wrapped around the motte. The latter two also have outer enclosures taking in their dependent villages. Just as the motte-and-bailey castles vary widely in size, so do the ringworks. The Crump, at Berden, with a diameter of 123ft (38m), whilst admittedly larger than its neighbour the Rookery, thought to be an unsuccessful trial-run, is still considerably smaller than Elmdon’s diameter of 165ft (61m) or that of the even larger Bishop Bonner’s Palace at Orsett, which measures 200ft (62m) across. Very often the earthworks of a castle were just the beginning, as the site evolved into something more permanent.
Figure 2 Map to show castles and other fortifications in Essex (1050–1500) (see Appendix 2 for details).
3 Stebbing: the large motte with its surrounding wet ditch.
4 Chipping Ongar: the on-site information board usefully shows the motte, nestling between its two baileys, as well as the village enclosure.
Norman Stone Castles
One of the first, and largest, of the Norman castles built after the Conquest was Colchester. Built around the podium of the Roman temple, within a ringwork raised over the ruins of the Roman temple court, it was probably intended to meet symbolic as well as more concrete criteria. The donjon measured 151ft by 110ft (46m by 34m), a larger footprint than the Tower of London. Following the sack of Colchester by the Danes in 1071, it was begun on the king’s orders either in around 1076, coinciding with the aftermath of Robert of Norfolk’s rebellion of the previous year, or in 1085, when another Danish invasion was expected. Whenever it was started, work soon stalled with only the ground floor being built over the Roman vault and finished off with temporary corner turrets and battlements. It was to be twenty years, and several reigns, before work resumed under Eudo, steward to Henry I, to complete the massive four-storey keep. On Eudo’s death in 1120, the castle reverted to the Crown.
Interpretation of the keep has been hampered by attempts to demolish it for its stone in the 1680s. Its great width meant that two spine walls, one of them possibly an arcade rather than a solid wall, were necessary to carry the floors, but the sheer floor-area available necessitated more partitioning than was normal, providing a greater provision of discrete spaces. Latest thinking suggests the following functions and allocation of space.
As the Roman sub-structure raised the ground floor above ground level, it was practicable in defensive terms to site the main entrance here, accessing a vestibule from which led the exceptionally wide spiral stair. The two vaulted spaces under the chapel and its projecting apse may have acted as strong-rooms, with the rest of this floor, once those above had been added, acting as storage. The first floor contained the hall and chapel, both of double height, another arcaded spine-wall increasing the size of the hall by adding an aisle. The blocked doorway next to the north-west turret could have led onto a balcony, used for appearances and ceremonial events. The remaining space would have provided private audience chambers and assembly space. The second floor had two mezzanine floors directly above those lower chambers, giving more private space, accessed via wall-passages or galleries reached by the second stair in the north-west turret. The entrance was protected by a fore-work entered between two small, solid, D-shaped towers and a route to the main door with its portcullis negotiating two dog-leg turns. There was an inner bailey with a gatehouse and wall towers, and an outer bailey between the keep and the Roman town wall. As well as the supposed Saxon chapel in the inner bailey, a hall and possible apartments have been excavated, suggesting that the majority of domestic accommodation was outside the keep. The keep is about to undergo a major redevelopment project and will be closed from Easter 2013 for a year.
5 Colchester: the imposing Norman keep, originally two storeys higher. (Photograph by Pam Osborne)
6 Hedingham: the Norman tower keep, showing the batter at the base of the wall, and one of the surviving corner turrets. (Photograph by Pam Osborne)
The other major Norman stone castle in Essex is Hedingham, built some time after Colchester. The great 100ft (31m) high, four-storey tower of around 1140 was built by Aubrey de Vere, Earl of Oxford, within a ringwork, possibly raised in the late eleventh century. The ground floor or basement, entered only from the floor above, served as store-rooms, with the base of a fore-building butted up against its western wall, the spiral stair in the north-west turret nestling in its angle. This fore-building contained stairs leading up to the main entrance protected by a portcullis. The floor above is supported on an arch which bisects this single large space with its recesses, large enough for small chambers, in the thickness (11ft, 3.3m) of the wall. The floor above this lower hall contains a double-height hall with galleries halfway up, at normal ceiling height. This too has a Norman arch, one of the biggest in Britain, with a span of around 30ft (9m) and a similar height. Originally the fourth level was simply a screen wall, with elaborate windows, masking the pyramidal roof, but a floor represents a later insertion. Two of the original four-corner turrets survive, making this one of the most striking Norman donjons in England. Since there was no living accommodation in the keep, the inner bailey contained the domestic buildings, of which a hall with vaulted under-croft, and a chapel have been excavated. Vestiges of double ditches excavated in 1976 suggest that there may have been a fortified village enclosure as at Pleshey and Ongar. This would have contained the church, market-place and several tenements, all to the south of the castle’s outer bailey.
7 Hedingham: the entrance at the top of a staircase which was originally encased in a fore-building whose lower floor housed a dungeon. (Photograph by Pam Osborne)
8 Hedingham: the double-height hall whose roof is supported on a massive Norman arch, one of the biggest in the country. (Photograph by Pam Osborne)
It was normal for castles to start out as wholly earth-and-timber structures and then subsequently to be rebuilt, often only partly, in stone. Pleshey received a stone building on its motte in the late twelfth century, probably built by William de Mandeville (who was allowed to re-fortify the castle in 1170, Henry II having ordered its demolition in 1158). It measures 67ft by 56ft (21m by 17m) and may have been a hall. Although it is said to have had corner turrets, the walls were only thin with buttresses, so it was probably not a keep. A thirteenth-century stone chapel excavated in the bailey was found to overlay the stone foundations of two, probably late twelfth century, round towers, the larger of which, 17ft (5m) in diameter, could have been defensive, or the bell-tower of an earlier chapel. Until replaced by a later brick one, the bridge of around AD 1200, connecting the bailey to the motte-top, was lodged on substantial stone platforms. At Stansted Mountfitchet it would appear that a ringwork was walled in stone to produce a shell keep in the latter part of the twelfth century. A small vestige of rubble walling survives on the southern side, suggesting that this stone shell may have had one or more projecting towers. Ironically, the site is currently managed as a reconstruction of an earth-and-timber castle.
Geoffrey de Mandeville’s other castle in Essex was at Saffron Walden. Here he built a square keep entered at first-floor level through a fore-building approached by a chalk ramp and steps. The keep, of at least three storeys, measured 38ft by 40ft (11.7m by 12.3m). The earthworks of the original motte and bailey have largely disappeared but traces of rubble walling have been found in the bailey. De Mandeville had been permitted to build here in 1140 but Stephen seized it two years later, and Henry II ordered its destruction in 1158. Excavations have uncovered both unfinished ditches and others deliberately back-filled in the late 1100s so, given the short timespan available for building, it would suggest that the great keep might never have been completed.
9 Saffron Walden: the sad remains of a once-impressive Norman keep whose outer shell of dressed stone has long ago been robbed.
A century later than all these was Hadleigh, a quite different type of fortress, one of enclosure, its strength contained in the circuit of stone curtain walls linking mural towers. It was licensed to Hubert de Burgh in 1230, but probably retrospectively, the castle being finished by then, having been built on a green-field site to replace the outdated Rayleigh. De Burgh had been justiciar to John and to Henry III but had lost his influence by 1232, and been forced to surrender the castle to the king. Built on a bluff overlooking the marshes, it was always subject to erosion, and the fabric of the castle has suffered badly over the centuries. The original castle appears to have consisted of a single bailey surrounded by a curtain with rectangular towers on the south and west sides, and a large hall and solar block on the west. All of the southern works had been destroyed in landslips by the end of the thirteenth century, necessitating the rebuilding of the hall, but these buildings themselves collapsed, leaving the castle to deteriorate well into the next century.
The Castle in War and Peace
Castles were sited by Norman barons to protect strategic locations, Colchester Castle, for example, being built against a background of continuous threats to the security of the realm. These could be internal uprisings such as that of Robert of Norfolk in 1075, and the activities of home-grown rebels such as Hereward, finally defeated in 1071, or external invasions such as a Danish attack in 1071 and its anticipated repeat in 1085.
A relevant statistic here is that considering the entire range of medieval and Tudor fortifications in the county and extending the timescale to include the events of the Civil War in the seventeenth century, we arrive at a figure of just nine assaults on the thirty-three castles of Essex. For most of the time, life was peaceful.


