18,49 €
Mehr erfahren.
- Herausgeber: Crowood
- Kategorie: Geisteswissenschaft
- Sprache: Englisch
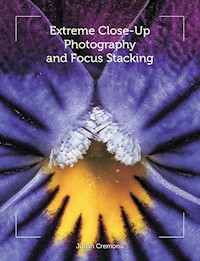
This practical book explains what is meant by macro photography and how to get even closer to your subject: not just a close-up of a butterfly, but details of the eye and wing scales. The techniques described explore ways to photograph virtually any creature, whether terrestrial, marine or from freshwater. All the key elements to achieve extreme close-ups are built in a clear way, for both outdoor and studio use, and special attention is given to focus stacking, with both software and further enhancements covered. Topics covered include an explanation of the equipment and techniques needed to gain extreme close-ups; advice on different lighting and support equipment, including the practicalities of tanks and aquatic organisms; suggestions on how to achieve sharpness, detail and ultimate depth of field; and coverage of all aspects of focus stacking with ideas for improvement. Step-by-step examples cover a wide range of wildlife. Superbly illustrated with 219 colour photographs.
Das E-Book können Sie in Legimi-Apps oder einer beliebigen App lesen, die das folgende Format unterstützen:
Seitenzahl: 264
Veröffentlichungsjahr: 2014
Ähnliche


Extreme Close-Up Photography and Focus Stacking
Julian Cremona
First published in 2014 byThe Crowood Press LtdRamsbury, MarlboroughWiltshire SN8 2HR
www.crowood.com
This impression 2016
This e-book first published in 2014
© Julian Cremona 2014
All rights reserved. No part of this publication may be reproduced or transmitted in any form or by any means, electronic or mechanical, including photocopy, recording, or any information storage and retrieval system, without permission in writing from the publishers.
British Library Cataloguing-in-Publication Data A catalogue record for this book is available from the British Library.
ISBN 978 1 84797 720 5
Frontispiece: Close-up of the hind wing of a Common Blue Butterfly Polyommatus icarus, male, × 4.
Dedication
This book is dedicated to my bug collectors Carys, Rory, Conor and Finlay.
Acknowledgements
Much of what I have learnt over the years has been down to trial and error. In recent years a number of people that I have met have triggered ideas through conversations and given support, like John Archer-Thomson, a landscape photographer, friend and work colleague. Mike Crutchley, a retired engineer, develops great ideas, some of which brush off onto me. Often through a collective discussion, ideas are generated. Some of the super ideas people are from the Quekett Microscopy Club. In particular are Phil Greaves, Geoff Mould, Carel Sartori, Ray Sloss and ‘Spike’ Walker. Thanks to all of them for their thoughts and suggestions over the years. Also to James Robson of the Horniman Museum in London: always one for a bargain on eBay! My family has been a constant support, especially my four super grandchildren who show such brilliant enthusiasm for the natural world at a young age. Thanks especially to Brenda, my long-suffering wife, who has always been my greatest supporter and critic.
CONTENTS
Introduction
1 What is Macro?
2 What Camera is Best?
3 Techniques for Getting Close
4 Lighting and Exposure
5 Image Quality and Sharpness
6 Stacking Images
7 Supporting Material
8 Improving Stacked Images
9 Working on Projects
Further Information
Index
Introduction
I have always been a collector: even at the age of eight I collected any object pertaining to wildlife. By ten years of age this collecting advanced to pickling pieces and parts of bodies, such as the heart of a dead bird. By twelve I was setting butterflies and other insects on boards. The collecting had now taken on a whole new angle as I discovered the use of crushed laurel leaves to produce cyanide to ‘bump off’ all the invertebrates in the back garden. The collection grew during my teenage years until my parents asked me why I had to kill everything. It was for my eighteenth birthday they bought me a camera and suggested I photograph them instead. The camera was one of the most difficult to use, but a cheap, single-lens reflex model: a Russian Zenith E. Gradually, as I learnt to use the camera my collecting changed again and has continued for more than forty years. My huge invertebrate collection is now on a computer and easier to access through a database. This digital image may not appear as exciting as the tangible object and yet the thrill of capture is no less electrifying. When exploring a new location the sight of a species I have never seen before provides the same level of excitement, so that as I move in with the digital SLR I am shaking. I stop breathing as I fire the shutter to capture the creature. It will start with a general distant shot with the habitat in the background and, by slowly moving closer, just the organism is collected. That is not good enough as I need to see the detail of wings and hairs on the legs. Every invertebrate has a personality, which the portrait photograph shows, and so the collection will not be complete until that head shot is in the bag.
Fig. 0.1
Portraits of different invertebrates. Left to right, top to bottom: Elephant Hawkmoth, Froghopper, White Ermine Moth, Scorpion-fly, Wasp, Prawn, House Fly, Jumping Spider, Saucer Bug, Tiger Beetle, Mantis Fly, Dolly Fly, Harvestman, Empid Fly, Common Shore Crab, Migrant Hawker, Praying Mantis.
Those early days with the Zenith were a struggle with minimum finance. Film was bought in bulk, cut up and loaded in the darkroom. I learnt at university to process my own, using the zoology department’s darkroom at night when no-one else needed it. Most difficult was teaching myself ways of taking close-ups and getting those head shots with no money to buy equipment. Toilet rolls, poster rolls, lenses borrowed from student microscopes and slide projectors as spot lights – all were used and developed until I had vaguely presentable images. I gave many people a good deal of enjoyment as they laughed at my methods. Today I would cringe at some of the results and yet the Zenith was a superb learning tool because of the difficulty in getting good results. Every day seemed to be a ‘back-to-the-drawing-board’ day as I developed the film and went back to try again. Today learning is easier, with near-instant results.
There is staggering beauty in the unseen elements of nature in close-up. I never cease to be amazed as details appear in a focus-stacked image which the unaided eye could not resolve. During my life as a biologist I have learnt and been lucky enough to branch into every area of the natural world, not just terrestrial invertebrates but to extend my collection in directions I never would have thought possible as a young teenager.
Embracing and developing new technologies to achieve this is ongoing. Relatively speaking, the price of equipment has never been lower, and products are more accessible with the Internet. Some new ideas can lead to a dead end and that can make people afraid of trying, concerned about getting it wrong. As has often been the case in history, most of what I have learnt has been through such mistakes. Sometimes I am pleased with particular images but typically I am not and always feel that I need to try again.
The digital vs. film debate still goes on – which is better? I suppose it depends on one’s viewpoint but I would never return to film, for environmental reasons and because I spent many years in darkrooms breathing in the noxious chemicals. In addition there are the improved methods of capturing close-ups and more advanced ways of learning to improve. I hope that this book will help you develop more quickly than I did. There is no better time than now to create extreme close-ups, and the technology is straightforward. Although it would be great if a student of photography could learn everything in one go, until that becomes possible, the linear fashion of chapters building upon each other is the way this book is written. The contents show the key points; dip in and out to suit yourself. The final chapter is the one that tries to piece it all together by taking specific subject matter and looking from that perspective. The choice of organisms has been made to cover most eventualities.
Today I have a catalogue of many thousands of species, digitally stored on my hard drive, which I have collected over my life. It may not be as spectacular as a museum collection but at least I no longer need to kill species to store them. Focus stacking has been described by many who practise it as only possible when using dead specimens. Unless I find the individual already dead, I rarely use dead material. Unless stated, all photographs were taken of living specimens.
This book is approached from the perspective of a naturalist wanting a record of any organism they find. It is about attaining maximum detail and sharpness. It is a practical guide covering all aspects of how to photograph any terrestrial or aquatic subject in close-up. Where possible, captions give some information about the organism. What sets this book apart, however, is its focus on providing the most concise information available to date on focus stacking, and it will be useful for anyone interested in this topic, whether for ‘macro’ or any other form of photography, such as landscapes.
We look at indoor, studio photography, as well as photography in the field. The word ‘studio’ suggests something grand but in practice it means a table or bench where all the paraphernalia that occurs with extreme close-ups can be set up next to a mains socket. This type of photography does entail an incredible variety of bits and pieces and so storage space in the form of drawers, boxes and shelves will be needed, as well as – most essentially – a nearby computer. This all suggests close-up photography is an expensive activity but it is surprising how, with a bit of ingenuity and searching, much of what you need will be unwanted material. Old photographic and darkroom equipment that has been collecting dust may become central to the effort. Extreme close-ups can take up an inordinate amount of time and patience (my wife says I disappear for hours) but with a bit of effort, and always bearing in mind the welfare of the creatures, it is amazing what is possible on even the tightest budget. Expect a heap of frustration on the way to gaining great results.
Fig. 0.2
Albany Daisy, Actinodium cunninghamii (centre of the flower), endemic to Western Australia. Magnification ×3, Fuji Finepix S602 bridge camera with a coupled 58mm lens.
Chapter 1
What is Macro?
What makes a good photograph is very subjective but to many it is a subject or viewpoint that few others see, making the viewer look twice. The world is typically seen from between one and two metres above the ground; by moving to ground level the viewer’s perception of the area changes. Alternatively, go higher: a view from the top of a hill or mountain can make a scene more interesting; aerial imagery is a whole genre of photography in itself. Getting close to living creatures will display more and more detail – almost personal elements of the subject’s life not seen before – and this can make intriguing photography. A whole new micro-world waiting to be photographed. This is the world of macro-photography; making small things look bigger.
The word ‘macro’ has been used and abused extensively. Its meaning can be confusing, as people’s perception of what ‘macro’ means varies widely, not least between manufacturers of lenses. Most photographers realize that a ‘macro’ setting will allow the user to get closer to a subject. This may be written on the side of a lens or the focusing scale. Purists would say that a macro setting on a general-purpose lens like this is not true macro, as it just provides a closer focusing facility. So what is true macro?
This was easier to answer when everyone used film, particularly the standard 35mm film like that used to produce slide transparencies. As 35mm film equivalents are still used today on digital camera lenses perhaps we can start here, too. A macro photograph of a subject is where the image is the same size as the film. For example, if the subject is a coin, once the film has been developed, it could be placed to fit exactly on top. The ratio is 1:1. Most general-purpose lenses and zooms that have a macro setting may also have a ratio nearby, typically something like 1:4 and not 1:1. This means that the image is a quarter of the size of the subject, or the subject is four times the size of the film image. With suitable equipment you could photograph a tiny flower such that the film image is twice the size of the actual subject. In this case the ratio will be 2:1. Of course, if the 35mm film transparency is projected on to a screen or made into a print the magnification is changed again. The ratio is used to refer to the initial imagery on the film; if the film format is different, e.g. 6cm × 6cm, then the ratio changes again. This is why attempting to define the term ‘macro’ can be confusing.
Fig. 1.1
Common Blue Butterfly, Polyommatus icarus, covered in early morning dew which renders it almost unable to fly, and therefore an easy subject for macro photography. Canon 7D with 150mm macro lens plus 21mm extension ring, 1/125th sec f8 ISO 400.
What about digital cameras? The principles are the same but instead of film it is the size of the sensor and the image that is projected from the lens onto that sensor. In the case of what is called a full-frame camera that size is still 35mm. For others you may need to refer to the manual or the Internet as there are a number of different sensor formats especially with compact cameras. The latter can produce excellent close-ups and appear to provide good magnification. However, it is not possible to see the original film with a digital camera; the image you see on the camera screen has been magnified to fit the screen.
To work out how your compact camera compares to true macro do the following. Switch on the macro mode, usually a flower symbol on the back of the camera. Using a metric ruler, focus as close as possible and take a photo. Make a note of the width of the scale that has been photographed, for example 26mm in the Canon G9 compact. Next you need to know the size of the sensor. The G9 has a sensor width of 7.5mm, a reasonable size by compact camera standards. To find the magnification ratio, divide 7.5 by 26, which gives a value of 0.29mm (around 0.3mm). The ratio is therefore approximately 1:3, which, despite the apparently good magnification, is not true macro. This information, although far from being essential in terms of enjoying taking close-ups, does help to put magnification into perspective; for digital there is always the extra magnification added by the camera, computer or printer.
As a guide, this book explores close-up photography predominantly within the range of ratios between 1:4 and 4:1, that is from a quarter size up to four times life size – around macro and beyond – as illustrated in Figures 1.2.1–1.2.4.
Fig 1.2.1
Fig 1.2.2
Fig 1.2.3
Fig 1.2.4
Figs 1.2.1, 1.2.2, 1.2.3, 1.2.4
Germander Speedwell, Veronica chamaedrys, photographed from close-up through to ×4 magnification. Fuji Finepix S602 bridge camera with (in 1.2.4) a coupled lens and focus stacked.
Chapter 2
What Camera is Best?
The saying, ‘the best camera is the one you have with you’, is very apt. If your digital single lens reflex camera (DSLR) is at home and an exotic insect appears in front of you then the Smartphone in your pocket is your only option. Whilst on holiday and during heavy rain a beautiful tree frog sits in the middle of the path waiting for you to take a photograph with your expensive camera but it is not waterproof. A waterproof compact is a fraction of the cost of a DSLR and so there is no excuse not to get the photo. Pentax and Olympus have been making excellent models for some years and the former with their ‘microscope mode’ and built-in LED lights allow for amazing extreme close-ups. So is this the best camera to use?
Fig. 2.1
Fly Orchid, Ophrys insectifera, close-up of a single flower on the stem, ×1. Canon 7D with 100mm macro lens, twin macro flash, 1/250th sec f14 ISO 200.
‘You must have a DSLR for nature photography and nothing else will do’ – a common statement found in magazines and elsewhere – is untrue. As with so many photographic debates the real answer is, ‘it depends’. Four types of camera are discussed below, in particular their suitability for macro photography.
Fig. 2.2
Sockeye salmon on a run in western Canada. Photographed by holding the camera at arm’s length under the water amongst the fish. Pentax WG waterproof compact, on auto.
THE DIGITAL SINGLE-LENS REFLEX (DSLR)
This has to be the prime camera of choice because of quality and ease of use in taking extreme close-ups. The sensor is larger than in a compact and can produce a better image. The most expensive ones are those with full-frame (35mm wide) sensors; the others will be APS-C sensors, a size based on an alternative format, smaller than 35mm film. It is worth remembering that putting a 35mm lens on an APS-C sensor changes the focal length. The correction factor depends on the make; for example Canon multiply by 1.6 and Nikon by 1.5. So a 100mm lens becomes 160mm or 150mm respectively. The lens can be removed and substituted with a specialist one such as a macro. It will be part of a ‘system’ and so a wide range of accessories can be purchased, produced either by the camera manufacturer or a third party. Crucially with extreme close-ups it is possible to connect the DSLR to a computer and control the camera from there. This presents live-view on the monitor, and to do it requires software, available for DSLRs.
The DSLR will have speed on its side with a minimum of delay when focusing, often with a number of focusing points. The reflex component of the name refers to the pathway of light through the camera, via prisms and mirrors, in the main. This can lead to the key disadvantage of weight and price. Cheaper ones tend to be lighter with more basic, plastic frames. Start adding strength, durability and weatherproofing to a body and the weight and price start to soar. Another consideration is that the more expensive DSLRs, usually what is termed the enthusiast level, will have a more substantial shutter mechanism than entry-level ones. Manufacturers guarantee a minimum number of shutter actuations (the number of times the shutter is fired); this is normally 100,000 times although the shutter may well survive for more than double that number. This may not seem an issue until you start using focus stacking techniques when five hundred actuations could be typical in an afternoon’s work.
When buying a DSLR look carefully at your ability to hold not just the camera body but lens and other options like a flash. These mount up and can easily begin to exceed 2 kilograms. A day’s shooting, holding this weight up to your eye soon develops strong bicep muscles. It is recommended that you use a different strap from the one that is provided with the camera. An example is the Crumpler Singapore Sling camera strap. This has a wide, padded strap, which spreads the load comfortably. Most significant, however, is that these straps quickly clip and unclip from the camera, making life less irritating when mounting the camera on tripods and optical benches to do stacking.
The ingress of dust has always been a problem with cameras that can have the lens removed. Minimize this by making sure the camera is switched off when you unclip the lens, have the lens removed for the minimum amount of time, and do it away from windy conditions. Even if you are very careful, the removal of the lens will eventually lead to dust getting onto the sensor. Whatever lens you put on the camera to take macro shots will also magnify the dust on the sensor, especially with short focal length lenses and small apertures. For this reason you will occasionally need to clean the sensor.
Although the weight produced by the reflex system is a negative issue, on the plus side there is a clear optical path to the viewfinder as well as the LCD screen on the rear. The more expensive models will have a 100% viewfinder meaning that the area you see is the area that will appear in the final photograph. Less expensive ones normally end up with more material being shown so the viewfinder may be closer to 96%. Whatever the viewfinder, the optical option is very useful as well as having the live-view on the LCD screen, found on all other cameras.
COMPACT SYSTEM CAMERAS (CSC)
This is a relatively new and developing field of cameras. First developed by Olympus and Panasonic, all the major camera manufacturers now have models available. They have the convenience of being the size and weight of a compact camera but like DSLRs they have a removable lens. Sensors vary in size between manufacturers but are bigger than compacts and some are the same as those used in DSLRs. This means that quality is very good. The main way in which these cameras differ from DSLRs is that the path of light is unhindered with a mirror, passing directly to the sensor. The lack of mirror and focal plane shutter reduces weight and size as well as reducing camera vibration. This can make them very useful to put on a microscope where weight and vibration can be a major issue. These are very positive aspects of CSCs but the downside is that with no optical path there will be no viewfinder – the image is a live-view on the LCD screen. Some do have optional Electronic View Finders (EVF) but they can take some getting used to although one good thing is that what you see is what you get. This refers to how the exposure looks as well as the area of view. To be successful the manufacturers have had to make sure that the live-view is good and focuses quickly, something that is not so good on DSLRs where live-view is a fairly new add-on. Here focusing can be tediously slow in automatic, although it is improving. The sockets present on the CSC and software available with different models will determine whether or not the camera can be attached to a computer to present live-view on a monitor and so be controlled from that computer. Currently, there are few CSCs that can be connected and this may be a potential drawback. Make sure some form of remote shutter release is available. This is most likely to be a tiny wireless remote that is quite inexpensive. There may well be a Smartphone app that can be used as a wireless remote; this may be cheaper than buying a separate one.
Fig. 2.3
Nikon 1, Compact System Camera on a 1960s Zeiss microscope with diatoms on the live-view rear screen.
Another possible drawback with CSCs is the limited number of lenses and other options available. However, it is possible to acquire, either from the manufacturer or third party, adapters that enable other lenses like those for DSLRs to be attached. They may not autofocus but for macro work that is not a problem.
In brief, there are three formats of CSCs available:
• The ‘DSLR replacement’, which looks like a miniature DSLR and functions in a similar way with an integral viewfinder;
• A rather ‘retro’ style taken up especially by Olympus and Fuji looking like the rangefinder cameras of decades ago; and
• The ones that look very much like a compact but with a removable lens.
BRIDGE CAMERAS
As the name suggests they bridge the gap between DSLRs and compacts. In most cases they will have a smaller sensor than the DSLR and CSC, so quality will not be as good. They do have plenty of pixels and as long as you understand their limitations they have their place. Also the lens is fixed so there is minimal chance of dust on the sensor. New models appear all the time with longer zoom lenses, over 1000mm equivalent. Along with their light weight, these cameras could be a useful substitute in situations when you really cannot carry a DSLR. They are also cheaper than a DSLR. It is a compromise as delays will occur when trying to focus with the telephoto but bridge cameras can excel at macro and micro photography. Small sensors allow for good close-ups, in many cases down to 1cm/0.5in. They are criticized for their small aperture range although these are not comparable with larger sensor cameras. Importantly, they have better depth of field. Quality may not match the DSLR but it does depend on so many factors –not least the photographer and post-processing on the computer. When contemplating a bridge camera check reviews for quality and noise level at high ISO values. Cheaper models can have unacceptable noise above ISO 400 such that images are unusable.
Figs 2.4 and 2.5
Different sensors. Both photos were taken using the same settings, 200mm lens, f8 and were focused on the white flower. The difference is that Fig. 2.4 was taken on a full-frame camera, i.e. a large sensor, whilst Fig. 2.5 was taken using a bridge camera that has a significantly smaller sensor. This shows the amount of detail that will come into focus with the bridge camera and small sensors. When enlarged there will be a slight difference in quality.
COMPACTS AND SMARTPHONES
In this book we will not be looking at using these in any serious, extreme close-up photography. It is possible to use them but they will be hard work; control of the image is very difficult and quality will suffer. However, a Smartphone may well be in your pocket and certain compacts, like the waterproof one mentioned before, should always be available in your bag even if it is just for emergencies. The reasons are threefold.
• Portability: there is never an excuse not to have a camera with you. The small sensor may not provide the best quality but it does enable the camera to reach incredibly close to a subject. Fig. 2.6 shows a fritillary butterfly laying eggs. This activity kept the butterfly sufficiently occupied for the lens of the compact to practically touch the back of it. Care needs to be exercised in keeping one’s shadow off the subject at such close range. By using the LCD screen on the rear, these cameras are almost equivalent to the SLR in that what you see is what you get. Hold your arm extended and your body well back and the insect may not be disturbed.
• Small lens: this may seem to be a disadvantage after seeing the width of some high-quality DSLR lenses, but where this wins is in the ability to place the tiny diameter over another lens such as a microscope or telescope. This is not easily possible with DSLRs or bridge cameras. Most compacts have high-quality video available and to achieve this through a microscope or telescope can be a major advantage. In fact the small diameter lens allows any lens to be placed in front. Find any suitable hand lens, such as a slide loupe used in checking slide transparencies, and this can be held over the front camera lens. Set the camera on close-up mode (usually a small picture of a flower) before holding the lens over the front. Any magnifier can be used and it is possible to buy specific ones for Smartphones. A technique called ‘coupling’ will be discussed in the next chapter and this can be used on compacts – although any coupled lenses will have to be held in place by hand as attachments will not be available or will be cumbersome.
• Waterproof and ‘ruggedized’ models: a little more expensive than basic compacts, these can be used underwater with no preparation required to depths in excess of 10 metres, and dropping them on concrete from a height of a metre or so is little problem. Pentax tested their initial model with a group climbing Everest to prove its durability and freeze resistance.
Fig. 2.6
Fritillary Butterfly, approximately 3cm across, laying eggs. Taken with a compact camera, with arm at full extension to minimize disturbance. The camera was angled so the camera did not cast a shadow but a nearby grass has projected a long dark shadow across the left wing. Canon G15 1/80th sec f8 ISO 100.
To summarize, it is possible to take close-ups and macro with any camera but if we want to have control over the photograph and achieve consistent and variable magnification the compact and Smartphone will not do the job and will not be considered further. For regular use and the greatest flexibility a DSLR is ideal; the others will give super results but are not so easy to control.
BEFORE STARTING
Macro and extreme close-up photography requires a good deal of trial and error. One problem of getting very close is that it is not always possible to see what you are doing, as most of the image is out of focus! This may seem bizarre but with experience the achievable outcome becomes clearer to understand. The learning process requires that you review and check your photographs regularly during a photographic session. This cannot be done accurately on the rear camera LCD screen and the review is not just about seeing an image: it will entail reading and comparing data on how the photographs were taken. This requires good image viewing software, which you may already have. Apple users probably use iPhoto. Software like Adobe Bridge in Photoshop or galleries in Lightroom can be used but take time to load and are not always flexible unless a good deal of memory is available in the computer.
Consider, especially if you are a Windows user, a free viewer download. There are plenty available. One very good, quick and simple viewer is FastStone. Designed as a viewer to make image comparisons, it takes a great deal of beating. FastStone allows the user to compare up to four images side by side with EXIF data available. Using a wheel on a mouse a simple roll back and forth can zoom in to the smallest amount of detail and compare the same area of the picture and make comparisons. EXIF data is the information recorded at the time the photo was taken and this is attached to the image. It records shutter speeds, apertures, whether the shutter was fired, as well as dates, times, and which camera and lens were used. By making comparisons and reading the data you reduce the learning time. Immediately you can see which method is achieving the best results and how you did it. This area will not be visited again during the book although reference to reviewing your photographs will be made.
Fig. 2.7
FastStone Image Viewer version 4.8: screenshot of the general view. Excellent free software.
Fig. 2.8
FastStone’s comparative view, where up to four separate images can be compared side by side along with main EXIF data.
Fig. 2.9
FastStone’s single view with some menus, including ECIF and enhancements.
Chapter 3
Techniques for Getting Close


