
20,99 €
Mehr erfahren.
- Herausgeber: Crowood
- Kategorie: Geisteswissenschaft
- Sprache: Englisch
Time and circumstance often prevent the perfect photograph from being taken. This book explains how to enhance an image using readily available software in order to obtain the photo you wanted to take. It explains how to analyse a photograph to recognize what needs to be done, and then shows how to improve it. Instead of being a guide to one specific software program, the book looks at different styles of workflow and process. It covers transferable skills and uses a variety of software for all budgets. Written with accessible clarity and practical detail, this book is a must for everyone who enjoys their photography and wants to take their images to the next level. Topics covered include: the digital image and the terms used, from pixels to histograms; software to suit all budgets, from the best of the free programs to the most expensive; downloading, organizing and viewing images; the essential elements of the image (how it was exposed, the tonal range, noise and sharpness) and finally, further options such as (composition, monochrome, colour palette and cloning tools). Examples of real photos and problems are given, along with step-by-step guides to how they can be rectified. It is a must for everyone who enjoys their photography and will be of great interest to biologists, naturalists, scientists and natural historians as well. It is superbly illustrated with 218 colour photos. Julian Cremona is a passionate photographer who specializes in extreme close-up photography and focus stacking.
Das E-Book können Sie in Legimi-Apps oder einer beliebigen App lesen, die das folgende Format unterstützen:
Veröffentlichungsjahr: 2019
Ähnliche
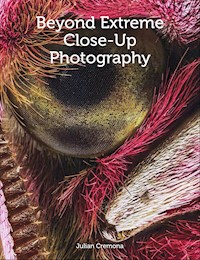


Photographic Image Enhancement and Workflow
Julian Cremona
CROWOOD
First published in 2019 by
The Crowood Press Ltd
Ramsbury, Marlborough
Wiltshire SN8 2HR
www.crowood.com
This e-book first published in 2019
© Julian Cremona 2019
All rights reserved. This e-book is copyright material and must not be copied, reproduced, transferred, distributed, leased, licensed or publicly performed or used in any way except as specifically permitted in writing by the publishers, as allowed under the terms and conditions under which it was purchased or as strictly permitted by applicable copyright law. Any unauthorised distribution or use of thistext may be a direct infringement of the author’s and publisher’s rights, and those responsible may be liable in law accordingly.
British Library Cataloguing-in-Publication Data
A catalogue record for this book is available from the British Library.
ISBN 978 1 78500 562 6
Frontispiece: Cropped image of a spider monkey required processing to reduce ISO noise and improve sharpening. F6.3 at 1/1000th sec, ISO 1600, taken with a 500mm lens. Cover: African sunset. The cloud on the horizon has created rays of sunlight that need a subtle processing to make them stand out. F11 at 1/100th sec, ISO 200, with a 22mm lens on a Canon M3.
Acknowledgement
The desire to write this book came from many years of running photography workshops. Most were practical field excursions in Pembrokeshire or Devon and at the end of each day, as participants viewed their pictures, so discussion of software inevitably occurred. Partly from this, I started to run software training weekends. The major problem is always the diverse needs of photographers from those that can afford the latest expensive equipment to those who have different requirements, including wanting to use free software. During one of these workshops a suggestion from a participant was the need for a book, which instead of a software training guide, discussed what issues occurred in photos, why you might want to enhance them and then ways of doing this. I would like to thank the many people over the years who have attended such workshops and taught me so much, probably as much as I have taught them.
The book has been challenging to write due to the problem of choosing what to include, the space available and covering as much software diversity as possible. My friend, John Archer-Thomson, read a draft of the book and made many useful comments, although inevitably I am entirely responsible for the final result. To that end I would also like to thank Rachel Allen at Crowood, who has always been so helpful in answering my many questions over several books. My wife Brenda has been quietly in the background providing great support and comment. As brilliant as always!
CONTENTS
Introduction
1Understanding the Digital Image
2Everyone Uses Photoshop, Don’t They? A Guide to Software
3Workflow 1: Download and Viewing
4Workflow 2: Basic Image Enhancement
5Is further work necessary?
6Practicalities and Image Rescue – Enhancement Scenarios
7Specialist Cases and Software
8And Finally
Index
Introduction
Recently, film has enjoyed a period of renaissance. Enthusiasts and professionals like the specific tones and colours of certain films, although that can now be recreated using software on digital images. Then there are those who want the experience of the darkroom, to go through the intense labour of creating the tangible product with materials and have the thrill of seeing the photograph appear before their eyes. Rather like vinyl records for audiophiles, film remains a niche area for photographers for many reasons but not least because digital is more immediate, easier, and less expensive. The latter is an arguable point as with enjoyment comes the need for more equipment, although for direct running costs digital photography has to be cheaper. The environmental cost is generally less, too, as processing chemicals, not to mention the inhaling of the fumes from amateur darkrooms with poor ventilation, are eliminated. Perhaps the most significant benefit of the digital image is the ease of enhancing the photograph not just on a computer, tablet or smartphone but also in the camera itself.
A phrase commonly bandied about in the photographic press is to ‘get it right in the camera’, meaning if you are careful enough you should not need to enhance the image as it will be perfect straight from the camera. Luck can play a big part in this, as well as high levels of photographic experience. Fundamentally, understanding your camera inside and out is a prerequisite for this to occur as if you are struggling to find the right button for controlling the exposure or correctly focus, there is a minimal chance of getting it right. At the moment of firing the shutter there is a great deal to think about: what is the ideal light; where do you focus; what is the exposure; what is the best composition; is the viewpoint correct; how do you ensure sharpness and avoid blur? Inevitably there will be numerous times when getting it right in the camera was not an option.
Birds flying over a rainforest at dawn; enhanced in Lightroom Classic to bring out detail in the foreground and misty mountains behind. In addition, the landscape photo was cropped to a more dramatic portrait format. 1/320th second at ƒ8, ISO 200, photographed with a 200mm lens.
Most photographs need a little help but some need a complete rescue package to make them successful. Ultimately, it comes down to circumstances. If the conditions are perfect, such as light and preparation time, you may well be about to produce a great shot that requires no further assistance and is suitable for immediate printing or uploading to a social media site. There are many occasions when this is not the case, especially if your camera is set to produce RAW images, which means that you will need to process the files in software on a computer. All of these issues will be discussed in this book, including the use of RAW files, and the various controls that software provides to enhance your photographs. Note the word ‘enhance’ used here; the book is about improving the images that you produce and not the manipulation of the photograph. There is a subtle difference, but what is manipulation?
The moment you bring the camera up to your eye to take a picture, you have started the process of manipulation as you choose the viewpoint for your photograph; choose what to include and exclude. Photographers have very different ways of considering what manipulation means. You imposed your style on the scene from the outset and therefore have effectively changed the image to the way you think. The street photographer Elliott Erwitt rarely crops any photographs, whereas wildlife photographers invariably do. There are a great many photographic competitions these days and each has rules about manipulation and enhancement. There have been some fairly high-profile disqualifications in recent years as winners were accused of applying cloning or merging two different photographs together after the event, or even using stuffed animals in place of living ones.
Digitizing Film. A is the original scan of a forty-year-old 35mm slide transparency. Note the dark foreground and over-bright sky. As well as dust there is a blue chemical patch near the middle. B is the restored and enhanced image. Whether a digital image or a digitized scan of film, it is possible to enhance and improve photographs.
Photography, like all art, is subjective with very diverging opinions. This book discusses ways to improve aspects such as the colour, exposure, detail and composition. It does not set out to recreate the image by adding extra trees or hills in a landscape, or turn a single bird into a flock. That would be to substantially change the content and, in the author’s view, manipulate rather than enhance a photograph. In the following pages we might want to remove something that distracts from the main subject or maybe change the sky from dull grey to blue, but that is about as far as we go. Primarily, the book concentrates not on professional images, but those you might typically take on holiday or of the family; photographs taken from a vehicle or a short visit to a tourist site. The professional can take time to check sites out, devoting time to planning and waiting for the shot.
Neither is this book a guide to Photoshop. There are plenty of specific software guides available elsewhere: here we take a different approach. In fact, chapter 2 looks at what alternative software is available for free as well as to buy or on subscription. Where this book tries to be different is by analysing photographic problems, recognizing what needs to be done to make an enhancement and then dealing with it. We will cross-reference different software packages, looking at particular benefits, and in some cases look at specialist programs that help to sort out specific issues such as noise. Note that at the time of writing the information was correct, but changes occur rapidly in the world of photographic software.
Life is rarely simple. Returning home with your camera is not just about opening your chosen software package and starting the enhancement. There is a series of actions that need to be carried out from the moment we sit down with our camera through to final viewing. This sequence is better referred to as our method of workflow. There is no single catch-all workflow program, you need to develop your own based on what is right for you. We all have slightly different ways of doing things depending on our priorities. Some actions will be common to all workflows, such as downloading the digital files to the computer. But even here there will be method differences on how and why people will do this. Are RAW and JPEG files treated the same and when is the right time to back up the images? We will look at all of the actions necessary and construct a basic plan so that you can begin to develop your personal workflow.
Digital images are wonderfully flexible. Once taken they can be displayed in any number of ways, including being printed out on paper, card, canvas and T-shirts. Of course, the image may have been derived from film that has been digitized by scanning. This will be highlighted in more detail in chapter 3. Using film is therefore just another action in the workflow program, as having digitized the photograph it will need enhancement. Rarely will a scanned image be really good straight out of the scanner. In this regard the book is important for any photographer, whatever the medium used.
Chapter 1
Understanding the Digital Image
The year 2000 was momentous for a number of reasons. In photographic history it marked the peak of the use of film, with approximately 85 billion photos taken. Whilst film usage has been in steady decline ever since, many millions of films were used in the last few years. However a conservative estimate of the number of digital photographs created in 2017 exceeds a trillion, with many sources placing the number significantly higher. Much of this rise has been due to smart-phones with new models invariably marketed for the in-phone camera more than any other feature. Unlike film, with a tangible material to work with, the digital image is a binary-coded computer file and how it looks depends on many factors, not least the display screen. Before looking at the enhancement of this digital file, understanding the properties of it is fundamental.
Fig. 1.1
A wide-angle lens on a mirrorless camera was used to take this photo from an airliner landing at Houston airport. Shooting through the multi-layered window reduces the quality of light and colour. Enhancement has restored these to provide a good tonal range and sharp detail.
PIXELS, BITMAPS AND RESOLUTION
Fig. 1.2
A tiny portion of a computer monitor with the mouse pointer for scale. Also shown is a small part of this that has been enlarged to see the individual pixels made up of three parts: red, green and blue. Note the wide variation in brightness/tone.
If our digital image is broken down to the smallest possible element that can be controlled and altered, we find the pixel. The term is derived from the term picture element. The number of pixels in an image is referred to as the resolution and is set within the camera. The higher the number, the better quality of photograph that can be printed out and viewed, although this only applies to a certain level of enlargement and even then, this has caveats that we will look at separately. Resolution is measured in two dimensions, width and length. For example, 3,000 pixels across by 2,000 pixels down multiplies to give a resolution of 6 million or 6 megapixels. This is often abbreviated to 6 MP.
Even if two photos from two different cameras have the same resolution they may not be the same quality, especially if one is a phone camera and the other is a DSLR. This is down to sensor size. Compact cameras and phones typically have small sensors, around 6.17 × 4.55mm. Micro Four Thirds cameras have dimensions of 17.3 × 13mm, an APS-C sensor in Canon DSLRs measures 22.2 × 14.8mm, with full frame sensors at 36 × 24mm. Medium format cameras like the Hasselblad have sensors of 53.7 × 40.2mm dimensions. These different-sized sensors may not necessarily produce a significantly higher resolution of pixels, but large sensors can accommodate larger photosites. These are the light, sensitive spots that create the signal to produce a pixel, and larger photosites will produce a better quality of pixel than a small photosite. With identical resolutions, a larger sensor will have bigger photo-sites and hence better light-gathering capability. All things being equal (which they often are not) this should produce better image quality.
What do we mean by better quality? Large pixels have a better signal to noise ratio; noise can be a problem, as we will see, and it refers to random colours and oddities in the pixels which we want to minimize to produce a smoother and more detailed image. Additionally, the dynamic range will be better with large pixels as they can take on more photons of light to have a wider range of brightness to dark pixels.
Pictures composed of pixels are called bitmap files and as they are enlarged, so they take on a blocky appearance. In this regard they have a finite level of enlargement. By contrast, there are computer files that are infinite in their enlargement. These are vectormaps and instead of pixels the lines are created by mathematical algorithms so no blocks will appear. Software programs that edit vector maps are predominantly used by design professionals dealing with line drawings.
Fig. 1.3
Monitor resolution. Screenshot of FastStone Image Viewer on a 3MP monitor, 1920 × 1080 pixels.
A bitmap image is displayed on a computer monitor according to the size defined by the resolution of its screen. Additionally, the software that displays the photo may have to stretch or shrink the image to make it fit. Monitors have a certain resolution and this is usually the prime feature affecting their cost. An HD screen, fairly typical on laptops and basic monitors, will be 1,920 × 1,080 pixels. A look inside the settings of the computer display will quickly confirm the resolution. In this instance the maximum number of pixels the screen can show is 1,920 across. A common image resolution of APS-C sensors found in DSLR and Compact System Cameras (CSC) is 24 MP, that is 6,000 × 4,000 pixels. The image, then, has more than three times the pixel number across it than the display can show and so software will need to reorganize the picture to reduce the size to fit. Likewise, if the image is only 800 × 600 pixels (as often found on websites), to fill the screen software will have to expand or interpolate the photo by inserting pixels. As can be expected, the latter example will not produce as good a picture as the former, with more pixels to play with.
Fig. 1.4
Monitor resolution. Unlike Fig. 1.3, the monitor resolution is much higher at 3200 × 1800 and although the thumbnails are smaller, more are visible. The sizes of thumbnails can generally be changed to suit. To maintain the size of the text and other features it is possible to set this in Settings within the operating system.
There are several consequences of this information. Unless you need all those 24 million pixels you could quite happily get away with far fewer to display on a computer. A 6 MP image would look just as good as the 24 MP version on the HD monitor. There can be advantages to reducing resolution, for example, if you run slide shows. Lower resolution images will give smaller file sizes and small file sizes will mean that less storage space is required. You may think this is insignificant but as time goes on, after a few years of digital photography the storage of photos can become a real headache. Additionally, small files take less time and processing power for the software to expand them to fill the screen. High-resolution images can slow down slide shows, although this will depend on the computer processor and memory. Digital projectors are just another form of monitor with resolution and display issues. In the final chapter we look at monitor calibration and how to ensure that colours are correctly displayed.
When working on your photographs within editing software, a very useful tool will be to zoom in and out of the image, changing the display for a close or wide view. With zoom controls there will be different options, such as ‘Fit to screen’ and different percentages. Fit to screen scales the entire picture to be seen within the window. In the case of the 24 MP image with an HD monitor, clicking ‘Fit’ will represent around a 30 per cent scale and will probably display that at the top of the screen; 100 per cent will enlarge the picture so that you are looking at the exact size of the image. This is a useful view as it is easier to check if the photo is in focus. Higher percentages such as 300–400 per cent enable a magnification to view almost to pixel level.
Why do you need a higher pixel density than the monitor can display? Printing large photographs, for one. Also, you are not always sure what your monitor resolution is likely to be like in the future. Ultra HD or 4K refers to screens with 3,840 × 2,160 pixel resolution and they have been around for a while, 8K resolution of 7,680 × 4,320 is already available, if currently rather expensive. These higher than HD densities of pixels can produce superb-looking, smooth images, although not always practical and projectors lag behind desktop screens by some margin. The practicality comes when using some computer programs because as the monitor resolution increases, the computer has to scale up windows and other components such as fonts and typefaces. With some software this does not always work, with low pixel density icons displaying smaller and smaller as the resolution increases. The general compromise of what is considered the ideal monitor is a 27in QHD at 2,560 × 1,440 pixels. Ultimately, before buying a new monitor check the reviews online as well as trying them out for yourself. There is also a benefit in having dual screens with the main screen displaying the editing software and a second one to the side displaying another program. This is especially helpful when trying to compare two images. Probably the most important reasons for your images to have a high resolution is if you hope to print them large.
All bitmaps have a default physical size for printing that is set within the image file by the camera. This can easily be changed at a later stage, in the computer. Early digital cameras had a large size by default that has changed in recent years. There are two phrases to look out for in the image information: pixels per inch (PPI) and dots per inch (DPI). PPI is straightforward as it is describing how many pixels an image contains per inch of distance and interprets resolution that is constant across all equipment. DPI is a term used in printing and in theory is the same as PPI but in practice will be different, as one pixel does not typically produce one dot when printed on paper. Usually several dots per pixel occur (called ‘dithering’) and will vary across the equipment. However, they are still useful guides. Let us have a look first at some metadata in an image.
IMPORTANCE OF EXIF METADATA
Fig. 1.5
Three sets of EXIF metadata from three images taken on a smartphone (left), a Compact System Camera (centre) and a DSLR (right).
When a digital photograph is taken, the camera sets down information about how the image was taken and its various attributes. This metadata, as it is called, is incorporated into the file and saved. This data is incredibly useful. The basics are easy to view within most editing software (often listed under properties). In Fig. 1.5 we see examples of information from three images. The middle one tells us that it is a JPEG format file and the resolution is 6,000 × 4,000 (24 MP) and 24bit; the print size is 17.4 × 11.43in and the DPI is 350 × 350. This would produce a high-quality print as 300 DPI is the normal requirement for magazines and books; 150 DPI would produce a good-quality print and a quick bit of maths shows the increase in size to 40 × 26in. Cameras vary considerably as to what this default DPI value will be. The data from the other two cameras has the DPI as 72. In all of these cases the DPI is really PPI but it is a very useful way of working out possible print sizes quickly. As DPI is for printing it only really needs to be considered at that stage; it can be changed with a click of the mouse and ultimately only needs setting in some software cases. Publishers and photo agencies often ask for images to be 300 DPI so they know the picture will print well.
There is a plethora of further metadata recorded in digital images. Finding all of it can be difficult and may require a special piece of EXIF software. The term EXIF refers to the agreed format of encoding it, standing for exchangeable image file. Some like EXIF Pilot or EXIF Reader are free downloads. Even then some attributes are still hidden and require software to be paid for. For example, the answer to how many times the shutter has been fired (shutter actuations) in a camera is recorded deep inside the metadata. In some cases (like Nikon) this can be found quite easily while in others (like Canon) it is well hidden and difficult to obtain, although not impossible.
Fig. 1.6
EXIF Pilot. A screenshot example of a free software program that can read and edit EXIF metadata. Over 150 separate EXIF data entries, in the panel on the right, can be read using the program.
Most of the useful metadata is quite viewable in the common software packages and, as we will see, is incredibly useful. For example, when comparing similar images on the computer you will be trying to decide why some are better than others. When using film it requires a small notebook to record values for each picture but for digital this is very straight forward, as just reading the metadata tells you how the photographs were taken. Knowing which shutter speed, aperture and ISO level was used on each photograph is incredibly useful. Even whether exposure compensation was used or the method of making the exposure, like aperture priority, can be helpful at a later stage. For specialist photography such as macro and astrophotography, checking for settings like flash firing and noise control can assist with future forays. Make sure you use a software package that can quickly display the EXIF data (see the following chapter).
Even if you do not regularly look at the meta-data, your computer software packages do. When opening up your image in editing software such as DXO PhotoLab or Adobe Photoshop Lightroom Classic (from here on referred to as just Lightroom), without you realizing, the program is analysing the metadata. This helps the software reach conclusions and suggestions on improvements, particularly when working automatically in batches. The danger sometimes is that more basic software can remove the metadata when you save changes. Enhanced images will usually have additional information added by software saying which application and version was used. These amendments are automatic although it is quite possible to change and add your own EXIF data. This can be useful when it comes to searching for particular images at a much later date.
FILE FORMATS
With metadata to store along with millions of pixels, a camera has to save a huge amount of data in each image file. In 1997 one of the first marketable digital compact cameras was the Casio, capable of producing an 800 × 600 pixel or 0.48 MP image. The following year Fujifilm brought out their first 1.3 MP cameras. File sizes may have been small, but at the time so was storage media at around 8 or 16 megabytes. Both photographic file sizes and storage capabilities have increased and continue to do so. During the 1990s a common format in which to save bitmap files on a camera was as a TIFF. They could be read by both PC and Mac, while other formats such as BMP could not. The problem was they were huge files and if you were lucky, as many as three images could be saved on a single memory card. Interesting that the Casio compact had built-in memory and no separate card. With the development of these early cameras came an important way of reducing the file size and JPEG became the agreed format.
Fig. 1.7
JPEG image compression. The photo was taken on a small drone sensor as a JPEG. When the image was enhanced on the computer it was saved several times and on each occasion, further compression occurred. Compare the enlarged portion of the croft house at the beginning, A, and at the end of the final save, B. Note the blocky appearance in the second image and loss of colour detail.
Unlike TIFF, the JPEG file is compressed to take up less space. An uncompressed format saves the data for every individual pixel while the process of compression in the JPEG looks at adjacent pixels to see how similar they are. If, say in a blue sky, the pixels in an area are the same then they are ‘clumped’ together with their pixel data combined to save space. The degree of compression can be controlled by you, the operator. Looking at the menu of your camera will show, usually under Quality, words such as Normal, Fine and Superfine. The highest quality will apply the least amount of compression. Changing resolution is not to do with quality and you can happily reduce the number of pixels down to say 6 or 8 MP, but in all cases set the JPEG quality at the highest possible level. If you need to save space for storage, reducing the pixel count is much better than increasing compression. It is better to have a higher quality of fewer pixels than many pixels in a compressed state. As can be imagined, combining data from many adjacent pixels will create poor-quality, ‘blocky’ images. Once heavily compressed, there is no going back.
You will notice that if a JPEG is opened up on the computer, altered in some way and then saved the file size becomes smaller. Every time you save the file it keeps getting smaller. Each save compresses the file and the result is called lossy, losing data. It is something like photocopying a photocopy. Each time you do this it degrades the image. If you have an important JPEG file, rather than work on it in that format first you might consider using Export or Save As to produce a TIFF format. Use this to make your changes and saves. As we will see later, there are some software packages that allow some simple changes that do not require saving, called lossless. These limited but quick actions, such as rotating photos, do not degrade the image.
Fig. 1.8
Camera file settings. An example on a Canon DSLR. Currently selected is the highest quality JPEG (in a white square) representing 20 MP and minimal compression. To the right is 20 MP with maximum compression represented by a blocky appearance. This would produce a smaller file but of less quality.
The TIFF format is not commonly found on cameras now but will be available in the computer software and we will consider this in more detail later. Instead, if you want to use a file on your camera containing the maximum amount of data, the alternative to a JPEG will be to save as a RAW file. While JPEG is a file extension appearing behind all files saved in that format, a RAW file varies with the manufacturer and so the extension is different. For example, Canon will end in CR2 (CR3 is now appearing on some cameras), Nikon as NEF, Sony as ARW, Olympus as ORF, Panasonic RW2, Pentax as PEF and Fujifilm as RAF.
The file in a RAW format has not had any changes or additions made and contains the information straight from the sensor. The files will be considerably bigger than a JPEG but contain all the data necessary to process the image on a computer. They have been likened to a film negative but this is an incorrect analogy as the file is not an image at all, just data. The pros and cons of using RAW files will be discussed in chapter 4 but be aware that they are manufacturer specific, so they are not visible in all software. This issue of RAW files not only being manufacturer specific but camera model specific as well has been addressed by the software manufacturer Adobe, who have produced their own universal RAW format (DNG). In addition, software itself can save files in the proprietor’s own format that will save all the processing actions. This can be useful to go back and continue working on something. For example, PSD is the Photoshop extension.
While these are all the file types that you are likely to come across there is a final one worth mentioning as it was one of the first graphical files and is still commonly used on the internet: the GIF format. It was the forerunner of JPEG and still has a use in keeping files small. However, the quality is not good as it supports only 256 colours to be displayed. This is because it is only 8-bit instead of the 24-bit found in, say, JPEG (note this in the EXIF data Fig. 1.5). What do we mean by this?
BIT DEPTH
Twenty-four-bit images are typical of JPEGs produced by cameras, but most photographic software can work at higher levels. You can happily scan images at 48-bit for an increase in colour except a point is reached where human eyesight cannot see the difference. However, it is thought that working at a higher level in software and then exporting as 24-bit copies later can produce better images. Here we see one advantage of most RAW files, as each of the three channels is 12-bit instead of 8-bit. With more data per pixel, the RAW file can extract the maximum amount of information to, at least in theory, produce the best picture. Note that not all software will support high bit depths, especially viewing software.
At this point we should not exclude black and white or monochrome photography, which can produce a very different mood to that found in colour and should not be ignored. Rather than just black or white (a 1-bit image) there are usually a range of grey tones in between. This is a greyscale image and is typically 8-bit (more in chapter 5).
DYNAMIC RANGE
Dynamic range is a way of describing the brightness of a scene from the darkest shadows to the brightest highlights. This is not specific to a picture but includes the range found across equipment like monitors, printers and scanners. Even our eyes have a dynamic range and across all of these objects, each can show incredible variation. The sensors on cameras today are brilliant at picking up this range, as can be seen when comparing images taken a decade ago or more. However, they still struggle to pick up the full dynamic range in a landscape with high contrast where a radiant blue sky shines brightly above a foreground of dark granite rock, deep in shadow. Small photosites on sensors of compact cameras can quickly become saturated with light, while larger sensors can gather greater amounts of light intensity. This is why larger sensors will invariably have a wider dynamic range.
Dynamic range is affected by the amount of incident and reflective light in a scene. The presence of noise will reduce the dynamic range, and as noise will develop in dark areas of an image it is there that we can expect problems. We also associate noise with an increase in ISO levels on the camera and so we can expect this to affect the dynamic range. ‘Contrast ratio’ is a phrase often used to describe the dynamic range, as it is the ratio of the brightest measurable area to the darkest before being affected by noise.
Fig. 1.9
Breakfast at a Malagasy street cafe. There is a wide dynamic range present from the pale sky to the dark shadows inside. Colour and tone is also very diverse with over 1.5 million colours displayed, way above the average number. The original only had 0.9 million and the colour depth has been enhanced on the computer.
Our eyesight is able to adapt and so we hardly notice the differences, but cameras do. On a practical level it is possible to push the range so that the camera achieves the maximum possible and then we extract that on the computer. Some photographers will try and get it right in the camera by different techniques including using gradient filters, or to take several images of different exposures and blend this on the computer. We will look at dynamic range in more detail in chapter 6.
UNDERSTANDING IMAGE HISTOGRAMS
The image histogram is a useful tool as it is a graphical representation of the exposed pixels in the photograph. It does not suggest where in the picture they exist but helps to identify how the image was exposed. The bottom (horizontal) axis represents luminance, or the degree of brightness from black on the left to white on the right. The vertical axis is the number or density of the pixels. So left of centre on the x-axis represents blacks, dark greys and shadows, whilst right of centre represents the pale greys, highlights and whites. The middle depicts the mid-tone greys. As well as seeing the horizontal axis as the range of light intensity it is the 256 colours (discussed above) displayed as the range of grey tones produced by the RGB channels.
When taking your photos they can be reviewed as images on the LCD screen of the camera but this is not accurate. The sharpness and detail may be revealed upon zooming in close but exposure and colour can be distorted by the ambient light around the camera. Additionally, if you are using RAW images the camera creates a JPEG image for the review and not the RAW file itself. This is the same when viewing the RAW file in many programs on the computer. The histogram is a much more accurate way of determining what has happened in the exposure and while a quick look in the field is helpful, it becomes a more serious tool when enhancing images. This is why understanding the histogram is so important.


