16,99 €
Mehr erfahren.
- Herausgeber: Crowood
- Kategorie: Geisteswissenschaft
- Sprache: Englisch
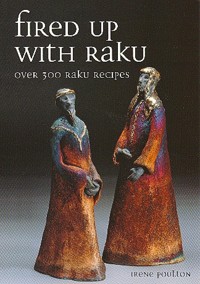
The origins of raku can be traced back hundreds of years to Japan, where it was used as the traditional method of creating clay bowls for the tea ceremony. Over the years potters have embraced and adapted the methods, celebrating the remarkable but unpredictable results achieved using raku techniques.The author, who has specialized in raku for over twenty years, considers the origins of raku before offering over 300 glaze recipes. A selection of other potters also share their ideas, and with one hundred photographs of raku-fired pieces, Fired Up With Raku offers inspiration to all potters and is an invaluable source of information and advice for all ceramicists. Includes over 300 glaze recipes. Superbly illustrated with one hundred colour photographs of raku-fired pieces. Irene Poulton has specialized in raku firing for over twenty years and her work is exhibited in both Australia and the USA.
Das E-Book können Sie in Legimi-Apps oder einer beliebigen App lesen, die das folgende Format unterstützen:
Seitenzahl: 117
Veröffentlichungsjahr: 2013
Ähnliche


First published in 2006 by
The Crowood Press Ltd
Ramsbury, Marlborough
Wiltshire SN8 2HR
www.crowood.com
This e-book first published in 2013
This impression 2011
© Irene Poulton 2006
All rights reserved. No part of this publication may be reproduced or transmitted in any form or by any means, electronic or mechanical, including photocopy, recording, or any information storage and retrieval system, without permission in writing from the publishers.
British Library Cataloguing-in-Publication Data
A catalogue record for this book is available from the British Library.
ISBN 978 1 84797 665 9
Disclaimer
Raku firing can be hazardous and it is important that correct health and safety procedures are adhered to and manufacturers’ guidelines followed. The author and the publisher do not accept responsibility or liability in any manner whatsoever for any error or omission, nor any loss, damage, injury or adverse outcome of any kind incurred as a result of the use of the information contained in this book or any reliance upon it. Due to print media constraints some glaze colours shown will vary.
Acknowledgements
The following people and organizations have helped over the years to accumulate glazes and other information: Wally Asselberghs, Belgium (www.wallyasselberghs.be); Barry Crocker, Australia; Clayart (www.ceramics.org/cic/clayart); Dewitts Glazes (www.dinoclay.com/info/glazes/degraku); Dinoclay (www.dinoclay.com); Mike Kusnik, OAM (Australia); Carol Ratliff (www.ratliffpotteryandtile.com). In Chapter 4 I particularly thank Walker Ceramics (Australia) Pty Ltd for kindly allowing me to include the tabular information on frits (for further information go to their web site at www.walkerceramics.com.au or contact them direct at: 55 Lusher Road, Croydon, Victoria, Australia 3136; telephone: +61 (3) 9725 7255; fax: +61 (3) 9725 2289).
Except where otherwise stated, photographs are by the author (in Chapter 7, by the relevant artist in each case).
Photograph previous page: ‘Shards of Memory’. (Photo: Victor France)
Contents
1 What Is Raku?
2 Raku Firing and Raku Kilns
3 Raku Techniques and Problems
Health and Safety for Raku
4 Raku Glazes A–Z
5 Alternative Methods and Materials of Decoration
6 Invited Artists
Appendix: Substitute Materials and Alternative Names, Colouring Oxides and Conversions
Bibliography
Glossary
Index
‘Maenad’.PHOTO: VICTOR FRANCE
1 What Is Raku?
Origins
The origin of raku can be traced back to sixteenth-century Japan and the tea ceremony. The name rakuyaki or raku denotes a type of Japanese pottery which involves low firing temperatures and the removal of pieces from the kiln while still glowing hot. In the traditional Japanese firing process, the pot or bowl is removed from the hot kiln and put direct into water or allowed to cool in the open air. Raku is recognized as the traditional method for creating clay bowls for the tea ceremony. These raku bowls are hand-made from earthenware and, due to the low firing temperature, have a porous body and were usually decorated by using a lead-based glaze. Some of these tea bowls are highly prized, each having a distinct form and individual style.
It was during the late sixteenth century that these raku artist potters were able to rise above the general craft potter of Japan with the formal recognition of their skills. The name raku is derived from the kanji character which means ‘enjoyment’ or ‘ease’. It was during this century that Chojir, first of a long line of raku potters, came under the patronage of the tea master Sen-No-Rikyu. In 1598 the ruler Hideyoshi bestowed the name Raku on Chojir after he began making tea bowls to the great tea master’s specifications. Upon the death of Chojir in 1592, his son Jokei continued the raku tradition. Both the name and the ceramic style have been passed down by the Raku family and continue to the present.
Raku as it is practised today in the West bears only a little resemblance to the original method used for tea ceremony bowls. Paul Soldner, the American potter, is credited with westernizing this traditional practice sometime in the middle of the last century. The use of a reduction chamber at the end of the raku firing was introduced by him to compensate for the difference in atmosphere between the original, wood-fired, Japanese raku kilns and the more up-to-date gas-fired American kilns. Typically, pieces removed from the hot kiln are placed in chambers full of a combustible material, such as straw, sawdust or newspaper, which then provides a reducing atmosphere for the glaze, and to expose the unglazed clay surface to the black carbon. The use of lead in a glaze is now discouraged since it is toxic, but almost any low-fired glaze can be used.
Contemporary Methods
But the methods used in raku today are still similar, in that the piece is first bisque-fired and then glazed and placed in a raku kiln and fired to approximately 1000°C, at which time the piece is taken from the kiln, while still glowing red, and placed in an airtight container. Sawdust, leaves or shredded paper and various other inflammable materials may be used to cover the piece after which a lid is placed over the top of the container, which is then left, depending on the size of the work, for anything from 10min to an hour to cool. This process is not without risk to the piece, the thermal shock of such a rapid transition from 1000°C can and often does shatter the piece.
The effects on the glaze are unpredictable, and although one can say with confidence that the effects will lay within certain limits, it is impossible to anticipate precisely what the surface quality will be. This freedom in allowing things to happen is so seductive for the maker and the collector; serendipity, or a happy accident? The unique appeal the raku experience has, in my experience, centres around the particular moment when we open the reduction bin and expose the finished article. But before this opening we hover over the kiln and with anticipation approach the reduction containers. How has the piece reacted to the kiln and reduction, has the glaze worked? These and more questions are asked and finally answered, at the great ‘unveiling’.
However, it is also my habit to refire until I am satisfied with the results, a practice that can and often does lead to the complete destruction of the piece. By its very nature, raku leaves an indelible imprint on any work. This can be small crackles in the glaze or glaze that runs; this is not a fault, but as Japanese tradition states, ‘The history of the fire’. Moreover, according to Japanese lore, a raku piece that has been given as a gift is very lucky for the owner and should never be given away.
‘Shrine’.
PHOTO: VICTOR FRANCE
‘Shrine’ (detail).
PHOTO: VICTOR FRANCE
This Book
Having specialized in raku firing for over twenty years and since having my own web site, I have been inundated with requests for glaze recipes and tips on how to achieve certain types of result. I therefore decided to gather all this information together in one handbook. The glazes I have collected over these years have come from a number of sources, such as books, journals and the Internet, and, of course, other raku artists, plus some of my own efforts. Several of the glazes I have altered to suit my own style of firing and so they may differ slightly from the original. Where possible I have acknowledged the authors of the glazes, and to the ones I have omitted or have not known I apologize now. Several glazes have been passed around from person to person and the original creator may be forgotten, and in addition the glazes may become changed subtly over time. I hope readers enjoy trying out these recipes and I do stress that everyone should test first before trying out a new glaze on a precious new form or pot. You have to also take into consideration that many ingredients change subtly over time.
‘Shrine No.2’.PHOTO:VICTOR FRANCE
‘Temple Tower’.
This can be observed when a glaze recipe does not produce the same results as before. It also means that you have to retest the glaze recipe with the altered ingredients. Copper and frits are often changed by the manufacturers; frits will be given different ingredients and copper often has ‘fillers’ added, which can be observed by the colour, as the darker green the copper the more pure copper it contains. Furthermore, reduction has a lot to do with how a raku glaze reacts. A heavy reduction in an airtight container will give an entirely different appearance to the same glaze that has had a very light reduction in an unsealed container. Once again, test with different reduction materials, such as leaves, seaweed (this is best used dry), newspaper (can be useful either wet or dry), pine cones or pine cone needles and different sawdusts such as pine (light wood) or jarrah (dark wood). You can also try a reduction in the kiln during the firing to get different results on your glazes. To me, the joy of raku is in experimenting with all these components and the excitement of opening up the reduction bin to see what, if anything, you have achieved. You should experiment with all types of glaze, reduction materials, the time of reduction and the oxidation effects. Keep good records of your experiments and in time you will build up a useful source of information. I also multi-fire a lot of my work, anything up to ten times, if I am not happy with it. This can lead to some wonderful results or total destruction; have fun and above all be safe.
‘Elegant Lady’ (detail).
‘Elegant Lady’.
In this book I have also invited other raku enthusiasts, people whom I have admired and looked up to, to share my raku journey. They originate from around the world, Australia, Britain, Belgium and the USA. I feel privileged that they took the time and agreed to participate and share their knowledge and experience with us all.
‘3 Friars’ (multi-fired).
PHOTO: VICTOR FRANCE
2 Raku Firingand Raku Kilns
There is an assortment of kilns available for raku, some ready-made and available from your ceramic supplier and others are home-made. Choose the kiln that suits both how you work and the size of your work. I personally have two kilns, a large one and a small one, which is also useful for glaze testing. I do not advocate the use of an electric kiln because the whole raku process is very damaging to the electric elements. Copper too has a detrimental effect on an electric kiln, corroding the elements. A liquid propane gas (LPG)-fuelled, outside kiln, which is movable and very convenient, is also popular, and one I would endorse. If you have natural gas in or near your studio, it can be cheaper to run this type of kiln and you do not have the inconvenience of running out of bottled gas at the wrong moment, but such kilns are usually quite large and not always suitable for use for raku work. You can also build a kiln from bricks and wood fire it. However, I am not going into the construction of kilns here since there are many books available on the subject, one of which is David Jones’ Raku – Investigations into Fire (Crowood).
If you are new to raku, try to go to some workshops and see as many different kiln types as you can, in that way you will get a good idea as to the one that would suit you best. The size of a kiln is not the only important factor: there are ‘top-hat’ kilns or opening door kilns, kilns that are operable by one person or ones that need at least two. Do some research before you commit yourself to one particular type. Firing a kiln is particularly subject to variations, since with most glaze recipes there can be no guarantee of results due to disparities in mixing, firing and sometimes the constituent chemicals. I urge you to always test first, sometimes try to repeat the test under different conditions and reduction atmospheres.
‘Temple’ (detail).
Clay and Materials
Almost any kind of clay can be used for raku firing, but the one used most often is one with an open clay body since this helps to give the clay more resistance to the thermal shock of the raku process. If you have a clay body that you like, the addition of grog or other materials should help to give the clay more resilience. Materials such as spodumene or petalite and even washed sand can be useful in this regard, but make sure that these materials are fully wedged throughout the clay. Porcelain can also be used for raku and tends not to need any added combustibles, but, due to the low firing temperature, it will not be fully vitrified. Almost all suppliers now have ready-made raku clays available for purchase.
‘2 Friars’ (multi-fired copper matt).
I often like to add other materials to my clay to give some additional texture. Crushed red brick, perlite, fireclay, vermiculite (a lightweight mica-derived mineral), and even copper or brass metal filings may be used. Some types of organic material that burn out but leave a texture can all be utilized in this manner. Experiment with different materials, but do not fire too high since some materials have a habit of exploding, which will not do your kiln much good. I suggest that you first make test tiles with some of the materials you wish to use and test fire them, always keeping records of the amount you used and the temperature you took the kiln to.


