Erhalten Sie Zugang zu diesem und mehr als 300000 Büchern ab EUR 5,99 monatlich.
- Herausgeber: Birlinn
- Kategorie: Geisteswissenschaft
- Sprache: Englisch
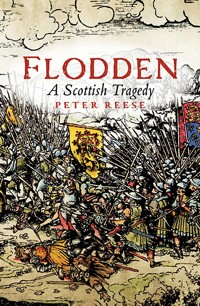
In the breadth of bitter-sweet Scottish history there is no more poignant, not more important, battle than Flodden. Before Scotland's disastrous defeat at the hands of the English under the Earl of Surrey, a proud country under its dynamic Stewart king, James IV, was emerging as a distinct and flourishing nation within Europe. With defeat the inevitability of Scotland's Reformation and union with England is hard to deny. Flodden was an ignominious and disastrous moment for the Scots, all the more so for being a largely unnecessary encounter, fought with superior numbers and arms, which left the country weak, exposed and leaderless. In this bestselling study of one of the most famous battles in history, Peter Reese recreates the drama and calamity of the battle fought just south of the River Tweed on 9 September 1513. Drawing together the political, military and historical background to the conflict, he examines the two armies and their leaders and explains the crucial tactical moves both before and during the encounter. The result is a thoroughly researched yet always accessible and realistic account of the battle Scotland has tried to forget.
Sie lesen das E-Book in den Legimi-Apps auf:
Seitenzahl: 330
Veröffentlichungsjahr: 2013
Das E-Book (TTS) können Sie hören im Abo „Legimi Premium” in Legimi-Apps auf:
Ähnliche


FLODDEN
A SCOTTISH TRAGEDY
For Leslie
This eBook edition published in 2013 by Birlinn Limited West Newington House Newington Road Edinburgh EH9 1QSwww.birlinn.co.uk
This edition first published in 2003 by Birlinn Ltd
Copyright © Peter Reese, 2003 Maps © Paul Vickers, 2003
The moral right of Peter Reese to be identified as the author of this work has been asserted by him in accordance with the Copyright, Designs and Patents Act 1988
All rights reserved. No part of this publication may be reproduced, stored or transmitted in any form without the express written permission of the publisher.
ISBN: 978-1-84158-265-8 eBook ISBN: 978-0-85790-582-6
British Library Cataloguing-in-Publication Data
CONTENTS
Introduction
Acknowledgments
List of illustrations
List of maps
PROLOGUE:
Burghmuir – August 1513
PART ONE: RIVAL KINGDOMS
1. The Defenders
2. Proud Monarchs
3. Slide Towards War
PART TWO: OPPOSING FORCES
4. The Soldiers and their Weapons
5. The English Commanders
6. The Scottish Commanders
PART THREE: FACE TO FACE
7. Opening Moves
8. Jockeying for Position
9. The Guns Speak
10. Riding the Storm
11. Fight to the Death
EPILOGUE:
INTRODUCTION
BEFORE UNDERTAKING THIS book I was quite sure Robert Bruce (Robert I) was Scotland’s leading king commander and his triumph at Bannockburn not only Scotland’s outstanding victory against the English but self evidently the country’s most significant battle from a political standpoint.
Nothing, of course, has changed my mind about the extent of Robert Bruce’s achievements nor the merit of his victory at Bannockburn – although if he had been given the opportunity to meet and defeat Edward I there, rather than the English king’s inept son, his military reputation would be truly unassailable not only in relation to other Scottish leaders but among military commanders world-wide – but I am no longer convinced about Bannockburn being Scotland’s most influential battle.
While Bannockburn undoubtedly laid the foundations for renewed Scottish independence some fourteen years afterwards, England and Scotland were soon fighting again and there were long years of further conflict before Scotland’s sovereign status was finally recognised in 1357 through the Treaty of Berwick, an agreement which predictably failed to prevent subsequent English claims to suzerainty. In contrast Scotland’s defeat at Flodden served to downgrade the country’s military capability and set in train what was to become an irreversible process towards union with England which, despite the recent granting of certain devolved powers, continues today.
Flodden deserves to rate highly amongst Anglo-Scottish battles for other reasons. The number of soldiers engaged there was unquestionably higher than at Bannockburn, higher than in Wallace’s battle against the English at Stirling Bridge and even higher than in the massive encounter that took place between the two countries at Pinkie Cleugh in 1547. The one battle where battle numbers were likely to have equalled or exceeded those at Flodden was Wallace’s clash with Edward I at Falkirk during 1298. Flodden is also notable for its high numbers of casualties, including a king, many leading nobles and 12,000 or so others killed. These far exceeded the totals at Bannockburn or at Stirling Bridge and stand comparison with the sanguinary encounters of Falkirk and Pinkie, a fact less surprising when one realises its main hand-to-hand engagement was fought with notable stubbornness, and for longer than the others, including William Wallace’s primarily defensive engagement against Edward I at Falkirk. And although it was the last medieval engagement fought in Britain due in large part to the obsolescent weapons used by many of the English soldiers, Flodden previsaged more modern battles with its opening artillery engagement.
Whereas every Scottish schoolboy knows of Bannockburn, those I have met recently were less aware of Flodden. Indeed, one needed some persuading I was not referring to Culloden! Understandably Flodden’s disastrous results have been deliberately played down in Scotland and, as the book attempts to show, for quite different reasons in England too.
This has had predictable results on its documentation. Whether those responsible for keeping the Scottish records were killed in the conflict or not, there are no contemporary records or accounts of it from north of the border and the major English sources are limited to three. These are the short Articles of Battle, likely to have been written by Thomas Howard, Surrey’s eldest son and the English vanguard commander; an avowedly contemporary account called the Trewe Encountre, which is limited to some few pages: and allusions made to the battle within Edward Hall’s The Triumphant Reigne of Kyng Henry VIII, printed in 1550 but reputedly based on reports of eye witnesses. Nonetheless, the conjunction of such accounts with contemporary letters and papers, along with later commentaries and a thorough investigation of the ground, has enabled the course of the battle to be traced with some accuracy. This process is made easier because, unlike Bannockburn and Falkirk (1298), the site is in little dispute, and its present memorial undoubtedly marks the location of some of the bitterest fighting. However, the nature of the English approach march, especially the movement of their final division to the battle, remains open to different interpretations.
As in my earlier account of Bannockburn, I attempt to describe the salient political and military developments leading to the conflict, the two armies’ different command systems and the use they made of contrasting weaponry, before going on to recount the conflict in detail and assess its important consequences.
On my visits to Branxton field I was struck by the hauntingly beautiful part of Northumberland where the fight occurred, with ruined castles nearby serving to emphasise the bloody history of the border regions as much as the damage inflicted by the Scots during their approach march to Flodden. However, visitors to the battle site are not well served. On my ascents up Piper’s Hill I have never failed to meet people puzzling over the simple viewscape there. For further details they are obliged to go to the visitors’ centre at Etal Castle over eight kilometres away where principal attention is paid to the castle itself. The time has surely come for a visitor centre to be erected on the battle site – probably near the present car park – where publications can be stocked, an appropriate interactive experience offered, and from where visitors can be directed along a trail to include the approach marches of both armies, the position taken up earlier by the Scots on Flodden Hill and the dispositions and movements of the contenders at Branxton.
ACKNOWLEDGEMENTS
WITH REGARD TO the book’s early stages I am indebted to four people in particular; to Paul Vickers, historian and the army’s systems librarian, who walked the battlefield, discussed the conflict’s sequence of events and produced the battle maps; to Dr Leslie Wayper, ‘historian extraordinaire’; to my long-time friend Mrs Jennifer Prophet for her valued comments on the text and, together with her son Charles, the production of the index, and to Mrs Christine Batten for her ever-skilled work with the computer.
With respect to essential professional support, I have received immense help from, among others, the National Library of Scotland, including its map department, The British Library, Scottish United Services’ Museum Library, Royal Armouries Library, Fort Nelson, Edinburgh Central Library, the Army Central Library, Hexham Public Archives, Farnborough Library, from Colonel A. Guinan, T.D. on artillery matters and the Provost and Council of Selkirk at the time of the burgh’s annual Common Ridings. For the illustrations I particularly acknowledge the assistance received from the Royal Collection, the National Portrait Gallery, Heinz Archive and Library and the Scottish National Portrait Gallery. The book was written largely in the Prince Consort’s Military Library, Aldershot, whose librarian Mr Tim Ward and staff are friends to whom I owe so much over more years than I care to remember.
At Birlinn Books I am, of course, very grateful to Hugh Andrew for his vital endorsement, to Neville Moir for piloting the book through its production stages and to Donald Reid for his rare perception and high editorial skills.
Finally, I am fortunate indeed in the continuing support of my wife who has borne the brunt of my Flodden mania and walked over the special mud of Branxton fields, where in places shoulder high thistles compare well with the best of Scottish ones.
Any errors or deficiencies are, of course, mine alone.
Peter Reese, 2003
LIST OF ILLUSTRATIONS
1. James IV by an unknown artist
2. Margaret Tudor Queen of Scotland, by David Mytens
3. Henry VIII by Gerard Horebout
4. Thomas Howard, 2nd Duke of Norfolk and Earl of Surrey by an unknown artist
5. Branxton Church
6. Illustrations of Sottish pike and English bill
7 & 8. Scottish 36 pounder cannon
9 & 10. English 2 pounder falcon
11. The Flodden Memorial
LIST OF MAPS
1. James IV ’s advance, 18 August – 7 September 1513
2. English Flank march, 8–9 September
3. Approach to battle, 9 September
4. Battle of Flodden, opening positions
5. Battle of Flodden, first Scottish advances
6. Climax of the battle
PROLOGUE
BURGHMUIR – AUGUST 1513
For he had charged that his array
Should southward march by break of day
Sir Walter Scott, Marmion
TWO HUNDRED YEARS after Robert Bruce led his men against King Edward II at Bannockburn another outstanding Scottish king again gathered his nation’s host to confront the English.
James IV gave orders for his men to attend on 13 August 1513 ‘with 40 days provisions’ at two assembly points, the Burghmuir (Edinburgh’s common moor) to the immediate south of the town, and a forward mustering point at Ellem Kirk in Berwickshire’s Duns forest, where he had gathered for his previous foray against Norham Castle in 1497. A good proportion of the men from Lothian, together with those from the north-west, were due to assemble initially at Edinburgh, while those from East Lothian, Fife and Angus would march directly to Ellem, where the whole army was scheduled to meet before moving southwards to the Tweed about twenty miles away. The Edinburgh muster gave James an opportunity to fill the old city with all the panoply of war and show himself in the dual capacity of monarch and military leader, thereby helping him demonstrate the extent of his country’s military commitment. Virtually every smith, wheelwright and seamstress would have been enlisted to support the host, the town’s bakehouses would have worked continually, while Edinburgh’s provost and baillies, after leaving the city’s affairs in the hands of their deputies, moved onto the Burghmuir and presented themselves for roll-call.
The muir covered five square miles, with its northernmost point marked by the Burgh loch lying near the base of the city’s walls; its southernmost boundary was the Pow burn. Today the loch that provided Old Edinburgh with drinking water has been drained and transformed into the parkland area of the Meadows, presently surrounded by busy streets, while the burn (now piped and running underground) bounds the city’s southernmost districts of West Morningside, Canaan, Blackford, Wester Grange and Mayfield. With such extensive development it is not easy to visualise the Burghmuir of the early sixteenth century, with its unprepossessing air of rough grassland intersected by clumps of ragged and ancient oaks from the one-time forest of Drumselch. King David I had gifted it to the city in 1143, and by the time of Flodden the muir had been used for several purposes: as a haven for outlaws and vagrants who skulked in rough huts or found refuge beneath the trees; as a quarantine area for the city’s plague victims; and, in 1384, as the point of assembly for a previous Scottish army reputedly 30,000 strong under the command of the earls of Fife and Douglas. James IV knew the muir well and gave Edinburgh’s magistrates the privilege of letting pockets of its land; such grants encouraged the clearing of some of the massive trees, as feu-holders could use the felled timber to extend the frontages of their Edinburgh houses by a maximum of seven feet. This may have helped open out the muir but it came at the cost of reducing the width of Edinburgh’s High Street dramatically.
The king had both ridden and hawked on the muir and, in 1507, he established a little chapel dedicated to Saint Roque, the French saint of the plague-stricken, on a site close to the present Astley Ainslie hospital. This chapel, together with the adjacent open ground, became the focus for his muster before Flodden. In his poem Marmion, Sir Walter Scott vividly described the likely spectacle of tents ‘spread over all the Borough-moor and chequering all the heath between the streamlet (the Pow burn) and the town . . . oft giving way where still there stood some relics of the old oak wood.’ In the centre of the assembled tents Scott writes:
The royal banner floated wide,
The staff a pine tree strong and straight,
pitched deeply in a massive stone.
The detail may not be authentic – the massive numbers described by Scott were unlikely to have much exceeded 40,000 men (still a large army) and the hole in the present bore stone now cemented into the boundary wall of Morningside parish church, whether the original or not, would not have held any large trunk. Yet Scott’s scene, as ever, is compelling:
The horses’ tramp, and tingling clank
Where chiefs reviewed their vassal rank
And charger’s shrilling neigh;
And see the shifting lines advance,
While frequent flash’d from shield and lance,
The sun’s reflected ray.
The bustle and urgency of the assembly was also captured by a reference in the contemporary treasurers’ accounts to last-minute embroidery. This was to complete the fringes of the royal standard before the flag could be handed to a horseman who galloped off after sunset to give it to the king. As unit after unit joined the muster, even the more cautious leaders and men must have felt increasingly confident of success, especially as they knew they were yet to meet up with further detachments at Ellem Kirk.
Even more spectacular than the stream of horsemen and foot soldiers hurrying along the town’s narrow streets was the rumbling progress of the king’s great guns from the castle. These started out on 17 August, two days before the main body left the Burghmuir. The heaviest guns went first but did not get far on the first day; the five great curtals were dragged from the castle to St Mary’s Wynd outside the Netherbow Port, where twelve sentries watched over them during the night. On Thursday they resumed their journey; each with its team of thirty-two oxen, their heads swinging and flanks glistening in the rain, probably triple yoked into eight ranks, with more animals roped behind to prevent the carts and their heavy burdens from running away when negotiating the sloping wynds. These were followed two days later by the remaining fifteen guns, accompanied by their own teams of oxen and handlers. In all 400 oxen were needed to pull the guns. Others dragged a crane, pack-horses followed, loaded with shot, both stone and metal, and lastly, after due interval, came a line of carts carrying the vital powder. On Saturday morning the leading infantry units commenced their journey and that evening the king left his palace at Holyrood for the last time to join them.
In spite of widespread support, not everyone shared the king’s enthusiasm for the campaign into England. James’ veteran adviser, Bishop Elphinstone, spoke openly against it in council and was supported by Archibald Douglas, Earl of Angus. Many other prominent nobles were only too aware of the long and arduous process by which they had reached their present eminence, including both political marriages and shrewd switches of allegiance, and of how much they stood to lose if James were defeated. However, while all were not necessarily over-enthusiastic they duly gave James their support and, apart from Elphinstone and Angus, only the queen made public expression of her concerns about the dangers of such a campaign, especially as the royal succession rested at this time on the uncertain life of their one infant boy, also called James.7
In addition to these individual doubts there were reports of two public auguries against the king going to war. The sixteenth-century chronicler, Robert Lindsay of Pitscottie, described how, shortly before the army left the Burghmuir at midnight while some of the artillery was being trundled down from the castle, Robert Lawson, a prominent member of the Lords in Council, heard a raised voice close to the Mercat cross. This summoned all men, earls, lords, barons, gentlemen and honest burgesses to appear before Plotcok or Pluto (a common name for the devil) within forty days. Lawson appealed against such a mortal threat by calling upon the mercy of God and Jesus Christ, and it would seem his pleas were heard, for of those who were assembling there only Lawson escaped death at Flodden. Pitscottie subsequently qualified his account by acknowledging in his Historie that in spite of the information he was given this might just possibly have been a jape mounted by drunks for their amusement.
Pitscottie referred to a second portent, also reported by the renowned sixteenth-century Scottish historian, George Buchanan, who described it as ‘a device of the queen and the party averse to the war, to operate on the King’s superstition and divert him from his rash projects.’ Pitscottie tells that while the king was in Linlithgow praying in church for the success of his expedition, a yellow-haired, balding man, fifty-two years of age, wearing a blue gown and carrying ‘ane great pyk staff ’ in his hand, asked to see the king, and when he had been admitted told him not to lead his army to war and not to use female counsel ‘nor lat them twitch they body nor thow thairs’. With this he apparently disappeared, although David Lindsay, later Lyon Herald and Marshal of the royal household, attempted to lay a hand on him. Professor Mackie has suggested that as the king’s religious susceptibilities were well-known the figure was most likely to have been an actor dressed to resemble St James. Pitscottie’s reference to the further piece of alleged advice, namely that the king should not ‘mell’ with women, was not taken up by later commentators, although if the actor was, in fact, following the queen’s instructions, her indignation over James’ mistresses could well have prompted such advice.
The showpiece assembly held by James at the Burghmuir and his forward muster at Ellem Kirk help to confirm other indications that he loved the opportunities for spectacle that attended the reality of war. The very fact that his wife or another of his councillors felt it possible that a suitably devised portent might deter him from his warlike purpose also points to James being a very different war leader from Robert Bruce, who may have been scrupulous in dedicating himself and his men to his maker but had no doubts who shouldered the prime responsibility for their success in battle.
This said, circumstances were more straightforward for Bruce prior to Bannockburn than for James IV before Flodden. As his country’s defender Bruce’s task was clear, he faced an attack from a massive English army moving into Scotland, if one led by an inept king supported by a divided nobility. In 1513 James himself took the initiative by allying his country to France, and he consciously upped the stakes by assembling his army on France’s behalf against a reawakened England under its young king. However warlike James’ dreams and colourful his army, his country’s interests would not be served by a major battle of attrition, nor, unthinkably, by a serious reverse against the English northern levies.
PART ONE
Rival Kingdoms
CHAPTER ONE
THE DEFENDERS
And much he marvelled one small land,
Could marshal further such various band
Sir Walter Scott, Marmion
PROBLEMS SIMILAR TO those facing James IV as he prepared to cross the border had been experienced by other Scottish monarchs during the previous four centuries. For in spite of the Romans’ failure to subdue the fierce tribesmen of the far north and their acceptance of that fact by building the great barrier wall separating England from what is virtually modern Scotland, it was not, of course, inevitable that Britain should remain so divided. That James IV was still king of an independent Scotland owed as much to generations of its soldiers as to the statecraft of past kings and their advisers. Those men who, whatever the dangers or however serious the defeats, bore arms for their kings and chiefs; men who were not always well led and had to meet an enemy who, whatever the calibre of its own leaders, usually possessed both superior resources and better weaponry.
There were calls to arms from the late eleventh century onwards for, although much of Europe was still fragmented, Scotland, under its Canmore line of kings, and England, under its Saxon and then Norman monarchs, were already distinct and different countries despite having a border that remained fluid and created much friction between them. Scotland’s chances of survival against the richer and far more powerful state to its south were not enhanced by what Scottish historian Ranald Nicholson saw as one of its chief characteristics, namely that ‘Diversity was more obvious than uniformity, local self-sufficiency more obvious than national inter-dependence. The concept of one race, one law, one tongue, did not apply in medieval Scotland’.1 Equally relevant, the writ of Scottish monarchs, including their ability to call out their national host, was traditionally much less pervasive than that exercised by kings in feudal England.2
Despite Scotland’s greater diversity and looser system of governance, through more than four hundred years, until the union of the two crowns in 1603, Scottish soldiers duelled with their southern adversaries. Sometimes these were mere skirmishes hardly warranting the name of a battle, but at other times they were massive and highly significant engagements, such as Bannockburn or the cataclysmic encounter at Flodden. The reason for such clashes and the nature of their fighting understandably owed much to the prevailing political climate. In this regard three distinct stages can be identified in the ongoing rivalry between the two countries.
The first stretched from the eleventh century until the commencement of the Wars of Independence in the late thirteenth century. This was a time when the English were generally willing to live and let live and the military activity on both sides was relatively unsophisticated. The second was marked by the Wars of Independence from 1286 to 1357 where England was determined to bring about unity by force and Scotland fought for its very existence, with significant strategic and tactical developments taking place on both sides. The third stage ran from the end of the Wars of Independence until the union of the two crowns in 1603.
During the first stage which saw periodic clashes in both countries between the Crowns and their nobility, like that in Scotland following the accession of Alexander I, their external forays tended to be relatively unstructured, with those taking part quite accustomed to changing their allegiance from one side to the other. Frequent marriages took place between the respective royal dynasties, although from time to time England raised its claims of feudal superiority over Scotland and Scotland showed itself reluctant to give up its claims to the English northern counties. However, like the Romans before them, the English did not give the conquest of the turbulent north a high priority. It did not seem a particularly valuable prize, for the Normans were consolidating their domestic power and had other fish to fry.
When fighting did break out it was more often than not due to Scottish aggression. Such clashes were usually provoked by courtly factions or border disputes and did not amount to serious war. Scottish claims for much of Cumberland and Northumberland were countered by the English belief that the existing border should run on the more northerly Tweed/Cheviot line. Inevitably all military actions in support of Scottish claims meant crossing the English border, and long before James IV Scottish kings came to appreciate the hazards of moving onto English soil. For example, in 1093 when Malcolm III headed an army into England, he was trapped near Alnwick and killed, together with his eldest son.
Fortunately Malcolm had other sons and the reigning English king, William Rufus, was content with sponsoring his favoured candidates from among them for the Scottish throne. Such favour had its costs: the princes came to acknowledge him as their superior, but whether purely for their lands in England or for their possessions further north is not clear. On Rufus’ death and the accession of his brother Henry to the English throne, the two crowns edged closer together through the marriage of Henry to Malcolm’s III’s daughter Edith (whom Henry called Maud). This affiliation was further demonstrated in 1114 after another of Malcolm’s sons, Alexander, spent many of his early years at the English court and married Sybilla, daughter of Henry I, before becoming Alexander I of Scotland. After his accession he even accepted joint command of a force campaigning in Wales to establish the English king’s overlordship of that country.3
The close relationship between the two countries continued when Alexander was succeeded by Malcolm’s youngest surviving son, David, who was to become one of Scotland’s most important early kings. David not only spent much of his boyhood in England, but he gained important holdings there, including the English Honour4 of Huntingdon (through his marriage to Matilda, widow of Simon de Seulis), and later became Earl of Northampton. As brother-in-law to the English king, he introduced Anglo-Norman families into Scotland, including the Morevilles, Soulis’, Lindsays, Somervilles and Bruces, although he did not foresee the problems that would ensue from offering them vast tracts of land in a country where their chances of gaining high influence appeared more favourable than in England.
As a rapid dividend such armoured knights and their followers helped to bolster his crown against its Scottish challengers, and after 1130 also helped to subdue a rebellion in Moray, as well as joining his invasion of Northumberland in furtherance of his claims there. Despite their help, however, David, like so many other Scottish kings, over-stretched himself whilst on English soil. In 1138 near Northallerton, at the so-called Battle of the Standard, the English fought round a mast bearing a consecrated host accompanied by the holy banners of St Peter of York, St John of Beverley and St Wilfred of Ripon, and David’s impulsive, lightly armed Galwegians broke against a force of dismounted mailed knights interspersed with archers. This tactical formation was designed to protect the mast, but in future years various versions of it would lead to notable English battlefield successes. In spite of his defeat, David believed he still had a good chance of receiving most of Northumberland when his friend, Henry of Anjou, became king of England, but the new English king not only reneged on his earlier promise but forced David’s successor Malcolm IV of Scotland to give up any such claims.
In 1173, once again in the hope of gaining land from the English northern counties, David’s grandson, William the Lyon, led an army in support of a rebellion mounted by Henry II’s son against his father. William’s campaign, like others during this period, was lacking in strategic planning and battlefield control. Intent upon devastation and plunder, William left part of his army in the west and took the remainder, including Norman knights with estates in Scotland and a band of Flemish mercenaries, to besiege the English border town of Alnwick. Under cover of mist an English force succeeded in capturing him and in punishment Henry II made William his vassal ‘for both Scotland and all his other lands’; the subsequent treaty of Falaise (1174) declaring that English lordship extended over Scotland and not just William’s English estates. By the treaty William also had to surrender his five strongest castles and to make both his bishops and lay barons subject to the English king. However, although William’s rashness encouraged the English crown to bring Scotland more closely under its control, it also gave rise to a mounting sense of national identity within Scotland itself against such alien dominance. Henry attempted to speed the process of assimilation by offering his own granddaughter to William in marriage and, when this was rejected by the Pope on grounds of consanguinity, substituted Ermengarde, the daughter of one of his senior barons and great-granddaughter of Henry I. As her dowry he even returned Edinburgh to William.
It is possible that, under Henry I, England and Scotland might have merged, even before England succeeded in subduing Wales, but Henry’s policy was not followed by his successor, Richard I. Arguably England’s greatest warrior king, he could, in all probability, have conquered Scotland long before Edward I managed it. But Richard preferred to do his fighting on crusade in the Holy Land using England as his milch-cow to provide the money to do so. Willing as he was to put England’s interests for sale, it is not surprising he sold the pass in Scotland, too, although the price he set for the Scottish king’s release was not low, particularly for a poor country, with the ransom being fixed at 10,000 marks (£6600).
Understandably relations between the two countries deteriorated when, with King John on the English throne, William the Lyon revived his earlier demands for Northumberland and Cumberland. Both countries prepared for war, but when, in August 1209, John approached the border castle of Norham with a much superior army the ageing Scottish king surrendered without a fight. He was forced to pay 15,000 marks (even more than his earlier ransom) for John’s goodwill and to deliver his two daughters into the English king’s custody, on the understanding that they would marry English rather than French or other European princes. For more than fifty years William the Lyon had taken startling military risks, unjustifiable in national terms, to acquire Northumberland.
Following his death, England and Scotland began to draw together again. The Lyon’s young son, who became Alexander II, had frequently resided at the English court and in 1216 he was among those who greeted the French king when he landed at Dover. However, King John’s troubles with his barons and the struggle that led to the signing of Magna Carta in 1215 were too strong a temptation for Alexander to resist and he joined forces with the English barons, bringing upon himself an attack by the English army which almost annihilated his forces.
Close ties between the two royal houses were restored when in 1221 Alexander II married Joan, daughter of King John, and in 1237 Scotland finally dropped its claim to Northumberland and Cumberland in return for a token income from lands in the two counties to the value of just £200.5 The policy of intermarriage continued when Alexander III, while still a minor, married Henry III’s daughter Margaret. However, such a long-term strategy of integration through marriage could never satisfy England’s next king, Margaret’s impatient and formidable brother Edward I, who aimed to bring both Wales and Scotland under England’s control during his lifetime.
Edward not only wanted to subjugate Scotland but he was willing to use whatever military means he felt necessary to achieve it, and his accession marked the second stage in the ongoing political and military rivalry between the two countries.
For a brief period it seemed as if Edward’s ambitions towards Scotland might be achieved peacefully. When Alexander III was accidentally killed in 1286, leaving as sole survivor of the Canmore line his granddaughter, the Maid of Norway, Edward at once proposed that she should marry his son and heir, the seven-year-old Prince Edward Caernarvon. But with the maid’s death in 1291 and Edward’s continuing determination to pursue his aims towards Scotland, war became inevitable.
When in 1296 Edward made his first attempt to coerce Scotland he massacred both soldiers and civilians in the Scottish border fortress of Berwick, thereby signalling that the fighting would be both bitter and bloody and marked by large and costly battles. In 1297 William Wallace responded with a notable success at Stirling Bridge where he prevented Edward’s lieutenant, Warenne, Earl of Surrey, using his full strength, only for this to be followed the next year by Edward’s revenge when the English main army gained an overwhelming victory over Wallace at Falkirk. Following Falkirk, Edward pursued Wallace relentlessly until taking a terrible revenge on him in 1305. The mood of the time was also reflected in the implacable attitude adopted by Edward against the rebellious Robert Bruce, who had declared himself King of Scotland. The English king ordered his commander Aymer de Valence to seek out and destroy Bruce, and he authorised Valence to ride under the dragon banner, which enabled him to declare Bruce and his followers outlaws and therefore subject them to the dire punishments of the day.
Nor was savagery confined to one side. After his victory at Stirling Bridge, Wallace flayed the body of Cressingham, the dead English vanguard commander, and sent the skin across Scotland as proof of his victory. In his turn Robert Bruce killed his leading Scottish rival, John Comyn, on the steps of the great altar of Dumfries parish church, while his subsequent harrying of the Buchan estates following his victory at Inverurie in 1308 caused men to grieve there for fifty years afterwards.6 In such a climate the earlier chivalric sallies were a thing of the past.
The intensity and duration of this conflict brought new military developments. Following William Wallace’s defeat at Falkirk, Robert Bruce adopted the classic survival policy of devastating his own country and exchanging ground for time until, hopefully, the English invaders lost momentum. He combined this with guerrilla warfare, in other words avoiding large clashes unless the conditions were strongly in his favour, a doctrine that became known as Good King Robert’s Testament, and included the capture, and then destruction, of castle strongholds to deprive the English army of possible bases. Bruce also developed the defensive battlefield formations of massed spearmen instigated by William Wallace into mobile units that owed much to the Swiss halberdiers or ancient Greek phalanxes, and which, in Bruce’s hands, were used at Bannockburn (1314) to devastating effect. Unfortunately, in those of later and lesser commanders this formation was to cast a bloody shadow over Scottish military fortunes when they ignored the fact that, although, at Bannockburn, Bruce defeated the unsupported cavalry of a maladroit Edward II, his doctrine was essentially one of caution and manoeuvre. It was lack of a close combination of cavalry, spearmen and archers that had cost the English so dear at Bannockburn, but they learned from their defeat there, and the same cavalrymen who had thundered around aimlessly on that field came to fight dismounted with their spearmen, protected by covering fire from bowmen stationed on their flanks. This combination would long confound the Scots and also succeed against the French in battles such as Crécy and Poitiers in 1356.
As invaders, the English also sought to develop ways of striking deep into the Scottish heartland, and if they were unable to trap the Scottish main army they looked to take over castle strongholds to help consolidate and prolong their presence. These gave rise to new logistical developments: they began to use ships to help their resupply, like those which docked at Leith to restock Edward II’s army just prior to Bannockburn, as well as prefabricated pontoon bridges to cross the great river barriers in order to speed their penetration into central Scotland. Additionally, to keep his soldiers in the field for the relatively long periods needed, Edward I also began to pay his regular retinues as well as foreign mercenaries.7 Such initiatives placed a crushing burden on the English exchequer for, in addition to his soldiers’ wages, after capturing the castle strongholds Edward needed to rebuild and garrison them until Scottish resistance could be extinguished.
The fact remains, however, that during the first War of Independence Scotland not only demonstrated formidable powers of resistance but, under Robert Bruce’s leadership, established a degree of military superiority that prevented the more powerful southern state from subduing the country until in 1328, after thirty-four years of fighting, the English were forced to discuss peace terms. Following Bannockburn a series of fruitless campaigns left the English forces demoralised and, with their treasury temporarily bankrupted they were no longer able to protect their northern counties from Bruce’s well-orchestrated invasions. For Scottish arms this represented a staggering achievement, for England a humiliating defeat; nothing less could have brought the English to the conference table.
By the Treaty of Northampton England recognised that Bruce and his heirs should be free of any English feudal claims and Scotland should also be both free and distinct from England; both sides agreed to underscore the agreement with a royal marriage, this time between Prince David of Scotland and Edward III’s sister Joan. In his desire for peace Robert Bruce also agreed to pay an indemnity of £20,000 within three years. He still, however, retained his defence agreement with France which in itself was bound to make England feel partly encircled. More serious still, the Scottish king did virtually nothing for the ‘disinherited’, the group of militant nobles who by the agreement lost both their lands and their titles. Robert Bruce had been forced to crush the factions within Scotland before he could take on the English, and with his own early changes of allegiance he knew only too well the problems of conflicting loyalties. The treaty therefore specified that those with lands in Scotland who did not become Scottish would lose their holdings. However, in the vast majority of cases he offered no compensation for such lost estates, nor made any redistribution of land in their favour.8
With influential men from both sides of the border determined to regain their lands, and a proud young king on the English throne intent on avenging his humiliation in battle against the Scots, an early resumption of hostilities was inevitable. Within a year Edward III renewed English attempts to subjugate Scotland, and this second half of the so-called Wars of Independence was to continue for a further twenty-seven years, during which time relations between the two states fell to their earlier abysmal levels and the Scots were again forced to refuse open battle until time worked to their advantage. As Bruce had feared, while English leadership grew in vigour and English tactics evolved significantly, leadership slackened in the northern kingdom. The king died in 1329 leaving a son just four years old; a short time later, with the death of Thomas Randolph, Earl of Moray, the last of his famous commanders had gone, too. With them went any full appreciation of the war’s earlier lessons.
Edward III began by giving covert help to the disinherited, enabling them to assemble a small army, less than 3000 strong but mainly made up of archers, whom the English king allowed to sail to Scotland in eighty-eight ships. This was jointly commanded by Henry Beaumont, Earl of Buchan, and Edward Balliol, son of the Scottish king usurped by Robert Bruce, whom Beaumont persuaded to come over from France to claim ‘his rightful inheritance’. On 11 August 1332 at


