
22,49 €
Mehr erfahren.
- Herausgeber: Crowood
- Kategorie: Lebensstil
- Sprache: Englisch
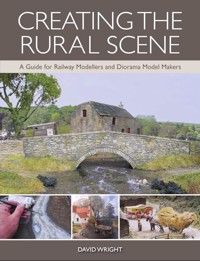
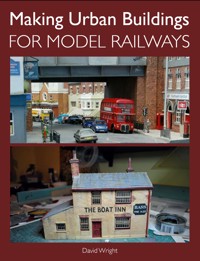
This book demonstrates the many different modelling techniques used in the creation of realistic historical buildings and convincing imaginary or fantasy structures. Aimed at the railway and diorama modeller, it includes photographs of existing structures, detailed illustrations and plans, followed by step-by-step photographs of the various stages in their creation; practical tips and constructive advice are provided alongside. Special emphasis has been placed on the use of scrap and low-cost materials. It gives guidance on modelling imaginary buildings and structures, with an example project presented from start to finish and also a complete fantasy-based model railway diorama, from concept and design through to the completed layout is covered. The author has written this book to inspire the modeller to try something innovative, and to attract new entrants to this creative hobby. Drawing on his own experience, he shares practical guidance to help the reader to produce models they will be proud of.
Das E-Book können Sie in Legimi-Apps oder einer beliebigen App lesen, die das folgende Format unterstützen:
Veröffentlichungsjahr: 2021
Ähnliche


MODELLING
HISTORIC BUILDINGS ANDIMAGINARY STRUCTURES
A Guide for Railway Modellers and Diorama Model Makers
First published in 2021 byThe Crowood Press LtdRamsbury, MarlboroughWiltshire SN8 2HR
www.crowood.com
This e-book first published in 2020
© David Wright 2021
All rights reserved. This e-book is copyright material and must not be copied, reproduced, transferred, distributed, leased, licensed or publicly performed or used in any way except as specifically permitted in writing by the publishers, as allowed under the terms and conditions under which it was purchased or as strictly permitted by applicable copyright law. Any unauthorised distribution or use of this text may be a direct infringement of the author’s and publisher’s rights, and those responsible may be liable in law accordingly.
British Library Cataloguing-in-Publication DataA catalogue record for this book is available from the British Library.
ISBN 978 1 78500 805 4
CONTENTS
DEDICATION AND ACKNOWLEDGEMENTS
INTRODUCTION
CHAPTER ONE:MODELLING A HISTORIC TIMBER-FRAMED BUILDINGCHAPTER TWO:BUILDING A HISTORIC STRUCTURE: CODNOR CASTLE DOVECOTECHAPTER THREE:MODELLING A HISTORIC INDUSTRIAL BUILDING: AQUEDUCT COTTAGECHAPTER FOUR:CREATING AN IMAGINARY BUILDING: ‘THE GAMEKEEPER’S HOVEL’CHAPTER FIVE:‘RAVEN’S RAVINE’: BUILDING A SMALL LAYOUT DIORAMACHAPTER SIX:CREATING THE SETTING FOR IMAGINARY BUILDINGS AND STRUCTURESAPPENDIX: COLOUR MIXING GUIDE
SUPPLIERS OF EQUIPMENT AND MATERIALS
PLACES OF INTEREST TO VISIT
FURTHER READING
INDEX
DEDICATION
I would like to dedicate this, my seventh book, to a special group of people: the exhibition managers and their many helpers. This dedicated group has devoted so much of their own time and effort, for free, to stage the model railway, and other miniature-related exhibitions.
ACKNOWLEDGEMENTS
Also I would like to pass on my special thanks to the following: Kate Murphy of Sinai Park House; Leslie Smith and Gareth Williams of Tutbury Castle; Caroline Talbot of Hawkstone Park Follies; Trevor Middleton and Charlie Glenn of Codnor Castle Heritage Trust; and my wife Karen. I thank all of them for their contributions towards the production of this book.
INTRODUCTION
In this, the seventh book I have put together for Crowood, I have purposely tried to present the contents in a way that I hope will fire the modeller’s imagination, rather than following exacting constraints. This will be especially evident for the model railway hobby, where for the most part modellers are trying to recreate a prototype as closely as possible down to the very last detail.
This desire for miniature perfection is especially true of the older modeller, who might be trying to create in model form what they remember from childhood. Others will try to create a three-dimensional miniature record of times before they were born, when the railways were at their peak.
These modellers will have to rely on historical records and photographs in order first to gain reference before creating their models. They would most likely have experienced the real railway when steam was king, and the railways were thought to be more attractive. This was most probably made more interesting because of the railway infrastructure evident at this time. The result of this has seen the model railway market catering for the older railway modeller, especially in recent years.
The model railway trade has therefore seen the creation of ready-to-run locomotives and rolling stock to appeal to most tastes, from pre-grouping up to the diesel era. If it is not available now ‘out of the box’, then there is probably a kit available, and there are many extra detailing parts for either the scratch builder or those who want to ‘super detail’ their ‘out-of-the-box’ models.
All these modellers were young in a world that was very different to the one we live in today. Life was simpler, I suppose, and for any young boy in the 1950s trainspotting and fishing were the main pastimes for this young generation. This was also true of the next generation growing up in the 1960s and 1970s, although steam had given way to diesel by this time, and popular music was, of course, a big influence on the young.
However, the modern world of today has changed dramatically, especially with the ever-growing advances in technology. The young of today are bombarded with immediate communications, instant gaming, and a vast number of images readily available at a touch of the screen on a smartphone, tablet or laptop computer. The younger generation have therefore mainly turned their back on any creative hands-on hobbies and pastimes, which tend to be considered as not being cool any more!
This is a shame, as we need new blood to move the hobby on for the future, otherwise we will see it disappear completely. This has concerns for me, as we need to be creative with both our hands and our minds. Model making is one of the best ways to keep these skills alive. This is why I have constructed this book in a way that I hope will appeal to the younger generation as well as older modellers.
As youngsters we always have a vivid imagination, although as we grow older, for most of us the responsibilities of life start to take over, and imagination becomes lost to reality. I remember my childhood vividly, in particular not being able to look over a high wall and wondering what lay beyond. My imagination would kick in, leading me into a fantasy world that might be lying on the other side.
This imagination has stayed with some into adulthood, and these few have used it creatively to produce great works of fiction and music, as well as visually towards creating unbelievable concept art for film productions. It is this imagination I want to bring to the fore in this book, and I hope it will perhaps inspire some of the younger generation to get ‘hands on’ again.
The castle has always evoked interest in the young mind; this is most likely to have been obtained from imagery seen in films or childhood story books. This has possibly led to an interest carried forward to explore the real structures. This interest has recently expanded amongst some teenagers, and has developed into the three-dimensional gaming hobby. Of course this is for the most part hinged totally on fantasy, so castles will be playing a major part. When looking at this hobby in more detail I have noticed the skills involved, and some of the materials used are not dissimilar to those of the model railway hobby – and yet they seem to be totally alienated from each other.
This super model diorama was constructed by the late Ray Williams of Belper, Derbyshire; it is now owned by John Huddlestone. The model is called ‘Combourge’, and features a fine trolley-bus layout. It is totally scratch built, using a combination of wood, styrene sheet and modelling plaster. All the stonework is hand painted and is superbly detailed and dressed out. The castle and the various shops and cottages represent the architecture of the Brittany region of France. For those interested in the trolley buses operated on the layout, they represent the following systems: Saint Maio, Limoges, Grenoble and St Étienne.
I have therefore purposely used projects in this book that would be both attractive and in some cases recognizable to both sets of model makers; this I hope will bring the creative skills of future modellers together. One major project will be themed in this way, combining the model railway with an imaginary or fantasy setting.
We can also combine structures such as castles and follies with reality when it comes to railway modelling. I can think of a few examples where castles feature directly or close to the railway. Conwy, for instance, immediately comes to mind, along with Corfe Castle on the Swanage branch. Knaresborough is also a good example, with the railway passing close to the ruins of the fourteenth-century castle. This has been modelled by Pete Goss in his incredible exhibition layout ‘The World’s End’. The folly features on a few exhibition layouts too, such as ‘Weaver Hill’ by Benjamin & Richard Brady, where a number have been incorporated within the scenic part of the layout.
A lovely model of a European castle surrounded by a narrow-gauge railway. The whole model diorama is on its own island surrounded by water in the form of a lake, and just shows what can be achieved in a very small space.
Follies have no direct purpose other than being situated where landowners wanted to improve a view or create a fantasy structure. Most of these structures resemble a ‘sham’ castle, such as the one crowning the crag at Mow Cop. This impressive structure was the creation of Randle Wilbraham in 1760. Another folly following this style is ‘Old John’ standing in Bradgate Park near to Leicester. It was built in 1786 by the 5th Earl of Stamford. This folly will feature later in the book as part of the ‘Raven’s Ravine’ project.
In the books I have compiled in the past, I have strictly concentrated on British outline modelling. In this book, however, although the subjects for the projects are British based, with a little alteration and imagination they would easily fit into any continental or even worldwide outline model railway or diorama.
I hope that by selecting a more fantasy-based theme with some of the projects, this will trigger the imagination of the older generation as well, so they consider constructing a starter model railway or diorama along with their children or their grandchildren. In this way I am sure that the younger mind will be inspired again, just as it was when I built my first model railway together with my father many years ago. It is also to be hoped that this approach will bring the relationship between the generations much closer together, particularly as the distractions of the modern world have so often caused them to drift apart.
MAKING A START
Before we move on to the first chapter I want to give a brief overview of the projects contained within this book. One of the main objectives of the projects was to use either scrap or very low cost materials for their construction. After all, we don’t always have large amounts of money to spend on our hobbies these days. It will also make it possible for the young modeller to create something that they can be proud of, and at the same time help towards recycling materials in today’s throw-away society. Most of the projects will consist of creating historic buildings or structures either based on a prototype, or using parts of the prototype to create an imaginary model.
Even with the imaginary or fantasy models we wish to make, it is important that we have some knowledge of the reason or purpose for its existence. This can be taken a stage further by examining the materials used for its construction. So let’s take a little time before we start any model making to consider this.
In this country we are blessed to have such a rich history, and an impressive number of historic buildings and structures that have survived the passing of time. For the most part we as a nation have always taken pride in our building heritage, and in most cases have ensured the preservation and upkeep of historic structures for future generations to enjoy. Our heritage has been used for numerous Hollywood feature film productions, using some of the buildings directly, or in part as backdrops.
Major organizations such as the National Trust and English Heritage, as well as a good number of other smaller heritage and conservation groups, have been responsible for their preservation and upkeep. It is these organizations that have made it possible for members of the general public to gain access to many of the properties, ruins and historic structures today.
The ‘Nine Stones Close’, a Bronze Age stone circle standing on Harthill Moor, near to Winster in the Derbyshire Peak District. A stone circle such as this will make an interesting feature to add to a model railway layout or a fantasy-themed diorama.
For us as modellers, these organizations can also provide further reference material, with on-site historic records available. If you are lucky, you can view photographs, drawings and plans from collections at a local museum, library or the local council records office. It’s always worth contacting them, and usually they are only too happy to help. Then of course there is always the internet, with a vast amount of information available from sites such as ‘Wikipedia’. You might find that a book has been published that covers the subject you wish to model. This might be available commercially, or contained in the reference section of the local studies library. I have found my local studies library invaluable in the past, especially for providing historical large-scale maps to help me with my model-making projects.
The next step is to examine the materials used for the construction of either a building or a structure. Most will be built of materials that are sourced locally. Before mass transportation this would have been the norm, although there are exceptions to this, even going right back to the Neolithic age around 3,000BC. The bluestones used for the construction of Stonehenge were transported all the way from the Preseli Hills in south-west Wales to Salisbury Plain, a distance of 250km. Even the larger sarsen stones were transported from the Marlborough Downs, some 20 miles (30km) to the site of the monument.
These ancient religious sites can always feature within a model railway, of course. A stone circle, burial chamber or a standing-stone monolith will always create a point of interest. This could be extended to standing stones contained within legends. The ‘Devils’ Arrows’ are three such monoliths that stand near to Boroughbridge in North Yorkshire, a puzzling legacy left by prehistoric man. Then there are always the actual or imaginary structures associated with the legendary land of King Arthur.
The very first settlers in our country used naturally formed rock formations, where caves became utilized for a dwelling. Although we might think of caves being used for shelter as totally reserved to the Stone Age, this is not always the case. If the geology of the area has created naturally formed caves, then these will have been used for dwellings. In fact caves have been used for homes up until recent years, and some are still used today. The only difference is the construction of a more traditional frontage, which has been added to the cave using materials we are more familiar with. A good example of this are the Rock Houses at Kinver Edge in the south of Staffordshire, and ‘Ye Old Trip to Jerusalem’ public house built into the sandstone of Castle Rock in Nottingham.
The man-made caves at Formark, in south Derbyshire. The caves have been given the name of ‘Anchor Church’, and are thought to have been carved out of the sandstone rock by a hermit. Like standing stones, it would be worth considering adding caves such as these to a model.
Caves and rock features can also accommodate interesting buildings. ‘Ye Olde Trip to Jerusalem’ claims – as the sign says – to be the oldest inn in England. It is built directly into the side of Castle Rock, making good use of the natural caves for extra accommodation. Today the inn is one of the main tourist attractions in the City of Nottingham.
In some cases the materials used for construction may have changed – for instance many of our castles originally consisted of a motte and bailey, with a ditch or moat dug into the earthworks. This would have been surrounded by a timber stockade, while inside the buildings would be timber framed with walls of wattle and daub and roofs of thatch. It was the Normans who were responsible for building castles of stronger materials. The stockade would have been replaced with a high curtain wall, broken at intervals with a defensive tower or turret, all constructed from stone to a thickness of several feet. The reason for rebuilding was to improve the castle’s defences, to keep out the armies of marauding raiders.
Most of the less important buildings of this period would still have been built from traditional materials, with timber-framed construction being most commonly found throughout most parts of the British Isles. The early examples consisted of a main cruck frame, where two large, naturally formed oak curved timber beams were brought together at the apex. An extra cross-beam was added to form something like a gigantic letter ‘A’. From a set of two or more main trusses, purlin timbers were positioned laterally to hold the many rafters in position.
A very early dwelling, reconstructed at St Fagan’s National History Museum, near Cardiff. The single-storey dwelling is known as ‘Nant Wallter Cottage’, and has been built with walls of ‘clom’, the name given to a mixture of local clay with straw. The roof was made from layers of gorse, overlaid with a topping of straw thatch.
The remains of the south curtain wall of Codnor Castle. This section includes the ogge arched window. Castles in a state of ruin such as this can provide a very impressive visual feature to both a model railway or to a themed diorama.
On very early buildings these would have been crude, and would not have been squared off. Thinner timbers known as withies would then have been interwoven through the rafters, creating a base for the roofing material. Most likely this would have consisted of a layer of bracken or heather, as a base for the final covering of thatch. In highland or moorland areas, where straw or reed was not available, then another thick covering of heather would have been used.
Later, buildings would still use the timber frame for their main construction, though a box frame replaced the cruck frame. Many examples of this type of building can still be seen throughout the UK today. The first project model in this book features a historic building built by this method.
Where stone was readily available this would have been used for the building of cottages and other buildings of lesser importance. The next few selected projects feature buildings and structures built from stone, including the last project in the book, where I will show the modelling of structures constructed from this ubiquitous material.
When brick making became established as a mass commercial industry, many newer buildings and structures were built using this building material. Bricks of course offered not only durability, but more importantly a regular size, which made construction much easier and quicker.
More recently, concrete has been used for buildings, and many other structures. Concrete, together with the inclusion of steel rods to reinforce the material, is very tough and durable. Buildings and structures using this material can either be built on site, or prefabricated sections can be built elsewhere and then brought to the site and assembled there. The material was ideal for buildings intended for defence, and was used extensively in both World Wars.
I hope that this book and its projects will inspire you to try out some of the modelling methods and materials used. I have purposely put together one chapter to include the construction of a whole diorama, with a small model railway as the main focal point. In this diorama I have tried to show how various impressive structures can be modelled from low cost materials, but also how to bring them together within a dramatic modelled terrain.
A more modern defensive structure. There were thousands of pre-cast concrete pill boxes such as this, built in case of a German land invasion. A good number still remain today, including this example constructed to guard the banks of the River Dove. A structure such as this would not look out of place on any post-war model railway or military-themed diorama.
This pill-box structure is effectively located as a feature on a model railway.
This folly, topping a rocky crag overlooking the Cheshire Plain, is ‘Mow Cop’. It was built simply to enhance the view from a wealthy land owner’s estate. This structure, purposely built to replicate a ruined castle in appearance, would make a fascinating subject for a model.
I have also provided a colour mixing guide as a special appendix in this book. When presenting demonstrations at model railway and general model shows, one thing I am always asked is how to make up and apply realistic colour. I hope that providing a guide within this book will make this task a little more understandable.
Happy model making!
DAVID WRIGHT
CHAPTER ONE
MODELLING A HISTORIC TIMBER-FRAMED BUILDING
In this country there are many examples of timber-framed buildings, especially those constructed of a timber box frame. Towns such as Lavenham in Suffolk can boast many such buildings, including the magnificent Guild Hall. All the buildings in this town were built on the wealth of the wool trade, and still survive today – so I could have chosen an existing example to model.
The gable over the porch to the Guildhall in the Suffolk town of Lavenham. The building is of a similar age to the lodging, so it was used as reference for style when constructing the main porch on the model.
A view of the Guildhall to show the side profile of the porch.
However, the building I decided to model no longer exists, so the benefit of an existing prototype was not an option. This choice was definitely going to be a challenge, but would create another dimension to the hobby of model making. I wanted to model a building that had a notable historical background – however, the building I had in mind had not survived the passage of time, mainly because it was not seen to be that important for the purpose for which it was originally built.
THE PROJECT: ‘MARY’S LODGING’
The building in question originated as a simple half-timbered hunting lodge located within the curtain walls of Tutbury Castle. The castle, situated overlooking the Dove Valley in East Staffordshire, was singled out as the perfect place to imprison Mary Queen of Scots on four occasions. For the first three times she was imprisoned in the South Tower, but on her fourth visit she was kept in this hunting lodge, which became known as ‘Mary’s lodging’. Mary was, of course, a threat to the Tudor Queen Elizabeth and the Protestant religion of England at this time in history. During her last imprisonment at Tutbury she became involved in a plot to escape and put herself on the English throne instead of the Protestant Queen Elizabeth. But this plot was discovered, and resulted in a move locally to Chartley; she was then sent to Fotheringhay Castle in Northamptonshire, where she was executed in 1586.
A preliminary sketch of how ‘Mary’s lodging’ might have appeared in 1585. The sketch was based firstly on archaeological information found at the site, secondly on a drawing of the castle’s inner bailey that appeared in papers belonging to Mary’s gaoler, and thirdly from architectural reference and studies of timber-framed buildings of the same period.
An illustration of how ‘Mary’s lodging’ was originally perceived, including my visual interpretation showing the colour of the walls and the handmade terracotta roofing tiles.
MAKING A START
Where do we make a start on a model of a building with no drawings or photographic reference existing? A good way to start this project was to arrange a visit to the site at Tutbury and talk with someone who might be able to give me a few clues as to how this building would have appeared. I was lucky enough to talk with a historian who had in recent years conducted several archaeological digs on the site. The information that had been collected gave evidence of the footprint, and therefore we could estimate some measurements of the building. This, together with fragments of various building materials dug from the ground, gave a reasonable starting point. There was also a rather crude plan of the inner bailey of the castle in the papers of Mary’s gaoler, which illustrated her lodgings, showing the building to be long and thin with a full length gabled roof.
Close-up of the restored wing of ‘Sinai Park House’. Although built later than ‘Mary’s lodging’, it would have been built from similar oak timbers, sourced locally for both buildings in the nearby ‘Forest of Needwood’.
The gable end of the north wing of ‘Sinai Park House’. Note the scaffolding holding up the crumbling skeleton timber frame. This part of the building, as you can see, has still to be restored to its former glory.
Another avenue open to me was to search for other buildings of this time that were constructed from similar materials. One such building was ‘Sinai Park House’, an impressive timber-framed manor house. Originally built as two timber houses by the monks of Burton Abbey, it was later acquired by the Paget family. The house was extended and used at this time for hunting, and was situated only 5 miles (8km) away from Tutbury. Although the extensions were later than our building, there is a good chance that the oak timbers would have been sourced from the same woodland, this being ‘The Forest of Needwood’, which lay only a few miles away from both buildings.
MAKING A DRAWING AND A SCALE PLAN
My next plan was to draw up a visual impression of how the building might have looked from the information found and given to me on site at Tutbury. I also had a number of photographs taken and site drawings made when I arranged a visit to Sinai Park House; I also took a look at some of the existing buildings to be found in Lavenham. From the evidence found on site, at Tutbury, the footprint showed small extensions on the facing side. These were most likely to have been porches, and would have been similar to examples found fronting buildings of the same age in the Suffolk town.
From the drawing made and with some measurements taken of the footprint, a scale plan could be drawn up ready to start the model. This was drawn up to 1:48th or ¼in to the foot, which would give the results I was looking for with this model, and would make the best use of the materials I was going to select in the course of constructing it. I needed now to look at how the model would be constructed. After thinking this out and spending some time looking over the drawing, I came to the conclusion that the easiest way would be to make up sections of the timber frame first, including the rendered infill panels. This would also include any window or door apertures that could be readily cut out.
CHOICE OF MATERIALS
The next stage was to consider the materials from which to construct this model.
FOR THE FRAME
From the start I wanted to use actual wood for the timber frame, making the model appear more authentic. Card would be fine for the panels, which I intended to cover with a thin skin of Das modelling clay to represent the wattle-and-daub infill. The card would only be used as the facing material, as a stronger material would be needed for the main construction. After much consideration I finally opted for Foamex.
This is similar to foam board, although the centre is much more condensed as it is made up from compressed PVC. The sheets are also laminated with PVC on both sides, making the whole construction more durable and ridged than foam board. It can be obtained from exhibition suppliers, and is now used extensively in the graphics trade for exhibition or shop display panels. If you know anyone employed in this trade, it might be worth contacting them to see if you can obtain any off-cuts.
OTHER TIMBER FEATURES
For the timber mullion window frames I decided to try ordinary matchsticks, which would give a good impression at this scale. The planked door could easily be fabricated from coffee stirrers – again these are perfect for this feature in this scale. Other timber features, such as the visible jetting beams, roof rafters, barge boards and any decorative mouldings, could be obtained from dolls’ house suppliers. However, the carved corner brackets fitted to support the jetted-out upper floor would have to be specially made.
The timber frame and the timbers forming the jetting beams to support the wider upper floor.
FOR THE ROOF
The roof covering consists of handmade terracotta tiles, and could be made from card. I normally recommend using old greetings cards for this purpose, as cards can usually be found that are the correct thickness for your models. At the same time you will be reusing cards that will only be thrown away or go to recycling.
FOR THE LEADED WINDOWS AND GLAZING
For the leaded windows and the glazing, celluloid sheet would be the best option, with the lead strips pre-printed on. However, this was a problem, as no commercial sheets existed that fitted this description and were in the correct scale. I therefore had the option either to try to make them up by scoring the diamond leaded pattern on to the celluloid, and filling them in afterwards, or sourcing them from one of the model suppliers. I opted for the second choice, and these are now available from ‘Freestone Models’.
The first option would have worked, although I thought the pre-printed ones would have looked neater. This is because the scoring method would need to be followed by adding thinned-down oil paint over the whole of celluloid sheet, and then wiping it off again, allowing the paint to remain in the scored-out grooves. Obviously this would create a smear over the clear celluloid, and it would be very difficult to remove all the residue paint from where it was not required.
FOR THE CHIMNEYS
The only major construction item left to consider was how to form the ornate brick chimneys, and what materials to use. Four would be needed on this model, with two stacks topping each rectangular base. Wood was selected and cut square to the required scale width. The right-angled corners were then cut at forty-five degrees, creating an eight-sided octagonal profile. The sides were then carefully fluted using a concave woodworking chisel. Extra detail was then added, which I will explain during the construction methods used for this model. For this project, however, I only made up one stack simply to save time. This was used as a master, and the stacks for the model were then cast in resin.
SOURCING ANTIQUE OAK
Before we look at building the model, I would like to elaborate further on some of the timber acquired for its construction. I thought it would be appropriate if real timber were used for the framing, and furthermore antique oak dating back to the Tudor period, if it was available. To my amazement I found a supplier to the dolls’ house trade that supplied cut-down strips of oak sourced from old ships dating from this period in history. I managed to purchase a number of relative widths for this model, which also came with proof of their historical provenance.
CONSTRUCTION OF THE MODEL
With all the materials that were considered suitable sourced and obtained, construction could now be addressed. I started by cutting the main corner posts and lower floor support timbers or studs to the desired length. Next the wall panels were measured out and cut to size, starting with the front wall. These were cut from the Foamex board, but I decided not to make the facing wall to full length, but to make it up from several panels consisting of shorter lengths. This would make handling easier, and they could be joined together later on in the construction process.
The construction of the walls, with the timber frame and the infill of wattle and daub clearly visible.
A selection of tools and materials used to start this model. The materials include Foamex board and artist’s mount board.
Construction has started on the lower-floor panels, showing the positioning of the timber framing on the walls. The construction began with ‘Foamex’, used to create a substantial backing for the model. The close stud vertical timbers and the corner posts were cut from oak dating close to those used on the original building. Mounting card was then cut to fill in between the vertical timbers before being faced with Das modelling clay. Also in view are the timber mullions fitted into position, all made from matchsticks to form the lower floor window frames.
The positions for the stud upright timbers were marked on the panels, along with the window and door apertures before the latter were all cut out. The window apertures were purposely cut slightly oversize to allow the glazing to be fixed in at a later stage. The upright stud timbers could now be glued to the wall panels, following the measured out spacing.
FITTING THE FACING PANELS
The next task was to fit in the facing panels to hold the render. These were measured out and then cut to size before being glued in the space left between the upright stud timbers. Mounting card was used here, as it is only 1.5mm thick and so would allow for the timbers to stand slightly proud. The window apertures would be cut again, however, this time they would be cut to the actual size.
This process was repeated on all the facing panels, which were put on one side ready for the next stage. I then moved on to making up the rear lower wall and the two lower end walling panels in the same way.
Applying the Render
Once all these were at the same stage, the render could be added. This was achieved by applying a thin skin of Das modelling clay. To do this, first PVA was brushed on, then the Das was applied with wet fingers to the desired thickness. To persuade the Das to fit up to the timbers neatly I used a dentist’s probe; however, a coffee stirrer will do the same job. Once Das has been added to all the panels, all the walling panels can be left for about twenty-four hours to completely dry off.
Das clay being added to recreate the daub covering. Note that a coffee stirrer has been used to push the wet clay into the joins and any tight corners.


