Erhalten Sie Zugang zu diesem und mehr als 300000 Büchern ab EUR 5,99 monatlich.
- Herausgeber: Books on Demand
- Kategorie: Lebensstil
- Sprache: Englisch
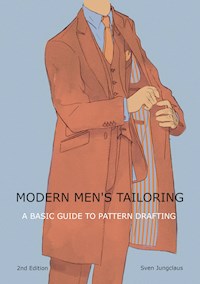
Bespoke tailoring A good silhouette is the DNA of a garment, a kind of architecture for textile ideas. In this book, practical step-by-step instructions ensure that inexperienced cutters can work out the perfect fit, on average body shapes, for a suit, a coat, pants and more - based on individual body measurements. From many years of experience, the internationally active tailor and master of this craft Sven Jungclaus passes on his professional knowledge to those who are interested. Because: The gentleman of today is wearing custom made!
Sie lesen das E-Book in den Legimi-Apps auf:
Seitenzahl: 103
Veröffentlichungsjahr: 2021
Das E-Book (TTS) können Sie hören im Abo „Legimi Premium” in Legimi-Apps auf:
Ähnliche


Contents
Preface
Taking measurements
Pants
Chino-pants
Jeans
Single-breasted vest
Double-breasted vest
Shirt
Sleeve for a shirt
Collar for a shirt
T-shirt
Underpants
Single-breasted jacket
Lining pockets for the jacket
Sleeve for a jacket
Collar for the single-breasted jacket
Double-breasted jacket
Collar for the double-breasted jacket
Single-breasted coat
Double-breasted coat
Raglan coat
Trenchcoat
Tie, bow tie, plastron
How to tie a tie and a bow tie
Etiquette: what to wear?
Washing and care symbols
Stain removal
Measurement table
Abbreviations
Biography
Book recommendation
Index
A few words to start ...
Bespoke
In the age of global mass production, this word unfolds its charm again. While there seem to be tailor-made solutions for everything today, in the 18th and 19th centuries, there was no alternative to custom work. Before industrial production, clothing was always individually adapted and later turned into a luxury item - as a counterpoint to commoditized attire.
Bespoke instead of for masses
In the meantime, craftsmanship is appreciated again. Handmade clothes receives new attention and is often the favorite piece. But without an optimal cut, the best tailoring does not work as desired. Patterns are the DNA of a garment, a kind of architecture for textile ideas. The final fit is a successful mix of subtle observation, precise measurement and skillful implementation in an individualized pattern.
Assistance by the pro
In this book, practical step-by-step instructions ensure that inexperienced cutters can work out the perfect fit for suits, coats, pants and more - based on individual body measurements. Over the years cutter and master tailor Sven Jungclaus has refined his know-how in a practical way and is now passing on his knowledge in the form of this book in an understandable way.
Have fun creating your pattern!
Why it is essential taking measurements the right way
Just using a measuring tape is not enough. The perfect fit of a garment depends on several factors: on one hand, on the tailor's skills. On the other hand, on the cutter’s know-how, who incorporates his experience in the pattern and simultaneously considers the characteristics of the respective material. First and foremost, however, correct and conscientious measures are essential. This is not just about the numbers determined by tape measure but also about what a cutter sees. The experienced consideration of the respective stature and posture are fundamental ingredients for the perfect cut.
Taking measurements already begins with the body's hidden analysis and the individual posture when a customer enters the tailor shop. As soon as someone knows that he will be measured, he automatically turns himself straight. This artificial posture falsifies the end result, and the awakening ensues at the first fitting when the garment’s balance does not match the customer.
There are a few tricks to distract the customer and, at the same time to determine optimal measurements: It is important not to measure in front of a mirror; this only unnecessarily awakens the vanity. In addition, there is nothing to see before the first fitting anyway. Finally, it helps to engage the customer into a conversation and thus distract him. On the other hand, the tailor should, of course, focus on taking the measurements, despite the small talk.
The calculation of the measurements in this book is more or less for the theory of proportions. For bodies that deviate from the 'norm' (broad shoulders, strong back, strong chest, etc.), the measured body measurements should be used instead of the calculated ones. The necessary fullness is already included in the calculation. Make sure to compare the pattern with your body measurements after drafting. In this way, you can correct the pattern before cutting in the event of a possible mistake.
Waistline (WAI)
The waistline is measured exactly around the waist, at the narrowest point just above the hipbone. Here a waist measuring tape is fixed to determine more measurements.
Waistband (WB)
The waistband is measured at the height of the desired position, exactly where the waistband of the pants should sit. Again, this is very individual for each client.
HIP
The hip width, or seat, is measured horizontally around the strongest point of the buttocks.
Neck (NE)
When measuring the neck, care must be taken that the tape measure is not set too high. The circumference is measured at the base of the neck (on the skin), directly above the collarbone. It helps to keep two fingers between the tape measure and neck not to measure too narrow.
Chest (CHE)
When measuring the chest, the tape measure will be placed around the strongest chest point, then passed under the arms and slightly higher at the back.
Sleeve length (SL)
Measure the sleeve length from the shoulder bone over a slightly bent elbow to the wrist.
Height (HEI)
Mostly, the customer knows his height. However, if you do not trust this information, it is measured from the top of the head to the sole of the foot, preferably without shoes. Otherwise, simply subtract the heel height.
Nape to knee (NTK)
The nape-to-knee is measured from the 7th cervical vertebra along the mid-back across the seat to the knee.
Note
The 7th cervical vertebra is the vertebra protruding slightly at the back of the neck - in the pattern constructions: it is called the cervical-vertebra-point CVP.
Depth of Scye / Depth of armhole (DOS)
To measure the depth of scye, push a piece of cardboard under the customer's arm and measure from the 7th cervical vertebra along the middle of the back to the upper edge of the cardboard.
Nape to waistline / Waist length (WL)
The length of the waist is measured from the 7th cervical vertebra along the middle of the back to the tape measure fixed at the waist.
Full shoulder width (FUSH)
The entire shoulder width is measured from the left shoulder bone across the back to the right shoulder bone.
Back width / across back (BW)
It is measured across the back in a relaxed position, from the left to the right arm.
Note
The taken measurements should be used in the pattern instead of the calculated ones with clients that deviate from the 'normal' clothing sizes (broad shoulders, strong back, etc.). The calculated measurements are more used for the theory of proportions.
Shoulder width (SH)
The shoulder width is measured from the neckline to the shoulder bone.
Chest width / across chest (CW)
The chest width is measured across the strongest breast point from the left to the right arm.
Upper arm (UPA)
For strong biceps, this measure should be read necessarily. It is measured around the strongest point of the upper arm.
Note
The taken measurements should be used in the pattern instead of the calculated ones with clients that deviate from the 'normal' clothing sizes (broad shoulders, strong back, etc.).
Nape to breast (NTB)
The nape to breast is measured from the 7th cervical vertebra (see explanation NTK, p. 10) over the shoulder toward the front to the point of the breast.
Nape to front waist (NTFW)
Note
Pay attention to the seam allowances on the shoulders of the jacket and coat.
Back pants' length (BPL)
First, fix the tape measure at the point where the waistband should sit. Now the back pants' length is measured from the waistband seam to the floor. (If the customer is wearing shoes, measure to the top of the heel.)
Outside leg (OUTL)
First, fix the tape measure at the point where the trousers' waistband should sit. Now the outside leg can be measured on the side from the waistband seam down to the floor.
(If the customer is wearing shoes, measure to the top of the heel.)
Inside leg (INL)
To measure the inside leg, have the customer pull up the pants into the crotch. Then it is easy to determine the measurement on the inside of the leg from the crotch to the floor. (If the customer wears shoes, the heel height is subtracted.)
Front pants length (FPL)
First, fix a tape measure at the point where the waistband should sit. Now the front length of the pants is measured from the waistband seam down to the floor. (If the customer wears shoes, the heel height is subtracted.)
Rise
The difference between OUTL and INL results in the rise (see page 101).
Width of thigh (TH)
The thigh circumference is measured around the strongest point of the thigh, about 10 cm below the crotch.
Width of length (WOL)
The hem circumference is measured at the bottom of the trouser's hem according to customer requirements.
Wrist (WR)
This circumference is measured at the wrist, directly at the base of the hand. It helps to slip two fingers between the tape measure and the wrist to avoid measuring too tight.
Manual for the pants
The measurements and further information can be found on page 21.
Start basic structure of front pattern
draw a 90° angle
the horizontal line is the waistband-line
from starting point: mark down outside-leg
OUTL
104 cm and square right, this line is the length
LG
from
LG:
mark up inside-leg
INL
82 cm and square right, this line is the crotch-line
from
LG:
mark up 1/2
INL
+ 6.5 cm and square right, this line is the knee-line
Basic structure
With or without pleat
you will find more information about the depth of the pleat on page 16, picture 2
if you draw the pants without pleats, the measurement of 1/4
HIP
on the crotch-line will be suitable
Width of length WOL
Knee-width
on knee-line from break-line: mark to each side 1/4
WOL
11.5 cm
connect the points at the knee-line with the points on the length
connect the points at the knee-line with the points at the crotch-line
The fly - center front CF
on fly-line from crotch-line: mark up 3 cm
at the front of the waistband-line: mark to the left approx. 0.5 cm and connect with previous point at center-front
CF
shape fly seam
The pleat
Finish the front-pattern
shape side seam and inseam nicely - compare the taken measurements of the front pants length
FPL
with your pattern
Seam pockets
on side seam from waistband-line: mark down 4 cm
from here, mark down the pocket opening with 16 cm
Jetted pockets
from waistband-line mark down 4 cm, then square right and mark 5.5 cm
for the lower point of the pockets: mark down the length of the pocket opening with 16 cm, then square right and mark 3.5 cm
connect both previous points
Slanted pockets
on waistband-line from side seam: mark to the right 5 cm
on the side seam, mark down 20 cm
connect both points and from the waistband-line mark down 4 cm
Back pattern
Cut out the front pattern and use it as a basis. Place it on a new piece of pattern paper.
extend all lines (waistband-line, knee-line, length and break-line)
on LG-line from the front pattern: mark 2 cm to each side, square up and mark 8 cm
on knee-line from the front pattern: mark 2 cm to each side
connect the points at the knee-line with the lower points
Width of back pants


