Erhalten Sie Zugang zu diesem und mehr als 300000 Büchern ab EUR 5,99 monatlich.
- Herausgeber: Books on Demand
- Kategorie: Lebensstil
- Sprache: Englisch
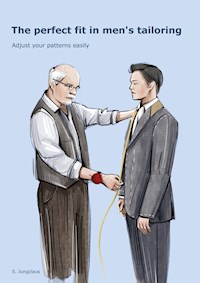
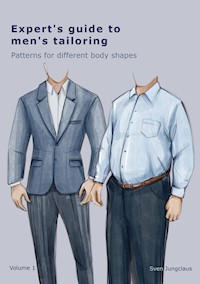
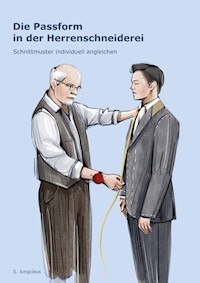
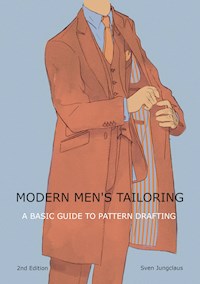
Recognise and professionally correct fit errors Not every piece that suits halfway fits perfectly. Folds and wrinkles often appear in unwanted areas, or the wearer notices an uncomfortable feeling of tension because the garment is too tight somewhere. Body shapes are individual. Skillfully fitted garments do not restrict but envelop the body in the best possible way. This book guides you from taking the correct measurements and incorporating individual proportions to garments that fit like a second skin. Anyone who also develops an eye for the respective posture will optimise the fit. Sven Jungclaus explains the causes of poor fit based on specific manufacturing defects and offers the optimal solution to the most common problems. Use the step-by-step instructions to develop a trained view of individual postures and let the professional tips guide you through to the finished garment. Have fun realising your perfectly fitting piece!!
Sie lesen das E-Book in den Legimi-Apps auf:
Seitenzahl: 97
Veröffentlichungsjahr: 2022
Das E-Book (TTS) können Sie hören im Abo „Legimi Premium” in Legimi-Apps auf:
Ähnliche


Contents
Preface
Taking measurements
Taken measurements in a pattern
Body shape and posture
Perfect fit and how to do a fitting
The pants
Pelvis tilted forward
Pelvis tilted backward
Raising the waistline at the side seam
Lowering the waistline at the side seam
Pelvis tilted sideways
Hip is stronger on one side
Knock-knees
Bowlegs
Extending the waistband
Reducing the waistband
Strong hip curve
Flat hip curve
Flat seat
Strong seat
Extending the crotch
Reducing the crotch
Room at the back of the pants
Lowering the rise
Lifting the rise
Considering the "package"
Pleat opens up
Too tight at the calf
Extending the thigh girth
Reducing the thigh girth
Extending the hem girth
Reducing the hem girth
Tailoring the pants
Pressing pants properly
The vest
Stooped posture
Rounded back
S-shape posture
Erect posture
The vest
Vest is too tight
Vest is too loose
Lower front edge sticks out (pronounced belly)
Front edges overlap too much at the top
Front edges overlap too much at the bottom
Front is too short
Strong chest
Front opening sticks out
Armhole sticks out
Neckline is too close to the neck
Neckline is too far from the neck
Front pushes into the armhole
Armhole is cut out too far
Square shoulders
Sloping shoulders
Shoulders are too wide
Shoulders are too narrow
Armhole is too high
Armhole is too low
Back is too long
Back is too short
Tailoring the vest
Pressing a vest properly
The jacket
Sleeve before tailoring
Position of the shoulder pads
Stooped posture
Rounded back
S-shape posture
Erect posture
Jacket is too tight
Jacket is too loose
Seat is too tight
Seat is too loose
Rounded shoulders
Square shoulders
Sloping shoulders
One-sided sloping shoulder
The jacket
Shoulders are too narrow
Shoulders are too wide
Back is too long
Fold at the neck
Strong shoulder blades
Back fold does not roll up
Back width is too narrow
Back width is too wide
Make the jacket slimmer at the waist
Flat chest
Strong chest
Front part pushes toward the armhole
Armhole is cut too wide toward the front
Wrong width of scye
The jacket sleeve
Wrong sleeve pitch
Sleeve is too long at the back
Sleeve head is too flat
Sleeve head is too high
Imperfectly fitting sleeve
Tension at the back
Width at the undersleeve
Sleeve hem is too tight
Sleeve hem is too wide
Armhole is too high
Armhole is too low
Strong upper arm
Neckline and collar of a jacket
Neckline is too narrow
Neckline is too wide
Collar is too low
Collar is too short
Tailoring the jacket
Pressing a jacket properly
Tips for tailoring
Appendix
Index
Abbreviations
Pattern alteration template
Measurement sheet and style details
Other books from the author
Biography
What is meant by the perfect fit?
The fit refers to the optimal way clothes suits the body. This may sound obvious, but it presents many challenges. Because in addition to different body dimensions, each person has their posture and individual body proportions.
Therefore, a ready-to-wear size sometimes has very little to do with an ideal fit. Classic ready-to-wear sizes are guidelines for the garments' length and width – they serve as a guide. After all, just because a garment is neither too tight nor too wide does not mean that it fits well.
Finding the cause of poor fit
This book examines the causes of poor fit and offers optimal solutions to the most common problems concerning the fit. Personal stylistic preferences are irrelevant in this context. Whether one tends towards the modern slim-fit shape or the classic wider cut, the garment should always fit with as few wrinkles as possible.
Identifying problems right from the start
Another challenge is the multitude of possibilities to achieve a perfect fit. It is rarely achieved with a single adjustment. Often the solution to a problem consists of a combination of several steps of modification. For the sake of convenience, the most common fitting errors are described individually on the following pages. Do not be afraid to combine specific improvements separately to achieve an even better result.
In most cases, it is advisable to work in the client's posture and proportions as early as the pattern-making stage. That spares tailors or sewists and customers from long and tedious fittings.
Achieving success with patience and perseverance
The more time you spend on the fit, the more you sharpen your eye for emerging problems. And the more causes you have discovered and eliminated, the easier it will be the next time. Have courage; practice makes perfect!
Good luck on your way to an ideal fit.
Taking measurements
Taking measurements
Measurement sheet
You will find a sheet in the appendix on page →.
Neck (NE)
When measuring the neck, care must be taken that the tape measure is not set too high. The circumference is measured at the base of the neck (on the skin), directly above the collarbone. It helps to keep two fingers between the tape measure and neck not to measure too narrow.
Chest (CHE)
When measuring the chest, the tape measure will be placed around the strongest chest point, then passed under the arms and slightly higher at the back.
Waistline (WAI)
The waistline is measured exactly around the waist, at the narrowest point just above the hipbone. Here a waist measuring tape is fixed.
Waistband (WB)
The waistband is measured at the height of the desired position.
HIP
The hip width, or seat, is measured horizontally around the strongest point of the buttocks.
Shoulder width (SH)
The shoulder width is measured from the neckline to the shoulder bone.
Chest width (CW)
The chest width is measured across the strongest breast point from the left to the right arm.
Upper arm (UPA)
For muscular biceps, this measure is necessary. It is measured around the strongest point of the upper arm.
Sleeve length (SL)
Measure the sleeve length from the shoulder bone over a slightly bent elbow to about 2 cm above the first thumb joint.
Nape to breast (NTB)
The nape to breast/chest is measured from the 7th cervical vertebra over the shoulder toward the front to the point of the breast. To draw a pattern, you will need the depth of breast DOB measurement.
Nape to front waist (NTFW)
The nape-to-front-waist-length is measured from the 7th cervical vertebra over the shoulder across the breast to the tape measure fixed at the waist.
Full shoulder width (FUSH)
The full shoulder width is measured from the left shoulder bone, across the back to the right shoulder bone.
Back width (BW)
It is measured across the back in a relaxed position, from the left to the right arm.
Depth of Scye /
Depth of armhole (DOS)
To measure the depth of scye, push a piece of cardboard under the customer's arm and measure from the 7th cervical vertebra along the middle of the back to the cardboard's upper edge.
Nape to waistline / Waist length (WL)
The waist's length is measured from the 7th cervical vertebra along the middle of the back to the tape measure fixed at the waistline.
Height (HEI)
Mostly, the customer knows his height. If you do not trust this information, it is measured from the top of the head to the sole, preferably without shoes. Otherwise, subtract the heel height.
Nape to knee (NTK)
The nape-to-knee is measured from the 7th cervical vertebra along the mid-back across the seat to the knee.
The 7th cervical vertebra is the vertebra protruding slightly at the back of the neck - in the pattern constructions, it is called the cervical-vertebra-point CVP.
Back pants length (BPL)
First, fix the tape measure at the point where the waistband should sit. Now the back pants length is measured from the waistband to the floor.
(If the customer is wearing shoes, measure to the top of the heel.)
Outside leg (OUTL)
First, fix the tape measure at the point where the waistband should sit.
Now the outside leg can be measured on the side from the waistband down to the floor.
(If the customer is wearing shoes, measure to the top of the heel.)
Inside leg (INL)
To measure the inside leg, have the customer pull up the pants into the crotch. Then it is easy to determine the measurement on the legs' inside from the crotch to the floor. (If the customer wears shoes, the heel height is subtracted.)
Front pants length (FPL)
First, fix a tape measure at the point where the waistband should sit. Now the front length of the pants is measured from the waistband down to the floor. (If the customer wears shoes, the heel height is subtracted.)
Thigh (TH)
The thigh circumference is measured around the thigh's strongest point, about 10 cm below the crotch.
Width of length (WOL)
The hem circumference is measured at the bottom of the trouser hem according to the customer requirements.
Wrist (WR)
This circumference is measured at the wrist, directly at the base of the hand. It helps to slip two fingers between the tape measure and the wrist to avoid measuring too tight.
Nape to belly (NTBE)
The nape to belly is measured from the 7th cervical vertebra (see explanation of NTK, p. →), over the shoulder forward, to the strongest point on the belly.
Since there are different belly shapes, such as the high belly, pointed belly or hanging belly, this measurement is essential for a perfect fit.
Under belly waistband (UBWB)
If the customer wears their trousers below the stomach, this measurement is incredibly important and is also used as the low waistline.
Note
The front pants length and the zipper of the trousers are remarkably short in trousers that sit below the belly.
Shoulder angle (SA)
The shoulder angle can be determined easily with the mobile phone and a protractor app. The device is placed on the shoulder at the base of the neck. This makes it easier to classify a hanging shoulder. It is best to measure directly with the desired shoulder pad.
Approximate shoulder angles
Square
approx. 10° - 16°
Half square
approx. 16° - 21°
Normal
approx. 21 °- 25°
Half sloping
approx. 25° - 30°
Sloping
approx. 30° - 36°
Taken measurements in a proportional pattern
Taken measurements in the pattern
For a modern proportional pattern, you don't need too many measurements. Usually, you can get along with HEI, NE, CHE, WAI, HIP, and SL. With these, you can create a decent pattern.
Especially as a beginner, you avoid making mistakes and learn how to create a pattern. Slight deviations in build or posture can be altered in fittings.


