15,59 €
Mehr erfahren.
- Herausgeber: Batsford
- Kategorie: Lebensstil
- Sprache: Englisch
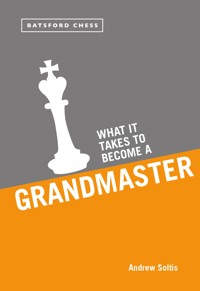
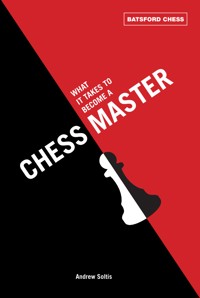
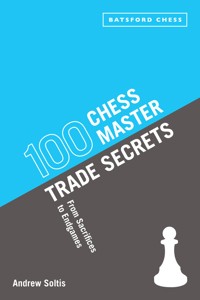
If you want to become a chess master, there are certain things you need to know – essential tips and techniques that the masters know, and you need to learn. This incredibly useful book collects all these techniques together in one volume, so you can try them out, tick them off, and start on your path towards chess greatness. Arranged in chapters covering every aspect of chess, from openings to endgames, renowned chess author Andrew Soltis provides top 20 rundowns of these specific positions and techniques: chapters include Top 20 Sacrifices, Top 20 Crucial Middlegame Decisions, Top 20 Endgame Techniques and Top 20 Exact Endgames. Written in Andrew Soltis's eternally engaging and accessible style, this book will prove invaluable to any player who wants to become a chess master.
Das E-Book können Sie in Legimi-Apps oder einer beliebigen App lesen, die das folgende Format unterstützen:
Seitenzahl: 235
Veröffentlichungsjahr: 2013
Ähnliche
More Great Titles from Batsford
www.anovabooks.com
Contents
Introduction
Chapter One: Twenty Five Key Priyomes
Chapter Two: Twenty Five Must-Know Endgame Techniques
Chapter Three: Twenty Five Crucial Sacrifices
Chapter Four: Twenty Five Exact Endings
Quiz Answers
Introduction
When my readers complain, I listen.
They complained about what I left out of Studying Chess Made Easy. In that book I explained that there was a less painful – and more beneficial – way to learn how to play the endgame:
There are some basic endings, with few pieces and pawns, that you can learn perfectly. You can always get the optimum result – a win or a draw – no matter how strong your opponent, I wrote.
And the good thing is there are only about two dozen of these ‘exact’ endgames that you must know. Once you master them, you can spend your scarce time on the more important endgame know-how, techniques.
These are the weapons, such as mismatches and opposition, shoulder blocking and zugzwang, that you use when there are more pieces and pawns on the board. That is, when it’s not yet an exact ending.
The complaint I got from readers?
“You didn’t tell us which exact endgames.”
“And you didn’t say which techniques.”
I also heard from my readers when I wrote What It Takes to Become a Chess Master. They were surprised – and somewhat pleased – to learn that the most important book knowledge was the middlegame techniques called strategic priyomes.
I gave some examples. But there are many other priyomes. Some are more important than others, I wrote.
The complaint from readers?
“You didn’t name the most important priyomes.”
This book will answer those complaints – and some others. It provides 100 specific examples of master trade secrets. It’s the kind of know-how you need to become a master. And it will help you set priorities in determining what you really need to study.
That’s difficult even for great players. Mikhail Botvinnik, for example, decided to study an obscure exact ending before the tournament that made him world champion. It was K+R+BP+RP -vs.-K+R.
Botvinnik felt that it was something he could study so deeply that he could play either side perfectly. He also felt that if he were going to become the world’s best player, he should know how to play this endgame.
But this ending is very, very rare. So let me say it one more time: There is an awful lot of things to study in chess. It’s a classic example of Too Much Information. You have to set priorities.
The first step to becoming a master is to separate the things you could know from what you should know – and from what you must know. In this book I’ve identified 25 examples each of the most valuable things to learn – priyomes, sacrifices, exact endings and endgame techniques.
There are things that every master knows – and it’s where every would-be master can start.
Chapter One: Twenty Five Key Priyomes
Every serious player knows the basic tactical devices, the ones with names like pin, skewer and fork. These have little to do with where the pawns are and everything to do with where the pieces are.
But there are strategic devices which depend on pawn structure. The only name we have for them is the one the Russians use: priyome.
You already know some simple examples of it even if you’ve never heard the word. Imagine a rook endgame with one pair of pawns traded.
White to play
The priyome calls for 1d1! and 2d7. White gets a huge advantage.
Other priyomes are only a bit more elaborate and only slightly improve a position. After 1 e4 d6 2 d4 f6 3 c3 g6 4 f3 g7 White may want to trade off Black’s bishop. The priyome consists of three or four steps, a bishop move such as e3 or g5 followed by d2 and h6xg7.
Alexey Suetin, one of the deans of the Soviet Chess School, said mastering priyomes was a key to success. Each would-be master should collect his own ‘personal fund’ of priyomes, as he put it, study them and – when the same patterns arise during a game – apply the priyomes.
Priyomes can be very general, like seizing a file with a rook in the last diagram. They can be described in words, not moves, as Vladimir Kramnik did in the next:
Kramnik – Zviagintsev Tilburg 1998White to play
After 1b5!, he wrote “My opponent underestimated this standard priyome.” He explained what he meant – “the exchange of the ‘bad’ bishop but one that defends many of his pawns.” Once the bishops are gone, Black had to lose the a- or d-pawn.
Other priyomes apply only to certain pawn structures. A priyome may consist entirely of piece maneuvers, like b5xc6 and e5 as in the Bird Bind, the first priyome we will look at. Or it can begin with a piece move, followed by a pawn move, such as Harry Pillsbury’s e5 and f2-f4. Or it may begin with a pawn move like h2-h4 in response to … g6 or … g6.
The Russian trainer Anatoly Terekhin estimated that masters know about 100 priyomes. But you don’t need to know nearly that many. We’ll examine 25 of the most common and useful.
1 Bird Bind
Henry Bird, the 19th century English master, deserves credit for popularizing a priyome based on trading a bishop for a knight so that he could occupy the center with his own knight.
He did it with his favorite 1 f4 and then 1 … d5 2f3 c5 3 e3c6 4b5! in order secure e5 as an outpost after xc6. An 1885 game of his went 4 … d7 5 0-0 e6 6 b3f6 7b2e7 8xc6!xc6 9e5c7 10 d3.
Black to play
White can continue with d2, e2 and eventually e3-e4 and/or c2-c4 with a small edge. This priyome has been adopted in similar positions, by players from Bobby Fischer to Aron Nimzovich, who adopted it with colors reversed in the Nimzo-Indian Defense: After 1 d4 f6 2 c4 e6 3 c3 b4 Black often equalizes with a timely … xc3 and … e4.
Aside from the strategic value, the xc6 idea can have a tactical punch:
Geller – Petrosian Moscow 1963Black to play
There wasn’t a vacant central square to exploit – until Black innocently played 1 … fxe5?? and was stunned by 2b5!.
White will win e5 for his pieces, ideally the knight. Bad would be 2 … exd4 3 xd4, e.g. 3 … d6 4 xc6 xc6 5 f4! d7 6 xd5!.
And Black would be blown off the board after 2 … e4 3e5d6 …
White to play
… 4f4! because he has no good defense to g6.
In the game, Black tried to bail out after 2 b5 with 2 … g6. But he had no good defense after 3xe5gxe5 4xe5.
For instance, 4 … d6 5 xe6+ xe6 6 xc6+. Or 4 … e7 5 f3 f6 6 xd5! xe5 7 f6+! and 8 xc6. Or, as the game went, 4 … a6 5xc6xc6 6xd5 and White won.
This priyome also works in a mirror image. In that case White wins control of d5 by means of xf6, as in variations of the Sicilian Defense.
Tal – Najdorf Bled 1961White to play
White began the priyome earlier with g5 and completed it with 1xf6!xf6 2d3c6 3d5. Then 3 … xd5 4 xd5 would confer a major positional edge because of his better bishop and the target pawn at d6.
It’s revealing that this game began as a Najdorf Variation – and that Black, Miguel Najdorf himself, did not understand that the best defense is a counter-priyome, eliminating the d5-knight with … g5 and … e7!.
The game went 3 … g5 4fd1 and now instead of 4 … c8 5 c3 e7!, Black tried to get counterplay on the f-file, with 4 … h8 5 c3 f5? 6f3.
Black to play
Now 6 … e7 7 xe7 xe7 and 8 exf5 xf5 9 e4 allows White to exploit e4 as well as d5.
Black ended up in a poor middlegame after 6 … xd5 7xd5 fxe4 8xe4e7 9d5f6 10d2!, with the idea of 11 e4.
He was headed for a bad endgame after 10 … xd2 11xd2c7 12e1af8 13e3 g6 14e4g7 15f3xf3 16xf3f6 17e4f7 and lost.
2 White’s a-pawn vs. … b5
Black often expands on the queenside with … a6 and … b5 in a wide variety of openings, from the Queen’s Gambit Declined to Sicilian and King’s Indian Defenses. But this comes with a risk: White can train more firepower on b5 than Black – and that makes a2-a4! dangerous.
Najdorf – Fischer Santa Monica 1966White to play
White has more of his pieces on the kingside, so 1 f4 looks natural. But after 1 … gxf4 2 xf4 e5! Black would stand well.
However, 1 a4! led to a positional rout. The problem with 1 … bxa4 is 2 c4!, threatening to capture on d6. After 2 … e5 3 xe5! dxe5 4 xa4 White would have a big positional edge: He has a protected passed pawn and can attack pawns at c5 and a6. Black has a bad dark-squared bishop.
So, Black bought time with 1 … b4. But after 2d1! and 3 e3! White had two knights to control c4 and Black only had one.
Since 2 … xe4? 3 d3 would open the center too quickly, Black chose 2 … e5 3e3g6. But then came 4ec4, attacking d6.
Black to play
If Black has to defend it with 4 … d8 White can exploit other holes in Black’s camp with 5 b6, e.g. 5 … b8 6 xc8 and xa6 or 5 … a7 6 dc4 with the idea of xc8/xd6 or a5-c6.
Instead, Black chose 4 … f4 5xf4 gxf4. But White’s knights ran riot after 6 e5! dxe5 7f3f8 (7 … d7? 8 d6 costs a rook) 8xe5.
He won after 8 … b7 9dc4ad8 (9 … xd5 10 d7!) 10c6.
It’s not just the square at c4 but also c5 and even b6 that can be exploited by a2-a4:
Euwe – Sanguineti Mar del Plata 1948White to play
White can see that c6 is potentially vulnerable and might have considered 1 a2 and 2 b4. But Black can get good play from his own priyome, the ‘Philidor Ring,’ as we’ll see, with … b6-c4.
Instead, White played the forcing 1 a4!. Then 1 … bxa4 2 xa4 followed by 3 c5 or 3 xd7/ 4 b6 – or even 2 xa4 – assures him a small edge.
Black replied 1 … b4 and White had a choice. In many similar positions, 2 b1 followed by d2-b3 is best. The knight can then occupy either c5 or a5 with a powerful cramping impact.
On this day, White chose 2e2 so that the knight can occupy d4 after 2 … xe5 3 dxe5. Black replied 2 … df6 (not 2 … d6 3 c7!).
White to play
White took further advantage of the priyome with 3 a5!. Both of Black’s queenside pawns became potential targets now that … a5 is ruled out.
Black protected his a-pawn with 3 … d6 4a4!de4. However, White made progress with 5c2!ac8 6fc1xc2 7xc2. He would be winning if he can play c1-a2 or c1-b3-c5.
Black lacks counter play. If he tries 7 … c8 8 xc8+ xc8 White invades with 9 c6 b7 10 b6. Black tried 7 … g4 but was lost after 8xg4 fxg4 9xd4 dxe4 10c5 and xb4.
The simplest and often best defense to a2-a4 is to liquidate, … bxa4:
Alekhine – Flohr Bled 1931Black to play
Black responded to a2-a4 with 1 … b4?. White established positional superiority with routine moves: 2bd2 0-0 3b3e7 4 e4d7 5e3 and then 5 … de5 6xe5xe5 7ac1b8 8c5!xc5 9xc5. Black’s weak a-pawn and bad-bishop helped cost him the game.
How could he have improved? With 1 … bxa4!.
White’s advantage would be minimal after 2c3b4 3e4e7 for instance (4xf6+xf6 5e4b7).
White to play
Once White retakes on a4, his b-pawn will be about as weak as Black’s a-pawn. Neither side’s pieces are superior. Chances are roughly equal.
3 Pillsburial
One of the most famous priyomes was popularized by Harry Nelson Pillsbury, from a position that has been arising out of a Queen’s Gambit Declined for more than a century. There are very similar ones with slightly different pawn structures, such as Black pawns at c6 and b7.
White to play
Pillsbury played 1e5, 2 f4! and f3. This entrenches his knight and if it’s captured he can retake fxe5! and exploit the half-open f-file.
One of Pillsbury’s games went 1 … bd7 2 f4 c5 3 0-0. Black began his own priyome, the queenside phalanx that we will examine later in this chapter. But this time it’s bad, 3 … c4? 4c2 a6 5f3 b5.
This is a case of timing. Black’s queenside might become significant if it were not for White’s initiative after 6h3!. He targets h7 and threatens 7 xd7 (7 … xd7 8 xh7 mate; 7 … xd7 8 xh7+! xh7 9 xd7).
Black to play
His attack exploded, 6 … g6 7 f5 b4 8 fxg6! hxg6 9h4! bxc3 10xd7xd7 11xf6! and 12af1. Or 6 … h6 7 xh6 gxh6 8 xh6 (8 … xe5 9 fxe5 e4 10 xe4 dxe4 11 f3!). Such games were known as ‘Pillsburials.’
This priyome typically works best with at least three sets of minor pieces on the board. A good defense was eventually found in 3 … e4, which blocks the b1-h7 diagonal and trades pieces.
But in other forms, e5/f2-f4 remains vibrant: Pillsburials still occur.
4 Brothers e4-e5 and … b4
Certain pairs of pawn moves, one by White and one by Black, are linked by bonds both tactical and strategic. We saw f2-f4 and … c5 in the Pillsburial and we’ll consider that pair in more detail later in this chapter.
In the Sicilian Defense, e4-e5 is linked with … b4, like brothers who never get along. Often the best defense to e4-e5 is … b4. And when Black drives a knight off c3 with … b4, the best counter may be e4-e5.
Aronin – Larsen Moscow 1959Black to play
At first it seems that 1 … b4 just wins a pawn (2 a4 xe4). A further look reveals that White has some compensation after 3 d4 f6 4 b6.
But the priyome tells us that when you see … b4, you should look for its brother. Here 2 e5! and then 2 … bxc3 3 exf6 gxf6 is promising for White after 4 b3 or 4 f5 cxb2 5xb2.
In this case White can exploit the position tactically because he was well developed. But if both players have their pieces well deployed, it’s usually bad to be the second to act in the e5/… b4 chain reaction:
Boudre – Shirov Val Maubuee 1989White to play
Black’s last move, … b4!, ensures an advantage. For example, 1 ce2 e5! 2 f5 b5 3 d2 c4 with favorable complications.
White tried 1 e5. He was right in thinking that if the Black knight moves from f6 he can play a good e4. And on 1 … dxe5 2 fxe5 xe5, White can complicate with 3 xh6 and 3 … b8 4 xg7 bxc3 5 b3.
But Black replied 1 … bxc3! 2 exf6xf6. Then 3 bxc3 or anything that allows 3 … cxb2 would weaken White’s king position considerably.
He kept the position semi-closed with 3 b3 and Black replied 3 … d5.
White to play
White’s 1 e5 has failed: Black is a pawn ahead and has the better attack, as 4c1 0-0 and then 5 g4b5! 6xb5 axb5, showed. Black threatened 7 … xb3! (8 cxb3? c2+; 8 axb3 a5 and … a8) and won.
The moral is: When you see e4-e5, look for … b4, and vice versa – but be careful when you’re the second to act.
5 Philidor’s Ring
The Russians say a knight that is supported by two pawns inside enemy territory is a ‘ring,’ such as Pillsbury’s e5, with pawns at d4 and f4. Trainer Anatoly Terekhin named this priyome after Andre Philidor because of this game:
Bruehl – Philidor London 1783Black to play
Black can claim a positional advantage but he has no point of penetration on the c-file to make it count. On 1 … ac8 2 0-0 and 3 ac1, a swap of rooks will nudge White closer to a draw.
Philidor’s solution was 1 … b5! 2 0-0b6! and then 3g3 g6 4ac1c4. This attacks b2 and looks for an opportune time for … xe3. Since the file is plugged up, Black may add to the queenside pressure with … a5-a4 or double rooks on the c-file, without allowing a trade of rooks.
White to play
Moreover Black does not fear a capture on c4 because he would get a protected passed pawn. After 5 xc4 he might opt for 5 … dxc4 and occupy the excellent d5 square with a knight.
White tried to exploit the kingside, 5xf5 gxf5 6g3+. But 6 … g7! 7xg7+xg7 turned out to be an excellent endgame for Black.
Philidor went on to win after 8xc4 bxc4!? 9 g3ab8 10 b3a3 11c2 cxb3 12 axb3fc8 13xc8xc8 14a1b4 15xa6c3 and then 16f2d3 17a2xd2 18xd2xb3 19c2 h4!. But the key to victory was 1 … b5, 2 … b6 and 4 … c4!.
Philidor’s Ring is often effective after b3 and … b6 followed by a queen swap that opens half of the a-file:
Janowski – Marshall Match 1905White to play
Three moves before, Black traded queens on b3. White had a choice of recaptures and chose axb3! so that he could continue 1 b4!e8 2b3!.
White is in no rush to dissolve his doubled pawns with b4-b5 because a pawn at b4 supports c5!. He also wants as many Black pawns left on the queenside so they can become targets.
Black was able to defend b7 with 2 … d6 3xd6xd6 4c5.
Black to play
White’s pressure increased after 4 … c7 5fe1c8 6d2e8 7 f4 f5 8f3e4 but he had not broken through.
So he played 9 b5! axb5 10xb5 with the idea of e5/xc6 and a8/ea1. Black ended up in a very poor case of bad-B-versus-good-N, 10 … xc5 11 dxc5d7 12xc6! bxc6 13d4f7 14a6! h6 15 b4, and lost.
6 Center Strike: … d5 vs. g2-g4
An ancient axiom says: ‘The best defense to an attack on a wing is a counterattack in the center.’
Good advice. But how? The most common way is … d5.
Michel – Stahlberg Mar del Plata 1947Black to play
White’s last move, g2-g4, threatens to drive away the f6-knight, Black’s best kingside defender. Once that is done, White can choose between promising pawn action (f4-f5) and promising piece play (perhaps g2, h4 and f3-h3).
Black appreciated that if he was going to strike back, 1 … d5! was the right way. Opening the long diagonal favors him (2 exd5 fxd5 3 xd5 xd5, e.g. 5 c3 c5 and … fd8/ … xe3).
But why isn’t 2 e5 good? The center remains closed and White can continue on the kingside after 2 … d7.
The answer is 2 … e4!. For better or worse, this is what the … d5 priyome calls for. After 3 xe4 dxe4 4 g2 Black should have ample play with … c5, … fd8, … c4 and … d5. (But not 4 … xc2 5 ac1.)
White preferred 3xe4 dxe4 and then 4 h4?.
Black to play
But this was a blunder that was punished by 4 … d8! 5 g5 (to stop 5 … xh4) and then 5 … xd4! 6xd4 e3+. Among the improvements is 4 ac1, to safeguard c2. But 4 … fd8 5 g1 c5 offers good chances.
There is a downside to this priyome. After … d5 Black may end up losing a pawn, either on d5 or on e4 after … e4/ xe4. But he often gets excellent compensation because of the loosening effect of g2-g4.
Baturinsky – Panov Moscow 1936Black to play
White’s last move, g2-g4?, was a mistake that was punished by 1 … d5!.
Then 2 e5 e4 3 xe4 dxe4 4 xe4 would favor Black after 4 … xd4 5 xd4 c6 because of the threats of 6 … c5 and 6 … xe4+.
White chose 2 exd5 and then 2 … xd4 3xd4c5!. If the queen goes to d3 or d1 he loses the f-pawn. Worse is 4 d2?, which costs a piece (4 … b4).
Play went 4c4 exd5 5xd5xd5 6xd5 (or 6 xd5 c6 7 g5 d4!).
Black to play
White is hoping for 6 … xg4 7 f5!. Then he would threaten xg4 and survive the crisis (7 … h5 8 c3 f8 9 xc7 and 10 c4).
But Black shot back 6 … c6!. Thanks to opening the long diagonal, he would win after 7 ad1 xd5 8 xd5 d8 9 d1 xd5 10 xd5 d6!.
White played the forced 7f3 but 7 … d7 threatened 8 … xf3+ 9 xf3 xg4 as well as 8 … a3! (and the immediate 8 … xg4). Black won after 8c3xg4 9xc6xc6 10f3xf3+ 11xf3d2.
7 Bayonet b-pawn
A queenside pawn majority is often an endgame asset. But it can also be a middlegame target for an enemy b-pawn supporting a Philidor knight.
In the following position, Black has two good ways of proceeding. One is 1 … c4 to force 2 e2 fc8 3 c3. Then he can favorably blow open lines with … b5-b4. But there’s a tactical problem: 3 … c6 allows 4 b3, trapping the rook.
Platonov – Petrosian Moscow 1964Black to play
Black chose the alternative, 1 … c6!. His idea is 2 … a6 and 3 … b5, since that would threaten to win the c-pawn after 4 … b4.
In this case, the tactics help Black, e.g. 2 e2 a6 3 a4 walks into 3 … b6, which threatens … xa4 (4 b3? xc3 or 4 a5 c4).
White chose 2h3? instead and Black made steady progress: 2 … b5 3 a3 a5 4d2 b4 5 axb4 axb4 6d1a8!.
White to play
White has protected c2 but ruined his piece coordination. Black will exploit it with … a1 and … f6-e4 or … b6-c4.
White didn’t last long: 7e3f6 8d3e4 9ed1a1 10h4b6 (threat of 11 … xd4 12 xd4 xc1). He resigned after 11g4 h5 in light of 12 e5 f6 13 h3 xe5 14 dxe5 xf2 or 13 f4 g5. Another case:
Perelshteyn – Atalik Philadelphia 2000Black to play
Since White’s bishop discourages … b8 it doesn’t seem that Black can achieve much by opening the b-file. But he got good things going with his queen, 1 … c6!.
Black readied … b5 followed by … a5, … d7, … d6, … fb8 and eventually … b4. If White opens the center, 2 c4 dxc4 3 xc4, Black has the better of 3 … b5 and … d5.
Instead, White tried to attack the king, 2e3 b5 3 g4 a5. But by then it was clear the attack wasn’t working. White should have tried to cut his losses by trading queenside pawns (4 a3 b4 5 axb4 axb4).
Instead, the game went 4d1 b4 5 h4 a4.
White to play
Black threatens to collapse the queenside chain with … a3. For example, 6 h5 a3! 7 hxg6 fxg6 8 c2 axb2 and now 9 xg6 bxc3!. Black’s king would be safe but White has lost the queenside.
White’s best try may be 6 xf6 xf6 7 h5. Instead, he went downhill, 6b1e4 7 f3d6 8g3fb8 9f2b6 10g2c4 11e1d6, and lost.
8 Exploiting c6
In several 1 d4 and 1 c4 openings Black’s best method of developing his light-square bishop is a fianchetto, … b7. But … b6 creates a hole at c6. How to exploit this is a trade secret known to every master.
Botvinnik – Donner Amsterdam 1963White to play
The priyome typically consists of three steps: (a) trade light-square bishops, (b) secure c6 with b4-b5, and (c) occupy the hole with a knight.
White began with 1d4!xg2 2xg2. Black could avoid the bishop swap only through concessions. For example, 1 … d5 2 e4! 5f6 and 3 e5! d5 4 c4 c8 5 c1 and g4 gives White a serious edge in space (3 … xg2 4 exf6!).
The trade prompted a battle for control of the g2-a8 diagonal. Play went 2 … c7 3b3fc8 4fc1b7+ 5f3!.
Now 5 … xf3+ 6 2xf3 and c6/c2/ac1 is quite bad for Black. So the game continued 5 … d5 6 e45f6 and now 7 b5! a6 8c6!f8 9 a4!.
Black to play
The priyome has shut Black’s heavy pieces out of the game. Trying to oust the c6-knight with 9 … b8? allows 10 xf6!. And if he prepares … b8 with 9 … e8 he invites 10 e5!, threatening e7+ and xb7.
Black tried to escape via trades, 9 … axb5 10 axb5xa1 11xa1a8. But 12d1! kept enough material on the board to make the c6-knight matter.
After 12 … e8 13c4c5 14 e5! there were tricks on the long diagonal (14 … c7 15 d7! xd7 16 e7+ and 17 xb7).
The end was 14 … c8 15a1c7 (15 … a8 16 xa8 xa8 17 e7+) 16a7xa7 (16 … c8 17 xb6 and wins) 17xa7xa7 18xb6 resigns.
Even if White does not occupy c6, the threat to do so can be powerful:
Aronian – Carlsen Elista 2007White to play
There’s an alternative priyome in this kind of position. White can try to shut out Black’s bishop and KN with f2-f3 and e3-e4. But 1 f3 is ineffective here because after 1 … d5! 2 e4 f4 gives Black kingside play he doesn’t deserve (3 e3 g5; 3 f2 e5).
White preferred targeting c6 with 1a6!. Play went 1 … xa6 2xa6xc1+ 3xc1b8.
Before White can exploit c6 he prepared with 4c4d8 and 5 h3e8 6 b5!. He may decide to create a passed pawn with c6/ … xc6/bxc6. Or he could restrict Black further with a3-a4 and a supported a3.
Black to play
What’s more, White need not hurry. The game went 6 … d5 7e2c5 8d1!c8 9f3d8 10c1d6 11 a4.
Black’s pieces are still restricted (11 … d7? 12 c6) and a3 is coming. Black chose to force matters, 11 … e5 12f5xf5 13xf5 f6 14e4f7.
But after 15a3!h8 16h2g8 17d6 White methodically enlarged his advantage until it won.
9 Charging h-pawn
Pushing White’s h-pawn to h5 is a fundamental idea after … g6. What makes it particularly attractive is when Black cannot keep the file closed.
Botvinnik – Gligoric Moscow 1956White to play
Black has just played … h6. His goal is to occupy d4 with a knight.
But there’s a drawback: After 1 h4! Black cannot play 1 … h5. The knight move is a priyome tipoff. When a master sees … g6 and … h6 he at least looks at h2-h4. It’s simple pattern recognition.
There followed 1 … d6 2 d3b8. Black lacked an easy defense on the kingside because 2 … g4 3 h5! xh5? loses a piece (4 xh6 xh6 5 g4!).
The game went 3 h5d7 and then 4xh6xh6 5 hxg6 hxg6.
White to play
White played the dramatic 6c1!. It’s based on 6 … xc1?? 7 xh8 mate.
After the forced 6 … g7 and 7xh8+xh8 8h6 Black could have defended better with 8 … f6 but lost after 8 … xc3+ 9 bxc3 e6?. White can mount a strong attack with 10d2 and h1/g5.
There’s another trigger that prompts a master to consider pushing his h-pawn. This occurs when his opponent plants a knight on g3 or g6.
R. Byrne – Fischer Sousse 1967Black to play
White has just played g3, to protect the e4-pawn and prepare h5. His position appears promising, e.g. 1 … b4 2 xf6 xf6 3 d5.
But after 1 … h5! he had no good answer to the threat of 2 … h4 and 3 … xe4. White had to try 2 h4.
But this made 2 … b4! stronger because White would be losing after 3 d5 xd5 4 xd5 xg5 5 xb7?? e3+ or 5 hxg5 xd5 6 xd5 xg5.
Instead, White went 3xf6xf6! 4d5xh4 but after 5xh5g5! his kingside was fatally loosened.
The h-pawn charge is a familiar priyome in many openings with an early g3. For example, 1 d4f6 2 c4 e6 3c3b4 4 e3c6 5e2 d5 6 a3e7 7g3 and now 7 … h5! 8d3 h4 9ge2 h3!.
But driving away a knight should be part of a greater goal, as in that case, when Black induced weaknesses with 9 … h3. Another example:
Geller – Flohr Moscow 1950White to play
Black’s last two moves were … g6 and … 0-0. The priyome is in the air – but the timing has to be right. White played 1 h4? and had nothing after 1 … c4! 2 h5e7.
His attempt to force matters on the kingside, 3 g4 b5 4 g5?!c5 5f4f5 6h1 hxg5 7xg5e7, left him overexposed and he eventually lost.
What went wrong? White should play 1f1!. Then when h2-h4-h5 drives the knight off g6, White can threaten mate on h7 with d3!.
10 Anti-Isolani
An isolated d-pawn often gives a player more space and ample opportunity to attack the wings. But there is an anti-Isolani priyome.
Korchnoi – Karpov World Championship 1981Black to play
The priyome calls for swapping all or most minor pieces and then tripling heavy pieces against the pawn. Here White had helped Black by mistakenly trading a wonderful knight on e5 for a bishop on c6.
Then came 1 … d6 2 g3d8 3d1b6 (not 3 … d7? 4 a4) 4e1d7 5cd3d6. But White can defend d4 with 6e4 and meet a knight maneuver to f5 with d4-d5!.
There followed 6 … c6 7f4d5! so that 8 e4 b4! forces a favorable queen trade (9 xc6 xc6 10 d5 b4!).
White retreated 8d2 but after 8 … b6 the threat of … b4 prompted 9xd5xd5 and then 10b3c6 11c3d7!.
White to play
Black is not threatening the pawn because after trades on d4 White has xb7. But Black is threatening 12 … e5!.
White’s 12 f4 was forced and then came 12 … b6! 13b4 b5 (threat of 14 … a5) 14 a4 bxa4 15a3 a5 16xa4b5 17d2.
Black could penetrate with his rook, 17 … c8 and … c1+. But he preferred
