Erhalten Sie Zugang zu diesem und mehr als 300000 Büchern ab EUR 5,99 monatlich.
- Herausgeber: Batsford
- Kategorie: Lebensstil
- Sprache: Englisch
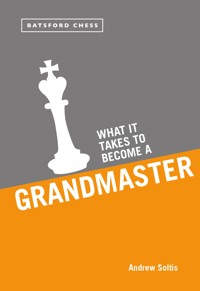
Becoming a Grandmaster is the ultimate aim for serious chess players, but whatever your chess abilities, this book will take you to the next level. Packed with tips, tricks and practical exercises aimed at players of all skill levels who aspire to greatness. Even an average chess player can find the same moves as a Grandmaster as much as 75 percent of the time. The difference is that only the Grandmaster can find the other 25 percent. This book identifies the kinds of moves and techniques that account for that 25 percent. Among the topics covered in the book are: Mysterious rook pawn moves, Tacking, Piece Nullification, "King Feeling," and how to play for a win without risk. Written by one of our biggest-selling and best-loved chess authors, in his trademark chatty, accessible but always informative style, this book is filled with practical exercises and test games that will reveal the secrets of how to join chess's elite ranks.
Sie lesen das E-Book in den Legimi-Apps auf:
Seitenzahl: 456
Veröffentlichungsjahr: 2016
Das E-Book (TTS) können Sie hören im Abo „Legimi Premium” in Legimi-Apps auf:
Ähnliche
Contents
Introduction
Chapter One
Uber-Luft
Bad Pawns Support Good Centers
Risk Management
Mystery Moves: Rooks
I Pass
Hidden Third Move
Blunder Zone
BOCs to Win
Preserving Tension
GMs Smell Zugzwang
Quiz
Chapter Two
Endgame Anchors
Hierarchy of Advantages
Piece Nullification
Mystery Moves: Rook Pawns
Save the Redwoods
GMs Shorten Games
Unequal “Equal” Positions
Overprotect
Delayed Castling
Trending
Quiz
Chapter Three
GMs Doubt Their Computers
Petrosian’s Law
Right Rook
Space Counts
Freezing the Center
Mystery Moves: Endgame RP Push
Timing
“... but the Knight is More Clever”
Multi-Goal Endgames
Phase II
Quiz
Chapter Four
Good-Bad Bishops
Tacking
Provoke!
Impossible Moves
Outcast Outposts
Mystery Moves: Queen
Permanent Pursuit
Lasker Rooks
Pre-Endgame
Backward Ho
Quiz
Chapter Five
Wing Chain
Drawability
Limits to Calculation
Fischer Was Right
It Takes a Lot to Lose
Yes, Endgame Sacrifices
King Feeling
Bad Bishops Build Blockades
The Inexpensive Exchange Sacrifice
Enough Good Moves Are Good Enough
Quiz
Quiz Answers
Introduction
After the 2014 world championship match, former champ Garry Kasparov offered a striking insight into what he had seen.
“Seventy percent of the moves could have been made by any competent player,” he said.
Now, you can dispute the exact number. But Kasparov’s main point was valid: Many of the moves played by remarkable players are not very remarkable.
He had more to say. “Twenty-five percent” of the match’s moves could have been played “by any grandmaster,” he added.
Kasparov was leading up to the punch line:
The five percent that remained were world-champion quality moves, he said. Only players like the match contestants – Magnus Carlsen and Vishy Anand – could find them and be confident enough to play them on the board.
Many fans wondered which moves comprised that five percent. But in this book we’re concerned with another question that Kasparov’s insight inspires.
What characterizes the twenty-five percent? That is:
What are ‘grandmaster moves’?
What distinguishes them from the moves that average players can find? Are they the result of superior calculating ability? Are they the fruit of years of experience against very strong opponents? Do they stem from clicking through thousands of database games?
If these are the necessary factors, then a non-GM may have little chance of ever playing a grandmaster move. He will have trouble even understanding one. He can only play over a GM game, stand back and marvel.
But there’s another answer to the question:
Grandmaster moves are not beyond the understanding of average players. Many of those moves are based on principles, on the positional techniques we call priyomes or on different ways of thinking that are unfamiliar to non-GMs.
We see these move-motivators repeatedly in grandmaster games, like this:
Vitiugov – Bukavshin, Chita 2015
1 d4 d5 2 c4 e6 3 ♘c3 c6 4 e3 ♘f6 5 b3 ♗d6 6 ♗b2 0-0 7 ♗d3 e5 8 dxe5 ♗xe5 9 ♘f3 ♗g4
While these moves were being played, the world-class computers Houdini and Stockfish had already concluded that Black was better. They didn’t consider 10 ♕c2 to be among White’s four best options.
Black tried to punish White for taking liberties, with 10 ... ♗xf3 11 gxf3 d4.
Then 12 exd4 ♕xd4 would leave White with serious weaknesses on dark squares and weak pawns (13 0-0-0 ♕f4+ 14 ♔b1 ♖e8 and ... ♘a6).
Moreover, after 12 ♘e2 ♕a5+ he had to move his king (because of 13 ♕d2? ♕xd2+ 14 ♔xd2 dxe3+ 15 fxe3?? ♗xb2).
What Black – and the the super-engines – failed to appreciate at first was 13 b4! ♕xb4+ 14 ♔f1.
White has violated all sorts of basic principles in just 14 moves. But there were valid reasons for White’s play.
Yes, the doubled f-pawns are a weakness.
But control of a file – provided it’s a half-open file – is often much more important. There’s a hierarchy of positional advantages and disadvantages that grandmasters understand well and they justify 10 ♕c2!.
Yes, White failed to castle.
But early castling is often a wasted move, which can be delayed in favor of something that takes a much higher priority, as Mikhail Botvinnik liked to say.
And, yes, White’s king looks highly vulnerable.
But without a light-squared bishop, Black has little chance to attack it. A grandmaster’s acquired sense, called “king feeling,” tells him that it is Black’s king that should be in greater danger. A GM may not be able to verify this by calculating. He just feels it.
White got his pawn back with 14 ... c5 15 f4 ♗d6 16 exd4. The power of his rooks and bishops became evident after 16 ... ♘bd7 17 ♖g1 g6 18 ♖b1 ♕a5 19 f5!.
For example, 19 ... ♔h8 20 fxg6 fxg6 21 ♗xg6! (21 ... hxg6 22 ♕xg6 and mates or 21 ... ♖g8 22 ♗xh7! ♘xh7 23 dxc5+ ♗e5 24 ♗xe5+ ♘xe5 25 ♖xb7 ♘f6 26 ♕f5 and wins).
Black tried to neutralize the b1-h7 diagonal by shedding a pawn, 19 ... g5 (20 ♖xg5+ ♔h8).
But he was losing after 20 ♕c1! ♔h8 21 dxc5! in view of 21 ... ♗xc5? 22 ♕xg5 and mates.
The game went 21 ... ♗e7 22 ♗d4 ♕c7 23 ♗e4! ♖ab8 24 ♘c3 h6 25 ♘d5 ♕d8 26 h4 ♗xc5:
And 27 hxg5 ♗xd4 28 gxf6 resigns (28 ... ♘xf6 29 ♕xh6+ ♘h7 30 f6 and mates).
Did you notice any grandmaster moves?
“Yes, 27 hxg5,” many amateurs would say.
And they would be wrong.
“Any competent player,” to use Kasparov’s words, could have found the final combination. The star moves, the ones that made a game-changing difference, began much earlier, with 10 ♕c2! and 12 ♘e2!.
These kinds of moves are difficult to appreciate. But with the proper approach and study you can understand them. You can learn to apply the reasoning behind them – and enjoy the rare satisfaction of playing a grandmaster move in your own games. That’s what this book is about.
Mysterious
There are so many different kinds of moves that can be called “grandmasterly.” But what characterizes many, if not most, of them is they are counter-intuitive. Sometimes they are downright mysterious.
Smyslov – Lombardy, Monte Carlo 1969
1 c4 ♘f6 2 ♘c3 d6 3 d4 e5 4 dxe5 dxe5 5 ♕xd8+ ♔xd8 6 ♘f3
Black retreated his only developed piece, 6 ... ♘fd7!. It looks bizarre. But it is quite logical:
Black wants to play ... f6. That would solve the long-term problem of defending his e5- and f7-pawns. It would also prevent tactics based on ♘g5. Black could continue ... c6, ... ♔c7, ... a5, ... ♘a6 and ... ♘dc5 with smooth development, a safe king and no real weaknesses.
White’s reply, 7 g4!, is more of a head-turner. But once again, it’s a move whose strengths become clearer upon inspection:
White expects to see ... f6 and already is planning to exploit it with a timely g4-g5 and gxf6. If he follows up with ♖g1 and ♗h3 he may have a serious advantage because he would control key lines like the g-file and h3-c8 diagonal.
Black was one of the 100 top players in the world when this game was played. Yet he admitted he was stunned by 7 g4. After 29 minutes of thought he concluded that his position was “if not actually lost” then “very bad.” He eventually lost.
In truth, he was far from lost. But White would simply have a position any GM would be delighted to play after, say, 7 ... f6 8 b3 ♗b4 9 ♗b2 ♖e8 10 0-0-0.
Another GM game went 10 ... c6 11 g5! ♔c7 12 ♗h3 ♘a6 13 ♖hg1 ♗f8 14 ♗f5 h6 15 gxh6 gxh6 16 ♗xd7 ♗xd7 17 ♘e4 ♗e7 18 ♖g7 and White won.
What helped make 6 ... ♘fd7 and 7 g4 grandmasterly is that they were counter-intuitive.
Intuition is a refined sense of what the best move in a position is likely to be. It is what enables good, experienced players to play good, experience-based chess moves. If those players develop this sense further they might become masters. They will be able to make master moves.
But to go further, beyond master, a player needs to appreciate the moves that his intuition rejects out of hand:
He needs to consider developing a rook on a closed, rather than open, file. He must resist occupying an appealing – but actually worthless – outpost square. He should learn to make an “I pass” move or even a retreat. He must be willing to create a backward pawn that supports a strong center. He needs to learn when a “bad” bishop is really good and when an “equal” position isn’t.
In short, to get beyond master he needs to go beyond master moves.
Grandmaster Mystique
Before we go any further, let’s make something clear: This book will not make you a grandmaster.
There is much more to learn, many other skills to master than can be described in any one book. It takes years to achieve that level of insight, precision and understanding. Even if they invest years, very few students will reach the GM level.
Nevertheless, I believe that almost any serious student – or “competent player” – can understand grandmaster moves if they take the time. But first, they have to get past the feeling that the task is impossible.
Pachman – Fischer, Havana 1966
1 d4 ♘f6 2 ♘f3 c5 3 c4 cxd4 4 ♘xd4 e6 5 e3 ♘c6 6 ♗e2 d5 7 ♘c3 ♗c5 8 0-0 ♗xd4!? 9 exd4 dxc4 10 ♗e3 ♘a5 11 ♗xc4 ♘xc4 12 ♕a4+ ♗d7 13 ♕xc4 ♗c6 14 ♗g5 ♕a5!? 15 ♕c5 ♕xc5 16 dxc5
Black’s eighth, ninth and 15th moves looked odd. They brought about an endgame with bishops of opposite color. Those bishops are notorious for making endgames hard to win. Yet Bobby Fischer was not playing for a draw. Far from it.
But now the game began to look bizarre. Black chose 16 ... a5. After 17 ♖fd1 he switched to the other wing with 17 ... h5. That prompted 18 h4. What’s going on?
Moves like these help create a grandmaster mystique that leaves an aspiring player muttering, “I’ll never be able to understand this. No matter how much I study.”
The “mysterious RP move” is actually a common feature of grandmaster games. And it isn’t that mysterious. Black played 16 ... a5! to stop a queenside initiative based on b2-b4-b5. His move also artificially isolated the c5-pawn. That pawn is a potential target because it can’t be easily defended by another White pawn.
Then 17 ♖fd1 h5! threatened to gain space for his KR with ... h4 (and possibly for his bishop with ... h3). White stopped that with 18 h4.
When you look at it that way, these moves weren’t so bizarre after all. The next stage of the game was easier to grasp: 18 ... ♘d7 19 ♗e3 ♘e5 20 ♗d4 ♘d7 21 b3 ♖g8 22 ♗e3 (otherwise 22 ... g5) ♘e5 23 f3 ♘g6 24 ♗f2 ♘f4 25 ♗e3 ♘d5.
After 26 ♘xd5 ♗xd5 27 ♖d4 ♔d7! 28 ♖c1 ♔c6 29 ♖c3 f6
... the possibility of ... g7-g5-g4 prompted 30 f4?!. Black had the edge after 30 ... ♖gd8 31 ♔f2 a4! 32 ♖xa4 ♖xa4 33 bxa4 ♗xa2 and eventually won.
In the following pages I’ve compiled 50 attributes of grandmaster thinking. They help GMs find grandmaster moves. These are not the only ones worth knowing. Becoming a grandmaster isn’t that easy. But these are a good start.
There is no prioritizing. The uber-luft (1) is not necessarily more important than, for example, the endgame anchor (11) or the technique of tacking (32) or the wing chain (41). This was just a convenient way to organize this book. Each chapter will end with a series of quiz positions based on the move-motivators discussed in it. Don’t expect to solve all of them, or even most of them. After all, even grandmasters fail to find some grandmaster moves.
Chapter One
When a grandmaster tries to explain a strange-looking move that he played, his annotation may consist solely of long varations of move analysis.
That analysis may be technically accurate. It will likely be based on what a computer found. But it may be useless to the vast majority of aspiring students.
Let’s try to do better, by explaining grandmaster moves in words. We will start with one of the recurring “mystery moves” that never fails to surprise fans.
1.Uber-Luft
Experienced players know what luft is. Many of us learned the hard way, as beginners:
An enemy rook or queen landed on our undefended first rank. Our castled king had no escape. Checkmate.
The traditional way to avoid this fate is to create luft (German for “air”). You push your g-pawn or h-pawn one square to make a flight square at g2 or h2. In desperate times, f2-f3 or f2-f4 will do.
Grandmasters appreciate the benefits of advancing the pawn two squares. This is uber-luft.
White would love to take on c5. But 1 ♕xc5? runs into 1 ... ♕xe4!. White is betrayed by his vulnerable first rank (2 ♖xe4? ♖d1+).
The other capture, 1 ♘xc5, allows 1 ... ♗xe4!, since 2 ♘xe4 ♕xe4! 3 ♖xe4? ♖d1+ is another mate.
It shouldn’t take long to realize that the lack of luft is crucial in this position. But 1 h3? again allows 1 ... ♗xe4! – while 1 g3?? ♖d1! is disastrous.
The position calls for 1 h4!. It creates a flight square at h2 and – what’s equally important – it does it with tempo. The g5-bishop is attacked and if it moves, White has time to capture strongly on c5.
Relatively best was 1 ... ♗xe4 but thanks to 1 h4 White can play 2 hxg5 ♗xf5. Then 3 ♖be2 would give White the better winning chances.
Black preferred 1 ... gxh3. But White’s first rank was no longer toxic. He could play 2 ♘xc5!.
Suddenly the tactics – which were running in Black’s favor in the previous diagram – are smiling on White. For instance, 2 ... ♗xe4? 3 ♘xe4 ♕xe4 doesn’t work because of 4 ♖xe4 ♖d1+ 5 ♔h2.
Neither does 2 ... ♗c8? in view of 3 ♘e3! and 3 ... ♗xe3 4 ♕xd8+, and White won. (Better was 2 ... ♗c6 but after 3 gxh3 and ♕b4! White is still on top.)
Uber-luft is the rare case of a move that is both safety-minded and super-aggressive. It need not be forcing, as 1 h4! was in that example. But it should do more for you than a mere one-square pawn advance.
Lastin – Loginov, Krasnodar 2002
1 e4 c5 2 ♘f3 d6 3 d4 cxd4 4 ♘xd4 ♘f6 5 ♘c3 a6 6 ♗g5 e6 7 f4 ♕b6 8 ♕d3 ♘c6 9 0-0-0 ♘g4 10 ♕g3 ♘xd4 11 ♕xg4 ♗d7 12 f5 ♖c8 13 ♕g3 ♘c6 14 ♗c4 ♘e5 15 ♗b3 ♕c7 16 ♖hf1 b5 17 fxe6 ♗xe6 18 ♘d5 ♗xd5 19 ♖xd5 f6 20 ♗f4 ♘c4 21 ♔b1 g6 22 ♖fd1 ♗e7
White might look at solid candidate moves such as 23 ♕h3 and 23 ♖5d4 (so that 23 ... 0-0? 24 ♗xd6). But his position is promising enough for him to be more ambitious.
The sacrifice 23 ♗xd6 ♗xd6 24 ♖xd6 ♘xd6 25 ♖xd6 seems to fit the bill. But after 25 ... ♕c5! White has to take time to meet the mating threat of 26 ... ♕g1+. He may be winning after 26 a3 ♖f8. But it isn’t clear.
When you look at variations like that, they may give you hints about the best move. These hints point to 23 a4!.
White threatens to win the b-pawn with 24 axb5. But 23 a4 also makes ♗xd6 much more dangerous because White has luft at a2.
If Black protects the b5-pawn with 23 ... ♕c6, White can pull the trigger on 24 ♗xd6! ♗xd6 25 ♖xd6 ♘xd6 26 ♖xd6.
The absence of a last-rank mate means that 26 ... ♕c5 is harmless. White could play 26 ♖xf6, followed by ♖e6+ and/or ♖xa6 followed by the decisive entrance of his queen.
Instead, Black managed to get his king to a degree of safety with 23 ... bxa4 24 ♗xa4+ ♔f7. But after 25 ♕h3 h5 26 ♗b3 ♔g7, White had a choice of promising lines, including 27 ♕e6 ♖he8 28 ♖5d4.
Masters often make luft when they have nothing more important to do. Timing isn’t critical in such a position. But uber-luft should be prompted by a sense of urgency:
Black has no time for 1 ... ♕f3? because of 2 ♖xd4 ♖e2?? 3 ♖d8+.
He saw the right idea – but one move too late, 1 ... axb4? 2 ♕xb4 h5.
White defended with 2 ♖xd4 ♕f3 3 ♖e4!. The tactics that might have helped Black had evaporated. He lost the queen ending, 3 ... ♖d8 4 ♖e3 ♕d1+ 5 ♔g2 ♖xd3 6 ♖xd3 ♕xd3 7 h4.
Yet Black could have saved the game with 1 ... h5!. Then ... ♕f3 is more of a threat because he has no last-rank problem.
There’s more. With 1 ... h5! Black prepares ... h4-h3! with an eye to ... ♕g2 mate. For example, 2 b5 h4! 3 ♕xa5? h3!.
White can neutralize the kingside with 2 h4.
But then 2 ... ♕f3! 3 ♖xd4 ♖e2 leads to another safe rook ending (4 ♖f4 ♖xd2 5 ♖xf3 axb4).
The main alternative is 2 b5 h4! 3 gxh4!. But 3 ... ♖e6 and 4 ... ♖g6+ prompts 4 ♖c6 ♖xc6 5 bxc6 ♕xc6, with a drawish queen ending (6 ♕xa5 ♕g6+ and ... ♕xd3).
The h-pawn is the most likely candidate for uber-luft, particularly in the endgame. We’ll examine cases of that later, in (26). Advancing the g-pawn two squares can be a bit more sophisticated:
If White could trade one pair of rooks, her b-pawn offers real winning chances. But with four rooks on the board Black is not worse. She has several options but 1 ... g5! is a grandmasterly claim to counterplay.
It makes the h2-pawn a target for a rook raid such as ... ♖a1+-h1. It also stops White from solidifying her pawn structure with f2-f4.
Black had enough play after 2 ♖d7 ♖a1+ 3 ♔c2 ♖c8+ 4 ♔d2 ♖cc1 5 ♖b7 ♖d1+ 6 ♔c2 ♖ac1+ 7 ♔b3 ♖d2.
Now 8 ♖f3 is met by 8 ... ♖cc2! (9 ♖bxf7 ♖xb2+ or 9 ♔a3 ♖xf2). A draw was agreed after 8 f4 gxf4 9 gxf4 ♖xh2 10 f5 exf5 11 ♖ee7 ♖h6 12 ♖xf7.
Of all the GM “mystery moves,” uber-luft is the one that amateurs should have the easiest time applying to their own games:
Whenever you are about to to push your h-pawn or g-pawn one square to create luft, consider advancing two squares. In the vast majority of cases, one square will be better. But in that minority of positions, the benefits of two squares are considerable.
Berliner – Fischer, Bay City 1963
1 d4 ♘f6 2 c4 e6 3 ♘c3 d5 4 cxd5 ♘xd5 5 e4 ♘xc3 6 bxc3 c5 7 ♘f3 cxd4 8 cxd4 ♗b4+ 9 ♗d2 ♗xd2+ 10 ♕xd2 0-0 11 ♗d3 b6 12 0-0 ♗b7 13 ♖fd1 ♘c6 14 ♕b2 ♕f6! 15 ♖ac1 ♖fd8 16 ♗b5 ♖ac8 17 ♘e5?! ♘xe5 18 dxe5 ♕f4 19 ♖xc8 ♖xc8
Black threatens the e4-pawn and might win the e5-pawn with ... ♖c5.
A natural defense is 20 f3 because of Black’s lack of luft (20 ... ♖c5?? 21 ♖d8 mate).
Black’s advantage would disappear after 20 f3 h6 21 ♗e2. For example, 21 ... ♖c5 22 g3 ♕xe5? is bad (23 ♕xe5 ♖xe5 24 ♖d8+ ♔h7 25 ♖d7).
However, Black does much better with 20 ... h5!. His idea is ... h4, to discourage g2-g3 and to soften up the White kingside with ... h3. After 21 ♗e2 h4 Black would retain good winning chances.
White chose 20 ♕d4, which threatens both the mating 21 ♕d8+ and the win of material with 21 ♕d7.
This time the quiet 20 ... h6 works well because 21 ♕d7? allows 21 ... ♖c1 or 21 ... ♖c2. White would have a difficult game after 21 f3 ♖c5.
But 20 ... g5! was stronger. Black prepared 21 ... ♔g7 and ... ♖c5xe5.
The difference between 20 ... g5! and routine luft, 21 ... g6?, was revealed after 21 f3?! g4!. Then 22 fxg4 ♕xg4 was bound to cost White a pawn. The same is true of 22 ♗e2 gxf3 23 ♗xf3 ♔g7.
White prefered 22 ♗e2 gxf3 23 gxf3 and now 23 ... ♖c2 was better than the game’s 23 ... ♔h8 24 ♔h1 ♗a6! 25 ♕f2? ♗xe2 26 ♕xe2 ♕xe5 because White could have defended better with 25 ♕d2!.
To repeat, a one-square advance is usually the better move when you need luft. It’s one of the seventy percent of moves that “any competent player” would find. Uber-luft is the grandmasterly exception.
2.Bad Pawns Support Good Centers
Young players can be terrified by scary stories about bad bishops. But as they gain experience they learn that often a bad piece can do very good things.
Masters know Mihai Suba’s sage observation, “Bad bishops defend good pawns.” We’ll see another version of the benefits – bad bishops build blockades, in (48).
Grandmasters carry this logic one step further: Bad pawns can support a good center.
Torre – van der Wiel, Thessaloniki 1988
1 e4 c5 2 ♘f3 ♘c6 3 ♗b5 g6 4 0-0 ♗g7 5 c3 ♘f6 6 ♖e1 0-0 7 d4 cxd4 8 cxd4 d5 9 e5 ♘e4 10 ♘c3! ♘xc3 11 bxc3 ♕a5 12 a4
White’s c3-pawn looks like the poster child of positional weaknesses. It is backward and lies on a half-open file. That makes it a prime target for a Black rook at c8. If Black can trade queens, that pawn alone may give him excellent winning chances.
But while queens are on the board, that c-pawn is a hero. It is the bedrock of the d4/e5 chain. That chain gives White a kingside space edge and attacking chances.
And it is not easy to win that pawn, e.g. 12 ... ♕xc3? lands the queen in trouble after 13 ♗d2 ♕b2 14 ♖b1 ♕a2 15 ♖e2.
Black completed development 12 ... ♗g4 13 ♖e3! ♖fc8. Then came 14 h3 ♗xf3 15 ♖xf3.
The c-pawn remains secure (15 ... ♘d8 16 ♗a3 ♖xc3 invites 17 ♕d2 or 17 ♕e1 with advantage).
Black realized he needed to get rid of that pawn and that it was safer to trade it off than try to capture it. After 15 ... e6 16 h4! a6 17 ♗f1 b5 18 h5 b4 19 cxb4 ♕xb4 he had exposed the d4-pawn.
But White had made enough progress on the kingside that after 20 ♗e3 his attack had become unstoppable, 20 ... ♘a5 21 ♖h3 ♘c4 22 hxg6 fxg6 23 ♕g4 ♕e7 24 ♗g5 ♕f7 25 ♕h4 ♗h8 26 ♗d3!, e.g. 26 ... ♖ab8 27 ♗xg6! ♕xg6 28 ♖g3.
If Black had won the d4-pawn or invaded with heavy pieces along the c-file, a different result was highly likely. But the c3-pawn denied him.
A similar situation arises in the Winawer French (1 e4 e6 2 d4 d5 3 ♘c3 ♗b4 4 e5 c5 5 a3 ♗xc3+ 6 bxc3). Black may open his side of the c-file with ... cxd4. The recapture cxd4 undoubles White’s pawn but exposes the c2-pawn to attack.
Then c2-c3 by White would create another backward pawn on a half-open c-file. It would also make White’s dark-square bishop a bit worse. But experience has found that supporting the d4-pawn is more important.
What about other ugly center pawns? If Black plays ... e5 in the open variations of the Sicilian Defense, his d-pawn becomes backward on a half-open file. That was once considered a near-fatal weakness.
But that was before openings like the Boleslavsky Variation (1 e4 c5 2 ♘f3 d6 3 d4 cxd4 4 ♘xd4 ♘f6 5 ♘c3 ♘c6 6 ♗e2 e5!?), the Najdorf Variation (1 e4 c5 2 ♘f3 d6 3 d4 cxd4 4 ♘xd4 ♘f6 5 ♘c3 a6 and 6 ... e5) and the Sveshnikov Variation (1 e4 c5 2 ♘f3 ♘c6 3 d4 cxd4 4 ♘xd4 ♘f6 5 ♘c3 e5) proved their value. That strong pawn on e5 gets key support from its d6-brother.
Another common example of this occurs when Black accepts a backward e6-pawn in the French Defense.
Wieczorek – Fedoseev, Warsaw 2012
1 e4 e6 2 d4 d5 3 ♘d2 ♘f6 4 e5 ♘fd7 5 ♗d3 c5 6 c3 ♘c6 7 ♘e2 cxd4 8 cxd4 f6 9 exf6 ♘xf6 10 0-0 ♗d6 11 ♘f3 ♕c7 12 ♗g5 0-0 13 ♗h4 ♘h5 14 ♖c1 g6 15 ♗b1 ♕g7
An amateur looks at Black’s e6-pawn and sees a liability. “If only it were on f7,” he might say.
But if it were on f7 White could pound the d5-pawn with ♘c3, a2-a3 and ♗a2. Thanks to the e6-pawn White lacks a target.
Black, on the other hand, has a good target, at d4. He also has the best way of changing the pawn structure favorably, with a well-timed ... e5.
White played normal moves, 16 ♖c3 ♗d7 17 a3 ♔h8 18 ♕d2.
But after 18 ... ♘f4 he faced a threat of 19 ... ♘xe2+ 20 ♕xe2 ♘xd4. And 19 ♖e1 ♘xe2+ 20 ♖xe2 ♖xf3! 21 gxf3 ♘xd4 is no defense.
White offered a pawn with 19 ♗g3 (19 ... ♘xe2+ 20 ♕xe2 ♗xg3 21 hxg3 ♘xd4 22 ♘xd4 ♕xd4 23 ♖c7). Black declined, 19 ... g5, and outplayed him in the complications of 20 ♘xf4 gxf4 21 ♗h4 ♖g8 22 ♘g5? h6 23 ♖h3 e5!.
In these examples, the weak-looking pawn that supports a good center was dictated by the choice of opening. But in an early middlegame a grandmaster may change the pawn structure to create a new strong point, supported by a weakie:
Reshevsky – Evans, New York 1955
1 ♘f3 ♘f6 2 g3 d5 3 ♗g2 ♗f5 4 0-0 c6 5 d3 e6 6 ♘bd2 ♘a6 7 a3 ♗e7 8 b4 0-0 9 ♗b2 h6 10 ♖e1 ♘d7? 11 e4 ♗h7 12 c4
Black can await events in the center (12 ... ♗f6 or 12 ... ♘c7) at the risk of being cramped by e4-e5. Or he can change the center.
With 12 ... dxe4 13 dxe4 Black would hand White a space edge. But he would have no real weaknesses.
Black opted for 12 ... dxc4, perhaps expecting 13 dxc4. This would reach the same position as 12 ... dxe4 13 dxe4. White can play e4-e5 at some point and free his g2-bishop to join the middlegame.
However, this move order allowed 13 ♘xc4!. To stop 14 d4, Black tried 13 ... c5 and allowed 14 b5! ♘c7 15 a4.
White’s d-pawn only looks weak. It performs a vital function by defending the e-pawn. That pawn gives White the edge because it keeps the h7-bishop out of play and denies Black’s knight the d5-outpost.
These factors can translate into a White queenside initiative with ♕b3 and a4-a5, e.g. 15 ... ♘e8 16 ♕b3 ♘d6 17 a5 ♕c7 18 ♘fd2 ♘xc4 19 ♘xc4.
For example, 19 ... b6 20 ♕c3 ♘f6 21 ♘e5 and ♘c6; 19 ... ♖ad8 20 b6 or 19 ... ♗f6? 20 e5 ♗e7 21 a6.
Black chose 15 ... ♗f6 and that gave White a good reason to simplify in the center, 16 d4 cxd4?! 17 ♗xd4 ♗xd4 18 ♕xd4.
White soon had an overwhelming positional edge (18 ... b6 19 ♖ed1 ♘c5 20 ♕e3 ♕e7 21 ♘fe5 and ♘c6).
Here’s a similar situation, from the Black point of view.
Bondarevsky – Bronstein, Leningrad 1963
1 d4 ♘f6 2 ♘f3 g6 3 ♗f4 ♗g7 4 e3 0-0 5 ♘bd2 b6 6 c3 c5 7 h3 d6 8 ♗e2 ♗a6 9 ♗xa6 ♘xa6 10 0-0 ♕d7 11 ♕e2 ♘c7 12 dxc5
This looks like a good resolution of the center tension, a topic we’ll tackle in (25). Black’s pieces would be a bit clumsy after 12 ... dxc5? 13 ♘e5! ♕c8 14 ♖fd1 or 13 ... ♕e8? 14 ♘xg6!.
Play continued 12 ... bxc5 13 e4.
White is looking for a chance to favorably push to e5. For instance, 13 ... ♘e6 14 ♗h2 ♕b7 15 ♖ab1 ♖fd8 16 e5.
Black’s 13 ... e5! made his d-pawn backward on a half-open file. But in the hierarchy of advantages that we’ll examine in (12), stopping an enemy plan typically counts more.
Play went 14 ♗e3 ♖ab8 15 b3 ♕c6 16 ♕c4 ♘d7. The Black center denies White pieces good center squares and White rooks can’t exploit the d6-pawn.
White lost the thread with 17 ♘h2? and Black quickly took over, 17 ... ♘b6 18 ♕d3.
Black’s superior center got better after 18 ... d5!, e.g. 19 exd5 ♘cxd5 (20 ♘c4 ♘xe3 21 ♘xe3 e4!).
White switched to defense, 19 f3 ♖bd8 20 ♕c2, but Black just got stronger in the center, 20 ... f5! 21 ♖ad1 ♘e6. He won a fine game after 22 exd5 ♘xd5 23 ♘c4 ♘ef4 24 ♖f2 ♘xe3 25 ♘xe3 ♖xd1+ 26 ♕xd1 e4! 27 ♕c2 ♗h6! and ... ♘d3.
3.Risk Management
The world’s strongest spectator was watching this game:
White played 1 ♖xc7 and offered a draw. Onlooker Magnus Carlsen didn’t like Black’s decision to accept.
“It’s an even position,” he said. “But it is not a drawn position.”
After 1 ... ♕xc7 Black has winning chances because of his queenside majority and the possibility that the knight will play better than the bishop in an ending (2 e4 ♘c4 3 ♕c3 ♕c6).
Even after 2 ♗xd6 ♕xd6 makes it a pure queen ending, he can try to create a winning passed pawn (3 ♕e4 ♕b8 4 ♕c6 ♔f8 and ... a6/ ... b5).
True, his winning chances are slim. The position is even, as Carlsen said. But there was very little risk of losing after 1 ... ♕xc7.
“Risk” is the magic word here. Objectively, a position may be dead even. Computers may evaluate it as 0.00. But engines don’t measure risk.
In the next position White offered a draw. Black accepted – and regretted his decision for years.
Botvinnik – Benko, Budapest 1952
1 ♘f3 ♘f6 2 c4 c6 3 d4 d5 4 cxd5 cxd5 5 ♘c3 ♘c6 6 ♗f4 e6 7 e3 ♗d6 8 ♗d3 ♗xf4 9 exf4 0-0 10 0-0 ♗d7 11 ♖c1 ♘a5 12 ♘e5 ♖c8 13 ♕e2 ♘c6 14 ♘f3 g6 15 ♖fd1 ♘e8 16 h4 ♘d6 17 g3 f6 18 ♔g2 ♘f5 19 ♗b1 h5 20 ♕d2 ♘ce7 21 ♖e1 ♕b6 22 b3 ♕b4
“I should have squeezed him by doubling rooks on the c-file and keeping him tied down to his weak d4-pawn,” Pal Benko wrote. “All this could have been done without risk.”
White, on the other hand, couldn’t change the position significantly without taking chances. For example, 23 ♘e4 ♕xd2 24 ♘exd2 gets queens off the board. But then 24 ... ♖xc1! 25 ♖xc1 ♖c8 would be a poor endgame for White.
“But I was young,” Benko added. “And my opponent was world champion!” Risk management in simplest terms is a matter of maximizing your chances for a win while carefully evaluating the possibility of the other two results.
The first thing you should notice is that Black can draw with checks, 1 ... ♘h3+ 2 ♔g2 ♘f4+ 3 ♔g1.
If White varies, he gets into trouble: 2 ♔h1? ♘g5 3 ♔g2 ♕d5! or 2 ♔g2 ♘f4+ 3 ♔h1? ♘xh5 4 ♘xh5 ♕h4+.
Should Black take the draw? No, because his pieces and pawns are better than White’s – and because the drawing mechanism (... ♘h3+ and ... ♘f4+) may be available for a while.
He should avoid 3 ... ♘d3 4 ♕e6+!, which would lead to a double-edged endgame. Also wrong is 3 ... ♕d5 4 ♕e3, which improves White’s coordination.
Black found 3 ... ♘h3+ 4 ♔g2 ♕h4!. This retained the drawing mechanism but also created a mating pattern of ... ♘f4+ and ... ♕h3.
White had to choose among several replies that seem equally good, such as 5 ♕b4, 5 ♕b5 and 5 ♕e6+. Forcing your opponent to make choices like that is usually the best way to induce an error.
The game went 5 ♕e6+ ♔h7!. This avoided another queen trade, 5 ... ♔h8 6 ♕e7!, and set a trap (5 ... ♔h7 6 ♕e7?? ♘f4+ 7 ♔g1 ♕h3 mates).
White saw it, 6 ♕g6+ ♔h8.
But the game goes on. Black threatened a 8 ... ♘f4+ fork.
White attacked the rook with 8 ♕d6 and after 8 ... ♖d8 he had another difficult choice.
A draw would be likely after 9 ♕c7 since the Black rook can’t leave the first rank (9 ... ♖d2 10 ♕c8+ ♔h7? 11 ♕xf5+).
White preferred 9 ♕a6 with similar ideas (9 ... ♖d2 10 ♕c8+).
Note that Black is in no danger of losing. He still had a draw in hand, 9 ... ♘f4+ 10 ♔g1 ♘h3+ 11 ♔g2 ♘f4+ 12 ♔g1.
He found a way to play on, 12 ... ♔h7!.
Black can get his rook to d2, e.g. 13 ♕b5 ♖d5 14 ♕b4 ♕g5 and 15 ... ♖d2.
He would be intensifying the pressure (15 ♕e7 ♖d1 16 ♕e3 ♖d2 17 ♕xd2?? ♘h3+). But White finally cracked, 13 ♕f1??.
Black could have won with 13 ... ♖d2 and ... ♘h3+. He actually repeated the position one more time, 13 ... ♘h3+ 14 ♔g2 ♘f4+ 15 ♔g1, and then 15 ... ♖d2! prompted resignation.
Managing risk is not something novices lose sleep over. They just try to find the best move. But grandmasters know that in many favorable positions the technically best move, the computer-approved move, would diminish their winning chances:
An extra pawn is often decisive in a knight endgame, particularly if there are pawns on both wings.
Therefore, Black played 1 ... a3!. This was a mini-lesson in drawability, which we’ll examine further in (42). Black wants the queenside liquidated, 2 bxa3 bxa3 3 ♘xa3 ♘b4 (or 3 ... ♘c3) and 4 ... ♘xa2.
White would have some winning chances then – because you almost always do with N+4Ps-vs.-N+3Ps. But those chances wouldn’t be great because all of the remaining pawns would be on the kingside.
How can White maximize his chances to win? Certainly not with 2 b3?? ♘c3.
His striking solution was 2 ♘xa3! bxa3 3 bxa3.
He understood that distant RPs are the hardest pawns for a knight to stop. White now has two potential ways to win:
(a) He can push his a-pawns with the help of his king, or
(b) He can create a passed h-pawn and raid the kingside with his king.
Black’s defense can be stretched to the breaking point if he has to keep his knight on the queenside and his king on the kingside.
What about White’s losing chances? There were virtually none. Barring a horrendous blunder, there were only two outcomes – a White win or a draw.
Play went 3 ... ♔f8 4 h5 ♘e7 5 a4 ♘c6 6 ♔e4.
Black recognized the dangers of routine defense, 6 ... ♔e7 7 f4 or 7 g5. For example, 7 f4 ♔d7 8 f5 exf5+ 9 gxf5 ♔e7 10 ♔d5 and White wins.
Black shot back 6 ... g5!. It was a brilliant way to get White thinking about the third outcome, a Black win.
The best winning try was 7 ♔d3! and 8 ♔c4. But that looks risky after 7 ... ♘xe5+ 8 ♔d4. (It isn’t – 8 ... ♘xg4?? 9 a5 loses outright, or 8 ... ♘d7 9 a5.)
White played it safe, 7 hxg6 fxg6 8 ♔f4 ♔f7. His belated sacrifice, 9 ♔g5 ♘xe5 10 a5 ♘c6 11 a6 e5, led only to a draw.
There are no books – at least, no chess books – that can teach you about risk management. The best way to learn is to examine the games of the very best players, even those of a century ago, to see how they played to win in even positions with a minimum of risk. The games of Bobby Fischer and Garry Kasparov are good. But so are those of some of the ancients.
Maroczy – Capablanca, Lake Hopatcong 1926
1 e4 c6 2 d4 d5 3 exd5 cxd5 4 ♗d3 ♘c6 5 c3 ♘f6 6 ♗f4 ♗g4 7 ♕b3 ♘a5 8 ♕a4+ ♗d7 9 ♕c2 ♕b6 10 ♘f3 e6 11 0-0 ♗b5! 12 ♘bd2 ♗xd3 13 ♕xd3 ♖c8
Going after the pawn, 13 ... ♕xb2? 14 ♘b3! ♘xb3 15 ♕b5+, is awful risk management. Next came 14 ♖ab1 ♗e7 15 h3 0-0 16 ♖fe1 ♘c4 17 ♘xc4 ♖xc4 18 ♘e5 ♖cc8 19 ♗g5! ♕d8!.
Black is preparing 20 ... ♘e4 21 ♗xe7 ♕xe7 followed by a minority attack (... a6, ... b5, ... ♖c7, ... ♖b8, ... a5, ... b4).
White foiled that with 20 ♗xf6. Then 20 ... ♗xf6 21 ♖e2 is roughly even. At some point Black would probably have to play ... ♗xe5. That would hand White kingside chances from ♖xe5 and f2-f4-f5.
Black chose 20 ... gxf6!?. It certainly looks risky. But the loosening of the kingside doesn’t endanger his king after 21 ♕g3+ ♔h8 22 ♘g4 ♖g8 23 ♕f3 ♖g6, for example.
Jose Capablanca saw that after 21 ♘g4 ♔h8 22 f4 he would have to play 22 ... f5! to stop 23 f5!. But he appreciated that he would have good play on the dark squares after 23 ♘e3? (or 23 ♘f2) ♖g8 and ... ♗d6.
In addition, he can exchange minor pieces after 23 ♘e5 ♗d6 under better circumstances than after 20 ... ♗xf6.
After 24 ♕f3 ♗xe5! and 25 fxe5 ♕g5 Black would turn out to have the safer kingside and an intiative on the g-file.
Better was 25 ♖xe5 and play went 25 ... ♖g8 26 ♖e2 ♕h4 27 ♔h2 ♖g6. To avert 28 ... ♖cg8 and 29 ... ♖g3 White accepted 28 g3 ♕f6 29 ♖g1.
Black had a new, low-risk plan in 29 ... ♔g7 and ... h5!. He had the edge after 30 ♕d3 a6 31 ♖c1 h5! 32 h4 ♔h6 33 c4 dxc4 34 ♖xc4 ♖xg3! and won after 35 ♕xg3? ♖xc4.
White could have drawn with 35 ♔xg3 ♖g8+ 36 ♔h3! ♖g4 37 ♔h2! ♕xh4+ 38 ♕h3 ♕f6 39 ♕f3!. But this is what can happen when you exert pressure.
The American grandmaster Sam Shankland may have been exaggerating when he said, “There is no such thing as a risk-free position, so don’t aim for one.” But as in other professions, the pros prosper by getting their opponents to take the greater risks.
4.Mystery Moves: Rooks
Among the moves that “any competent player” would find are those of an undeveloped rook to an open file. Post-beginners learn to do this early in their playing career. Rook-to-open-file becomes routine.
But as they gain experience they discover the benefits of developing a rook to a closed – but soon-to-be-opened – file.
Ribera – Capablanca, Barcelona 1929
1 d4 ♘f6 2 ♘f3 e6 3 c4 b6 4 ♘c3 ♗b7 5 ♗g5 ♗e7 6 e3 ♘e4 7 ♗xe7 ♕xe7 8 ♘xe4 ♗xe4 9 ♗d3 ♗b7 10 0-0 d6 11 ♖e1 ♘d7 12 e4 0-0 13 e5
One of Black’s rooks belongs on the d-file. A natural procedure is 13 ... dxe5 14 ♘xe5 ♘xe5 and 15 ... ♖ad8.
More ambitious is the immediate 13 ... ♖ad8!. Black’s idea is 14 ... dxe5 15 dxe5? ♘c5. White can also get into trouble on the file after 15 ♘xe5 ♕g5 (16 g3 c5).
White could avoid trouble on the file with the innocuous 14 exd6 ♕xd6 15 ♗e4. But he chose 14 ♕e2.
Black responded with a risk-management decision:
He would equalize at least with 14 ... ♗xf3 15 ♕xf3 dxe5 16 dxe5 ♘c5 (17 ♗f1 ♖d2).
But with a minimum of risk, he played for more, 14 ... dxe5. He would have the upper hand after 15 ♘xe5 ♕h4!, e.g. 16 ♕e3 ♘xe5 17 dxe5 ♕d4.
Instead, 15 dxe5 ♘c5 16 ♗c2 (better than 16 ♖ad1 ♘xd3 17 ♖xd3 ♖xd3 18 ♕xd3 ♖d8) ♗xf3 17 ♕xf3 ♖d2 was played.
White has to defend carefully (18 ♖e2 ♖d4 19 b4).
He allowed Black to dominate the open file, 18 ♕c3? ♖fd8, and was lost after 19 ♖ad1 (19 b4 ♕h4 20 g3 ♕d4!) ♘e4! 20 ♕e3 ♖xc2 21 ♕xe4 ♖xb2.
A bit more mysterious is developing a rook on a file that is two or more tempi away from being opened. This was made famous by games like Capablanca-Janowski, St. Petersburg 1914 (1 e4 e5 2 ♘f3 ♘c6 3 ♗b5 a6 4 ♗xc6 dxc6 5 ♘c3 ♗c5 6 d3 ♗g4 7 ♗e3 ♗xe3 8 fxe3 ♕e7 9 0-0 0-0-0?! 10 ♕e1 ♘h6 and now 11 ♖b1! f6 12 b4 ♘f7 13 a4 and b4-b5 gave White an edge).
But 11 ♖b1! wasn’t that shocking. Shifting a rook from an open or half-open file to a closed one is more of a grandmaster move.
Shipov – Sakaev, Sochi 2004
1 d4 d5 2 c4 c6 3 ♘c3 ♘f6 4 ♘f3 dxc4 5 a4 ♗f5 6 ♘h4 ♗g4 7 h3 ♗h5 8 g4 ♗g6 9 ♘xg6 hxg6 10 e3 e6 11 ♗xc4 ♗b4 12 ♕f3 ♘bd7 13 ♔f1!? ♕a5 14 ♘e4 ♘xe4 15 ♕xe4 0-0-0 16 ♔g2
Thanks to 9 ... hxg6, Black’s KR can be considered already developed. It suggests a natural plan of doubling rooks on the h-file (16 ... ♖h4).
But the h3-pawn is well-protected, so doubling doesn’t achieve much.
Better was 16 ... ♖hf8!, with the idea of 17 ... f5. The tactical point is that 18 ♕xe6?? ♖f6 would trap the queen.
Black had good prospects after 17 b3 f5! 18 ♕c2 and now 18 ... ♖de8. The second rook move is a little less mysterious than 16 ... ♖hf8. On e8 the rook defends the e6-pawn and prepares ... e5.
Grandmasters take this one step further: They move a rook to a file that is not certain to be opened soon. This is the “mysterious rook move” made famous by Aron Nimzovich. He saw the idea in the games of others.
Bogolyubov – Nimzovich, St. Petersburg 1914
1 e4 e6 2 d4 d5 3 ♘c3 ♘f6 4 e5 ♘fd7 5 ♕g4 c5 6 ♘f3 a6 7 dxc5 ♕c7 8 ♕g3 ♘xc5 9 ♗d3 g6 10 ♗f4 ♘c6 11 0-0 ♘e7
Black’s last move avoided 11...♗ d7 12 ♘xd5! exd5 13 e6. It also prepared to secure the kingside with ... ♘xd3 and ... ♘f5.
White’s 12 ♖ac1! had two ideas. First, if Black plays ... ♘xd3, then cxd3 would grant White control of an open file. Second, if there is no ... ♘xd3, White can force the file open with ♘e2 and c2-c4.
Play went 12 ... ♗g7 13 b4 and instead of 13 ... ♘xd3 14 cxd3 ♕b6 Black preferred 13 ... ♘d7 14 ♘e2 0-0.
Now 15 c4! would have made the benefits of 12 ♖ac1 clearer (15 ... dxc4 16 ♖xc4 ♕b8 17 ♗e4).
White preferred 15 ♘ed4 and then 15 ... ♘c6 16 ♘xc6 bxc6 17 c4. Black managed to defend with 17 ... dxc4! 18 ♗xc4 ♕b8 followed by ... ♘b6-d5.
Even more “grandmasterly” is the purely prophylactic rook move.
Bronstein – Petrosian, Moscow 1967
1 e4 c6 2 d4 d5 3 ♘c3 dxe4 4 ♘xe4 ♘d7 5 c3 ♘gf6 6 ♘g3 e6 7 ♘f3 c5 8 ♗d3 cxd4 9 ♘xd4 ♗e7 10 0-0 ♘e5 11 ♗c2 ♗d7 12 ♖e1 ♘c6 13 ♘f3 ♕c7 14 ♕e2 h6 15 ♗d2 g5!?
After the natural 16 ♖ad1, Black could continue 16 ... g4. The first point is that 17 ♘d4?? ♘xd4 18 cxd4 ♕xc2 drops a piece.
The second is that 17 ♘h4 would put the knight in limbo, e.g. 17 ... h5 prepares to win it with ... ♘g8!.
So a likely continuation could be 16 ♖ad1 g4 17 ♘e5 ♘xe5 18 ♕xe5 ♕xe5 19 ♖xe5, when White has only a tiny edge.
He avoided this with 16 ♖ac1!. The rook would defend the c2-bishop after 16 ... g4? 17 ♘d4 ♘xd4 18 cxd4. Then 18 ... ♗c6 19 ♗a4 or 18 ... ♕b6 19 ♕e5! favors White because of the newly-opened file.
Black preferred 16 ... ♘d5 and drew a sharp middlegame after 17 b4 ♘f4 18 ♗xf4 gxf4 19 ♘f5 ♗f8 20 b5. But White could have done better.
He should have tried to justify 16 ♖ac1! further with 17 ♘d4!.
For example, 17 ... 0-0-0 18 ♗e4 and then 18 ... ♘f4 19 ♗xf4 gxf4 20 ♘gf5! works because of 20 ... ♘xd4? 21 cxd4 or 20 ... exf5 21 ♗xc6 and ♕xe7.
The complications also favor him after 20 ... ♗f8 21 ♘b5 ♕b8 22 ♖cd1! (22 ... exf5 23 ♖xd7!).
As with uber-luft, the mysterious rook move is counter-intuitive. Whenever your intuition tells you to develop routinely – rook-to-open-file – take a moment to consider an alternative. In most situations, the routine move is better. But grandmasters look for the minority of times in which it isn’t.
5.I Pass
We are hard-wired to feel that each move we make should do something. Moves that are the equivalent of “I pass” seem wasted. This has been the modern way of thinking since the Soviet School put the initiative at the pinnacle of priorities.
But that was the early Soviet School. Later graduates took a much more patient view.
Grischuk – Zhang Zhong, Shanghai 2001
1 e4 c5 2 ♘f3 d6 3 d4 cxd4 4 ♘xd4 ♘f6 5 ♘c3 a6 6 f3 e5 7 ♘b3 ♗e6 8 ♗e3 ♗e7 9 ♕d2 h5!? 10 a4 ♘bd7 11 a5 ♖c8 12 ♗e2 ♕c7 13 0-0 0-0 14 ♔h1 ♖fd8 15 ♘c1
We’ve seen a few mystery moves so far: RPs were advanced, castling was delayed, the “equalizing” ... d5 was rejected by Black.
But what was most remarkable about the game was White’s comment here. Alexander Grischuk said Black should pass with 15 ... ♗f8 – and, if 16 ♖d1, then 16 ... ♗e7!?.
“It is pretty difficult for White to win the position with this structure if Black decides to do absolutely nothing,” he wrote in New in Chess.
That sounds bizarre. Surely White can do something if Black does nothing.
But let’s see if that’s true: White’s knight on c1 would love to reach d5. The best way to get there is through b4.
The direct 17 ♘d3 allows 17 ... d5!. And 17 ♘1a2 ♕xa5 is a dubious sacrifice. White has other options, of course, but none that promise much. (Black preferred 15 ... h4 and the weakened h-pawn turned out to be a liability.)
If you’re wondering if this was just a joke by Grischuk, here’s how he passed in one of his own games.
Tomashevsky – Grischuk, Tbilisi 2015
1 d4 ♘f6 2 c4 g6 3 ♘c3 ♗g7 4 e4 d6 5 ♘f3 0-0 6 h3 e5 7 d5 a5 8 g4 ♘a6 9 ♗e3 ♘d7 10 a3 c6!? 11 ♖g1 ♖b8 14 ♘d2 ♘dc5 13 ♖b1
There’s a lot that each player could say about their choice of moves so far. But White limited himself to a few notes. He explained that he hardly considered the pawn-winning 11 dxc6!? because Black’s knight would reach a strong square at e6 after 11 ... ♘dc5.
Instead, White intended to expand on the wings, with b2-b4 and/or g4-g5/h3-h4-h5.
Black’s problem is that his pieces can’t be easily improved (13 ... ♗d7? 14 b4 loses a piece).
And he can’t favorably change the pawn structure, e.g. 13 ... f5? 14 gxf5 gxf5 15 ♗h6 ♖f7 16 ♕h5 helps White. The same for 13 ... cxd5?! 14 cxd5 (14 ... ♘c7 15 ♘c4).
Black’s solution was 13 ... ♘d7. He invited 14 b4 because 14 ... axb4 15 axb4 c5! would give his knights excellent play (16 b5 ♘b4).
White tried 14 ♕f3 and next came 14 ... ♘dc5!? 15 ♕d1!?.
So here we have two world-class grandmasters using one move to advance a piece and the next move to bring it back to where it was.
Black lost after 15 ... ♖a8 16 ♖g3 ♔h8 and 17 b4 axb4 18 axb4 ♘d7 19 ♖a1 ♖b8 when he allowed the strong Exchange sacrifice, 20 ♖xa6! bxa6 21 dxc6.
What should Black have done? Another pass – with 15 ... ♘d7!, White said.
This is not a strategy that works in many positions. But in a small minority, the best plan is ... no plan. When you can’t find moves that improve your prospects, your best option may be moves that do no harm.
Previous generations had an easier time understanding this.
Bogolyubov – Nimzovich, Bad Kissingen 1928
1 d4 ♘f6 2 c4 e6 3 ♘c3 ♗b4 4 ♕c2 ♗xc3+ 5 bxc3!? d6 6 ♘f3 ♕e7 7 g3 b6 8 ♗g2 ♗b7 9 0-0 ♘bd7 10 a4 ♗e4 11 ♕b3 a5 12 ♗h3 0-0 13 ♘d2 ♗b7 14 f3 e5 15 e4 ♖ae8 16 ♖e1 ♔h8 17 ♘f1
Black temporized, 17 ... ♗c8 18 ♗g2 ♗b7, and told his readers not to feel embarrassed by the appearance of wasteful indecision:
“One should learn to execute such ‘maneuvers’ without blushing! Surely the error with many chess friends is ‘activity above all.’ It’s often just as important to prevent the opponent from doing something, as it is to start even a very important counter-action.”
He meant that the bishop was needed on b7 because it was important to answer ♘e3-d5 with ... ♗xd5. Black got his counterplay after 19 ♘e3 ♘h5 20 ♖a2 g6 21 ♖ae2 f5 22 ♘d5 ♗xd5 23 exd5 g5 and managed to draw.
Today “I pass” moves have become a common feature of games with pawn structures such as the Hedgehog:
Korchnoi – Hjartarson, Reykjavik 1988
1 ♘f3 ♘f6 2 c4 b6 3 g3 c5 4 ♗g2 ♗b7 5 0-0 e6 6 ♘c3 a6 7 b3 d6 8 d4 cxd4 9 ♘xd4 ♕c7 10 ♗xb7 ♕xb7 11 ♗b2 ♗e7 12 e4 0-0 13 ♖e1 ♘c6 14 ♘xc6 ♕xc6 15 ♖c1 ♕b7 16 a4 ♖fd8 17 ♖c2 ♖ac8 18 ♖d2 h6 19 ♖e3 ♘e8 20 h4 ♗f6 21 ♕e2 ♕c6 22 ♔h2 ♕c5 23 f4
Black can’t undertake anything significant. He’d love to make one of the thematic breaks, ... b5 or ... d5. But they don’t work well (23 ... ♘c7 24 ♖ed3 b5? 25 cxb5 axb5 26 ♘xb5 ♗xb2 27 ♘xc7! ♗c3 28 ♖c2 or 26 ... ♘xb5 27 ♗xf6).
However, Black’s position is very solid. That means he doesn’t need to do anything: He passed, 23 ... ♗e7 24 ♘d1 ♗f6.
Since a trade of bishops would ease his game a bit, White refused, 25 ♘c3. Black passed again, 25 ... ♗e7.
White wasn’t ready to draw so play went 26 ♔h3 h5! (to stop g3-g4-g5) 27 ♘d1 ♗f6 28 ♘f2.
Then came 28 ... ♗xb2 29 ♖xb2 g6 30 ♖d2.
Black’s patience rewarded him with counterplay, 30 ... b5! (31 cxb5 axb5 32 ♕xb5? ♕xe3 or 32 axb5 ♘c7).
White went astray in the complications that followed, 31 ♘d3 ♕b6 32 f5 ♘f6 33 fxe6 fxe6 34 ♖f3 ♘g4 35 e5 dxe5 36 ♕e4 ♖c7! 37 ♕xg6+?? ♖g7 (38 ♕xh5 ♕g1 wins).
Bent Larsen could have been thinking of games like this when he said, “Lack of patience is probably the most common reason for losing a game.” This is particularly true for the defender in passive, slightly inferior positions.
Kasimdzhanov – Kramnik, Tromso 2014
1 d4 ♘f6 2 c4 e6 3 ♘f3 d5 4 ♘c3 ♘bd7 5 ♗f4 dxc4 6 e3 ♗d6 7 ♗xd6 cxd6 8 ♗xc4 a6 9 a4 d5 10 ♗d3 b6 11 0-0 0-0 12 ♕b3 ♕e7 13 ♖ac1 ♗b7 14 ♖c2 ♖fc8 15 ♖fc1
White has a slight edge because of the weakened Black queenside pawns. But after 15 ... ♕d6? 16 ♘e5! his edge had grown because his knight can be entrenched (16 ... ♖ab8 17 f4!).
Black accepted the challenge, 16 ... ♘xe5? 17 dxe5 ♕xe5 18 ♕xb6, and should have lost quickly after 18 ... ♖cb8 19 ♘e2 ♘d7 20 ♕b4! followed by ♕e7 or ♖c7 (rather than the game’s 20 ♕d4? ♕d6).
What did Black do wrong? In New in Chess, White said any neutral move in the diagram would have been OK. For example, 15 ... ♖c7, since 16 ♘e5? ♘xe5 17 dxe5 ♘d7 is at least equal. “In fact just passing the move to one’s opponent (well, I know it’s not legal in chess, but I’d just like to stress the point nevertheless),” White said.
Passing is also a worthy option in a slightly superior middlegame without an obvious, active plan. It does not mean abandoning hope of a crushing victory. Rather, it gives the opponent an opportunity to err.
This is another difference between masters and grandmasters. Masters win many of their games by creating complications that confuse their opponents. Grandmasters often win with a more indirect approach.
White couldn’t find a way to improve his pieces. But he also saw that Black’s pieces were as well placed as they could be, considering that he had to defend three pawns (d5, f7 and h4).
White passed, 1 ♔a2. Black realized what was happening and followed suit, 1 ... ♔a7 2 ♕d2 ♔b8 3 ♕f4 ♔a7.
Note how he refused the invitation to liquidate, 1 ... ♖hg8 2 ♕xh4 ♖xg5 3 ♖xg5 ♕xg5 4 ♕xg5 ♖xg5. Trades should help the defender. But in this case White would have a good passed pawn, 5 h4 ♖h5 6 ♗e2 ♖h6 7 h5.
Since Black didn’t take the bait, White forced matters with 4 ♖he1, which prepared 5 ♖e7. That led to a trade of h-pawns, 4 ... ♗xh3 5 ♖h1 ♗c8 6 ♖xh4 ♖xh4 7 ♕xh4.
That should have eased Black’s task a bit. Instead, it prompted an error, 7 ... b6?, after which White won brilliantly, 8 ♕h6 ♖g8 9 ♕c6! ♗e6 10 g6 ♖g7? 11 gxf7 ♗xf7 and now 12 ♖e7! ♕xe7 12 ♗a6! ♔xa6 13 ♕a8 mate.
In sum, an active move is best in most positions, a semi-passive move is best in others. But in a few, the best advice is:
Don’t just do something. Stand there.
6.Hidden Third Move
Experienced calculators know they are limited by the law. It’s the law of diminishing returns.
You get a better picture of the future if you can calculate four moves ahead rather than three. But the benefit of seeing five moves ahead, rather than four, isn’t nearly as great.
Computers verified this when they made great leaps in calculating ability. They were able to look 10, 15, 20 moves ahead. But each additional ply of calculating depth didn’t bring a 200-rating point jump in ability as had been predicted.
A much more efficient method is to focus on the very-near future:
In “the tree of analysis,” you don’t need to scan for the longest branches. You need to look at one of the lowest branches. The best branch to look at is often an alternative at the third move.
There is nothing wrong with defending the attacked c4-knight (1 ♖c1). But White is so close to a win that he was tempted by 1 ♕xa6.
The crucial line is 1 ... ♕xa6 2 bxa6 ♖xc4. But when you look for the knockout, the obvious 3 a7 fails to 3 ... ♘b6 (4 ♖b1 ♖b4 5 ♖d1 ♖d4).
Before you abandon 1 ♕xa6 and play 1 ♖c1, you should look wider. Wider, not further.
That is, rather than looking beyond 4 ♖b1 ♖b4 5 ♖d1 ♖d4 in the 1 ♕xa6 line, you should have another mental examination of the position after 2 ... ♖xc4.
White found that 3 a5!, rather than 3 a7, would win outright. (In fact, Black met 1 ♕xa6! with 1 ... ♕d5 and resigned after 2 ♕c8+ ♘f8 3 ♘e3 ♕e5 4 b6 ♖d2 5 ♖f1.)
Moves like 3 a5! seem obvious afterwards. But at the point of candidate-crunching, they are easily overlooked. They are hidden.
The easiest moves to foresee are forcing ones, like 1 ♕xa6 and 1 ... ♕xa6, or forced, like 2 bxa6. They block or blur our mental view of the alternatives.
Glek – Arkhipov, Russian Team Championship 2001
1 e4 c5 2 ♘f3 ♘c6 3 ♗b5 e6 4 0-0 ♘ge7 5 ♖e1 a6 6 ♗xc6 ♘xc6 7 d4 cxd4 8 ♘xd4 ♕c7 9 ♘xc6 bxc6 10 e5! ♗b7 11 ♘d2 c5 12 ♘c4 ♗d5
An obvious candidate is 13 ♘d6+ and 13 ... ♗xd6 14 exd6. Once you see that 14 ... ♕xd6? fails to 15 c4 you can find yourself burning up minutes looking at the alternatives, 14 ... ♕c6 and 14 ... ♕b7.
Is there a difference between those two queen moves? Yes, if you spend the time you might see that 14 ... ♕c6 favors White after 15 ♕g4 (15 ... 0-0? 16 ♗h6). But 14 ... ♕b7! 15 ♕g4 0-0 is fine for Black (16 ♗
