14,39 €
Mehr erfahren.
- Herausgeber: Batsford
- Kategorie: Lebensstil
- Sprache: Englisch
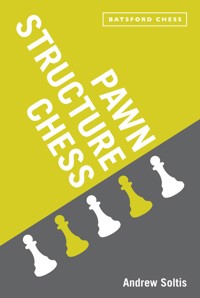
Every chess player needs to know how to handle his pawns. Pawns form the 'playing fields' of chess games, a semi-permanent 'structure' that can determine whether a player wins or loses. This comprehensive guide to pawn structure teaches the reader where pieces are best placed, which pawns should be advanced further or exchanged, and why certain structures are good and others disastrous. This invaluable book is a major update of this chess-world classic, first published in 1975 and unavailable for several years.
Das E-Book können Sie in Legimi-Apps oder einer beliebigen App lesen, die das folgende Format unterstützen:
Seitenzahl: 342
Veröffentlichungsjahr: 2013
Ähnliche
First published in the United Kingdom in 2013 by
Batsford
10 Southcombe Street
London
W14 0RA
An imprint of Anova Books Company Ltd
Copyright © Batsford 2013
Text copyright © Andrew Soltis 2013
The moral right of the author has been asserted.
All rights reserved. No part of this publication may be reproduced, stored in a retrieval system, or transmitted in any form or by any means, electronic, mechanical, photocopying, recording or otherwise, without the prior written permission of the copyright owner.
First eBook publication 2013 eBook ISBN: 978-1-84994-115-0
Also available in paperback Paperback ISBN: 978-1-84994-070-2
The print edition of this book can be ordered direct from the publisher at the website
www.anovabooks.com, or try your local bookshop.
Contents
Introduction
Chapter One: The Caro-Slav Family
Chapter Two: The Slav Formation
Chapter Three: The Open Sicilian/English
Chapter Four: Chain Reactions
Chapter Five: The e5 Chain
Chapter Six: The King’s Indian Complex
Chapter Seven: The Queen’s Gambit Family
Chapter Eight: The Panov Formation
Chapter Nine: Stonewalls And Other Prisons
Chapter Ten: The Nimzo-Gruenfeld Formation
Chapter Eleven: The Lopez Formation
Chapter Twelve: The Closed Sicilian/English
Introduction
Mastering pawn structures comes down to acquiring three traits:
(a) Being able to recognize what good and bad pawn structures look like,
(b) Understanding how to exploit a good one, and
(c) Knowing how to change a structure favorably.
Some good structures are obviously good. But it’s not obvious why they are good. For example, Polugayevsky – Dokhoian, Belgrade 1988:
1 f3 f6 2 c4 b6 3 g3 b7 4 g2 e6 5 d4 b4+ 6 d2 xd2+7 xd2 0-0 8 c3 e4 9 d3 f5 10 e5.
Black used tactics to release White’s pressure on the long diagonal, 10 … c5 11 dxc5 xg2. Then came 12 g1 c6 13 0-0-0 f6 14 f4! bxc5.
White to play
A pawn ahead, Black was understandably reluctant to give up two pawns. So when White played 15 xc6 he rejected 15 … xc6 (16 xd7 d4 17 xc7 ab8 with Black counterplay) in favor of 15 … dxc6.
An inexperienced player – particularly one who peeks at the ‘Black resigns’ at the end of the game – will be tempted to say, “Of course, he loses. He tripled his pawns. They’re weak.”
But that’s not the reason. Black went rapidly downhill after 15 … dxc6?? but not because his pawns could be captured.
Play continued 16 e4! a6 17 e5! and White had achieved what annotators like to call a ‘positionally won game.’ He severely restricts enemy pieces and can maximize the power of his own without interference: 17 … e7 18 f3 e8 19 g2 f7 20 gd2.
Black to play
Black is lost because his pieces can’t play:
His knight has only two moves. One is bad (20 … b8? 21 d8) and the other is useless (20 … b4 21 a3). His rooks can’t go to the d-file, the only one that matters, and he wants to keep one of them on his second rank to avoid d7. If his queen moves away he allows xc6 (That’s the only major way in which the vulnerability of his pawns is felt.).
Black’s predicament is not an accident. His pieces can’t play because the pawn structure won’t let them. If we could make a tiny change – like picking up the pawn at c7 and moving it to d5 or d4 – Black’s fortunes change dramatically. But that’s illegal. As it stands, Black’s pawns are fairly well protected. Yet they cost him the game.
White took his time to find a winning breakthrough. That’s what a very favorable pawn structure allows you to do – take your time. Black eventually ran out of ideas:
20 … h6 21 a4 h7 22 a3 b8 23 c3 c8 24 a5 b3 25 d3 xd3 26 xd3 b7 27 c2 e7 28 d8! g6 29 d2 f7 30 d1 g6?! 31 g4! fxg4 32 xg4+ h7 33 f5 exf5 34 xf5+ g6 and Black resigned before White could play 35 f8 and deliver mate.
A good pawn structure is one that allows you to carry out desirable plans and tactics. A bad structure won’t let you do that. It’s as simple as that. Doubled, even tripled pawns are not always bad. True, they may be more vulnerable to capture. But it’s what the pawn structure allows you to that matters most.
One of the most sensational games of the last 50 years, Short – Timman, Tilburg 1991, featured a remarkable finish. But it was the pawn play that sets the stage – and teaches us the most:
1 e4 f6 2 e5 d5 3 d4 d6 4 f3 g6 5 c4 b6 6 b3 g7 7 e2 c6 8 0-0 0-0 9 h3 a5 10 a4 dxe5 11 dxe5 d4 12 xd4 xd4 13 e1 e6?! 14 d2 d5 15 f3 c5 16 e4 b4!.
White to play
White can exploit the Black kingside if he can get his queen to h4, where it supports h6 and can threaten mate on h7 with g5. But 16 … b4 interrupts that plan. Black allows 17 xd5 exd5 18 xd5 because 18 … e6 would offer him excellent play for a pawn.
If, instead, White retreats, 17 e2, Black can complete development and be close to equality with 17 … b6 and 18 … a6.
White realized this and found 17 c4! and then 17 … b6 18 b3!!. The point is that 18 … xc4 19 bxc4 is actually a very favorable pawn structure. It allows White to begin his kingside attack undisturbed. Black cannot trade queens and he doesn’t have time to threaten the c4-pawn.
After Black met the a3 threat with 19 … e8, play went 20 d1 c5 21 h4 b6 22 e3 c6 23 h6 h8 24 d8! b7 25 ad1 g7 26 8d7! f8 27 xg7 xg7 28 1d4 ae8 29 f6+ g8 30 h4! h5.
White to play
Thanks to the pawn structure, White’s pieces dominate. Thanks to the dominating pieces, Black has no counterplay. All it takes for White to win is to add one more piece to the attack. He did it with the dazzling 31 h2 c8 32 g3! ce8 33 f4! c8 34 g5!. Black resigned because h6/ g7 mate is threatened and 34 … h7 35 xg6+ is also a quick mate. An unforgettable finish – made possible by 18 b3!!.
Most amateurs don’t think about which pawn structures they will play. The opening chooses for them. The variations they adopt in a 1 e4 game will determine whether they end up in a Caro formation, an Open or Closed Sicilian structure, or a Lopez or Panov formation, for example.
But in some cases the structure is in flux past move 10 and you get to choose it, as in Tomashevsky – Ganguly, Moscow 2007:
1 f3 d5 2 c4 dxc4 3 e3 f6 4 xc4 e6 5 xc4 e6 6 e2 c5 7 0-0 a6 8 d1 b5 9 b3 b7 10 a4 b4 11 d3 c6 12 bd2 c7 13 c4 g4 14 g3 ge5 15 fxe5 xe5 16 xe5 xe5.
White to play
The position seems at least equal for Black because his pieces have greater mobility and White’s kingside seems weak (17 d4 e4!). But it isn’t equal – after 17 e4!.
The structure gives White a strong plan of f2-f4-f5, directed at the weak points e6 and f7. After Black’s bid for play with … c4 was foiled by 17 … c8 18 c4! he was clearly worse, 18 … e7 19 f4! c7 20 f1! f6?! 21 f5!. He didn’t like 21 … exf5 22 xf5 and e3/ af1 so he chose 21 … e5.
White to play
But this is a losing position – losing because the structure allows White to overload the kingside with pieces. The trend continued with 22 e3 e7 23 h4 0-0 24 f2 h8 25 af1 fd8 26 g2.
Seeing how hopeless his chances would be after h5 and g3-g4-g5, Black became desperate, 26 … d4 27 xd4 exd4 and lost after 28 h5 f8 29 g4 g6 (29 … xh4 30 h2) 30 h6 g5 31 hxg5 (31 … xg5 32 f6!).
Most pawn structures are more familiar than these first three examples. Masters handle them better than amateurs do because they know the typical ways to exploit the structures and to favorably change them. A structure may change quickly – and violently – in the course of a few moves. Take the case of San Segundo – Pigusov, Menorca 1994:
1 d4 f6 2 c4 e6 3 f3 d5 4 c3 e7 5 g5 h6 6 h4 0-0 7 e3 b6 8 e2 b7 9 xf6 xf6 10 cxd5 exd5 11 b4 c6 12 0-0 a5 13 a3 d7 14 b3 e8 15 d3.
Black to play
The trade of pawns on move 10 created what we call the Orthodox Exchange formation (d4+e3 versus d5+c6). White is carrying out a well-known strategy called the Minority Attack. We’ll examine it further in Chapter Seven. What you need to appreciate here is that he intends b4-b5 and bxc6 to create targets at b6 and d5.
Black responded with 15 … b5. This is a counter-strategy well known to masters. Black not only stops b4-b5 but sets up White’s b-pawn as a target that can be attacked by … e7-d6 and … e7. He also prepares to bring his knight into play on an excellent outpost square, … b6-c4.
But there’s a counter-counter-strategy. White knew that the way to exploit … b5 in very similar situations is to break through in the center, that is with 16 e4. Then he threatened to win a pawn with 17 exd5 or gain space with 17 e5. The natural 16 … dxe4 17 xe4 favors White after, say, 17 … e7 18 ad1 axb4 19 axb4 f6 20 e5!.
However, this is a rare case when Black has a strong response to the e3-e4 plan and it lies in the stunning 16 … c5!.
White to play
And you thought pawn play was dull? If it were Black’s move he could choose from among four pawn-takes-pawn captures. Instead, it is White’s turn and he has the choice of four captures with his pawns.
But it is the threats of 17 … c4! and 17 … dxe4, winning a piece, that take precedence. White can’t afford 17 xd5 c4, 17 exd5 c4, or 17 dxc5 dxe4 and doesn’t like 17 xb5 dxe4.
He opted for 17 e5 and 17 … c4 18 b2 to keep material equal. But it wasn’t positionally equal after 18 … xe5! 19 f5 f6 20 xb5 f8. Black has a strong passer, the two bishops and targets at d4 and b4. His edge grew after 21 fe1 xe1+ 22 xe1 b6 23 a4 c6 and he won after 24 bxa5 xa5 25 b4 xb5 26 e8 e7! 27 xe7 xa4 (or 27 xe7 xe8).
Pawn play becomes trickier when the structure is so fluid that it can evolve into different formations over the course of several moves, and each potential change requires evaluation. An illustration of that is Tal – Anand, Cannes 1989, which began:
1 c4 c5 2 f3 c6 3 c3 d4 4 e3 xf3+ 5 xf3 g6 6 b3 g7 7 b2 d6 8 g3 b8 9 g2 h6 10 d1 0-0 11 0-0 d7 12 a4 c6 13 d4 xg2 14 xg2 c8.
White to play
White’s center is about to come under attack from … f5. He can obtain a slight edge with 15 d5!, particularly since 15 … f5 16 e4! d4 17 b5! trades pieces favorably (17 … xb5 18 xg7 and 19 axb5 make a7 a target for rooks.).
But he erred with 15 d3? and Black made a good structural change, 15 … cxd4! 16 exd4 f5. This created another fork in the road:
If White had gone on the defensive, 17 e2?, Black would have obtained the edge with another change, 17 … d5!. Then 18 c5 a5! stops White from obtaining a favorable Panov Formation (with b3-b4!), as we’ll see in Chapter Eight. In this case Black would continue … b6 since cxb6/… xb6 turns the White b-pawn and d-pawn into chronic weaknesses.
After 18 … a5
But this didn’t happen. White sought something more ambitious than 17 e2. His best chance for equality was 17 d5! and then 17 … e6 18 e3. But he made another natural move, 17 d5, and there followed 17 … b6 18 d1 xb2 19 xb2.
Black could secure a solid position, with no serious losing chances, after 19 … a5, since a4-a5 is stopped and the b3 pawn can become a target. But White could try for counter-balancing pressure against e7.
Black to play
Black found the superior 19 … e5!, yet another change in the structure. If White allows that to stand, he is definitely worse. Black would have a wonderful outpost on d4 and there would no longer be a target at e7. From a positional point of view, 20 dxe6! was forced.
Then came 20 … fxe6 21 ad1 f6!. Black will play … e5 and his pressure on the f-file trumps the weakness of his center pawns or the hole at d5 (and 22 g4? h4+ is suicidal). Black’s advantage became apparent after 22 d2 e5! 23 d5+ g7 24 b5 c7 25 c5 xc5 26 xb7+ c7 27 d5 b4 28 fd1 c5 29 a8 xb3 and he won shortly.
As these examples show, it is often hard to recognize what a good pawn structure looks like and sometimes harder to understand why it’s good. In this book we’ll explore 12 basic structures and several related formations to seek answers.
But before we start, a few warnings: First, many pawn structures that you encounter are messy. They won’t fit neatly into the classifications you’ll find in these pages. You’ll have to deal with them the way you would any strange middlegame situation: Figure it out.
1 e4 g6 2 d4 g7 3 c3 d6 4 g5 h6 5 h4 c6 6 d5 d4 7 d2 c5 8 d1 d7 9 c3 b5 10 f4 f6 11 d3 c7 12 f3 b5 13 0-0 0-0 14 c2 h5.
White to play
This resembles the more familiar formations which arise when White’s c-pawn is on c4 or c2. Then the thematic plan for White is e4-e5. But here 15 e5 g4 leads to obscure complications.
In Vallejo Pons – Korobov, Aix-les-Bains 2011, White noticed something else that make this position different from typical Benonis. Black’s knights can’t get to e5 easily. That indicates 15 f5! – which is often dubious when it surrenders e5 – is strong here. It threatens 16 fxg6 fxg6 17 e5! and xg6. White would sacrifice soundly on g5 after 15 … g5?!.
The game went 15 … gxf5 16 exf5 f6 17 e3 c8. Thanks to the kingside pawn structure, Black desperately needs counterplay. He wants to target d5 with … b7. But White foiled that 18 a4 a6 19 b3! b7 20 c4!.
This effectively took Black’s queenside pieces out of the game. And after 20 … d7 the time was right for 21 xf6!. Black would have only one piece to defend the kingside after 21 … xf6 22 ae1 followed by g4. Recognizing that as lost, he preferred 21 … exf6.
White to play
This is a very one-sided structure. The pawns make it easy for White to attack, hard for Black to defend and impossible to create counterplay. The outcome was becoming clear after 22 g4 h5 23 f2! fe8 24 e4 and then 24 … bxc4 25 bxc4 a5 26 g3 a6 27 xh5.
Black resigned shortly after 27 … b4 28 f4! f8 29 e4 a6 30 ac1 h8 31 h4 e7 32 g6+! fxg6 33 fxg6 d8 34 f5 e7 35 ce1 f8 36 g7.
A second caveat is: There are some recurring pawn structures that have been omitted to keep this book to a reasonable size. It’s a textbook, not an encyclopedia, and there is no examination of, for example, the doubled pawns that arise after 1 e4 c5 2 f3 c6 3 b5 and xc6 or 1 d4 f6 2 c4 e6 3 c3 b4 4 a3 xc3+5 bxc3 or 1 e4 e5 2 f3 c6 3 c3 f6 4 b5 b4 5 0-0 0-0 6 d3 d6 7 g5 xc3 8 bxc3.
And third, often the only way to favorably change a structure requires tactics. Here’s a case, Kramnik – Lputian, Debrecen 1992:
White to play
White’s e-pawn has captured on f4, so this is a cross between the Slav formation you’ll find in Chapter Two and the Isolani of Chapter Seven. One of White’s goals in both those formations is to push his d-pawn. Here he can play 17 d5!! based on tactics:
Black loses outright after 17 … xd5? 18 h7 mate and less quickly after 17 … cxd5 18 xd5! xc2 19 xe7+! or 17 … exd5 18 xd5!.
Instead, Black played 17 … d8 and White was able to make a favorable change, 18 fe1 h8 19 dxe6! and then 19 … xd1 20 xd1 fxe6. He finished off by going after the e6-target: 21 e4 g6 22 c5! xc5 23 xc5 g8 24 a2! g7 25 xe6 f8 26 d7! Resigns.
Enough caveats. Let’s start mastering pawn structures.
Chapter One: The Caro-Slav Family
By ‘family’ we mean a group of closely related pawn structures that share some features with or evolve from a common opening. In the Caro-Slav family only one player has a center pawn on the fourth rank and it is a d-pawn. His opponent has traded off his own d-pawn for either an e-pawn – resulting in what we’ll call the Caro formation – or for a c-pawn – the Slav formation. These are the only center pawn exchanges made in the basic cases, as shown by the diagrams.
The Caro formation
The Slav formation
Besides the facial resemblance, the two structures share a basic solidity. White cannot open lines further except by means of a sacrifice (d4-d5!?) or with the help of another pawn: For example, c2-c4 followed by d4-d5 in the Caro, or e3-e4 and d4-d5 in the Slav.
If Black doesn’t try to change the pawn structure, such as with … c5 or … e5, the middlegame is often slow-paced. But Black usually wants to change it because the d4-pawn gives White advantages such as greater control of the center and good outposts for pieces at e5 and c5. If Black competes for those squares, with … f6 or … b6, he creates weakness, as Supplemental Game # 1, at the end of this chapter, shows.
Black has a natural outpost too, at d5. But the structure tends to limit his pieces to his first three ranks – while White can more easily put his pieces on his first four ranks. And four is simply better than three.
One thing to remember, here and throughout this book: These formations can come about in reversed form. That is, Black could be the one with a pawn on the fourth rank, at d5, facing White pawns at c3 and e3. For the sake of convenience, and because these formations come about more often in the other way, we’ll look at the Caro and Slav with White having the d-pawn.
The Caro Formation
The Caro formation is by no means limited to the Caro-Kann Defense (1 e4 c6 2 d4 d5 and … dxe4). It also arises out of French Defense when Black gives up the center (1 e4 e6 2 d4 d5 and … dxe4). It can come about from the Scandinavian Defense (1 e4 d5 2 exd5 xd5 or 2 … f6/3 … xd5). And it is familiar to 1 d4 players as well because it arises in Queen’s Gambit Declineds and Catalan Openings when White plays e2-e4 and Black replies … dxe4.
What’s more, Black does not have to initiate the Caro pawn trade. White can do it: 1 e4 f6 2 e5 d5 3 d4 d6 4 f3 g6 5 c4 c6 6 0-0 g7 and now 7 exd6 and 7 … xd6. Even after 1 f3 we can find the Caro, such as after 1 … d5 2 c4 d4 3 e3 c6 4 exd4 xd4 5 xd4 xd4 6 c3 f6 and 7 d3 followed by 8 e3, 9 d4 and … e6/… c6.
But it’s the qualities of the Caro, not how it comes about, that are our main concern. The first lesson is that Black’s spatial inferiority – the four-versus-three factor – can be fatal if he does not compete in the center. A model example of this is Lasker – Capablanca, Moscow 1935:
1 e4 e6 2 d4 d5 3 c3 b4 4 e2 dxe4 5 a3 e7 6 xe4 f6 7 2c3 bd7? 8 f4! xe4 9 xe4 f6 10 d3 0-0 11 xf6+ xf6 12 c3 d5.
White to play
Black tries to use the threat of … xg2 to allow him to challenge the center with … c5 or … e5. But he missed earlier freeing moves. For example, 7 … c6! and then 8 e3 xe4 9 xe4 e5! (10 dxe5 xd1+ with equality, or 10 d5 d4! 11 xd4 xd5! with advantage).
In the diagram White played 13 e2! because preventing a liberating break is what matters most. He stops 13 … e5 and would meet 13 … c5 with 14 e4! (14 … b3 15 d6), winning a pawn.
True, Black can carry out his threat with 13 … xg2. But White retains an edge after 14 e4 h3 15 xc7 and he has an attractive alternative in the gambit line 15 0-0-0. Instead, Black solidified his formation with 13 … c6 and natural moves followed, 14 0-0 e8 15 ad1 d7.
White to play
Black still cannot play … c5 in view of e4, and he is not ready for … e5 (e.g. 16 … e5 17 c4 or 17 dxe5 xe5 18 xh7+). White could increase his edge with 16 e5!, to inflict damage with xf6 or trap the queen with b2-b4 and c3-c4 (16 … xe5? 17 xh7+! xh7 18 dxe5 -moves 19 xd7).
Instead, he played simply: 16 fe1 a5 17 c2 g6 (or 17 … h6 18 e2 followed by e4, intending h7+) 18 e5 g7 19 h4! d8 20 h5 g5 21 xg7 xg7 22 e5 e7 23 de1 g8 24 c1! ad8 25 1e3 c8 26 h3.
Black to play
White’s attack seems effortless only because the favorable pawn structure makes it easier to find strong moves. He threatens 27 hxg6 and 28 h6+, e.g. 26 … h8 27 h6 g7 28 hxg6 fxg6 29 xg6! or 26 … f6 27 hxg6 hxg6 28 h6+ f7 29 g3 (29 … fxe5 30 xg6+ and mates).
Black played 26 … f8 but succumbed to 27 h6+ g7 28 hxg6 hxg6 29 xg6!. He couldn’t capture the bishop in view of 30 h8+ and 31 f3+, so he surrendered his queen after 29 … f6 30 g5! e7 31 f3 and lost.
White’s d4-d5 Plan
As favorable as the basic Caro formation tends to be, White can change it with the ambitious c2-c4 followed by d4-d5. This holds great rewards if he is better developed and can exploit the further opening of the center. An ideal example is Spassky – O’Kelly, San Juan 1969:
1 e4 e6 2 d4 d5 3 c3 dxe4 4 xe4 d7 5 f3 c6 6 d3 xe4 7 xe4 c6 8 0-0 f6 9 d3 bd7 10 c4 d6 11 b3 0-0 12 b2 c7 13 c2 fe8 14 fe1 f8 15 ad1 g6.
White to play
Unlike the previous example, Black has a solid kingside and a target at d4 to attack by … g7 and doubling rooks on the d-file. But White has the two bishops and that encourages him to try to open the center:
Step I – White repositioned his light-squared bishop so that it aims at d5 – 16 f1! g7 17 g3 ad8 18 g2.
Step II – He placed his rooks so that they would gain the utmost mobility from d4-d5 – 18 … h5 19 e2! c8 20 h4 cd8 21 de1.
Step III – He shifted the queen to the vulnerable a1-g7 diagonal – 21 … hf6 22 c1! h5 23 h3 f8 24 a1 g4 25 c3 h6 26 b2.
Black missed his opportunities for counterplay, such as … c5 at moves 18-20. He could continue to play passively (26 … h7, for example). That would have forced White to take additional steps to make d4-d5 work, such as e5-d3-f4. Alternatively, White could shift to another strategy such as c4-c5 followed by e5-c4-d6. But after Black played 26 … f5?:
White to play
Black has two pawns and a rook defending d5. But White made the push as a sound pawn sacrifice, 27 xf5! gxf5 28 d5! xc3 29 xc3 cxd5 30 d4 (threat of xf5) 30 … d7 31 c5!.
The prospect of White pushing his c-pawn tied Black’s pieces up – 31 … h7 32 b4 a6 33 a4 c8 (not 33 … xa4 34 c6! and a1) 34 b5 axb5 35 axb5 f8 36 c6 bxc6 37 bxc6 d8 38 c1 f6 39 c7! d7 40 e3! and wins, e.g. 40 … e4 41 f3 d6 42 g5+ h7 43 xh5+ g7 44 g4!.
But White’s d-pawn can turn from asset to liability after piece trades:
Black to play
This is a typical position when that occurs. White’s attacking chances are slim and that makes the d-pawn the most obvious target on the board. This became apparent, in a game from an international tournament in 1968, after 1 … e7! and 2 … f6.
White should have recognized the danger and played 2 c3 and 3 b2. Then Black can increase his pressure with … g6, … e7-f8-g7 and … c5, or by tripling his heavy pieces on the d-file as he does in the game.
Instead of 2 c3 White fumbled about with 2 c2? f6 3 c3 e7 4 a4? and Black replied 4 … d7! 5 c1? cd8 6 b2 g6!. White’s loss of time meant that Black can add decisive pressure against d4 with his queen before White can double rooks on the d-file. For example, 7 d1 f8! 8 e2 g7 9 ed2 is too slow because 9 … c5! costs White a pawn.
So White resorted to a desperation attack, 7 h4 e8 8 h5 d6 9 hxg6 hxg6 and was lost soon after 10 g2 d7 11 h1 xd4 12 xd4 xd4 13 d2! f6! 14 h6 g7!.
Black’s … c5
Black’s most natural counterplay is to trade his c-pawn for White’s d-pawn. It is easier to engineer than the other break, … e5, because Black usually has much greater control of c5 – and White has less of it – compared with e5.
A goal of … c5 is to free Black’s minor pieces. It opens up part of the a8-h1 diagonal for his bishop. A trade of pawns may give him excellent outposts for knights at e5 or c5. If White reinforces his d-pawn with c2-c3 and then … cxd4/cxd4, Black gets an ideal blockading outpost at d5. We’ll look further at this structure, the Isolani, in Chapter Seven.
A striking example of the penetrating power of Black’s pieces after … c5 is Gligoric – Smyslov, Moscow 1963:
1 e4 c6 2 d4 d5 3 c3 dxe4 4 xe4 d7 5 f3 gf6 6 xf6+ xf6 7 c4 f5 8 e5 e6 9 0-0 e7 10 b3 a5 11 c4? 0-0 12 f4.
Black to play
“Distrust a pawn move,” Emanuel Lasker warned. “Examine carefully its balance sheet.” Here White has underestimated the cost of c2-c4. His d-pawn may not be vulnerable – because none of Black’s minor pieces can attack it. But the d4 square is weak after 12 … c5!. Had he not moved his c-pawn he could reinforce d4 with 13 c3.
The natural response, 13 e3 cxd4 14 xd4, is bad after 14 … a4!, e.g. 15 c2 xc2 16 xc2 xd4 and 15 xa4 xa4 16 xa4 xd4. (White apparently rejected 13 d5 because of 13 … exd5 14 cxd5 e4 – overlooking the tactical shot 15 d6! xd6 16 xf7 or 15 … xd6 16 g6.)
Instead he chose 13 dxc5 xc5 14 e2, hoping to contest all of the d-file squares after 15 ad1. But the reply 14 … d4! threatened the bishop on f4 and led to 15 g3 a4!. That wins material whether White opts for 16 d1 a3! or 16 c2 xb2 or 16 ad1 e4!.
White’s Anti- …c5 Strategies
White can meet … c5 in four ways. He can: (a) reinforce d4 with a piece, such as 13 e3 in the last example. Or (b), do this with a pawn (c2-c3). That usually leads to an Isolani following … cxd4/cxd4. The alternatives are (c) the trade, dxc5, and (d) the push, d4-d5.
The trade is the most common and it has obvious benefits. White may be the first to exploit the open d-file or the now-longer diagonal leading to c6. He also clears d4 for use by minor pieces, typically a knight, and creates a queenside majority and a semi-passed c-pawn. White can dominate the center quickly as in Steinitz – Marco, Nuremberg 1896:
1 d4 d5 2 c4 e6 3 c3 c6 4 e4 dxe4 5 xe4 f6? 6 xf6+ xf6 7 f3 b4+ 8 d2 xd2+ 9 xd2 d7 10 0-0-0! 0-0 11 e3! c5 12 dxc5 f5 13 d3 xc5 14 he1.
Black to play
A game from 1896? Yes, this book includes many ‘classic’ games. (That’s another way of saying ‘old’.) The reason they serve better than more recent games is that modern masters know a lot more than the players of the ‘classic’ era. They don’t make the instructive mistakes that are worth studying.
Today’s players know, for example, that 5 … f6 is bad compared with 5 … b4+! 6 d2 xd4 and 6 c3 c5!. They also know 11 e3! was needed to stop … e5. And they appreciate that the position in the diagram favors White. Exchanging minor pieces eased Black’s space problem but left him weak on the dark squares and behind in development.
Fleeing into the endgame, 14 … xe3+ 15 xe3, is bad. For example, 15 … f6 16 e5 stifles Black’s pieces (16 … d7 loses a pawn to 17 xd7 xd7 18 xh7+ and xd7.). Also unpromising is 15 … c5 16 c2 a5 – to stop 17 b4 – in view of 17 g5 h6 18 e4, when Black still has to solve the problem of developing his bishop.
In the game, he chose 14 … c7 but after 15 e5! e8 16 b1 his difficulties persisted. If he had tried 16 … f6 he would have invited a ready-made attack with g2-g4-g5!. Instead, he chose the safer 16 … f8 so he could continue … f6 and … e5. But 17 c5! secured a protected outpost at d6 for White’s own knight. The possibility of pushing the pawn to c5 is another benefit of dxc5.
The game went 17 … f6 18 c4 e5 19 d6 e7 20 f4 d7. White converted his spatial edge to a mating attack: 21 f5! c6 22 c4+ h8 23 g4! b6 24 g5 fxg5 (else 25 gxf6 gxf6 26 g1 g7 27 xg7 xg7 28 g1+) 25 xg5 h6 26 h5 bxc5 27 f7+ h7 28 g5+ h8 29 f6! gxf6 30 xh6+ h7 31 xh7 xh7 32 xf6+ g7 33 xe5 Resigns.
The queenside majority is a long-term benefit of dxc5. White is usually able to convert his 3-to-2 pawn advantage there into a passed pawn. For example, Teschner – Golombek, Hamburg 1955:
1 e4 c6 2 d4 d5 3 c3 dxe4 4 xe4 f5 5 g3 g6 6 h4 h6 7 f3 d7 8 d3 xd3 9 xd3 c7 10 d2 gf6 11 0-0-0 e6 12 c4 0-0-0 13 c3 d6 14 e4 xe4? 15 xe4 f6 16 e2 he8 17 he1 c5 18 dxc5! xc5 19 e5 xd1+ 20 xd1 d8 21 xd8+ xd8.
White to play
Black missed a chance to equalize with 14 … f4+ 15 b1 e5! since 16 xe5 xe5 17 e3 xe4! 18 dxe5 xc3+ 19 xc3 xd1+ 20 xd1 d8 trades down to nothingness. And if White avoids that with 18 xe4 he is a bit worse after 18 … f6 because his d-pawn is the board’s chief target, as we saw a few pages ago.
Before activating his majority in the diagrammed position, he took aim at the other wing with 22 g4! and then 22 … e8 23 g5 hxg5 24 hxg5 d6 25 f3, threatening to ruin Black’s pawns with 26 g6!.
After 25 … g6 Black’s majority was damaged and White changed direction with 26 b4! e7 27 b2 d6 28 c5 f5 29 e4 e8 30 e5!. A trade of queens allowed him to safely advance his king, 30 … xe5 31 xe5 a5 32 a3 axb4 33 axb4 d8 34 b3 e7 35 d2! d5 36 e4 e7.
White to play
White made progress with 37 f6! since the king-and-pawn endgame, 37 … xf6 38 xf6+ xf6 39 gxf6, is won (39 … d7 40 c4 c7 41 b5 followed by, for example, d4-e5-f4-g5-h6-g7).
Black retreated, 37 … f8, and was soon limited to two ranks, 38 c4 d7 39 b5 c8 40 d2 d7 41 f3 e7 42 e5+ e8. White set up a winning plan of c5-c6 with 43 xe7 xe7 44 g4 f4 45 f6 d8 46 b6! (46 … e7 47 c6!). Black resigned after 46 … e5 47 e4 d7 48 d6 h3 49 xb7 xg5 50 d5.
If pawns are equal, the presence of a majority on one wing means there must be a rival majority on the other. White’s queenside majority in the Caro formation rarely becomes a factor before the late middlegame. But Black’s kingside majority often makes itself felt much earlier. This is illustrated by Maroczy – Charousek, Nuremberg 1896:
1 d4 d5 2 c4 e6 3 c3 c6 4 e4 dxe4 5 xe4 f6? 6 c3? e7 7 f3 0-0 8 d3 c5! 9 0-0 cxd4 10 xd4 bd7 11 f3 a5 12 d2 e5 13 e4 xf3+ 14 xf3 c7 15 c3 xe4 16 xe4.
Black to play
White’s bishops look murderous. But by mobilizing his pawns, Black renders them harmless with: 16 … f5! 17 e2 d6! 18 h3 e5.
Black has seized the initiative. White sought to neutralize the pawn majority with 19 b4 e4 20 c2 b6 21 f3!. But instead of the faulty 21 … exf3?, which led to an equal game, Black could increase his edge with 21 … b7! 22 fxe4 ae8 and … xe4.
White’s d4-d5
When White meets … c5 by pushing his d-pawn, it is usually captured by Black’s e-pawn. If White recaptures with his c-pawn, the new d5-pawn can become a strong passer – or a highly vulnerable target. On the other hand, if he recaptures on d5 with a piece, the resulting structure is symmetrical and, in theory, dead even. But in practice, one side is usually better developed and he profits from opening lines.
For example, Quinteros – Henley, New York 1985:
1 f3 f6 2 c4 c6 3 d4 d5 4 c3 e6 5 g5 h6 6 xf6 xf6 7 c2 d7 8 e4 dxe4 9 xe4 d8 10 d3 c5.
White to play
Now 11 d5! assures White of superiority because of his control of the two central files. This became manifest after 11 … f6 12 e2 d6 13 0-0-0! and then 13 … 0-0 14 c2!.
White wanted to occupy d5 with pieces. After 14 … e8 15 d3! he threatened he1 followed by dxe6 and prepared h2-h3/g2-g4-g5. Black became so desperate in view of 15 … exd5 16 xd5 xd5 17 h7+ that he tried the desperate 15 … b5 and lost the endgame after 16 cxb5 exd5 17 xd5 xd5 18 xd5 f4+ 19 b1 xd5 20 xd5 b7 21 xc5.
A similar situation arises in the Catalan Opening: 1 d4 d5 2 c4 e6 3 f3 f6 4 g3 e7 5 g2 0-0 6 0-0 c6 7 b3 bd7 8 b2 b6 9 c2 b7 10 bd2 c8 11 ad1 c7 12 e4! dxe4 13 xe4 xe4 14 xe4 c5.
White to play
If White retreats his queen and allows … cxd4, the position approaches equality. The ambitious alternative is 15 d5 (15 … exd5?? 16 xe7). Black has a choice of two good answers, 15 … f6, which seems to win a pawn, and 15 … f6, which neutralizes White’s pieces.
The safer 15 … f6 works well after 16 xf6? xf6, because White loses the d-pawn without compensation. Better is 16 c2 exd5 17 cxd5 when the pawn will be highly vulnerable following 17 … d6 or 17 … xb2 18 xb2 f6 19 d6 b8.
The double-edged 15 … f6 16 c2 exd5 makes 15 d5 into a temporary gambit. White stands well after 17 e5! d8 18 g5, which threatens 19 xf6 and xh7 mate and forces 18 … g6.
Because of the double pin on the d-pawn, White will regain his pawn. But he wants to retake on d5 with pieces rather than with a vulnerable pawn. Yefim Geller won two games, in similar fashion, from this position. One went 19 a1 d7 20 h4 f6 and now 21 xd5 xd5 22 xd5 xa1 23 xa1 f6 24 ad1 e5 25 e4 with great centralization (and a favorable endgame that he won after 25 … c6 26 d6 e5 27 xe5).
White to play
Geller did better in a later game with the immediate 19 h4 and play continued 19 … h5 20 xd5 xd5 21 xd5! e8 22 e1 c6 23 b2 fe8. White unleashed a farsighted combination with 24 xh7! xh4 (not 24 … xh7 25 xh5+) 25 ed1! e6 26 c3! f6 27 d3 g4 28 g5!.
The main point is that 28 … xg5 29 xg6+ g7 loses to 30 xf6+ xf6 31 xg4 and White is better after 29 … h8 30 xg5! xd1+ 31 h2.
Black tried 28 … e4 29 xf6+ xf6 30 gxh4 ed8 but lost the endgame after 31 xd8+! xd8 32 xd8+ f7 33 xf6 xf6 34 d6+ f7 35 dxg6 xh4 36 g7+.
The takeaway is: When the structure becomes symmetrical after … c5/d4-d5/… exd5, it is piece play, not the pawns that usually matters most.
Preventing … c5
White’s most enterprising strategy is to stop … c5 mechanically by putting his own pawn on that square. This advance has a balance sheet filled with pluses and minuses, to use Lasker’s term.
It cedes d5 to Black pieces, virtually rules out d4-d5, makes White’s d-pawn a backward target on an open file, and enables Black to open lines with … b6. Yet the benefits of c4-c5 often outweigh these factors, as in Pillsbury – Winawer, Budapest 1896:
1 d4 d5 2 c4 e6 3 c3 c6 4 e3 f6 5 f3 bd7 6 d3 d6 7 0-0 0-0 8 e4 dxe4? 9 xe4 xe4 10 xe4.
Black to play
In the next chapter, we’ll see why 8 … dxc4!, creating the Slav formation, is superior. Nevertheless, the slight inferiority of the Caro structure could have been repaired by 10 … c5 (or, as we’ll see in a few pages, by 10 … h6 and 11 … e5).
When this game was played, it was believed that White could get the advantage in any case with 11 c2 and d3, threatening mate on h7.
That’s true after 10 … c5 11 c2! c7 12 d3 f6 13 g5! or 12 … g6 13 h6 e8 14 ad1. But later it was found that 12 … f5!, activating Black’s majority, may equalize.
In the game Black made a tempting but faulty gain of time, 10 … f6?! 11 c2. Then he realized how bad 11 … c5? 12 g5 followed by d3 would be, e.g. 12 … cxd4 13 xd4 e7 14 h4! h6 15 xh6! gxh6 16 xh6 and
